Windows下运行官网Mask_Rcnn
版权所有,翻版必究。https://blog.csdn.net/fightingxyz/article/details/106091110
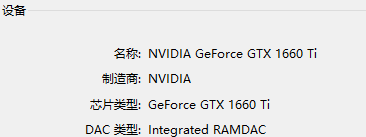
运行环境:WIN10,pycharm,相应的CUDA,CUDNN,tensorflow1.15.0,tensorflow-gpu-1.14.0,Anaconda3
Mask RCNN开源项目:https://github.com/matterport/Mask_RCNN

第一步:数据准备
首先安装labelme进行数据的标注。安装方法pip install labelme。根据后面程序中的有关问题,有些大佬说安装labelme3.2版本。
(网上很多使用方法,不会用可以查一查)
有关mask-rcnn算法可以参考:https://blog.csdn.net/linolzhang/article/details/71774168 (可以去看看论文比较好,网上容易搜索到)
注意:官网中并不需要准备数据,因为他是程序中生成的简单数据。有关自己数据的训练,下一篇博客再说。
第二步:使用Anaconda3中的Jupyter Notebook。
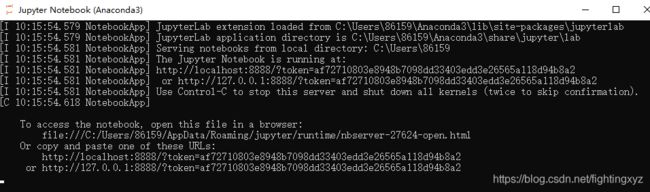

点击Upload添加demo.ipynb(Mask_RCNN-master\samples路径下)。打开的目的不是在这个上面运行,我一般都是在pycharm中运行。目的是将其转到pycharm中。
不过在这之前还需要添加一些网络上学好的模型:https://github.com/matterport/Mask_RCNN/releases
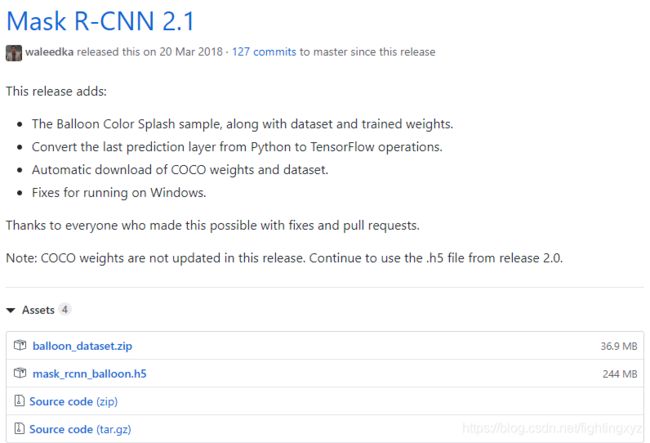

有两种形式,这里选择的是mask_rcnn_coco.h5。新建了一个demo.py,并将mask_rcnn_coco.h5下载放进其中。
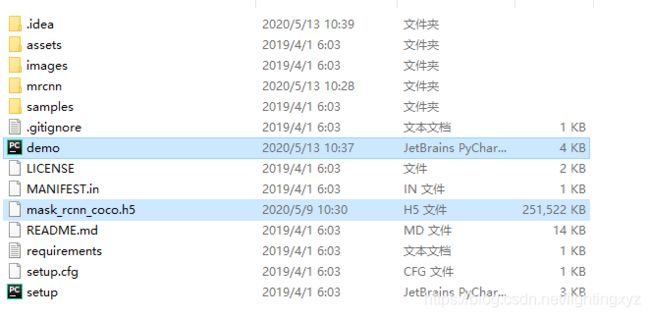
demo.py中存放的是demo.ipynb中的代码(注意提取mask_rcnn_coco.h5的路径问题!!!):
import os
import sys
import random
import math
import numpy as np
import skimage.io
import matplotlib
import matplotlib.pyplot as plt
import cv2
import time
# Root directory of the project
ROOT_DIR = os.path.abspath("../")

# Import Mask RCNN
sys.path.append(ROOT_DIR)  # To find local version of the library
from mrcnn import utils
import mrcnn.model as modellib
from mrcnn import visualize
# Import COCO config
sys.path.append(os.path.join(ROOT_DIR, "samples/coco/"))  # To find local version
from samples.coco import coco   #这个地方需要更改,主要就是加载路径问题!!1


# Directory to save logs and trained model
# MODEL_DIR = os.path.join(ROOT_DIR, "logs")
MODEL_DIR = ROOT_DIR    #路径问题,为了提取mask_rcnn_coco.h5


# Local path to trained weights file
# COCO_MODEL_PATH = os.path.join(MODEL_DIR, "mask_rcnn_coco.h5")
COCO_MODEL_PATH = os.path.join(ROOT_DIR, "Mask_RCNN-master\\mask_rcnn_coco.h5")  #路径!

print("COCO_MODEL_PATH: ", COCO_MODEL_PATH)
# Download COCO trained weights from Releases if needed
if not os.path.exists(COCO_MODEL_PATH):
    utils.download_trained_weights(COCO_MODEL_PATH)
    print("cuiwei***********************")

# Directory of images to run detection on
IMAGE_DIR = os.path.join(ROOT_DIR, "images")

class InferenceConfig(coco.CocoConfig):
    # Set batch size to 1 since we'll be running inference on
    # one image at a time. Batch size = GPU_COUNT * IMAGES_PER_GPU
    GPU_COUNT = 1
    IMAGES_PER_GPU = 1

config = InferenceConfig()
config.display()


# Create model object in inference mode.
model = modellib.MaskRCNN(mode="inference", model_dir=MODEL_DIR, config=config)

# Load weights trained on MS-COCO
model.load_weights(COCO_MODEL_PATH, by_name=True)

# COCO Class names
# Index of the class in the list is its ID. For example, to get ID of
# the teddy bear class, use: class_names.index('teddy bear')
class_names = ['BG', 'person', 'bicycle', 'car', 'motorcycle', 'airplane',
               'bus', 'train', 'truck', 'boat', 'traffic light',
               'fire hydrant', 'stop sign', 'parking meter', 'bench', 'bird',
               'cat', 'dog', 'horse', 'sheep', 'cow', 'elephant', 'bear',
               'zebra', 'giraffe', 'backpack', 'umbrella', 'handbag', 'tie',
               'suitcase', 'frisbee', 'skis', 'snowboard', 'sports ball',
               'kite', 'baseball bat', 'baseball glove', 'skateboard',
               'surfboard', 'tennis racket', 'bottle', 'wine glass', 'cup',
               'fork', 'knife', 'spoon', 'bowl', 'banana', 'apple',
               'sandwich', 'orange', 'broccoli', 'carrot', 'hot dog', 'pizza',
               'donut', 'cake', 'chair', 'couch', 'potted plant', 'bed',
               'dining table', 'toilet', 'tv', 'laptop', 'mouse', 'remote',
               'keyboard', 'cell phone', 'microwave', 'oven', 'toaster',
               'sink', 'refrigerator', 'book', 'clock', 'vase', 'scissors',
               'teddy bear', 'hair drier', 'toothbrush']
# Load a random image from the images folder
#file_names = next(os.walk(IMAGE_DIR))[2]
#image = skimage.io.imread(os.path.join(IMAGE_DIR, random.choice(file_names)))

image= cv2.imread("./images/12283150_12d37e6389_z.jpg")
# Run detection
results = model.detect([image], verbose=1)
# Visualize results
r = results[0]
visualize.display_instances(image, r['rois'], r['masks'], r['class_ids'],
                           class_names, r['scores'])
结果显示:
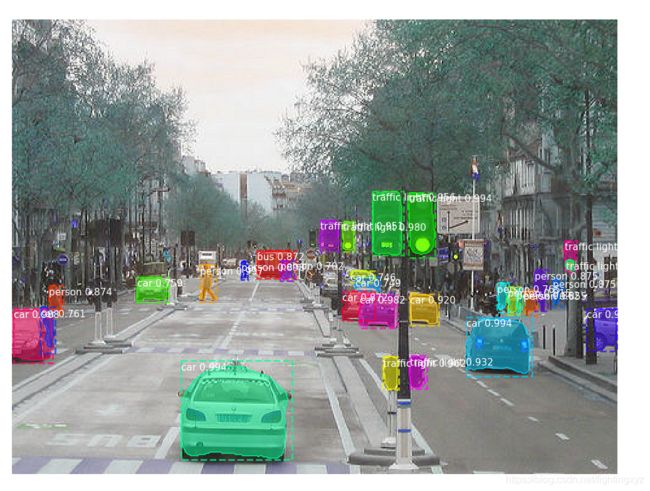
OK!基本测试已经搞定。
第三步:添加train_shapes.ipynb。并按照上面的步骤,更改为train_shapes.py。

import os
import sys
import random
import math
import re
import time
import numpy as np
import cv2
import matplotlib
import matplotlib.pyplot as plt

# Root directory of the project
ROOT_DIR = os.path.abspath("../../")

# Import Mask RCNN
sys.path.append(ROOT_DIR)  # To find local version of the library
from mrcnn.config import Config
from mrcnn import utils
import mrcnn.model as modellib
from mrcnn import visualize
from mrcnn.model import log

# %matplotlib inline

# Directory to save logs and trained model
MODEL_DIR = os.path.join(ROOT_DIR, "logs")

# Local path to trained weights file
COCO_MODEL_PATH = os.path.join(ROOT_DIR, "Mask_RCNN-master-1\\Mask_RCNN-master\\mask_rcnn_coco.h5")
print(COCO_MODEL_PATH)

# Download COCO trained weights from Releases if needed
if not os.path.exists(COCO_MODEL_PATH):
    utils.download_trained_weights(COCO_MODEL_PATH)


class ShapesConfig(Config):
    """Configuration for training on the toy shapes dataset.
    Derives from the base Config class and overrides values specific
    to the toy shapes dataset.
    """
    # Give the configuration a recognizable name
    NAME = "shapes"

    # Train on 1 GPU and 8 images per GPU. We can put multiple images on each
    # GPU because the images are small. Batch size is 8 (GPUs * images/GPU).
    GPU_COUNT = 1
    IMAGES_PER_GPU = 8

    # Number of classes (including background)
    NUM_CLASSES = 1 + 3  # background + 3 shapes
    # NUM_CLASSES = 1 + 1  # background + 1 shapes

    # Use small images for faster training. Set the limits of the small side
    # the large side, and that determines the image shape.
    IMAGE_MIN_DIM = 128
    IMAGE_MAX_DIM = 128

    # Use smaller anchors because our image and objects are small
    RPN_ANCHOR_SCALES = (8, 16, 32, 64, 128)  # anchor side in pixels

    # Reduce training ROIs per image because the images are small and have
    # few objects. Aim to allow ROI sampling to pick 33% positive ROIs.
    TRAIN_ROIS_PER_IMAGE = 32

    # Use a small epoch since the data is simple
    STEPS_PER_EPOCH = 100

    # use small validation steps since the epoch is small
    VALIDATION_STEPS = 5


config = ShapesConfig()
config.display()


def get_ax(rows=1, cols=1, size=8):
    """Return a Matplotlib Axes array to be used in
    all visualizations in the notebook. Provide a
    central point to control graph sizes.

    Change the default size attribute to control the size
    of rendered images

    返回要在其中使用的Matplotlib Axes数组
     笔记本中的所有可视化。 提供一个
     控制图形大小的中心点。

     更改默认大小属性以控制大小
     渲染图像
    """
    _, ax = plt.subplots(rows, cols, figsize=(size * cols, size * rows))
    return ax


class ShapesDataset(utils.Dataset):
    """Generates the shapes synthetic dataset. The dataset consists of simple
    shapes (triangles, squares, circles) placed randomly on a blank surface.
    The images are generated on the fly. No file access required.
    生成形状数据集。 数据集由简单形状(三角形,正方形,圆形)随机放置在空白表面上。这些图像是即时生成的。 无需文件访问。
    """

    def load_shapes(self, count, height, width):
        """Generate the requested number of synthetic images.
        count: number of images to generate.
        height, width: the size of the generated images.
        生成所需数量的合成图像。
         count:要生成的图像数。
         高度,宽度:所生成图像的大小。
        """
        # Add classes
        self.add_class("shapes", 1, "square")
        self.add_class("shapes", 2, "circle")
        self.add_class("shapes", 3, "triangle")

        # self.add_class("shapes", 1, "xueqing")

        # Add images
        # Generate random specifications of images (i.e. color and
        # list of shapes sizes and locations). This is more compact than
        # actual images. Images are generated on the fly in load_image().
        '''#添加图片
         #生成图像的随机规格(即彩色和形状大小和位置的列表)。 这比
         实际图像。 图像是在load_image()中即时生成的。
        '''
        for i in range(count):
            bg_color, shapes = self.random_image(height, width)
            self.add_image("shapes", image_id=i, path=None,
                           width=width, height=height,
                           bg_color=bg_color, shapes=shapes)

    def load_image(self, image_id):
        """Generate an image from the specs of the given image ID.
        Typically this function loads the image from a file, but
        in this case it generates the image on the fly from the
        specs in image_info.
        """
        info = self.image_info[image_id]
        bg_color = np.array(info['bg_color']).reshape([1, 1, 3])
        image = np.ones([info['height'], info['width'], 3], dtype=np.uint8)
        image = image * bg_color.astype(np.uint8)
        for shape, color, dims in info['shapes']:
            image = self.draw_shape(image, shape, dims, color)
        return image

    def image_reference(self, image_id):
        """Return the shapes data of the image."""
        info = self.image_info[image_id]
        if info["source"] == "shapes":
            return info["shapes"]
        else:
            super(self.__class__).image_reference(self, image_id)

    def load_mask(self, image_id):
        """Generate instance masks for shapes of the given image ID.
        """
        info = self.image_info[image_id]
        shapes = info['shapes']
        count = len(shapes)
        mask = np.zeros([info['height'], info['width'], count], dtype=np.uint8)
        for i, (shape, _, dims) in enumerate(info['shapes']):
            mask[:, :, i:i + 1] = self.draw_shape(mask[:, :, i:i + 1].copy(),
                                                  shape, dims, 1)
        # Handle occlusions
        occlusion = np.logical_not(mask[:, :, -1]).astype(np.uint8)
        for i in range(count - 2, -1, -1):
            mask[:, :, i] = mask[:, :, i] * occlusion
            occlusion = np.logical_and(occlusion, np.logical_not(mask[:, :, i]))
        # Map class names to class IDs.
        class_ids = np.array([self.class_names.index(s[0]) for s in shapes])
        return mask.astype(np.bool), class_ids.astype(np.int32)

    def draw_shape(self, image, shape, dims, color):
        """Draws a shape from the given specs."""
        # Get the center x, y and the size s
        x, y, s = dims
        if shape == 'square':
            cv2.rectangle(image, (x - s, y - s), (x + s, y + s), color, -1)
        elif shape == "circle":
            cv2.circle(image, (x, y), s, color, -1)
        elif shape == "triangle":
            points = np.array([[(x, y - s),
                                (x - s / math.sin(math.radians(60)), y + s),
                                (x + s / math.sin(math.radians(60)), y + s),
                                ]], dtype=np.int32)
            cv2.fillPoly(image, points, color)
        return image

    def random_shape(self, height, width):
        """Generates specifications of a random shape that lies within
        the given height and width boundaries.
        Returns a tuple of three valus:
        * The shape name (square, circle, ...)
        * Shape color: a tuple of 3 values, RGB.
        * Shape dimensions: A tuple of values that define the shape size
                            and location. Differs per shape type.
        """
        # Shape
        shape = random.choice(["square", "circle", "triangle"])
        # Color
        color = tuple([random.randint(0, 255) for _ in range(3)])
        # Center x, y
        buffer = 20
        y = random.randint(buffer, height - buffer - 1)
        x = random.randint(buffer, width - buffer - 1)
        # Size
        s = random.randint(buffer, height // 4)
        return shape, color, (x, y, s)

    def random_image(self, height, width):
        """Creates random specifications of an image with multiple shapes.
        Returns the background color of the image and a list of shape
        specifications that can be used to draw the image.
        创建具有多种形状的图像的随机规格。
         返回图像的背景色和形状列表可用于绘制图像的规格。
        """
        # Pick random background color
        bg_color = np.array([random.randint(0, 255) for _ in range(3)])
        # Generate a few random shapes and record their
        # bounding boxes
        shapes = []
        boxes = []
        N = random.randint(1, 4)
        for _ in range(N):
            shape, color, dims = self.random_shape(height, width)
            shapes.append((shape, color, dims))
            x, y, s = dims
            boxes.append([y - s, x - s, y + s, x + s])
        # Apply non-max suppression wit 0.3 threshold to avoid
        # shapes covering each other
        keep_ixs = utils.non_max_suppression(np.array(boxes), np.arange(N), 0.3)
        shapes = [s for i, s in enumerate(shapes) if i in keep_ixs]
        return bg_color, shapes


# Training dataset 训练数据
dataset_train = ShapesDataset()
dataset_train.load_shapes(500, config.IMAGE_SHAPE[0], config.IMAGE_SHAPE[1])
dataset_train.prepare()

# Validation dataset 测试数据
dataset_val = ShapesDataset()
dataset_val.load_shapes(50, config.IMAGE_SHAPE[0], config.IMAGE_SHAPE[1])
dataset_val.prepare()

# Load and display random samples 加载并显示随机样本
image_ids = np.random.choice(dataset_train.image_ids, 4)
for image_id in image_ids:
    image = dataset_train.load_image(image_id)
    mask, class_ids = dataset_train.load_mask(image_id)
    visualize.display_top_masks(image, mask, class_ids, dataset_train.class_names)

# Create model in training mode
model = modellib.MaskRCNN(mode="training", config=config,
                          model_dir=MODEL_DIR)

# Which weights to start with?
init_with = "coco"  # imagenet, coco, or last

if init_with == "imagenet":
    model.load_weights(model.get_imagenet_weights(), by_name=True)
elif init_with == "coco":
    # Load weights trained on MS COCO, but skip layers that
    # are different due to the different number of classes
    # See README for instructions to download the COCO weights
    model.load_weights(COCO_MODEL_PATH, by_name=True,
                       exclude=["mrcnn_class_logits", "mrcnn_bbox_fc",
                                "mrcnn_bbox", "mrcnn_mask"])
elif init_with == "last":
    # Load the last model you trained and continue training
    model.load_weights(model.find_last(), by_name=True)

# Train the head branches
# Passing layers="heads" freezes all layers except the head
# layers. You can also pass a regular expression to select
# which layers to train by name pattern.
# 训练头上的树枝,传递layers =“ heads”将冻结除head以外的所有图层
# 还可以传递正则表达式来选择,按名称模式训练哪些层。
model.train(dataset_train, dataset_val,
            learning_rate=config.LEARNING_RATE,
            epochs=1,
            layers='heads')

# Fine tune all layers
# Passing layers="all" trains all layers. You can also
# pass a regular expression to select which layers to
# train by name pattern.
# 微调所有图层。通过layers =“all”训练所有层。 你也可以传递正则表达式以选择要图层。按名称训练模式。
model.train(dataset_train, dataset_val,
            learning_rate=config.LEARNING_RATE / 10,
            epochs=2,
            layers="all")
需要更改model.py中的2200行:
![]()
把2199这一行改为2200这一行!!!!!