使用D435i相机录制数据集跑ORB-SLAM2稠密建图
目录
- 前言
-
- 系统版本
- 一、录制视频
- 二、提取rgb和depth图片
-
- 1.
- 2.
- 3.
- 三、测试数据集
前言
本文写于2022年7月24日。
系统版本
Ubuntu18.04 + ROS melodic
一、录制视频
这一步需要使用InterRealSenseD435i SDK2,可以参考此链接安装。
打开Intel RealSense Viewer。设置Depth Stream以及Color Stream的图像分辨率为640 × 480,设置采集帧率为30 fps。点击左上角的Record按钮即可进行录制,开始录制后,点击左上角的Stop按钮即可结束录制并保存录制结果。
若点击Record按钮后出现以下报错,则更改一下保存路径。
UNKNOWN in rs2_create_record_device_ex(device:0x7f151c000b20, file:/):
Error opening file: /home/d/Documents/20220723_223742.bag

点击右上角的齿轮图标,选择Settings,然后改变存储路径,之后点击Apply,OK。
结束录制后,在相应存储路径下即生成.bag文件。
二、提取rgb和depth图片
1.
首先,进入bag文件的存储路径并打开终端,通过rosbag info 20220723_202328.bag查看待提取的深度图及彩色图所对应的 topic,如下图所示:

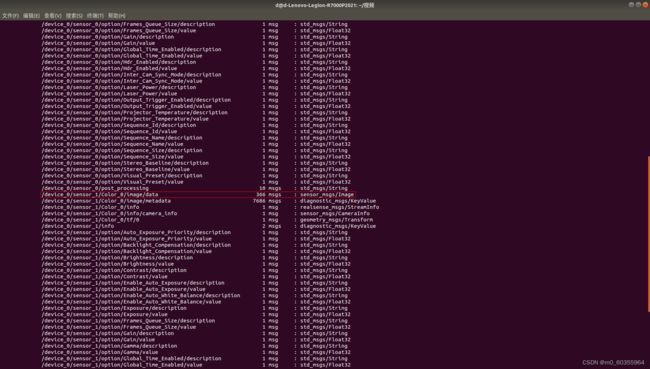
新建文件夹room(此名称随意),在此文件夹下新建文件夹rgb和depth保存提取出来的深度图和彩色图,同时新建文件rgb.txt和depth.txt为对齐时间戳做准备。
2.
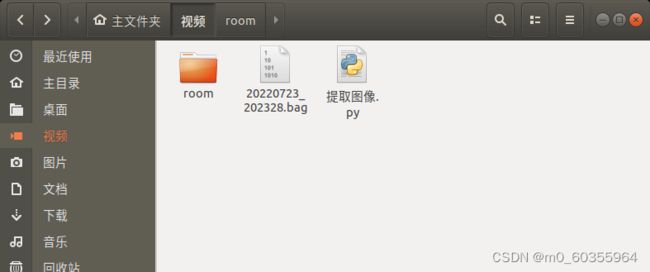
执行以下python脚本提取图像.py
注:我保存的路径出现了中文,所以在第一行加入了# -*- coding: utf-8 -*-,否则会报错SyntaxError: Non-ASCII character '\xe8' in file 参考链接
# -*- coding: utf-8 -*-

import roslib
import rosbag
import rospy
import cv2
import os
from sensor_msgs.msg import Image
from cv_bridge import CvBridge
from cv_bridge import CvBridgeError

rgb = '/home/d/视频/room/rgb/'  #rgb path
depth = '/home/d/视频/room/depth/'   #depth path
bridge = CvBridge()

file_handle1 = open('/home/d/视频/room/depth.txt', 'w')
file_handle2 = open('/home/d/视频/room/rgb.txt', 'w')

with rosbag.Bag('/home/d/视频/20220723_202328.bag', 'r') as bag:
    for topic,msg,t in bag.read_messages():
        if topic == "/device_0/sensor_0/Depth_0/image/data":  #depth topic
            cv_image = bridge.imgmsg_to_cv2(msg)
            timestr = "%.6f" %  msg.header.stamp.to_sec()   #depth time stamp
            image_name = timestr+ ".png"
            path = "depth/" + image_name
            file_handle1.write(timestr + " " + path + '\n')
            cv2.imwrite(depth + image_name, cv_image)
        if topic == "/device_0/sensor_1/Color_0/image/data":   #rgb topic
            cv_image = bridge.imgmsg_to_cv2(msg,"bgr8")
            timestr = "%.6f" %  msg.header.stamp.to_sec()   #rgb time stamp
            image_name = timestr+ ".jpg"
            path = "rgb/" + image_name
            file_handle2.write(timestr + " " + path + '\n')
            cv2.imwrite(rgb + image_name, cv_image)
file_handle1.close()
file_handle2.close()
需要将以下几行路径改成自己对应的路径
rgb = '/home/d/视频/room/rgb/'  #rgb path
depth = '/home/d/视频/room/depth/'   #depth path
bridge = CvBridge()

file_handle1 = open('/home/d/视频/room/depth.txt', 'w')
file_handle2 = open('/home/d/视频/room/rgb.txt', 'w')

with rosbag.Bag('/home/d/视频/20220723_202328.bag', 'r') as bag:
改好了之后打开终端输入以下指令执行python脚本
python 提取图像.py
3.
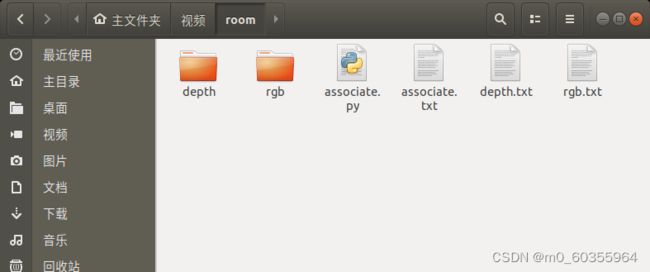
由于深度图及彩色图的时间戳并非严格一一对齐,存在一定的时间差,因此需将深度图及彩色图按照时间戳最接近原则进行两两配对。将associate.py脚本文件存储至room文件夹下,如图所示:
associate.py脚本文件:
"""
The RealSense provides the color and depth images in an un-synchronized way. This means that the set of time stamps from the color images do not intersect with those of the depth images. Therefore, we need some way of associating color images to depth images.

For this purpose, you can use the ''associate.py'' script. It reads the time stamps from the rgb.txt file and the depth.txt file, and joins them by finding the best matches.
"""

import argparse
import sys
import os
import numpy


def read_file_list(filename):
    """
    Reads a trajectory from a text file.

    File format:
    The file format is "stamp d1 d2 d3 ...", where stamp denotes the time stamp (to be matched)
    and "d1 d2 d3.." is arbitary data (e.g., a 3D position and 3D orientation) associated to this timestamp.

    Input:
    filename -- File name

    Output:
    dict -- dictionary of (stamp,data) tuples

    """
    file = open(filename)
    data = file.read()
    lines = data.replace(",", " ").replace("\t", " ").split("\n")
    list = [[v.strip() for v in line.split(" ") if v.strip() != ""] for line in lines if
            len(line) > 0 and line[0] != "#"]
    list = [(float(l[0]), l[1:]) for l in list if len(l) > 1]
    return dict(list)


def associate(first_list, second_list, offset, max_difference):
    """
    Associate two dictionaries of (stamp,data). As the time stamps never match exactly, we aim
    to find the closest match for every input tuple.

    Input:
    first_list -- first dictionary of (stamp,data) tuples
    second_list -- second dictionary of (stamp,data) tuples
    offset -- time offset between both dictionaries (e.g., to model the delay between the sensors)
    max_difference -- search radius for candidate generation

    Output:
    matches -- list of matched tuples ((stamp1,data1),(stamp2,data2))

    """
    first_keys = first_list.keys()
    second_keys = second_list.keys()
    potential_matches = [(abs(a - (b + offset)), a, b)
                         for a in first_keys
                         for b in second_keys
                         if abs(a - (b + offset)) < max_difference]
    potential_matches.sort()
    matches = []
    for diff, a, b in potential_matches:
        if a in first_keys and b in second_keys:
            first_keys.remove(a)
            second_keys.remove(b)
            matches.append((a, b))

    matches.sort()
    return matches


if __name__ == '__main__':

    # parse command line
    parser = argparse.ArgumentParser(description='''
    This script takes two data files with timestamps and associates them
    ''')
    parser.add_argument('first_file', help='first text file (format: timestamp data)')
    parser.add_argument('second_file', help='second text file (format: timestamp data)')
    parser.add_argument('--first_only', help='only output associated lines from first file', action='store_true')
    parser.add_argument('--offset', help='time offset added to the timestamps of the second file (default: 0.0)',
                        default=0.0)
    parser.add_argument('--max_difference',
                        help='maximally allowed time difference for matching entries (default: 0.02)', default=0.02)
    args = parser.parse_args()

    first_list = read_file_list(args.first_file)
    second_list = read_file_list(args.second_file)

    matches = associate(first_list, second_list, float(args.offset), float(args.max_difference))

    if args.first_only:
        for a, b in matches:
            print("%f %s" % (a, " ".join(first_list[a])))
    else:
        for a, b in matches:
            print("%f %s %f %s" % (a, " ".join(first_list[a]), b - float(args.offset), " ".join(second_list[b])))
在该路径下打开终端并通过执行如下命令生成配对结果associate.txt
python associate.py rgb.txt depth.txt > associate.txt
至此,数据集制作完成。
三、测试数据集
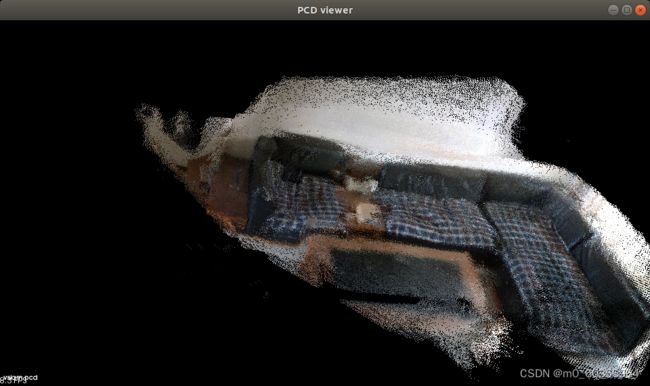
使用高翔的ORB-SLAM2稠密点云的代码,高翔ORB-SLAM2稠密建图编译参考链接
./bin/rgbd_tum Vocabulary/ORBvoc.txt Examples/RGB-D/MyD435i.yaml /home/d/视频/room /home/d/视频/room/associate.txt
结果如下图:
MyD435i.yaml文件
%YAML:1.0

#--------------------------------------------------------------------------------------------
# Camera Parameters. Adjust them!
#--------------------------------------------------------------------------------------------

# Camera calibration and distortion parameters (OpenCV)
Camera.fx: 910.099731
Camera.fy: 909.994873
Camera.cx: 639.493347
Camera.cy: 359.377410

Camera.k1: 0.0
Camera.k2: 0.0
Camera.p1: 0.0
Camera.p2: 0.0
Camera.p3: 0.0

Camera.width: 640
Camera.height: 480
# Camera frames per second
Camera.fps: 30.0

# IR projector baseline times fx (aprox.)
# bf = baseline (in meters) * fx, D435i的 baseline = 50 mm
Camera.bf: 50.0

# Color order of the images (0: BGR, 1: RGB. It is ignored if images are grayscale)
Camera.RGB: 1

# Close/Far threshold. Baseline times.
ThDepth: 40.0

# Deptmap values factor
DepthMapFactor: 1000.0

#--------------------------------------------------------------------------------------------
# ORB Parameters
#--------------------------------------------------------------------------------------------

# ORB Extractor: Number of features per image
ORBextractor.nFeatures: 1000

# ORB Extractor: Scale factor between levels in the scale pyramid
ORBextractor.scaleFactor: 1.2

# ORB Extractor: Number of levels in the scale pyramid
ORBextractor.nLevels: 8

# ORB Extractor: Fast threshold
# Image is divided in a grid. At each cell FAST are extracted imposing a minimum response.
# Firstly we impose iniThFAST. If no corners are detected we impose a lower value minThFAST
# You can lower these values if your images have low contrast
ORBextractor.iniThFAST: 20
ORBextractor.minThFAST: 7

#--------------------------------------------------------------------------------------------
# Viewer Parameters
#--------------------------------------------------------------------------------------------
Viewer.KeyFrameSize: 0.05
Viewer.KeyFrameLineWidth: 1
Viewer.GraphLineWidth: 0.9
Viewer.PointSize:2
Viewer.CameraSize: 0.08
Viewer.CameraLineWidth: 3
Viewer.ViewpointX: 0
Viewer.ViewpointY: -0.7
Viewer.ViewpointZ: -1.8
Viewer.ViewpointF: 500

PointCloudMapping.Resolution: 0.01
meank: 50
thresh: 2.0