mmdetection--自定义数据集
文章目录
-
- PASCAL VOC数据集格式
-
- 组织结构
-
- Annotation
- ImageSets
- JPEGImages
- COCO数据集格式
-
- 组织结构
-
- annotations(注释)
- json格式
- instances
- 自定义数据集(coco类型)
-
- 修改config文件
-
- dataset模块
- model模块
- 检查注释文件
mmdetection主要支持COCO,次要支持PASCAL VOC(提供了转化为COCO的脚本),因此我们首先介绍COCO和VOC数据集。
PASCAL VOC数据集格式
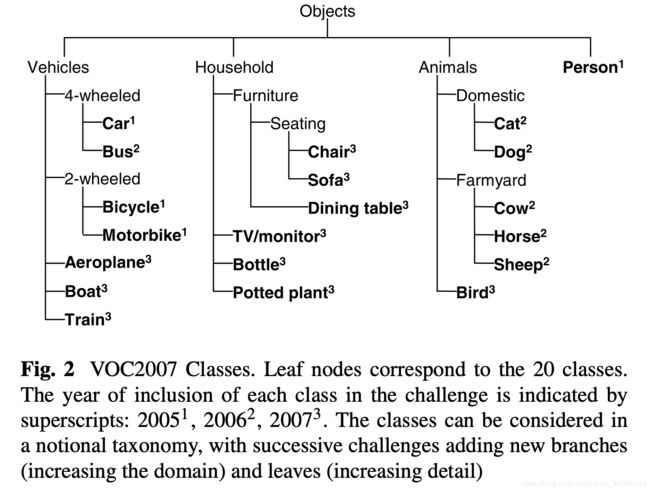
PASCAL VOC2007和2012总共分为了四个大类,大类又细分为了20个小类,具体如图所示:
组织结构
解压VOC2007后,文件组织形式如下:
├── Annotations 进行 detection 任务时的标签文件,xml 形式,文件名与图片名一一对应
├── ImageSets 包含三个子文件夹 Layout、Main、Segmentation,文件夹中包含了对应任务的数据集划分
├── JPEGImages 存放 .jpg 格式的图片文件
├── SegmentationClass 存放按照 class 分割的图片
└── SegmentationObject 存放按照 object 分割的图片
Annotation
以第一张图片的信息为例:
<annotation>
	第一部分:声明图像的数据来源、大小等元信息
	<folder>VOC2007</folder>
	<filename>000001.jpg</filename>
	<source>
		<database>The VOC2007 Database</database>
		<annotation>PASCAL VOC2007</annotation>
		<image>flickr</image>
		<flickrid>341012865</flickrid>
	</source>
	<owner>
		<flickrid>Fried Camels</flickrid>
		<name>Jinky the Fruit Bat</name>
	</owner>
	<size>
		<width>353</width>
		<height>500</height>
		<depth>3</depth>
	</size>
	<segmented>0</segmented>

	上述信息包含的内容有:
	1. 图像路径为VOC2007/JPEGImages/000001.jpg;
	2. 来自flickr网站上(source&owner);
	3. 图像大小为353x500x3;
	4. 没有分割标注(1表示有);

	第二部分:对象信息
	<object>
		<name>dog</name>
		<pose>Left</pose>
		<truncated>1</truncated>
		<difficult>0</difficult>
		<bndbox>
			<xmin>48</xmin>
			<ymin>240</ymin>
			<xmax>195</xmax>
			<ymax>371</ymax>
		</bndbox>
	</object>
	上述信息包含的内容有:
	1. 种类为dog;
	2. 视角为left;
	3. 是否被标记为截断:是(1);
	4. 是否被标记为很难识别:不是(0);
 	5. 框的位置:左上角:(48,240),右下角:(195,371);

	<object>
		<name>person</name>
		<pose>Left</pose>
		<truncated>1</truncated>
		<difficult>0</difficult>
		<bndbox>
			<xmin>8</xmin>
			<ymin>12</ymin>
			<xmax>352</xmax>
			<ymax>498</ymax>
		</bndbox>
	</object>
</annotation>
ImageSets
Main:服务于分类和检测任务;
Layout:服务于人体动作行为分析,检测人及其身体的各个组成部分;
Segmentation:服务于图像分割任务;
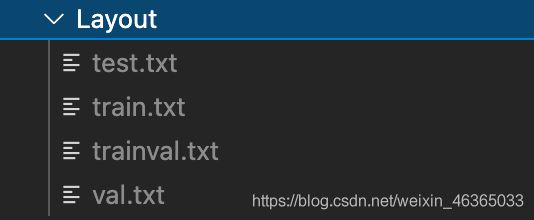
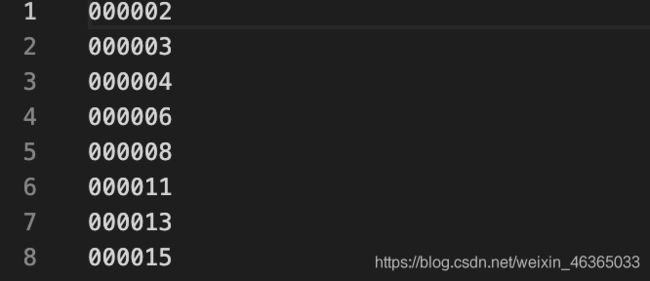
在Layout和Segmentation中的文件为:
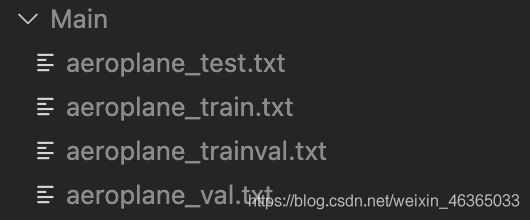
Main中的文件则有点特殊,组织形式是以类别为单位的:
在样本编号之后也多了一个数字:
0表示图像中包含aeroplane,但是难以识别;
1表示图像中包含aeroplane;
-1表示图像中不包含aeroplane。
JPEGImages
原始图像文件,格式为JPG。
如果自制VOC数据集的话,在采样时务必用JPG格式保存。
COCO数据集格式
coco2017数据集包含了12个大类,80个小类。
组织结构

test、train、val三个文件夹中包含了原始图片,格式为jpg。
annotations(注释)
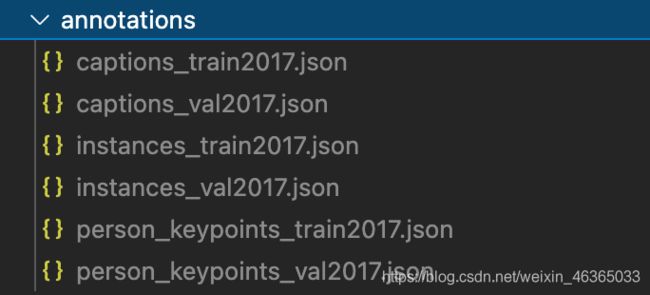
解压的文件为annotations_trainval2017.zip,不同的压缩文件对应了不同的标注内容,也意味着不同的研究目标。
上述包含了三种标注类型:
- object instances(目标实例);
- object keypoints(目标上的关键点);
- image captions(看图说话)。
json格式
json是一种与语言无关的数据交换的格式。
json有两种格式:
- 对象格式:{“key1”:obj1,“key2”:obj2,“key3”:obj3…}
- 数组/集合格式:[obj1,obj2,obj3…]
其中,需要注意的是,属性名称和字符串值是需要用双引号扩起来的。
instances
文件包含的主要字段有:
{
	"info":基本信息,如:description、url、version、year、contributor;不重要;
	"licenses":不重要;
	"images":存储图片信息;重要;
	"annotations":存储图片注释信息;重要;
	"catagories":存储对象类别信息;重要;
}

annotation{
	"segmentation": RLE or [polygon], # 物体分割信息
    "area": float, # segmentation的面积
    "iscrowd": 0 or 1, # 是否有重叠
    "image_id": int, # 图像编号
    "bbox": [x,y,width,height], # 物体的框
    "category_id": int, # 类别编号
    "id": int, # 每个框的身份编号
}
自定义数据集(coco类型)
coco格式的模版如下:
'images': [
    {
        'file_name': 'COCO_val2014_000000001268.jpg',
        'height': 427,
        'width': 640,
        'id': 1268
    },
    ...
],

'annotations': [
    {
        'segmentation': [[192.81,
            247.09,
            ...
            219.03,
            249.06]],  # if you have mask labels
        'area': 1035.749,
        'iscrowd': 0,
        'image_id': 1268,
        'bbox': [192.81, 224.8, 74.73, 33.43],
        'category_id': 16,
        'id': 42986
    },
    ...
],

'categories': [
    {'id': 0, 'name': 'car'},
 ]
修改config文件
我们需要修改在dataset模块和models模块中对于数据集的描述。
dataset模块
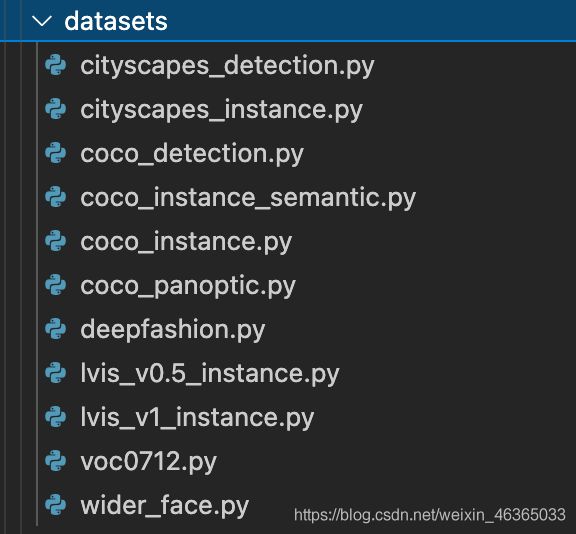
对于任何一个config都离不开对于base文件夹的继承,在base/dataset中又有这些文件,分别对应了不同数据集、不同任务的数据集处理文件。
我们以其中的coco_detection.py文件为例:
# dataset settings
dataset_type = 'CocoDataset' # 数据集种类
data_root = 'data/coco/' # 数据集位置
img_norm_cfg = dict(
    mean=[123.675, 116.28, 103.53], std=[58.395, 57.12, 57.375], to_rgb=True)
train_pipeline = [ # 数据增强的参数
    dict(type='LoadImageFromFile'),
    dict(type='LoadAnnotations', with_bbox=True),
    dict(type='Resize', img_scale=(1333, 800), keep_ratio=True),
    dict(type='RandomFlip', flip_ratio=0.5),
    dict(type='Normalize', **img_norm_cfg),
    dict(type='Pad', size_divisor=32),
    dict(type='DefaultFormatBundle'),
    dict(type='Collect', keys=['img', 'gt_bboxes', 'gt_labels']),
]
test_pipeline = [ # 数据增强的参数
    dict(type='LoadImageFromFile'),
    dict(
        type='MultiScaleFlipAug',
        img_scale=(1333, 800),
        flip=False,
        transforms=[
            dict(type='Resize', keep_ratio=True),
            dict(type='RandomFlip'),
            dict(type='Normalize', **img_norm_cfg),
            dict(type='Pad', size_divisor=32),
            dict(type='ImageToTensor', keys=['img']),
            dict(type='Collect', keys=['img']),
        ])
]
# train、val、test数据分配
data = dict(
    samples_per_gpu=2,
    workers_per_gpu=2,
    train=dict(
        type=dataset_type, # 数据集类型
        ann_file=data_root + 'annotations/instances_train2017.json', # 注释文件位置
        img_prefix=data_root + 'train2017/', # 源文件位置
        pipeline=train_pipeline), # 数据增强方式
    val=dict(
        type=dataset_type,
        ann_file=data_root + 'annotations/instances_val2017.json',
        img_prefix=data_root + 'val2017/',
        pipeline=test_pipeline),
    test=dict(
        type=dataset_type,
        ann_file=data_root + 'annotations/instances_val2017.json',
        img_prefix=data_root + 'val2017/',
        pipeline=test_pipeline))
evaluation = dict(interval=1, metric='bbox') # 评分指标
对于自定义的数据集,我们首先创建一个配置文件:configs/my_config.py。
其中的数据集部分如下进行修改:
dataset_type = 'CocoDataset'
classes = ('a', 'b', 'c', 'd', 'e')
data = dict(
    samples_per_gpu=2,
    workers_per_gpu=2,
    train=dict(
        type=dataset_type,
        # explicitly add your class names to the field `classes`
        classes=classes,
        ann_file='path/to/your/train/annotation_data',
        img_prefix='path/to/your/train/image_data'),
    val=dict(
        type=dataset_type,
        # explicitly add your class names to the field `classes`
        classes=classes,
        ann_file='path/to/your/val/annotation_data',
        img_prefix='path/to/your/val/image_data'),
    test=dict(
        type=dataset_type,
        # explicitly add your class names to the field `classes`
        classes=classes,
        ann_file='path/to/your/test/annotation_data',
        img_prefix='path/to/your/test/image_data'))
需要注意的是,我们需要明显地向data.train/val/test字段中加入classes。
model模块
在使用coco数据集时,我们默认了num_classes为80,因此,在自定义的config文件中需要对此做出修改:
model = dict(
    roi_head=dict(
        bbox_head=[
            dict(
                type='Shared2FCBBoxHead',
                # explicitly over-write all the `num_classes` field from default 80 to 5.
                num_classes=5),
            dict(
                type='Shared2FCBBoxHead',
                # explicitly over-write all the `num_classes` field from default 80 to 5.
                num_classes=5),
            dict(
                type='Shared2FCBBoxHead',
                # explicitly over-write all the `num_classes` field from default 80 to 5.
                num_classes=5)],
    # explicitly over-write all the `num_classes` field from default 80 to 5.
    mask_head=dict(num_classes=5)))
修改完以上两个部分后,我们需要进一步检查自定义数据集的注释文件。
检查注释文件
- catagories字段的长度需要与config-dataset部分中的classes的长度一致;
- catagories字段中的name的顺序与classes中的顺序一致、元素一致;
- annotations中的catagory_id应该能在catagories的id中找到。
