利用Antd的Upload组件上传图片至七牛云(自定义react-quill富文本编辑器上传图片)
文章目录
前言
一、引入react-quill富文本编辑器
二、自定义富文本编辑器上传图片按钮
1. 申请七牛云存储空间
2. 前端
2.1 前端引入七牛和antd依赖
2.2 前端从后端得到上传token
2.3 在render()中引入Upload组件
2.4 改写富文本编辑器上传图片按钮
2.5 Upload组件中的自定义方法
总结
前言
在社区或其他项目中,上传图片至图床存储至云端是很常见的做法。在vue中可以把图片存在本地某个文件夹中,最后将项目一起部署到云端。而react中无法直接通过一个本地文件路径引入图片。大三上学期小组做了一个社区app,前端用的react,后端用的springboot,在富文本编辑器发帖这一块搞了很久,最后实现了通过前后端分别上传图片七牛云的两种方法,记录一下。
本文记录前端通过upload组件上传图片至七牛云,相比而言前端上传局限性会更大一点,而且也不是很方便。
大概流程如下:
- 前端向后端发送请求,后端先获取到七牛那边的提供的一个token值
- 然后在前端利用upload组件(上传 Upload - Ant Design)将文件上传到七牛那边提供的一个url上面(一个post接口,要附带之前token提交上去)
- 会返回一个图片的网络url
一、引入react-quill富文本编辑器
这一步可以参考其他文章,网上有挺多的
二、自定义富文本编辑器上传图片按钮
1. 申请七牛云存储空间
在七牛云 - 国内领先的企业级云服务商 (qiniu.com)中申请一个存储空间,我的存储区域选的是华东(这里的区域关系到后面的配置)。
2. 前端引入七牛和antd依赖
npm install qiniu -S
npm install antd --save
import { Upload } from 'antd'3. 前端从后端得到上传token
①前端向后端发送请求
在ComponentDidMount()中调用fetchUploadToken();
自定义方法fetchUploadToken:
 // 访问后端,获取请求上传凭证
 fetchUploadToken = () => {
    $axios.get('/upload/token/get', {}).then(res => {
        Toast.clear();
        console.log(res);
        this.setState({
            uploadToken: res.message,//从后端得到uploadToken
            fileKey: Date.now() + Math.floor(Math.random() * (999999 - 100000) + 100000)+1
            //这里的fileKey其实没啥用,因为ComponentDidMount只会执行一次,实际是下面的Upload组件中的随机生成fileKey在起作用
        })
    })
}
②后端向七牛云请求得到token并返回给前端
后端使用的是SpringBoot框架,在pom.xml中添加依赖
    com.qiniu
    qiniu-java-sdk
    [7.2.0,7.2.99]
在common包中新建ImageUploadController类
package com.example.spidercommunity.common;

import com.example.spidercommunity.common.Result;
import com.qiniu.common.Zone;
import com.qiniu.http.Response;
import com.qiniu.storage.Configuration;
import com.qiniu.storage.UploadManager;
import com.qiniu.util.Auth;
import org.springframework.web.bind.annotation.*;
import org.springframework.web.multipart.MultipartFile;

import java.io.InputStream;

@RestController
@CrossOrigin
@RequestMapping("/upload")
public class ImageUploadController {
    private String accessKey = "...";

    private String secretKey = "...";
    //上面两个key是七牛云的公钥和个人密钥,可以在个人空间中找到

    private String bucket = "...";//bucket名字,即空间名

    @RequestMapping("/token/get")
    public Result getToken() {

        // 调用七牛云的接口获取token
        Auth auth = Auth.create(accessKey,secretKey);
        String upToken = auth.uploadToken(bucket);

        return Result.success(upToken);
    }
}
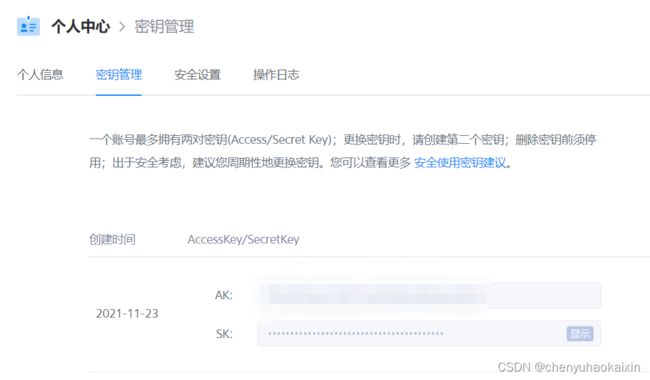
其中的两个key在七牛云的个人中心中可查到
4. 在render()中引入Upload组件
{/* 上传图片 */}
//这个button作为Upload的“扳机”,将富文本编辑器上的上传图片按钮和这个按钮绑定,点击上传图片按钮就会出发Upload组件
5. 改写富文本编辑器上传图片按钮
这是我在ComponentDidMount()中对quill的引入和配置,关于react-quill的引入可以看看其他文章,这里贴的代码可能不是很完整。主要想说明的是在options中对点击工具栏中image图标的方法重写,绑定上面提到的uploadRef的按钮。这样点击image图标就会弹出一个选择文件框,将选中文件传给Upload组件
const container = [
    ['bold', 'italic', 'underline'],        // toggled buttons
    ['blockquote'],

    // [{ 'header': 1 }, { 'header': 2 }],               // custom button values
    [{ 'list': 'ordered' }, { 'list': 'bullet' }],
    [{ 'script': 'sub' }, { 'script': 'super' }],      // superscript/subscript
    // [{ 'indent': '-1' }, { 'indent': '+1' }],          // outdent/indent
    // [{ 'direction': 'rtl' }],                         // text direction

    // [{ 'size': ['small', false, 'large', 'huge'] }],  // custom dropdown
    [{ 'header': [1, 2, 3, 4, 5, 6, false] }],

    [{ 'color': [] }],          // dropdown with defaults from theme
    // [{ 'font': [] }],
    [{ 'align': [] }],
    ['image'],
    ['clean'],                                         // remove formatting button
    //['emoji'], //emoji表情,设置了才能显示

];//必须叫container,下面才能自定义!!!!!

const options = {
    minHeight: "200px",
    debug: 'warn',
    modules: {
        'emoji-toolbar': true,  //是否在工具栏展示出来
        "emoji-textarea": false, //我不需要emoji展示在文本框所以设置为false
        "emoji-shortname": true,
        toolbar: {
            container,
            handlers: {
                // 'image':this.selectImage.bind(this)
                'image': () => {
                    this.refs.uploadRef.click()
                }
            }
        },
        imageDrop: true,//这里的imageDrop名字要和上面的'modules/imageDrop'一样

    },
    placeholder: '请输入文本...',
    readOnly: false,
    theme: 'snow',

};

this.editor = new Quill(textbox, options);//textbox是富文本编辑器的位置
6. Upload组件中的自定义方法
(可参考官方文档API (上传 Upload - Ant Design))
①beforUpload() 这里加了一个上传之前图片压缩的功能,因为当时是在做一个移动端app,防止图片超出屏幕。不需要的话可以删掉直接在beforUpload()中return true。file是通过选择文件框选择并传给Upload组件的文件。(内置参数无需自己定义)
beforeUpload(file) {
    return new Promise(resolve => {
        // 图片压缩
        let reader = new FileReader(), img = new Image();
        reader.readAsDataURL(file);
        let imgFile = null
        //reader读完之后执行onload
        reader.onload = function (e) {
            img.src = e.target.result;
        }
        //img加载完成之后
        img.onload = function () {
            let canvas = document.createElement('canvas');
            let context = canvas.getContext('2d');

            if (img.width <= 350) {
                resolve(file);
            }
            else {
                //若上传图片宽度超过屏幕宽度
                console.log("图片尺寸" + this.width + "," + this.height)
                let originWidth = 350;
                let originHeight = (350 / this.width) * this.height; //等比例缩放高度

                //将图片利用canvas.drawImage进行绘制
                canvas.width = originWidth;
                canvas.height = originHeight;
                context.clearRect(0, 0, originWidth, originHeight);
                context.drawImage(img, 0, 0, originWidth, originHeight);

                //绘制后调用toBlob方法转化为blob对象并压缩,最后通过new File()将blob对象转化为文件对象并上传
                canvas.toBlob((blob) => {//此处的blob就是压缩后的blob对象
                    imgFile = new File([blob], file.name, { type: file.type }); // 将blob对象转化为图片文件
                    console.log("压缩后的图片尺寸" + imgFile.size)
                    resolve(imgFile);
                }, file.type, 1); // file压缩的图片类型
            }
        }
    }
    )
}
② 将图片上传至七牛云上后,七牛云会返回一个url,在Upload组件的handleChange()中调用这个方法,将图片在编辑器光标处显示
 // 获取回传的文件地址
 handleUploadChange = info => {
    if (info.file.status === 'done') {
        const imageKey = info.file.response.key
        const uploadUrl = "http://xxx.com/" + imageKey;//这个http://xxx.com/是你的七牛云的
        console.log(uploadUrl);

        //将图片插入编辑器
        const addImageRange = this.editor.getSelection();
        const cursorPosition = 0 + (addImageRange !== null ? addImageRange.index : 0);
        this.editor.insertEmbed(cursorPosition, 'image', uploadUrl);//插入图片//react无法读本地图片!!
        this.editor.setSelection(cursorPosition + 1);//光标位置加1
    }
}
总结
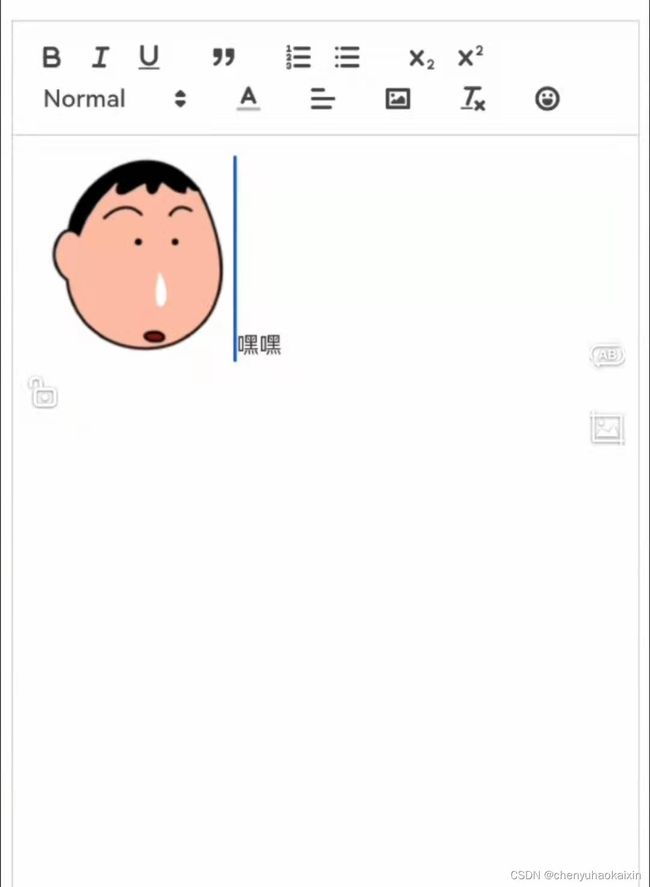
经过以上步骤,最后可以基本实现在react-quill上传图片至七牛云图床保存,(保存前压缩大小),并将图片回显到编辑器内如图。
这篇讲的是前端上传图片至七牛云,这种方法略显局促,后面会出一篇后端上传图片至七牛云,通用性和便捷性更强。这种方法不止可以在富文本编辑器上传图片使用,可以在任意需要上传图片存储到云端的情况下使用。作为记录,希望能帮到有需要的泥!


