(一)ncnn | Windows10 + VS2019环境配置
文章目录
- 1. ncnn简介
- 2. 相关依赖及软件安装
-
- 2.1 Visual Studio 2019
- 2.2 CMake 3.18.0
- 2.3 OpenCV 3.4.10
- 2.4 protobuf 3.4.0
- 2.5 ncnn
- 3. 项目配置
- 4. 总结
- 参考
1. ncnn简介
n c n n {\rm ncnn} ncnn是一个为手机端极致优化的高性能神经网络前向计算框架,开源地址为ncnn。本文将介绍 n c n n {\rm ncnn} ncnn在 W i n d o w s 10 {\rm Windows10} Windows10下的编译,并使用 V S 2019 {\rm VS2019} VS2019测试。最后,使用该仓库的 y o l o {\rm yolo} yolo- f a s t e s t {\rm fastest} fastest模型进行测试。
2. 相关依赖及软件安装
2.1 Visual Studio 2019
官网下载 V S 2019 {\rm VS2019} VS2019,工作负载选择情况如下:
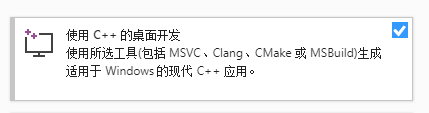
安装结束。
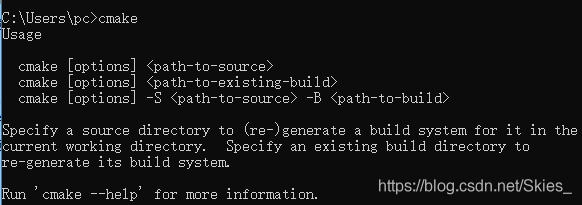
2.2 CMake 3.18.0
官网下载相应版本,安装完成后需要配置环境变量。在此电脑=>高级系统设置=>环境变量的系统变量部分的Path添加 C m a k e {\rm Cmake} Cmake的 b i n {\rm bin} bin目录。使用命令行窗口测试是否安装成功:
2.3 OpenCV 3.4.10
首先在该地址下载 o p e n c v 3.4.10 {\rm opencv\ 3.4.10} opencv 3.4.10,下载完成后安装即可。
2.4 protobuf 3.4.0
从该地址下载 p r o t o b u f 3.4.0 {\rm protobuf\ 3.4.0} protobuf 3.4.0并解压,然后在开始菜单找到Visual Studio 2019=>x64 Native Tools Command Prompt for VS 2019(下同)并打开,输入以下命令编译 p r o t o b u f 3.4.0 {\rm protobuf\ 3.4.0} protobuf 3.4.0:
> cd <protobuf-root-dir>
> mkdir build
> cd build
> cmake -G"NMake Makefiles" -DCMAKE_BUILD_TYPE=Release -DCMAKE_INSTALL_PREFIX=%cd%/install -Dprotobuf_BUILD_TESTS=OFF -Dprotobuf_MSVC_STATIC_RUNTIME=OFF ../cmake
> nmake
> nmake install
一路成功! c m a k e {\rm cmake} cmake暂时没有学习,所以现在还不明确其中使用的参数,不过这里的Release要和后面对应。
2.5 ncnn
从该仓库克隆后下载项目到本地。输入以下命令编译 n c n n {\rm ncnn} ncnn:
> cd <ncnn-root-dir>
> mkdir build
> cd build
> cmake -G"NMake Makefiles" -DCMAKE_BUILD_TYPE=Release -DCMAKE_INSTALL_PREFIX=%cd%/install -DProtobuf_INCLUDE_DIR=<protobuf-root-dir>/build/install/include -DProtobuf_LIBRARIES=<protobuf-root-dir>/build/install/lib/libprotobuf.lib -DProtobuf_PROTOC_EXECUTABLE=<protobuf-root-dir>/build/install/bin/protoc.exe -DNCNN_VULKAN=OFF .. -DOpenCV_DIR=<opencv-root-dir>/build
> nmake
> nmake install
一路成功!这里的Release和上面对应,上面指令中的
3. 项目配置
打开 V S 2019 {\rm VS2019} VS2019并新建一个空项目,新建yolo-fastest.cpp文件,内容如下(来自这里):
#include "cpu.h"
#include "net.h"
#include "gpu.h"
#include "benchmark.h"
#include "datareader.h"
#include依次点击视图=>其他窗口=>属性管理器,在Release | x64(与上面编译过程中的参数对应)处右击进入属性界面。点击VC++ 目录,在包含目录中依次添加如下内容:
<opencv-root-dir>/build/include
<opencv-root-dir>/build/include/opencv
<opencv-root-dir>/build/include/opencv2
<ncnn-root-dir>/build/install/include/ncnn
<protobuf-root-dir>/build/install/include
在库目录中依次添加如下内容:
<opencv-root-dir>/build/x64/vc15/lib
<ncnn-root-dir>/build/install/lib
<protobuf-root-dir>/build/install/lib
ncnn.lib
libprotobuf.lib
opencv_world3410.lib
至此,项目的配置环境完成。在 V S 2019 {\rm VS2019} VS2019的运行窗口栏处依次选择Release和x64,与上面的选择对应。然后运行程序,得到检测结果:
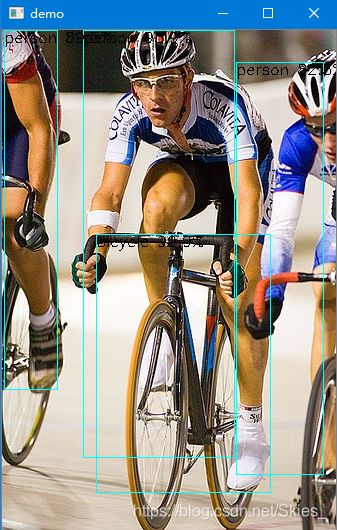
4. 总结
本文主要介绍了 n c n n {\rm ncnn} ncnn在 W i n d o w s 10 {\rm Windows10} Windows10下的编译,并使用 V S 2019 {\rm VS2019} VS2019测试。后续会继续介绍 C M a k e {\rm CMake} CMake语句的内容和 n c n n {\rm ncnn} ncnn在安卓移动端的部署等内容。
参考
- https://github.com/Tencent/ncnn.
- https://github.com/dog-qiuqiu/Yolo-Fastest(模型及代码下载).
- https://www.cnblogs.com/fsong/p/10295183.html(opencv配置).