ViSP安装之Windows系统基于VS2019编译器编译获得VISP动态库
Windows系统基于VS2019编译器编译获得VISP动态库
官网地址:
Installation from source for Windows with Visual C++ 2019 (vc16)
In this tutorial you will learn how to install ViSP from source on Windows 10 with Visual C++. These steps have been tested on Windows 10 (64 bit) , with CMake 3.19.4 and Visual Studio Community 2019. 上面是需要满足的环境
## 安装先决条件
(补充一下,编辑文本的时候代码块用的C,所以有时候//被理解为注释了,实际上可能是在表示网址)
Visual Studio
官网:VS2019
其他的安装和平时的教程一样,唯一需要注意的就是下面的
“Desktop Development with C++" 和 "Windows 10 SDK"两个选项需要选择,如果已经安装好了可以检查一下是否勾选
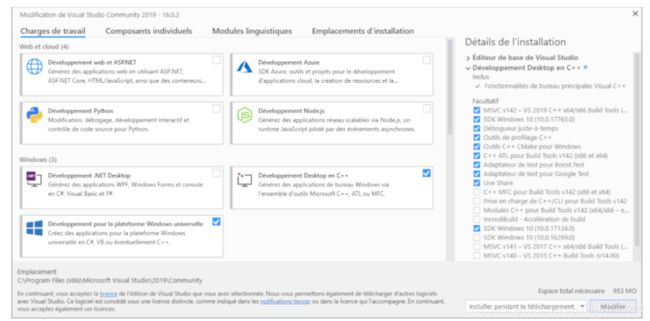
选择好之后,点击右下角按钮就行了
怎么进入这个修改界面呢
CMake
下载链接CMake
正常下载与安装
Git
下载链接Git
This installation allows then to use git in a cmd Command Prompt.
安装教程(不需要太复杂的,这个教程比较简便清楚):
安装Git
安装完成之后,win+R再输入cmd命令回车

再输入git --version出现下面的字则表示成功

Create a workspace
If not already done, create a workspace that will contain all ViSP source, build, data set and optional 3rd parties. This workspace is here set to C:\visp-ws folder, but it could be set to any other location.
上面的步骤都完成了后,打开cmd窗口,输入命令
To create the workspace, open a cmd Command Prompt (a fast way to launch this window is to press the Win + R keys on your keyboard. Then, type cmd or cmd.exe and press Enter or click/tap OK) and run the following to create a workspace environment var named VISP_WS:
C:\> setx VISP_WS "C:\visp-ws"
C:\> exit
Open a new cmd Command Prompt and create the corresponding folder
创建新的文件夹
C:\> mkdir %VISP_WS%
C:\> exit
Quick ViSP installation
快速下载
快速下载可能并不适用与我的工程,所以选择下面的下载方式
To have a trial, just jump to Install ViSP data set before running some binaries that you just build or jump to Next tutorial. You can later come back to the Advanced ViSP installation.
Advanced ViSP installation
下载第三方库
ViSP is interfaced with several 3rd party libraries. The complete list is provided here.
- To use optimized matrix operations you may install Eigen3 3rd party.
- We recommend also to install OpenCV 3rd party in the workspace.
- If you have an Intel Realsense depth camera you may also install
librealsense 3rd party. - If your camera is a PointGrey you may install FlyCapture 3rd party,
while if your camera is a Basler, you may rather install Pylon 3rd
party. - Other 3rd parties are optional and should be considered only by
expert developers.
***百度翻译:***ViSP 与几个第三方图书馆接口。完整的列表在这里提供。要使用优化的矩阵操作,您可以安装Eigen3 第三方。我们还建议在工作区安装OpenCV 第三方。如果你有一个英特尔实感深度相机,你也可以安装自由感第三方。如果你的相机是一个点灰色,你可以安装飞帽第三方,而如果你的相机是一个巴斯勒,你可能宁愿安装Pylon第三方。其他第三方是可选的,只应由专家开发人员考虑。
这些第三方库根据不同的需求下载
我们普通的相机应该就是选择前两个第三方库进行下载安装
Eigen3 3rd party
按照如下命令在命令窗口输入即可
Even if Eigen3 is designed as a template we recommend to install the library with Visual Studio.
Get Eigen3
Download the latest Eigen3 release from http://eigen.tuxfamily.org. At the time this tutorial was written we downloaded eigen-3.3.9.zip archive corresponding to Eigen 3.3.9.
Extract the content of the archive in %VISP_WS%.解压到创建的文件夹
Once unzipped, you should have Eigen in
%VISP_WS%\eigen-3.3.9
Build and install Eigen3 from source
Create a build directory
C:\> mkdir %VISP_WS%\eigen-3.3.9\build-vc16
C:\> cd %VISP_WS%\eigen-3.3.9\build-vc16
Run CMake in build directory (here the generator is chosen for Visual Studio 16 2019 and installation folder is set to %VISP_WS%\eigen-3.3.9\build-vc16\install folder):
C:\> cmake -G "Visual Studio 16 2019" -A "x64" %VISP_WS%\eigen-3.3.9 -DCMAKE_INSTALL_PREFIX=%VISP_WS%\eigen-3.3.9\build-vc16\install
Build and install Eigen3 (installation doesn’t need administrator privileges)
C:\> cmake --build . --config Release --target install
Eigen3 is now installed in %VISP_WS%\eigen-3.3.9\build-vc16\install folder
Complete Eigen3 installation
Now you have to complete Eigen3 installation setting some environment vars:
In order that ViSP detects Eigen3 you have to set EIGEN_DIR environment variable. Start up a cmd Command Prompt and enter:
C:\> setx Eigen3_DIR "%VISP_WS%\eigen-3.3.9\build-vc16\install\share\eigen3\cmake"
C:\> exit
where %VISP_WS%\eigen-3.3.9\build-vc16\install is where you have installed Eigen3. Inside the folder %VISP_WS%\eigen-3.3.9\build-vc16\install\share\eigen3\cmake you should have a file named Eigen3Config.cmake.
There is no need to set Path environment var since Eigen3 is a template that has no library.
OpenCV 3rd party
1,先解压到上面的文件夹,正常的opencv按照操作
建议和原文一样用4.5.1版本
注意:这里是已经安装git之后,用命令行实现的。
如果没有下载git,就可以用CMake来编译,具体见另一篇:
32位的OpenCV库怎么生成得到并配置环境变量
下载链接:
Opencv
Note注意事项
OpenCV 4.5.1 win pack installer doesn’t contain prebuild OpenCV libraries build with Visual Studio 16 2019. It contains only prebuild libraries build with previous Visual Studio version (vc14 and vc15). That’s why we need to build OpenCV from source.(解释了一下为什么进行下面的操作)
Build OpenCV from source
Create a build directory
C:\> mkdir %VISP_WS%\opencv-4.5.1\build-vc16
C:\> cd %VISP_WS%\opencv-4.5.1\build-vc16
Run CMake in build directory (here the generator is chosen for Visual Studio 16 2019) and installation dir is set to the existing folder %VISP_WS%\opencv-4.5.1\build:
C:\> cmake -G "Visual Studio 16 2019" -A "x64" %VISP_WS%\opencv-4.5.1\sources -DCMAKE_INSTALL_PREFIX=%VISP_WS%\opencv-4.5.1\build
Build and install OpenCV using release and debug configuration respectively (installation doesn’t need administrator privileges)
下面是Release和Debug的
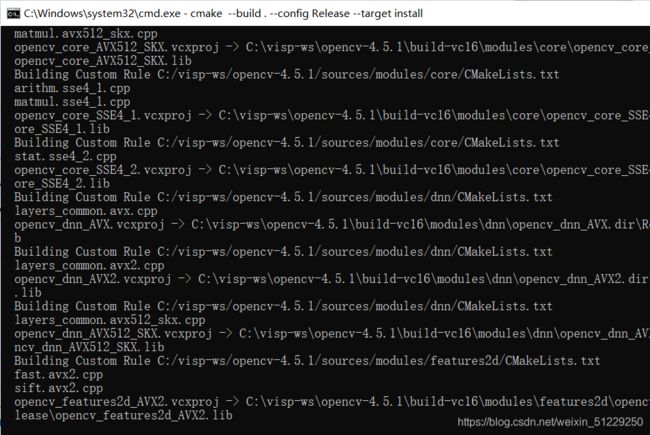
C:\> cmake --build . --config Release --target install
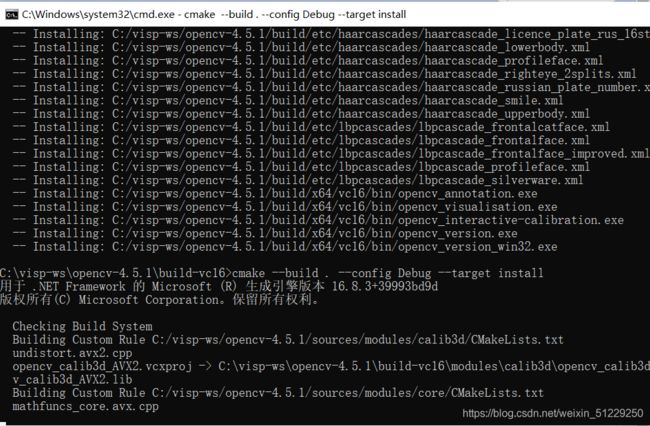
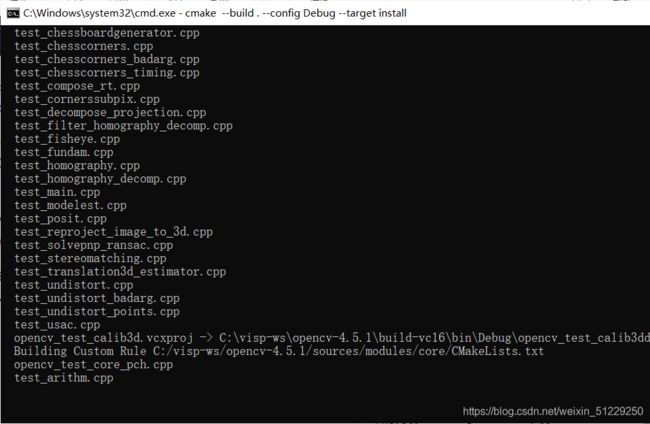
C:\> cmake --build . --config Debug --target install
Complete OpenCV installation
后面的操作用于完成安装
Now you have to complete OpenCV installation setting some environment vars:
In order that ViSP detects OpenCV you have to set OpenCV_DIR environment variable. (设置路径为了让VISP能够识别到Opencv)
Start up a cmd Command Prompt and enter:
C:\> setx OpenCV_DIR "%VISP_WS%\opencv-4.5.1\build"
C:\> exit
where %VISP_WS%\opencv-4.5.1\build is where you have installed OpenCV. Inside this folder you should have a file named OpenCVConfig.cmake.
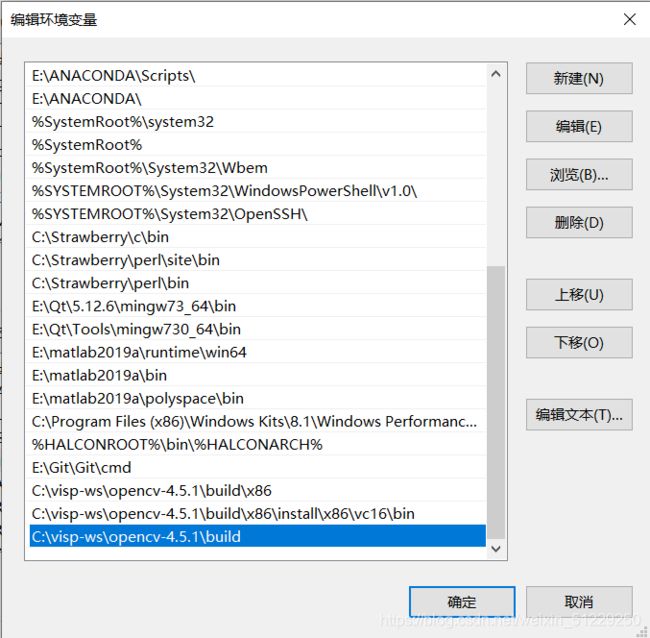
You have also to add the location of OpenCV libraries corresponding to Visual Studio 16 2019 usage in the Path environment variable.(为VS添加opencv路径)
Open the “Edit environment variable” UI, and modify Path to add a new line with %VISP_WS%\opencv-4.5.1\build\x64\vc16\bin.
(另外的几个第三方库是特定的相机(英特尔实感深度相机,巴斯勒相机等)使用的,需要的可以在官网查看)
上面这样就完成了我对这两个库的添加,接下来开始添加VISP
Get ViSP source code
可以直接使用cmd命令:
C:\> cd %VISP_WS%
C:\> git clone https://github.com/lagadic/visp.git
输入后界面

上面的命令运行完了后就可以了,下面的是同样的效果,我觉得用命令行方便
也可以下载zip等文件
地址:VISP
也可以下载tar.gz文件
地址:VISP
Configure ViSP from source
编译文件
先新建一个文件夹
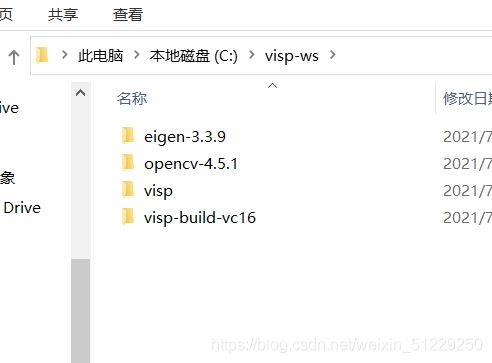
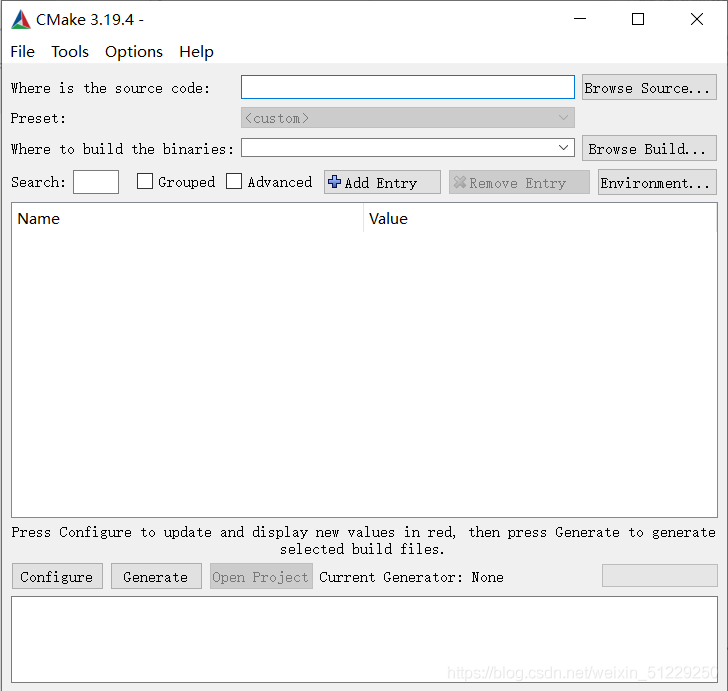
打开CMake
如图输入
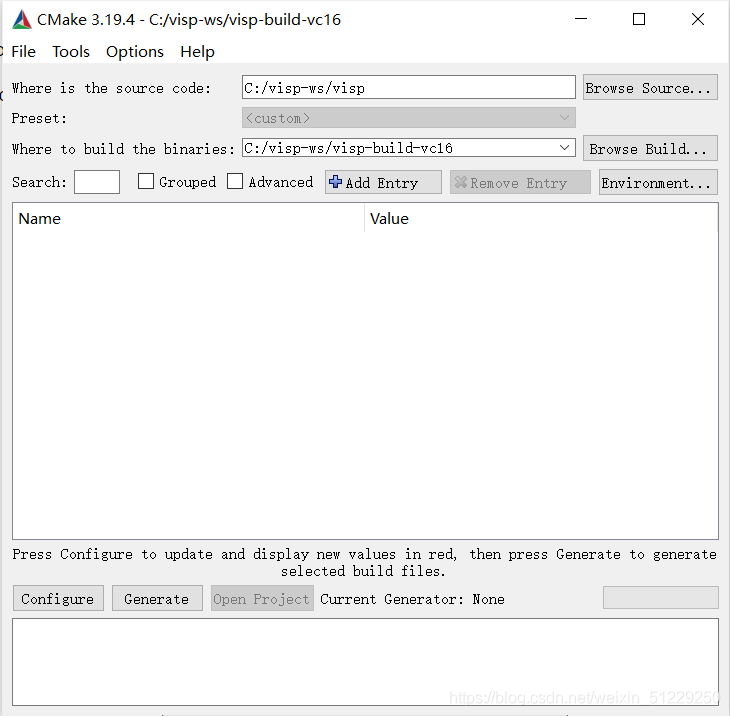
按下Configure
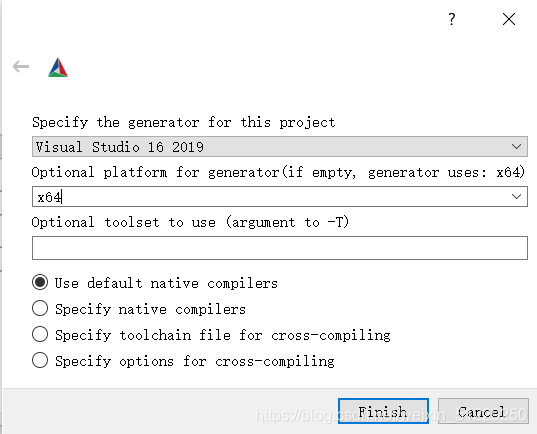
按下Finish
这将启动CMake配置。如下一张图片所示,自动检测到 Eigen3、飞帽、GDI(图形设备界面)、OpenCV、OpenMP、Pylon 和 Realsense2 第三方。
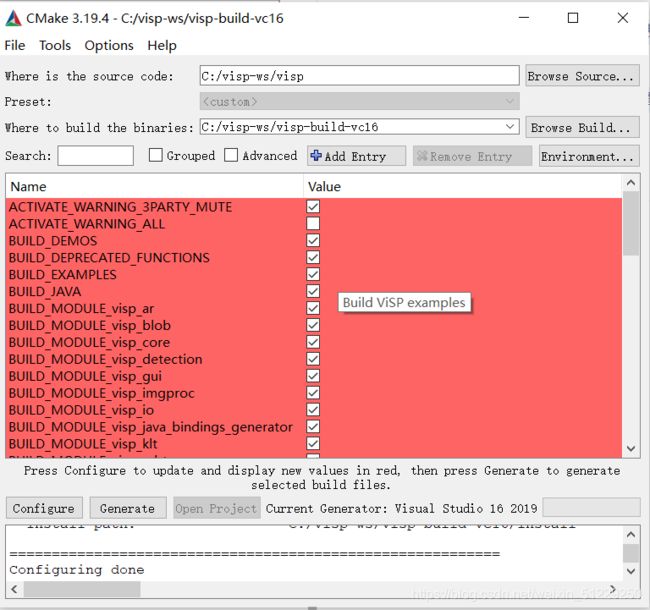
Warning
报这个错就按照下面的方法重新来
If you forgot to set Eigen3_DIR environment var, you will get the following warning in cmake_gui:
CMake Warning at CMakeLists.txt:1156 (message):
  Eigen3 config file is detected in C:/visp-ws/eigen-3.3.9/build-vc16.  Using
  C:/visp-ws/eigen-3.3.9/build-vc16/Eigen3Config.cmake doesn't allow to use a
  valid Eigen3 include dir: C://include/eigen3.  Modify Eigen3_DIR to point
  to Eigen3Config.cmake file located in Eigen3 installation folder or turn
  USE_EIGEN3 OFF.
We strongly recommend to fix this warning. To this end:
- close cmake-gui
- set Eigen3_DIR environment var running setx Eigen3_DIR
“%VISP_WS%\eigen-3.3.9\build-vc16\install\share\eigen3\cmake” - open again cmake-gui
- delete the cache using menu File > Delete Cache
- and configure again ViSP.
At this point, you should no more see the warning.
再一次按下Configure
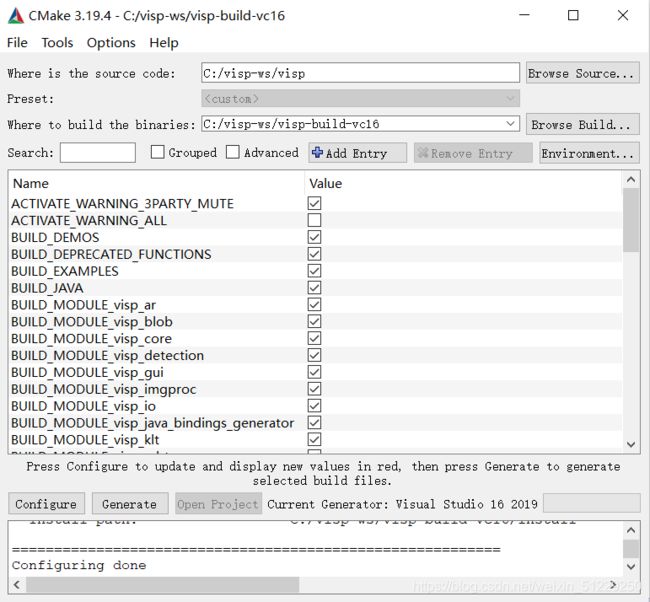
都正常了
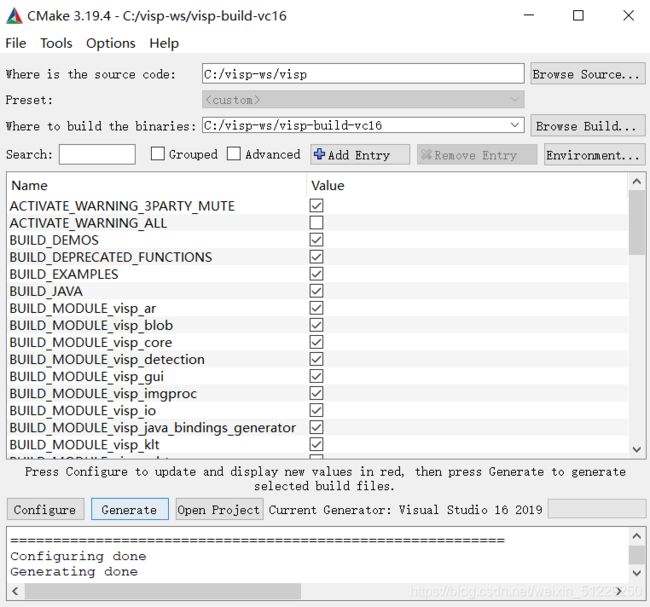
再按下Generate,再文件夹中就有了VISP.sln文件
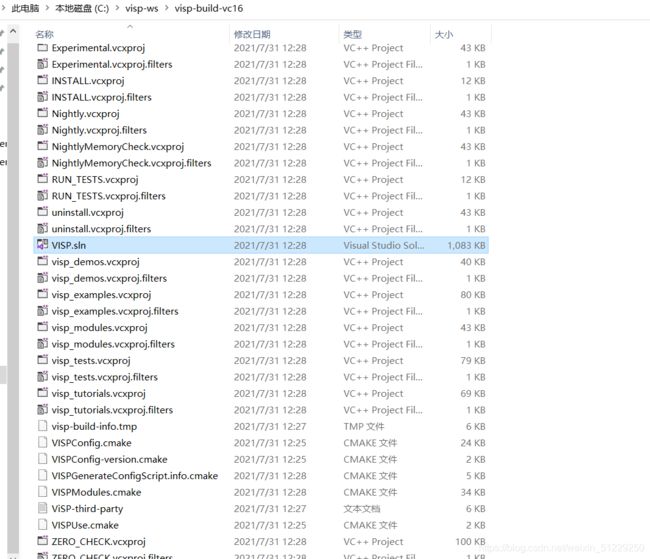
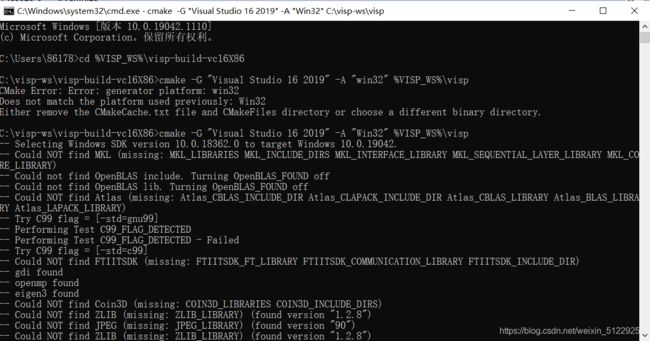
又出了一个问题,我的工程要在X86上跑,所以前面的有个地方要改,不过后面要转到X64,这个也留着吧。我再创建了一个文件夹,编译出X86的,就不重复了,就是CMake那一步选编译器的那一步选Win32就行了

打开了sln文件:
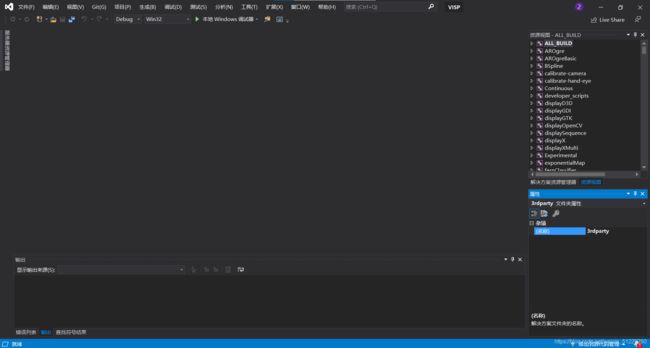
按下第一个

正在编译

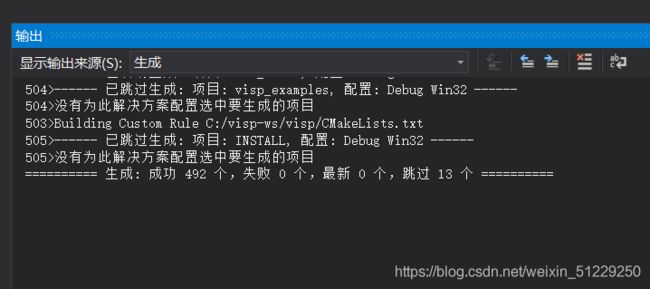
我是win32的所以编译出来的动态库在这里

官方的用X64的编译完成如下图

还有一步很重要的内容
我给漏了这一步,然后失败了
需要找到这个文件,再右击生成

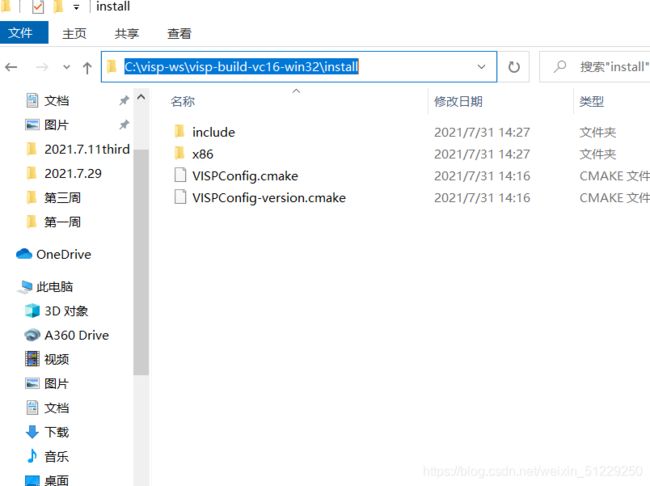
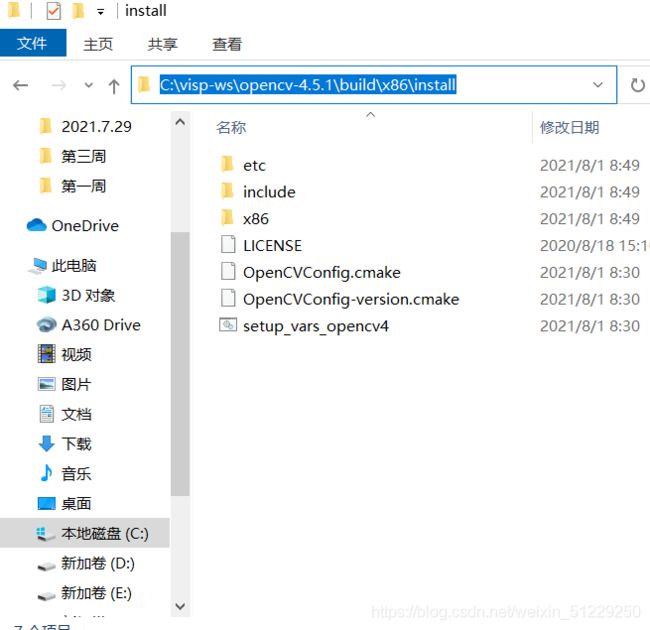
这样才有install文件夹

所以后续步骤有一些我要重来
Build ViSP documentation
***先要下载一个软件:***Doxygen
To build ViSP documentation, you have first to install Doxygen:
Download binary distribution for Windows. At the time this tutorial was written, we downloaded doxygen-1.8.20-setup.exe
Run the installer following default options
Open a new cmd Command Prompt and enter build directory
C:\> cd %VISP_WS%\visp-build-vc16
Run CMake in build directory:
C:\> cmake -G "Visual Studio 16 2019" -A "x64" %VISP_WS%\visp
Build documentation using:
C:\> cmake --build . --config Release --target visp_doc
Debug模式也要改一下
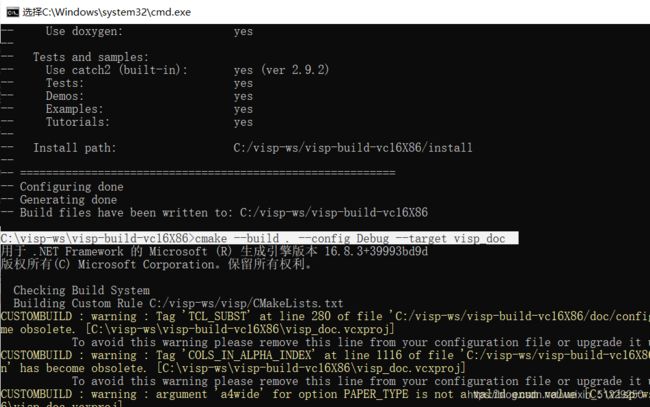
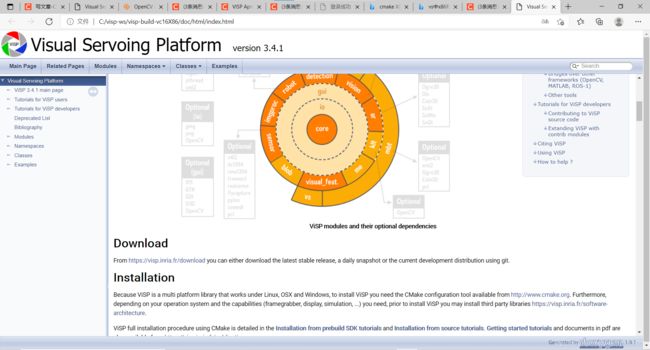
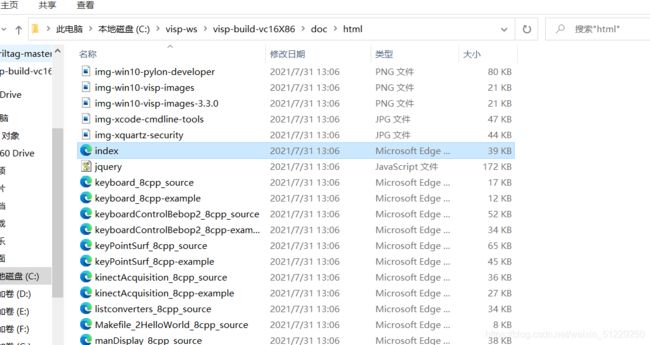
生成的文件
也就是线上的一个帮助文档
Set Path environment var
注意下面的都是X64的
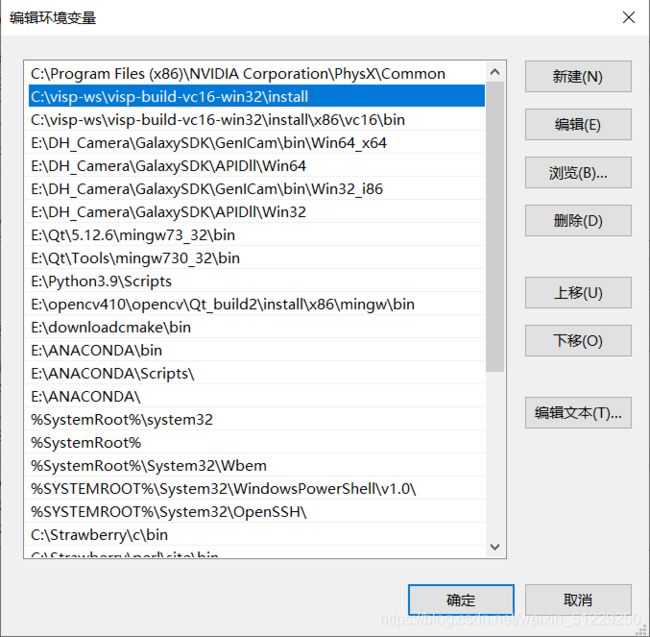
就可以配置动态库了,可以像别的方法一样打开VS配置比如添加%VISP_WS%\visp-build-vc16\install\x64\vc16\bin
也可以用命令行配置。
C:\> setx Path "%Path%:%VISP_WS%\visp-build-vc16\install\x64\vc16\bin"
C:\> exit
Set VISP_DIR environment var
为了便于 CMake 在外部项目中用作第三方时,CMake 检测到 VISP,例如教程中描述的项目:如何在 Unix 或 Windows 上创建和构建使用 ViSP 和 CMake 的项目,您可以设置与文件路径相同的环境变量:VISP_DIRVISPConfig.cmake
C:\> setx VISP_DIR "%VISP_WS%\visp-build-vc16\install"
C:\> exit
Install ViSP data set
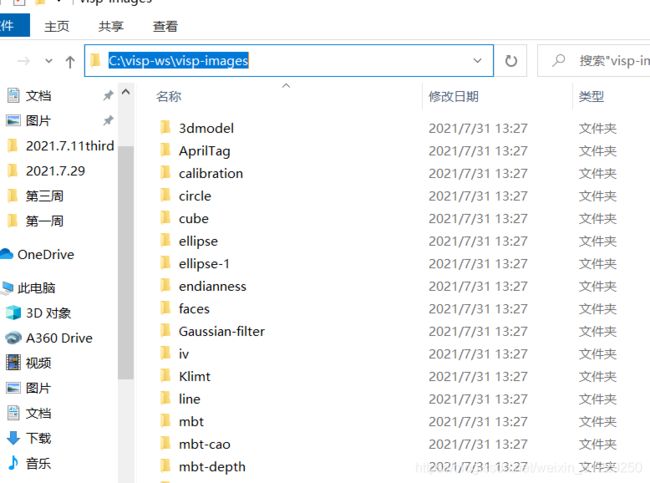
有一些VISP例子需要使用到一些图片和数据之类的
这里只介绍git的方法:
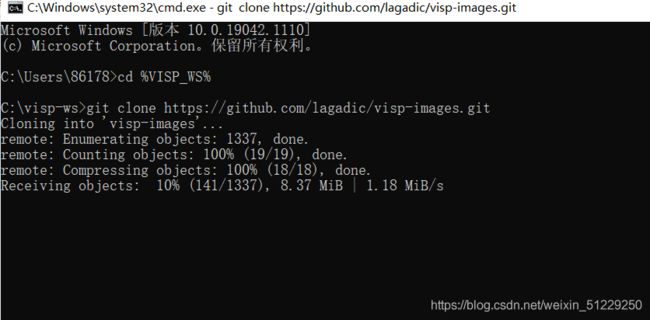
C:\> cd %VISP_WS%
C:\> git clone https://github.com/lagadic/visp-images.git
为了让VISP识别到图片,输入:
C:\> setx VISP_INPUT_IMAGE_PATH %VISP_WS%\visp-images
C:\> exit
Test data set usage
一些简单的用法,可以测试是否安装成功
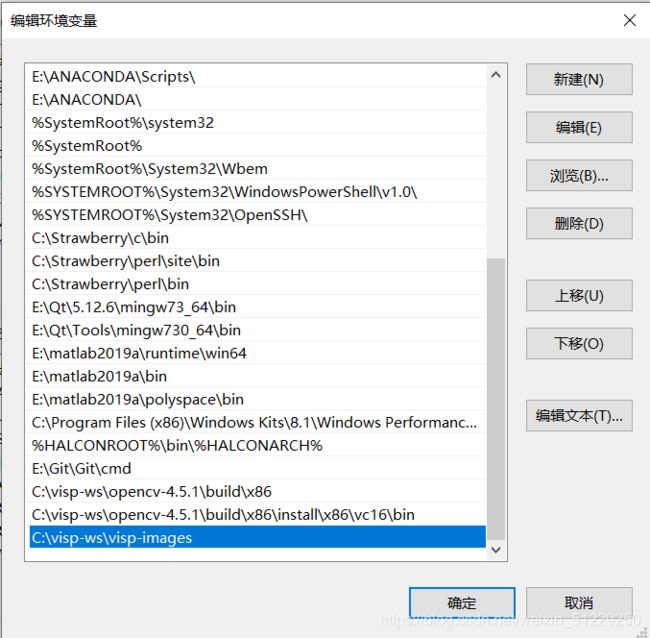
还需要注意一个:为了让VISP识别OpenCV,添加OpenCV的一个路径(在上面那一篇文章里面有):

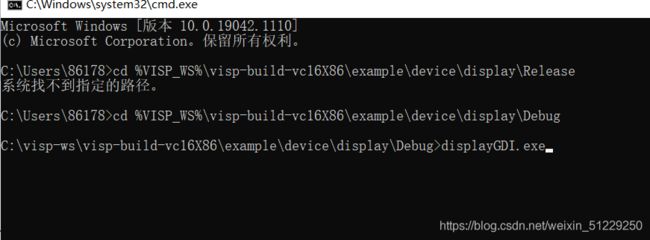
如果你想要运行%VISP_WS%\visp-build-vc15\example\device\display\Release\displayGDI.exe
输入下面代码
C:\> cd %VISP_WS%\visp-build-vc15\example\device\display\Release
C:\> displayGDI.exe

A click to close the windows...

A click to display a cross...
Cross position: 392, 306

A click to exit the program...
Bye
Tips and tricks
How to take into account a newly installed 3rd party
Since all 3rd parties are optional you may have started to install only some of them. Imagine that you just installed a new third-party, or that you upgraded the version of this 3rd party. The next step is to go back to the build folder, configure ViSP with CMake to detect the newly installed third-party library and build again ViSP. This could be achieved with:
$ cd $VISP_WS/visp-build-msvc16
$ cmake ../visp
Here you can check the content of the ViSP-third-party.txt file and see if the newly installed 3rd party is well detected.
Finally, you need to rebuild and install ViSP with:
$ cmake --build . --config Release --target install
How to uninstall ViSP
After ViSP installation, you can remove installed material using:
$ cd $VISP_WS/visp-build-msvc16
$ cmake --build . --config Release --target uninstall
How to build only ViSP libraries
If you want to build only ViSP modules libraries, nor the examples, tutorials and tests:
$ cd $VISP_WS/visp-build-msvc16
$ cmake --build . --config Release --target visp_modules
How to build a ViSP specific module
If you want to build a given module and all the dependencies:
$ cd $VISP_WS/visp-build-msvc16
$ cmake --build . --config Release --target visp_<module_name>
For example to build the model-based tracker module named mbt, run:
$ cd $VISP_WS/visp-build-msvc16
$ cmake --build . --config Release --target visp_mbt


