在CentOS7.9系统上安装N卡3060驱动、CUDA和离线升级gcc(4.8—>8.3)用以编译框架的过程记录
1、更换yum源
主要是在终端操作需要,在显示器界面可以直接联网解决网络问题进行软件安装或更新
""""备份原来的源"""
mv /etc/yum.repos.d/ /etc/yum.repos.d.bak/
mkdir /etc/yum.repos.d
vim /etc/yum.repos.d/xxx.repo
"""更换联网的mirrorlist,涉及http,里面的enable的0 1修改,改完后保存退出"""
yum clean all
yum makecache
yum update -y
关于centos系统设置的一些命令:
"""获取CentOS操作系统版本详细信息"""
cat /etc/centos-release
"""也可用如下"""
lsb_release -a
"""若不行"""
yum install -y redhat-lsb
2、离线安装nvidia显卡驱动
根据显卡的配置,越新越高级的显卡需要的显卡驱动版本越新,老的显卡驱动可能带不动。
yum install kernel-devel kernel-headers -y
"""关闭X-sever"""
sudo service lighttqm stop
或者
sudo stop lighttqm
或者
sudo init 3
"个人以前用过的Centos 系统的关闭命令(带显示器)如下,与ubuntu不同"
systemctl stop gdm.service
"安装好驱动程序后再重启"
systemctl start gdm.service
安装前:
查看显卡信息:
lshw -numeric -C display
预安装:
yum clean all
yum groupinstall "Development tools"
yum install kernel-devel epel-release
yum install dkms
nouveau驱动故障需要更新配置:
vim /etc/default/grub
"""打开文件后在里面修改"""
GRUB_TIMEOUT=5
GRUB_DISTRIBUTOR="$(sed 's, release .*$,,g' /etc/system-release)"
GRUB_DEFAULT=saved
GRUB_DISABLE_SUBMENU=true
GRUB_TERMINAL_OUTPUT="console"
GRUB_CMDLINE_LINUX="crashkernel=auto rhgb quiet nouveau.modeset=0"
GRUB_DISABLE_RECOVERY="true"
根据计算机硬件启动方式选择,BIOS或EFI
BIOS:
$ sudo grub2-mkconfig -o /boot/grub2/grub.cfg
EFI:
$ sudo grub2-mkconfig -o /boot/efi/EFI/centos/grub.cfg
安装:
#The Nvidia drivers must be installed while Xorg server is stopped. Switch to text mode by:
systemctl isolate multi-user.target
#Install the Nvidia driver by executing the following command:
"""安装命令,选择自己下好的离线驱动安装包,执行如下命令"""
bash NVIDIA-Linux-x86_64-*.sh
中间过程:
sudo bash NVIDIA-Linux-x86_64-390.87.run
 """
1、Accept License
2、Would you like to register the kernel module sources with DKMS? This will allow DKMS to automatically build a new module, if you install a
different kernel later. -> YES
3、Install NVIDIA’s 32-bit compatibility libraries? -> YES
4、The distribution-provided pre-install script failed! Are you sure you want to continue? -> CONTINUE INSTALLATION
5、An incomplete installation of libglvnd was found. Do you want to install a full copy of libglvnd? This will overwrite any existing libglvnd
libraries. -> Install and overwrite existing files
6、Would you like to run the nvidia-xconfig utility? -> YES
"""
"""安装好之后,重启The Nvidia driver is now installed. Reboot your system:"""

"""重启很重要"""
sudo reboot
这个时候,就基本装完了,想要测试有没有成功就可以执行:
nvidia-smi
3、装CUDA和CuDNN
这个已经写过好多安装过程和方法了,不细述,主要问题就是环境变量需要添加到系统,不然无法找到cuda,主要碰到的问题是:
①执行nvcc -V命令时出错
②我在编译过程中碰到的:
/bin/sh: /usr/local/cuda-11.1/bin/nvcc:没有那个文件或目录
这都可以通过下面的方法解决:
cd /usr/local/cuda/bin
vim ~/.bashrc

"添加如下两行命令到文件末尾即可"
export LD_LIBRARY_PATH=/usr/local/cuda/lib
export PATH=$PATH:/usr/local/cuda/bin
"保存退出后执行如下命令"

source ~/.bashrc
我觉得走完上述流程可以重启一下机器,再去走后面的
4、离线下载gcc相关依赖并编译(4.8-8.3)
前面所做的工作以及当前的都是为了编译我的框架用的,由于框架编译dcnv2报了gcc版本过低的问题(系统自带4.8),我又看了以前编译过的gcc是5.4,所以选择升级gcc版本。过程有点长
gcc安装包和依赖包下载:
gcc:http://mirror.linux-ia64.org/gnu/gcc/releases/
m4:http://ftp.gnu.org/gnu/m4/
gmp+mpfr+mpc+isl:http://mirror.linux-ia64.org/gnu/gcc/infrastructure/

gcc安装通过软连接是最方便的
下载离线安装包放到如下位置:
/usr/local/src/
cd /usr/local/src/
tar -zxvf gcc-8.3.0.tar.gz
cd gcc-8.3.0/

"""进入解压后的gcc文件夹,把下载的依赖包拷进去,再对依赖包进行解压"""
tar -xf gmp-6.1.0.tar.bz2
tar -xf mpfr-3.1.4.tar.bz2
tar -xf mpc-1.0.3.tar.gz
tar -xf isl-0.18.tar.bz2

"""解压后,建立与依赖包的软连接"""
ln -sf gmp-6.1.0 gmp
ln -sf mpfr-3.1.4 mpfr
ln -sf mpc-1.0.3 mpc
ln -sf isl-0.18 isl

"""在当前路径创建编译文件夹build并进入"""
mkdir build && cd build

"""随后开始编译,编译的时间很长,在一小时左右"""
../configure -enable-checking=release -enable-languages=c,c++ -disable-multilib
make && make install
期间碰到automake版本报错问题,版本低要升级,于是编译gcc出错后,重新解决了automake的问题,我升级的是automake1.15
Centos7 WARNING: ‘aclocal-1.15‘ is missing on your system
automake下载路径:https://ftp.gnu.org/gnu/automake/automake-1.15.tar.gz
下载到 /usr/local/src 路径下
cd /usr/local/src
"""解压"""
tar -xzf automake-1.15.tar.gz

cd automake-1.15
"""路径配置"""
./configure  --prefix=/usr/local/src/automake
"""编译"""
make

make install

"""导入环境变量"""
vim /etc/profile
"""打开配置文件,添加依赖包路径"""
	export PATH=$PATH:/usr/local/automake/bin
"""更新激活配置文件"""
source /etc/profile
"""验证安装正确"""
aclocal --version
至此待顺利完成gcc的编译,就可对框架进行编译,我是在这样的情况下完成框架编译的。
5、相关软件卸载命令和cuda、pytorch网址
更新显卡驱动的一些卸载命令:
"""找到离线安装包.run的位置"""
./NVIDIA-Linux-x86_64-515.0 --uninstall
卸载CUDA的命令:
cd /usr/local/cuda-11.3/bin/
sudo ./cuda-uninstaller
附上一些下载软件的链接:
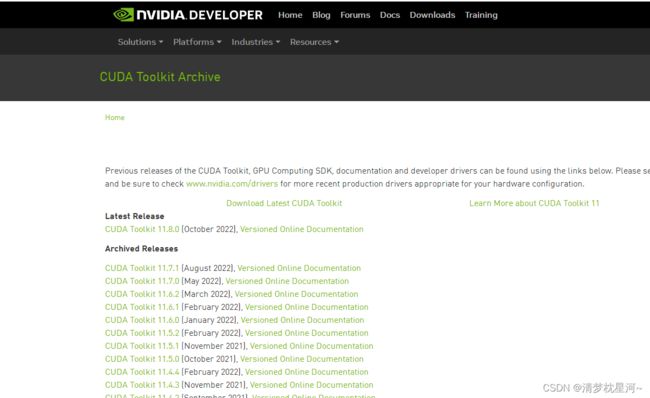
CUDAToolkit:https://developer.nvidia.com/cuda-toolkit-archive

CuDnn:https://developer.nvidia.com/rdp/cudnn-download

pytorch与cuda版本对应关系,以及torch和torchvision版本对应关系:https://pytorch.org/get-started/previous-versions/

