私人定制AI绘画——快速finetune stable diffusion教程
最近AI绘图非常火,只需要输入文本就能得到令人惊艳的图。
举个例子,输入 “photo of a gorgeous young woman in the style of stefan kostic and david la chapelle, coy, shy, alluring, evocative, stunning, award winning, realistic, sharp focus, 8 k high definition, 3 5 mm film photography, photo realistic, insanely detailed, intricate, elegant, art by stanley lau and artgerm” 得到:
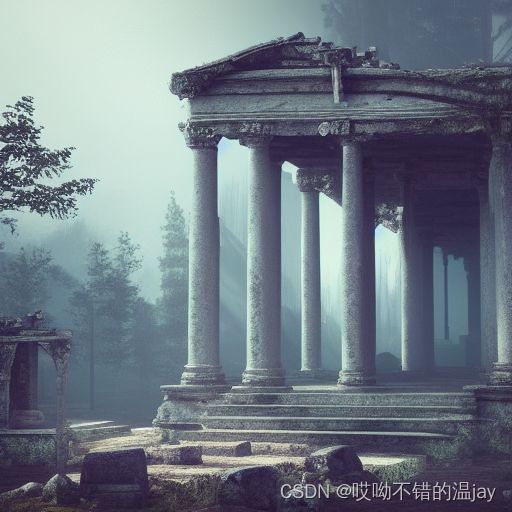
输入“temple in ruines, forest, stairs, columns, cinematic, detailed, atmospheric, epic, concept art, Matte painting, background, mist, photo-realistic, concept art, volumetric light, cinematic epic + rule of thirds octane render, 8k, corona render, movie concept art, octane render, cinematic, trending on artstation, movie concept art, cinematic composition , ultra-detailed, realistic , hyper-realistic , volumetric lighting, 8k –ar 2:3 –test –uplight” 得到:
以上效果出自最近开源的效果非常好的模型——stable diffusion。那可能会有很多人和我一样,想得到自己的定制化的模型,专门用来生成人脸、动漫或者其他。
github上有个小哥还真就做了这件事了,他专门finetune了一个神奇宝贝版stable diffusion,以下是他模型的效果: 输入“robotic cat with wings” 得到:
是不是很有趣,今天这篇文章就介绍一下如何快速finetune stable diffusion。
小哥写的详细介绍可以移步:https://github.com/LambdaLabsML/examples/tree/main/stable-diffusion-finetuning
1、准备数据
深度学习的训练,首先就是要解决数据问题。由于stable diffusion的训练数据是 文本-图像 匹配的pairs,因此我们要按照它的要求准备数据。
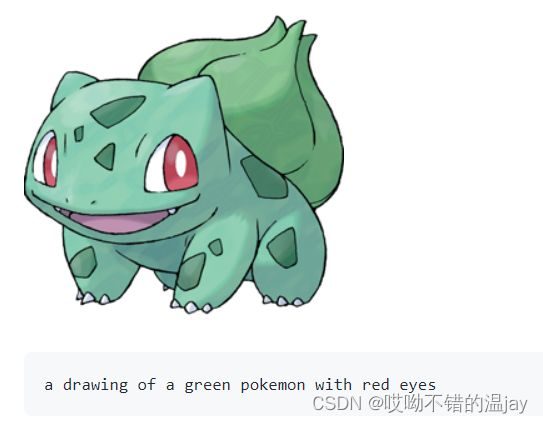
准备好你的所有图片,当然对于大部分人来说,要得到图片容易,但是手里的图片数据都是没有文本标注的,但是我们可以用BLIP算法来自动生成标注。
BLIP项目地址:https://github.com/salesforce/BLIP
效果见下图:
BLIP自动给妙蛙种子生成了一段描述,当然算法的效果很难达到完美,但是足够用了。如果觉得不够好,那完全也可以自己标注。
将得到的text,与图片名使用json格式存起来:
{
    "0001.jpg": "This is a young woman with a broad forehead.",
    "0002.jpg": "The young lady has a melon seed face and her chin is relatively narrow.",
    "0003.jpg": "This is a melon seed face woman who has a broad chin.There is a young lady with a broad forehead."
}
2、下载代码模型
这里我们使用小哥魔改的stable diffusion代码,更加方便finetune。
finetune代码地址:https://github.com/justinpinkney/stable-diffusion
按照这个代码readme里的要求装好环境。同时下载好stable diffusion预训练好的模型 sd-v1-4-full-ema.ckpt ,放到目录里。
模型下载地址:CompVis/stable-diffusion-v-1-4-original · Hugging Face
3、配置与运行
stable diffusion使用yaml文件来配置训练,由于小哥给的yaml需要配置特定的数据格式,太麻烦了,我这边直接给出一个更简单方便的。只需要修改放图片的文件夹路径,以及第一步生成的配对数据的json文件路径。具体改哪儿直接看下面:
model:
  base_learning_rate: 1.0e-04
  target: ldm.models.diffusion.ddpm.LatentDiffusion
  params:
    linear_start: 0.00085
    linear_end: 0.0120
    num_timesteps_cond: 1
    log_every_t: 200
    timesteps: 1000
    first_stage_key: "image"
    cond_stage_key: "txt"
    image_size: 64
    channels: 4
    cond_stage_trainable: false   # Note: different from the one we trained before
    conditioning_key: crossattn
    scale_factor: 0.18215

    scheduler_config: # 10000 warmup steps
      target: ldm.lr_scheduler.LambdaLinearScheduler
      params:
        warm_up_steps: [ 1 ] # NOTE for resuming. use 10000 if starting from scratch
        cycle_lengths: [ 10000000000000 ] # incredibly large number to prevent corner cases
        f_start: [ 1.e-6 ]
        f_max: [ 1. ]
        f_min: [ 1. ]

    unet_config:
      target: ldm.modules.diffusionmodules.openaimodel.UNetModel
      params:
        image_size: 32 # unused
        in_channels: 4
        out_channels: 4
        model_channels: 320
        attention_resolutions: [ 4, 2, 1 ]
        num_res_blocks: 2
        channel_mult: [ 1, 2, 4, 4 ]
        num_heads: 8
        use_spatial_transformer: True
        transformer_depth: 1
        context_dim: 768
        use_checkpoint: True
        legacy: False

    first_stage_config:
      target: ldm.models.autoencoder.AutoencoderKL
      ckpt_path: "models/first_stage_models/kl-f8/model.ckpt"
      params:
        embed_dim: 4
        monitor: val/rec_loss
        ddconfig:
          double_z: true
          z_channels: 4
          resolution: 256
          in_channels: 3
          out_ch: 3
          ch: 128
          ch_mult:
          - 1
          - 2
          - 4
          - 4
          num_res_blocks: 2
          attn_resolutions: []
          dropout: 0.0
        lossconfig:
          target: torch.nn.Identity

    cond_stage_config:
      target: ldm.modules.encoders.modules.FrozenCLIPEmbedder


data:
  target: main.DataModuleFromConfig
  params:
    batch_size: 1
    num_workers: 4
    num_val_workers: 0 # Avoid a weird val dataloader issue
    train:
      target: ldm.data.simple.FolderData
      params:
        root_dir: '你存图片的文件夹路径/'
        caption_file: '图片对应的标注文件.json'
        image_transforms:
        - target: torchvision.transforms.Resize
          params:
            size: 512
            interpolation: 3
        - target: torchvision.transforms.RandomCrop
          params:
            size: 512
        - target: torchvision.transforms.RandomHorizontalFlip
    validation:
      target: ldm.data.simple.TextOnly
      params:
        captions:
        - "测试时候用的prompt"
        - "A frontal selfie of handsome caucasian guy with blond hair and blue eyes, with face in the center"

        output_size: 512
        n_gpus: 2 # small hack to sure we see all our samples


lightning:
  find_unused_parameters: False

  modelcheckpoint:
    params:
      every_n_train_steps: 30000
      save_top_k: -1
      monitor: null

  callbacks:
    image_logger:
      target: main.ImageLogger
      params:
        batch_frequency: 30000
        max_images: 1
        increase_log_steps: False
        log_first_step: True
        log_all_val: True
        log_images_kwargs:
          use_ema_scope: True
          inpaint: False
          plot_progressive_rows: False
          plot_diffusion_rows: False
          N: 4
          unconditional_guidance_scale: 3.0
          unconditional_guidance_label: [""]

  trainer:
    benchmark: True
    num_sanity_val_steps: 0
    accumulate_grad_batches: 1
最后一步,运行命令:
python main.py --base yaml文件路径.yaml --gpus 0,1 --scale_lr False --num_nodes 1 --check_val_every_n_epoch 2 --finetune_from 上面下载的模型路径.ckpt大功告成,等待模型训练就行了。需要注意的是,我这边启用了两个GPU,并且stable diffusion是比较吃显存的,我在V100上进行训练batchsize也只能设为1。


