Docker 安装docker 创建私有仓库,创建私有镜像推送到仓库,容器互联
Docker学习笔记
安装docker 构建私有仓库
安装docker
关闭防火墙
systemctl stop firewalld #关闭防火墙
systemctl status firewalld #查看防火墙状态
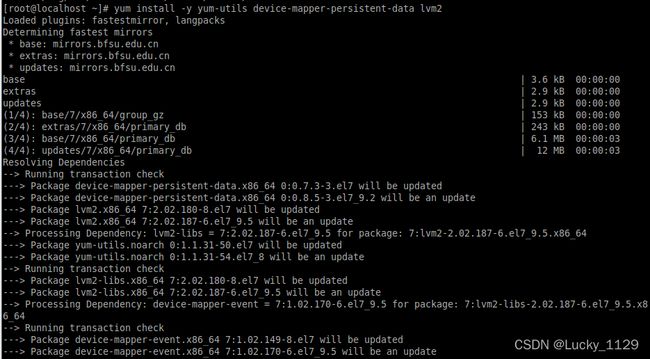
yum install -y yum-utils device-mapper-persistent-data lvm2
yum-config-manager --add-repo http://mirrors.aliyun.com/docker-ce/linux/centos/docker-ce.repo
vi /etc/docker/daemon.json
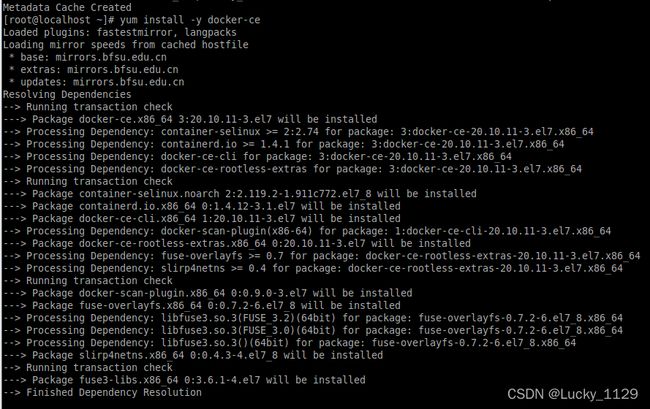
yum install -y docker-ce
systmctl start docker
systemctl enable docker
docker vision

查看docker运行状态 active表示docker启动成功
systemctl status docker
创建私有镜像,在该镜像中部署网页,启动后可在浏览器查看
拉取私有仓库镜像
docker pull registry
docker run -d -p 5000:5000 --name registry docker.io/registry
查看运行的容器
docker ps

输入地址在浏览器查看仓库,显示如下界面表示仓库建立成功
这里的192.168.153.132指的是虚拟机的ip
命令ip addr 查看虚拟机的ip

修改配置文件
vi /etc/docker/daemon.json
注意 镜像加速器地址后面要加逗号,然后加上仓库的地址
拉取hello-world镜像进行测试
docker pull hello-world

给hello-world打标签并查看现有镜像
这里的ip和上文中一样 是虚拟机的ip
docker tag hello-world:latest 192.168.153.132:5000/hello-world:latest
查看镜像
docker images

将hello-world推送到私有仓库
显示pushed表示推送成功
docker push 192.168.153.132:5000/hello-world:latest
新建springboot项目
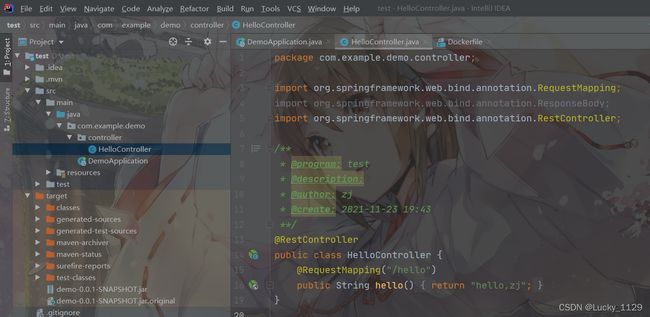
在本地浏览器测试是否成功运行

打jar包 编写Dockerfile文件
找到target文件中的demo-0.0.1-SNAPSHOT.jar表示已经打成jar包
注意编写Dockerfile文件时一定不要有多余的空格和空行
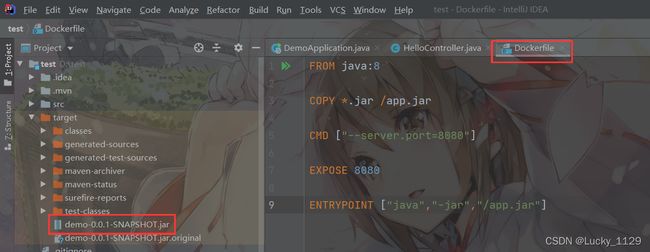
用MobaXterm上传到虚拟机的home文件夹中的idea文件夹

在虚拟机中查看是否上传成功
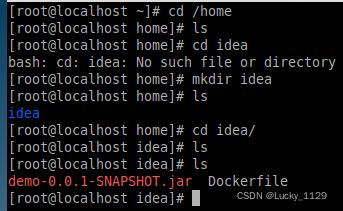
创建自己的私有镜像 用刚刚上传的springboot项目
命名为test
docker build -t test

查看镜像,并创建容器运行 命名为xx-springboot-web项目 并用docker ps命令查看
分配的端口号为49153

查看是否运行成功
curl localhost:49153/hello
在本地浏览器查看

在虚拟机浏览器查看

给私有镜像打标签

推送到私有仓库

查看仓库是否推送成功,多了一个test表示推送成功

利用私有镜像创建2个docker实例,实现2个docker实例间互相通信
首先创建自己的网络 模式为桥接模式 网段为192.168.0.0 网关为192.168.0.1
并将该网络命名为mynet
docker network create --driver bridge --subnet 192.168.0.0/16 --gateway 192.168.0.1 mynet
docker network ls

用私有镜像test创建两个容器,分别命名为demo1,demo2
docker run -dit --name demo1 test sh
docker run -dit --name demo2 test sh
docker exec -it demo1 sh
docker network connect mynet demo1
docker network connect mynet demo2
查看两个容器的ip
ip addr

