canal中间件集成springboot实战落地
目录
一、数据库开启相关权限功能:
二、canal 服务端配置启动:从官网下载程序和源码到本地环境
三、canal客户端配置启动:
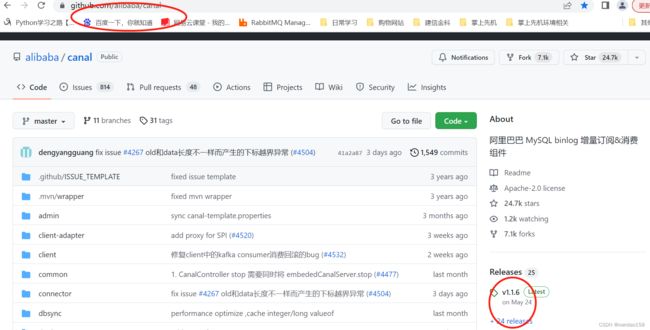
canal中间件集成springboot实战落地开始分享,这是目前互联网很常见的中间件,监听数据库变化、全量数据缓存等功能,起到很方便的作用,原理和使用场景可以直接参考官网,介绍的很详细,中文文档:GitHub - alibaba/canal: 阿里巴巴 MySQL binlog 增量订阅&消费组件
今天我们就直接开始分享实战使用,使用分为三大步骤,数据库开启big-log功能,canal服务端配置启动、canal客户端配置启动和数据测试:
一、数据库开启相关权限功能:
Canal 模拟 MySQL 从节点获得数据库服务器的数据,很明显,对 MySQL服务器的配置完全可以参考MySQL的主从复制中主节点的配置。
1、先开启 Binlog 写入功能,开启bin-log权限:
SHOW VARIABLES like "%log_bin%";数据库显示已开启状态:
SHOW VARIABLES like "%binlog_format%";查询显示:
3、 主数据库的唯一值server_id配置:
SHOW VARIABLES like "%server_id%";查询显示:
4、创建一个用户用来同步数据:
CREATE USER canal IDENTIFIED BY 'canal';

GRANT SELECT, REPLICATION SLAVE, REPLICATION CLIENT ON *.* TO 'canal'@'%';
--如果创建报错,可以先刷新一下权限
FLUSH PRIVILEGES;

--创建后查询用户相关信息
SELECT * from mysql.user;

SELECT user, select_priv,Repl_slave_priv,Repl_client_priv from mysql.user;
创建后查询:
5、 查询此主库的状态:
show master status;查询结果:
 mysql-bin.000001 信息来源于mysql配置文件配置,my.int文件,下面会说到
6、查询此从库状态:
show slave status;查询为空,因为这个数据库是主库:
7、 查看当前所有binlog的日志存储
show binary logs;结果:
8、查看当前已经消费到了什么位置
show binlog events in 'mysql-bin.000001';结果:
[client]

port=3306
default-character-set=utf8
[mysql]

default-character-set=utf8

[mysqld]

# The TCP/IP Port the MySQL Server will listen on
port=3306

#开启查询缓存
explicit_defaults_for_timestamp=true

#Path to installation directory. All paths are usually resolved relative to this.
basedir=C:/Program Files/mysql-5.7.18-winx64/

#Path to the database root
#datadir="C:/Program Files/mysql-5.7.18-winx64/data/"

# The default character set that will be used when a new schema or table is
# created and no character set is defined
character-set-server=utf8

# The default storage engine that will be used when create new tables when
default-storage-engine=INNODB

# Set the SQL mode to strict
sql-mode="STRICT_TRANS_TABLES,NO_AUTO_CREATE_USER,NO_ENGINE_SUBSTITUTION"

#用于第一次登录 可以免密
skip-grant-tables

max_connections=100

server_id=1   # 配置 MySQL replaction 需要定义,不要和 canal 的 slaveId 重复
log-bin=mysql-bin  # 开启 binlog
binlog-format=ROW   # 选择 ROW 模式 MIXED
#binlog_format=MIXED   # 选择 ROW 模式 MIXED

#query_cache_size=0

# table_cache=256

#innodb_log_file_size=24M
相关的配置主要是这几行:
server_id=1   # 配置 MySQL replaction 需要定义,不要和 canal 的 slaveId 重复
log-bin=mysql-bin  # 开启 binlog
binlog-format=ROW   # 选择 ROW 模式 MIXED
#binlog_format=MIXED   # 选择 ROW 模式 MIXED
二、canal 服务端配置启动:从官网下载程序和源码到本地环境
1、下载入口:进入里面有各种版本
2、解压缩到固定目录:
直接解压即可
3、修改核心配置文件:
canal.deployer-1.1.6\canal.deployer-1.1.6\conf 目录下的 canal.properties 文件,核心的几个配置如下:
# tcp bind ip 服务端ip
canal.ip =127.0.0.1
#服务端默认端口号
canal.port =11111
canal.instance.tsdb.dbUsername = canal
canal.instance.tsdb.dbPassword = canal
#监控的模块之一,可以是多个 canal.destinations = promotion,example
canal.destinations = promotion
4、修改需要监控的包配置:新建promotion目录,添加修改配置文件和example目录是并列关系
canal.deployer-1.1.6\canal.deployer-1.1.6\conf\promotion
# position info
canal.instance.master.address=127.0.0.1:3306
#主库binlog日志
canal.instance.master.journal.name=mysql-bin.000001
#监控的位置
canal.instance.master.position=1612
canal.instance.dbUsername=canal
canal.instance.dbPassword=canal
canal.instance.connectionCharset = UTF-8
canal.instance.filter.regex=master-db.frend
# 监听的表,可以指定,多个用逗号分割,这里正则是监听所有
canal.instance.filter.regex=.*\\..*
#canal.instance.filter.black.regex=mysql\\.slave_.*
5、启动服务,win环境 点击 bin目录下的 startup.bat
正常启动是这种控制台日志
6、server 日志查看目录在:
三、canal客户端配置启动:
1、jar包引入:
            com.alibaba.otter
            canal.client
            1.1.6


                    org.apache.rocketmq
                    rocketmq-client


            com.alibaba.otter
            canal.protocol
            1.1.6
2、配置信息相关
canal:
  server:
    ip: 127.0.0.1
    port: 11111
  promotion:
    destination: promotion
    #subscribe: .*\..*
    batchSize: 1000
3、客户端初始化类
package com.nandao.datasource.dynamic.mybatis.config;

import com.alibaba.otter.canal.client.CanalConnector;
import com.alibaba.otter.canal.client.CanalConnectors;
import org.springframework.beans.factory.annotation.Value;
import org.springframework.context.annotation.Bean;
import org.springframework.context.annotation.Configuration;
import org.springframework.scheduling.annotation.EnableAsync;
import org.springframework.scheduling.annotation.EnableScheduling;
import java.net.InetSocketAddress;

@Configuration
@EnableScheduling
@EnableAsync
public class CanalPromotionConfig {

    @Value("${canal.server.ip}")
    private String canalServerIp;

    @Value("${canal.server.port}")
    private int canalServerPort;

    @Value("${canal.server.username:blank}")
    private String userName;

    @Value("${canal.server.password:blank}")
    private String password;

    @Value("${canal.promotion.destination}")
    private String destination;

    @Bean("promotionConnector")
    public CanalConnector newSingleConnector(){
        //有默认账号,初始化的时候可以不加
        String userNameStr = "blank".equals(userName) ? "" : userName;
        String passwordStr = "blank".equals(password) ? "" : password;
        return CanalConnectors.newSingleConnector(new InetSocketAddress(canalServerIp,
                canalServerPort), destination, userNameStr, passwordStr);
    }
}
4、监听的业务类
package com.nandao.datasource.dynamic.mybatis.service.impl;

import com.alibaba.otter.canal.client.CanalConnector;
import com.alibaba.otter.canal.protocol.CanalEntry;
import com.alibaba.otter.canal.protocol.Message;
import com.nandao.datasource.dynamic.mybatis.service.IProcessCanalData;
import lombok.extern.slf4j.Slf4j;
import org.apache.commons.lang.StringUtils;
import org.springframework.beans.factory.annotation.Autowired;
import org.springframework.beans.factory.annotation.Qualifier;
import org.springframework.beans.factory.annotation.Value;
import org.springframework.scheduling.annotation.Async;
import org.springframework.scheduling.annotation.Scheduled;
import org.springframework.stereotype.Service;

import javax.annotation.PostConstruct;
import javax.annotation.PreDestroy;
import java.util.HashMap;
import java.util.HashSet;
import java.util.Map;
import java.util.Set;

@Service
@Slf4j
public class PromotionData implements IProcessCanalData {

    private final static String SMS_HOME_ADVERTISE = "sms_home_advertise";
    private final static String SMS_HOME_BRAND = "sms_home_brand";
    private final static String SMS_HOME_NEW_PRODUCT = "sms_home_new_product";
    private final static String SMS_HOME_RECOMMEND_PRODUCT = "sms_home_recommend_product";
    /*存储从表名到Redis缓存的键*/
    private Map tableMapKey = new HashMap<>();

    @Autowired
    @Qualifier("promotionConnector")
    private CanalConnector connector;

    @Value("${canal.promotion.subscribe:server}")
    private String subscribe;

    @Value("${canal.promotion.batchSize}")
    private int batchSize;

    @PostConstruct
    @Override
    public void connect() {
        connector.connect();
        if("server".equals(subscribe))
            connector.subscribe(null);//可以直接采用服务端配置的扫描表的范围
        else
            connector.subscribe(subscribe);//自定义表的范围,不依赖服务端
        connector.rollback();
    }

    @PreDestroy
    @Override
    public void disConnect() {
        connector.disconnect();
    }

    @Async
    @Scheduled(initialDelayString="${canal.promotion.initialDelay:5000}",fixedDelayString = "${canal.promotion.fixedDelay:5000}")
    @Override
    public void processData() {
        try {
            if(!connector.checkValid()){
                log.warn("与Canal服务器的连接失效!!!重连,下个周期再检查数据变更");
                this.connect();
            }else{
                Message message = connector.getWithoutAck(batchSize);//获取batchSize条数据
                long batchId = message.getId();
                int size = message.getEntries().size();
                if (batchId == -1 || size == 0) {
                    log.info("本次[{}]没有检测到促销数据更新。",batchId);
                }else{
                    log.info("本次[{}]促销数据本次共有[{}]次更新需要处理",batchId,size);
                    /*一个表在一次周期内可能会被修改多次,而对Redis缓存的处理只需要处理一次即可*/
                    Set factKeys = new HashSet<>();
                    for(CanalEntry.Entry entry : message.getEntries()){
                        if (entry.getEntryType() == CanalEntry.EntryType.TRANSACTIONBEGIN
                                || entry.getEntryType() == CanalEntry.EntryType.TRANSACTIONEND) {
                            continue;
                        }
                        CanalEntry.RowChange rowChange = CanalEntry.RowChange.parseFrom(entry.getStoreValue());
                        String tableName = entry.getHeader().getTableName();//获取表名
                        if(log.isDebugEnabled()){
                            CanalEntry.EventType eventType = rowChange.getEventType();
                            log.debug("数据变更详情:来自binglog[{}.{}],数据源{}.{},变更类型{}",
                                    entry.getHeader().getLogfileName(),entry.getHeader().getLogfileOffset(),
                                    entry.getHeader().getSchemaName(),tableName,eventType);
                        }
                        factKeys.add(tableMapKey.get(tableName));
                    }
                    for(String key : factKeys){
                        if(StringUtils.isNotEmpty(key))  {
                            log.info("删除需要");
                        }
                    }
                    connector.ack(batchId); // 提交确认
                    log.info("本次[{}]处理促销Canal同步数据完成",batchId);
                }
            }
        } catch (Exception e) {
            log.error("处理促销Canal同步数据失效,请检查:",e);
        }

    }
}
处理字段信息:增删改
for (CanalEntry.RowData rowData : rowChange.getRowDatasList()) {
                            if (eventType == CanalEntry.EventType.DELETE) {
                                List columns = rowData.getBeforeColumnsList();
                                for (CanalEntry.Column column : columns) {
                                    if(column.getName().equals("id")) {
                                        deleteDoc(column.getValue());
                                        break;
                                    }
                                }
                            } else if (eventType == CanalEntry.EventType.INSERT) {
                                List columns = rowData.getAfterColumnsList();
                                ProductESVo productESVo = new ProductESVo();
                                JSONObject jsonData=new JSONObject();
                                //jsonData.put("", tableName);
                                String docId = makeVo(columns,productESVo);
                                String docIdNew = makeVoNew(columns,jsonData, tableName);
                                insertDoc(docId,productESVo);
                                insertDocNew(docId,jsonData);
                            } else {
                                List columns = rowData.getAfterColumnsList();
                                ProductESVo productESVo = new ProductESVo();
                                String docId = makeVo(columns,productESVo);
                                if(null != docId){
                                    if(null == productESVo){
                                        log.info("商品的删除状态字段update为已删除,从ES中移除");
                                        deleteDoc(docId);
                                    }else  updateDoc(docId,productESVo);
                                }
                            }
                        }
遍历字段:
 private String makeVoNew(List columns,JSONObject jsonData,String tableName ){
        String docId = null;

        for (CanalEntry.Column column : columns) {
            String colName = column.getName();
            String colValue = column.getValue();
            jsonData.put(colName,colValue);
            if(colName.equals(T_ID)) {
                docId = colValue;
            }
            if(parentTableList.contains(tableName)){
                jsonData.put("relation_flag",tableName);
            }
            if(subTableList.contains(tableName)){
                jsonData.put("relation_flag",tableName);
                jsonData.put("parent",docId);
            }
        }
        return docId;
    }
5、启动客户端服务:5秒监听一次
6、修改数据库数据:立刻看到监听到数据
看到监听的数据消费,到此,canal 实战流程分享完毕,大家一定要动手操作演练,才能熟练掌握,下篇我们分享canal实战过程中遇到的问题,敬请期待!


