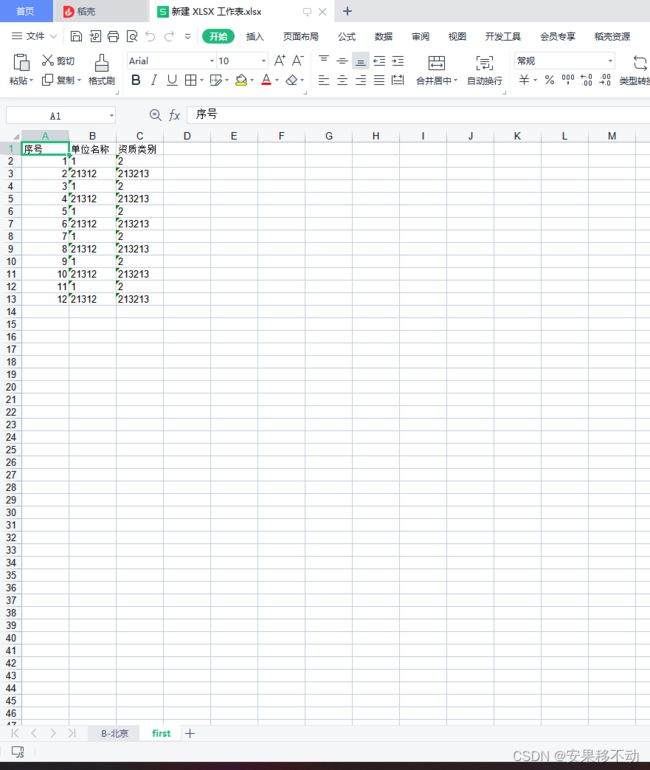
python 处理excel 识别图片文字 转换成表格内容输出
pycharm idea 开发利器啊(主要为了进入活动)
# This is a sample Python script.
import os
import re

import requests

# Press Shift+F10 to execute it or replace it with your code.
# Press Double Shift to search everywhere for classes, files, tool windows, actions, and settings.

import urllib

import pytesseract
from PIL import Image

# 读写2003 excel
import xlrd
import xlwt
# 读写2007 excel
import openpyxl


def deal_space():
    pass


def deal_excel():
    parentPath = "txt\\final_text"
    outPut = "新建 XLSX 工作表.xlsx"
    wb = xlwt.Workbook()
    for (root, dirs, files) in os.walk(parentPath):
        for filename in files:
            filename_full_path = os.path.join(root, filename)
            print("filename_full_path " + filename_full_path)
            sheet = wb.add_sheet(filename.replace(".txt", ""))

            with open(filename_full_path, encoding="utf-8", mode="r") as f:
                context = f.readlines()
                value = []
                value.append( ['序号', "单位名称", "资质类别"])
                index = 0
                for x in context:
                    text = x.replace("\n", "")
                    if text:
                        index = index + 1
                        value.append([index] + text.split("#"))

                print(value)
                for i in range(0, len(value)):
                    for j in range(0, len(value[i])):
                        print(value[i][j])
                        sheet.write(i, j, value[i][j])
            # value = [["名称", "价格", "出版社", "语言"],
            #          ["如何高效读懂一本书", "22.3", "机械工业出版社", "中文"],
            #          ["暗时间", "32.4", "人民邮电出版社", "中文"],
            #          ["拆掉思维里的墙", "26.7", "机械工业出版社", "中文"]]

            # continue
    wb.save(outPut)
    print("写入数据成功!")

    pass


def main():
    # 下载图片
    # downloadPic()
    # 将图片二进制程序化

    # hex_pic()
    # 识别图片存取到一个文件党章
    # generate_text()
    # 处理空格
    # deal_space()
    # 处理xml
    deal_excel()


def hex_pic():
    img = Image.open('pic/origin/02.jpg')

    # 模式L”为灰色图像,它的每个像素用8个bit表示,0表示黑,255表示白,其他数字表示不同的灰度。
    Img = img.convert('L')
    Img.save("pic\\hex_pic\\02.jpg")

    # # 自定义灰度界限,大于这个值为黑色,小于这个值为白色
    # threshold = 200
    #
    # table = []
    # for i in range(256):
    #     if i < threshold:
    #         table.append(0)
    #     else:
    #         table.append(1)
    #
    # # 图片二值化
    # photo = Img.point(table, '1')
    # photo.save("test2.png")
    # # 识别图片内容
    # import pytesseract
    # img_path = 'test2.png'
    #
    # text = pytesseract.image_to_string(Image.open(img_path))

    for (root, dirs, files) in os.walk("pic/origin"):
        for filename in files:
            filename_full_path = os.path.join(root, filename)
            print("filename_full_path " + filename_full_path)
            img = Image.open(filename_full_path)

            # 模式L”为灰色图像,它的每个像素用8个bit表示,0表示黑,255表示白,其他数字表示不同的灰度。
            Img = img.convert('L')
            Img.save(filename_full_path.replace("hex_pic", "origin"))


# 根据图片生成每个text
def generate_text():
    parent_path = "pic/origin/"
    # 批量添加namespace|
    # 列出windows目录下的所有文件和文件名
    res = ""
    for (root, dirs, files) in os.walk(parent_path):
        for filename in files:
            filename_full_path = os.path.join(root, filename)
            print("filename_full_path " + filename_full_path)
            im = Image.open(filename_full_path)
            # 识别文字
            # 识别文字,并指定语言
            res = pytesseract.image_to_string(im, lang='chi_sim')
            # 识别所有图片 认识
            with open("txt\\hex_pic\\" + filename.replace(".jpg", ".txt"), encoding="utf-8", mode="w") as f:
                f.write(res)

    pass


# 步骤1  下载文件到本地
def download_pic():
    url = "https://xxxx"
    s = requests.Session()
    context = s.get(url).text
    reg = r'data-original=\"(.*?r.jpg)\"'
    res = re.findall(reg, context)
    print(res)
    res = {}.fromkeys(res).keys()
    print(len(res))
    print(res)
    path = "pic"
    index = 0
    for x in res:
        index = index + 1
        text = "0" + str(index) if index <= 9 else str(index)
        urllib.request.urlretrieve(x, path + "\\" + text + ".jpg")


# Press the green button in the gutter to run the script.
if __name__ == '__main__':
    main()

# See PyCharm help at https://www.jetbrains.com/help/pycharm/
处理内容就是将图片生成文字
将文字再处理成excel 这里都是代码。。需要会点的才会点。。好像很废话。
那么识别文字如何做的呢
用python识别图片
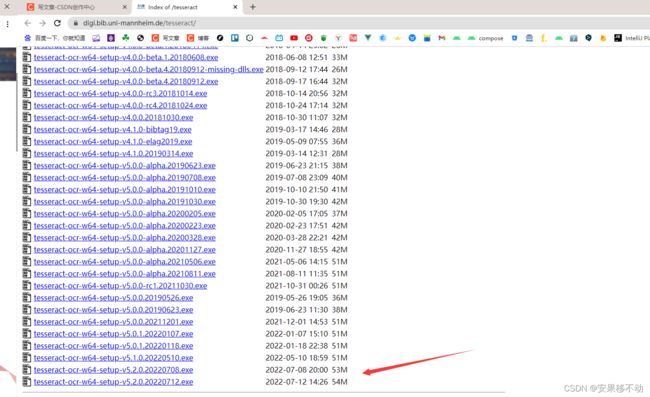
先下载tesseract
网址:Index of /tesseract
下载好了记住安装目录。然后把安装目录设置为环境变量
pip install --upgrade pip
pip install pytesseract
pip install pillow
安装目录里面有一个
tessdata
这个是存放语言识别文件的。
下载地址 :
https://raw.githubusercontent.com/tesseract-ocr/tessdata/4.00/chi_sim.traineddata
这个是中文简体。繁体也可以去下载这个
https://raw.githubusercontent.com/tesseract-ocr/tessdata/4.00/chi_tra.traineddata
下载好了丢进tessdata 即可
识别中文文字
        im = Image.open(filename_full_path)
            # 识别文字
            # 识别文字,并指定语言
            res = pytesseract.image_to_string(im, lang='chi_sim')
            # 识别所有图片 认识
            with open("txt\\hex_pic\\" + filename.replace(".jpg", ".txt"), encoding="utf-8", mode="w") as f:
                f.write(res)
识别的结果如果不理想可以先将图片二进制化
         img = Image.open(filename_full_path)

            # 模式L”为灰色图像,它的每个像素用8个bit表示,0表示黑,255表示白,其他数字表示不同的灰度。
            Img = img.convert('L')
            Img.save(filename_full_path.replace("hex_pic", "origin"))
然后再次进行处理
    parentPath = "txt\\final_text"
    outPut = "新建 XLSX 工作表.xlsx"
    wb = xlwt.Workbook()
    for (root, dirs, files) in os.walk(parentPath):
        for filename in files:
            filename_full_path = os.path.join(root, filename)
            print("filename_full_path " + filename_full_path)
            sheet = wb.add_sheet(filename.replace(".txt", ""))

            with open(filename_full_path, encoding="utf-8", mode="r") as f:
                context = f.readlines()
                value = []
                value.append( ['序号', "单位名称", "资质类别"])
                index = 0
                for x in context:
                    text = x.replace("\n", "")
                    if text:
                        index = index + 1
                        value.append([index] + text.split("#"))

                print(value)
                for i in range(0, len(value)):
                    for j in range(0, len(value[i])):
                        print(value[i][j])
                        sheet.write(i, j, value[i][j])
            # value = [["名称", "价格", "出版社", "语言"],
            #          ["如何高效读懂一本书", "22.3", "机械工业出版社", "中文"],
            #          ["暗时间", "32.4", "人民邮电出版社", "中文"],
            #          ["拆掉思维里的墙", "26.7", "机械工业出版社", "中文"]]

            # continue
    wb.save(outPut)
    print("写入数据成功!")
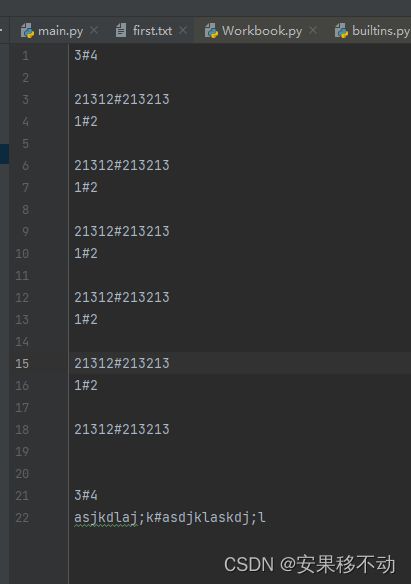
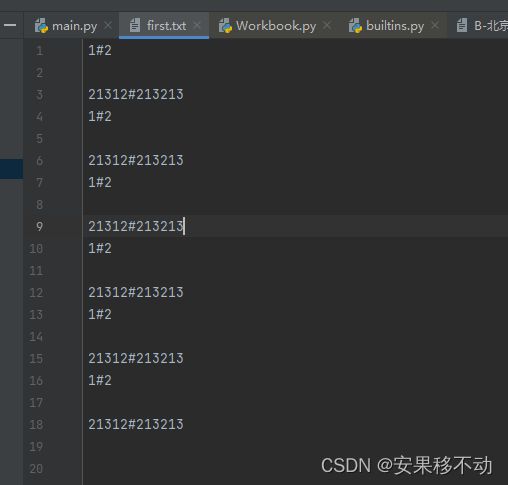
处理后拿到文本再根据一定格式存好
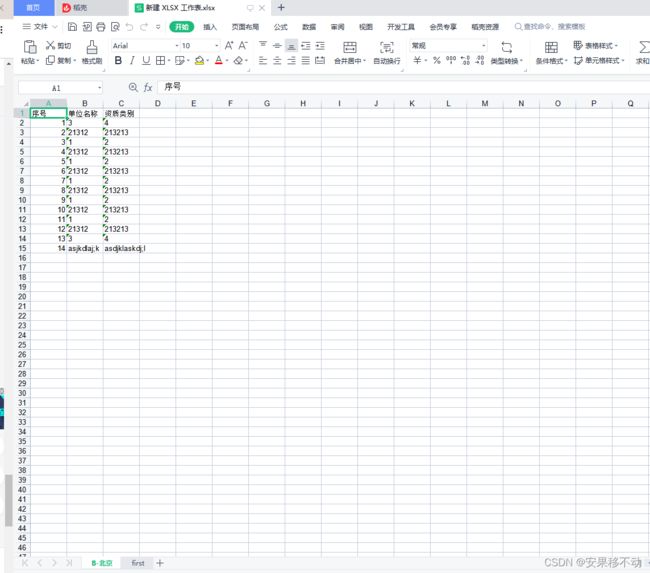
文件名称就是我们的sheet名称
我们随意的造假数据
然后根据当前文本特点生成表格
最后 查看表格内容
