DATAHUB 调研测试文档
DATAHUB 调研测试文档
李达 20200710 [email protected]
1.环境安装
服务器配置:
服务器ip:192.168.123.80
系统版本:CentOS Linux release 7.4.1708 (Core)
Cpu:2核ntel(R) Celeron(R) CPU 1007U @ 1.50GHz
内存:8g
硬盘:50G系统硬盘 + 1T挂载硬盘
2.docker部署
2.1.Docker安装
https://github.com/linkedin/datahub
$ sudo yum install -y yum-utils
$ sudo yum-config-manager --add-repo
https://download.docker.com/linux/centos/docker-ce.repo
https://docs.docker.com/engine/install/centos/
sudo yum install docker-ce docker-ce-cli containerd.io
[root@localhost ~]# yum list docker-ce --showduplicates | sort -r
已加载插件:fastestmirror, langpacks
已安装的软件包
可安装的软件包
 * updates: mirrors.huaweicloud.com
Loading mirror speeds from cached hostfile
 * extras: mirrors.huaweicloud.com
docker-ce.x86_64            3:19.03.8-3.el7                    docker-ce-stable
docker-ce.x86_64            3:19.03.8-3.el7                    @docker-ce-stable
docker-ce.x86_64            3:19.03.7-3.el7                    docker-ce-stable
docker-ce.x86_64            3:19.03.6-3.el7                    docker-ce-stable
docker-ce.x86_64            3:19.03.5-3.el7                    docker-ce-stable
docker-ce.x86_64            3:19.03.4-3.el7                    docker-ce-stable
docker-ce.x86_64            3:19.03.3-3.el7                    docker-ce-stable
docker-ce.x86_64            3:19.03.2-3.el7                    docker-ce-stable
docker-ce.x86_64            3:19.03.1-3.el7                    docker-ce-stable
docker-ce.x86_64            3:19.03.0-3.el7                    docker-ce-stable
docker-ce.x86_64            3:18.09.9-3.el7                    docker-ce-stable
docker-ce.x86_64            3:18.09.8-3.el7                    docker-ce-stable
docker-ce.x86_64            3:18.09.7-3.el7                    docker-ce-stable
docker-ce.x86_64            3:18.09.6-3.el7                    docker-ce-stable
docker-ce.x86_64            3:18.09.5-3.el7                    docker-ce-stable
docker-ce.x86_64            3:18.09.4-3.el7                    docker-ce-stable
docker-ce.x86_64            3:18.09.3-3.el7                    docker-ce-stable
docker-ce.x86_64            3:18.09.2-3.el7                    docker-ce-stable
docker-ce.x86_64            3:18.09.1-3.el7                    docker-ce-stable
docker-ce.x86_64            3:18.09.0-3.el7                    docker-ce-stable
docker-ce.x86_64            18.06.3.ce-3.el7                   docker-ce-stable
docker-ce.x86_64            18.06.2.ce-3.el7                   docker-ce-stable
docker-ce.x86_64            18.06.1.ce-3.el7                   docker-ce-stable
docker-ce.x86_64            18.06.0.ce-3.el7                   docker-ce-stable
docker-ce.x86_64            18.03.1.ce-1.el7.centos            docker-ce-stable
docker-ce.x86_64            18.03.0.ce-1.el7.centos            docker-ce-stable
docker-ce.x86_64            17.12.1.ce-1.el7.centos            docker-ce-stable
docker-ce.x86_64            17.12.0.ce-1.el7.centos            docker-ce-stable
docker-ce.x86_64            17.09.1.ce-1.el7.centos            docker-ce-stable
docker-ce.x86_64            17.09.0.ce-1.el7.centos            docker-ce-stable
docker-ce.x86_64            17.06.2.ce-1.el7.centos            docker-ce-stable
docker-ce.x86_64            17.06.1.ce-1.el7.centos            docker-ce-stable
docker-ce.x86_64            17.06.0.ce-1.el7.centos            docker-ce-stable
docker-ce.x86_64            17.03.3.ce-1.el7                   docker-ce-stable
docker-ce.x86_64            17.03.2.ce-1.el7.centos            docker-ce-stable
docker-ce.x86_64            17.03.1.ce-1.el7.centos            docker-ce-stable
docker-ce.x86_64            17.03.0.ce-1.el7.centos            docker-ce-stable

* base: mirror.bit.edu.cn
[root@localhost ~]# sudo yum install docker-ce-19.03.8 docker-ce-cli-19.03.8 containerd.io
2.2.Dokcer启动
sudo systemctl start docker
2.3.Docker-compose安装
https://docs.docker.com/compose/install/
- sudo curl -L
“https://github.com/docker/compose/releases/download/1.25.5/docker-compose- ( u n a m e − s ) − (uname -s)- (uname−s)−(uname -m)” -o /usr/local/bin/docker-compose - sudo chmod +x /usr/local/bin/docker-compose
- sudo ln -s /usr/local/bin/docker-compose /usr/bin/docker-compose
- docker-compose –version
3.安装datahub
- git clone https://github.com/linkedin/datahub.git
- cd datahub
- [root@localhost datahub]# ./docker/quickstart/quickstart.sh


datahub的docker相关命令
- docker container ls
- docker exec -it mysql /usr/bin/mysql datahub --user=datahub
–password=datahub
4.Datahub安装问题记录
4.1.Web登录报错

解决方法:
重启 gms
- docker restart datahub-gms
4.2.Datahub-gms域名问题
01:24:22 [main] INFO  play.api.Play - Application started (Prod)
01:24:31 [main] INFO  play.core.server.AkkaHttpServer - Listening for HTTP on /0.0.0.0:9001
01:24:58 [application-akka.actor.default-dispatcher-14] ERROR application -

! @7gdo8l17l - Internal server error, for (GET) [/api/v1/user/me] ->

play.api.UnexpectedException: Unexpected exception[RuntimeException: com.linkedin.r2.RemoteInvocationException: com.linkedin.r2.RemoteInvocationException: Failed to get response from server for URI http://datahub-gms:8080/corpUsers/($params:(),name:datahub)]
	at play.api.http.HttpErrorHandlerExceptions$.throwableToUsefulException(HttpErrorHandler.scala:247)
	at play.api.http.DefaultHttpErrorHandler.onServerError(HttpErrorHandler.scala:176)
	at play.core.server.AkkaHttpServer$$anonfun$2.applyOrElse(AkkaHttpServer.scala:363)
	at play.core.server.AkkaHttpServer$$anonfun$2.applyOrElse(AkkaHttpServer.scala:361)
	at scala.concurrent.Future$$anonfun$recoverWith$1.apply(Future.scala:346)

https://github.com/linkedin/datahub/issues/1566
最终解决方式: rebuid_all.sh
4.3.检索后台报错
	at java.util.concurrent.ThreadPoolExecutor.runWorker(ThreadPoolExecutor.java:1149)
	at java.util.concurrent.ThreadPoolExecutor$Worker.run(ThreadPoolExecutor.java:624)
	at java.lang.Thread.run(Thread.java:748)
Caused by: com.linkedin.r2.message.rest.RestException: Received error 500 from server for URI http://datahub-gms:8080/corpUsers
	at com.linkedin.r2.transport.http.common.HttpBridge$1.onResponse(HttpBridge.java:76)
	... 4 common frames omitted
最终解决方式:
[root@localhost gms]# docker-compose -p datahub down
Stopping datahub-gms ... done
WARNING: Found orphan containers (datahub-mce-consumer, kafka-rest-proxy, schema-registry-ui, ingestion, kafka-topics-ui, neo4j, kafka-setup, zookeeper, datahub-mae-consumer, broker, schema-registry, kibana, elasticsearch, elasticsearch-setup, datahub-frontend, mysql) for this project. If you removed or renamed this service in your compose file, you can run this command with the --remove-orphans flag to clean it up.
Removing datahub-gms ... done
Removing network datahub_network
ERROR: error while removing network: network datahub_network id 7598488e12b658a729f1b2e69f4bb85203befd789b249d0f9892d3dabba4e739 has active endpoints
解决方式:docker-compose up --build
4.4.安装异常问题分析
databub中的组件较多,在编译build时,总是容易有一些出现问题,会导致后面会的服务无法正常使用。
最好按照官方的建议,对各个组件进行详细检查。
https://github.com/linkedin/datahub/blob/master/docs/debugging.md#how-can-i-confirm-if-all-docker-containers-are-running-as-expected-after-a-quickstart
5.datahub分析
5.1.内部及开源区别
开源当前支持的数据源和数据模型较少。

5.2.架构

- datahub-gms: Metadata store service
- datahub-frontend: Play application, which serves DataHub frontend
- datahub-mce-consumer: Kafka Streams application that consumes from
Metadata Change Event (MCE) stream and updates metadata store - datahub-mae-consumer: Kafka Streams application that consumes from
Metadata Audit Event (MAE) stream and builds search index and graph
db
5.3.数据模型
选择利用Pegasus,这是一种由LinkedIn创建的开放源码和完善的数据模式语言。Pegasus专为通用数据建模而设计,因此适用于大多数元数据。但是,由于Pegasus没有提供模型关系或关联的明确方法,因此我们引入了一些自定义扩展来支持这些用例。
为了演示如何使用Pegasus对元数据建模,让我们看一个简单的例子,它由以下修改后的实体关系图(ERD)演示。

该示例包含三种类型的实体:用户、组和数据集,由图中的蓝色圆圈表示。我们用箭头来表示这些实体之间的三种关系类型,即OwnedBy,HasMember和HasAdmin。换句话说,一个组由一个管理员和多个用户组成,他们可以拥有一个或多个数据集。
以Pegasus为例,我们将每个实体,关系和元数据方面转换为单独的Pegasus架构文件(PDSC)。为简单起见,我们在此仅包含每个类别的一个模型。首先,让我们看一下用户实体的PDSC:
每个实体都需要具有URN形式的全局唯一ID ,可以将其视为一种类型的GUID。User实体具有包括名字,姓氏和LDAP的属性,每个属性都映射到用户记录中的可选字段。
接下来是OwnedBy关系的PDSC模型:

5.4.URN
URN (Uniform Resource Name) is the chosen scheme of URI to uniquely define any resource in DataHub. It has the following form
urn:<Namespace>:<Entity Type>:<ID>
Onboarding a new entity to GMA starts with modelling an URN specific to that entity. You can use the existing URN models for built-in entities as a reference.
URN(统一资源名称)是URI的选择方案,用于唯一定义DataHub中的任何资源。它具有以下形式
urn:<Namespace>:<Entity Type>:<ID>
将新实体加入GMA首先要为该实体特定的URN建模。您可以将现有的URN模型用于内置实体作为参考。
命名空间
DataHub中所有可用的URN都li用作其命名空间。如果您派发DataHub,则可以轻松地将其更改为组织的其他名称空间。
实体类型
URN的实体类型与GMA上下文中的实体不同。可以将其视为任何资源的对象类型,您需要为其每个实例提供唯一的标识符。您可以为实体类型为[DatasetUrn]的GMA实体创建URN时dataset,也可以为数据平台[DataPlatformUrn]定义URN。
ID
ID是URN的唯一标识符部分。它对于特定名称空间中的特定实体类型是唯一的。对于复杂的URN,ID可以包含一个字段,也可以包含多个字段。复杂的URN甚至可以包含其他URN作为ID字段。这种类型的URN也称为嵌套URN。对于非URN ID字段,该值可以是字符串,数字或Pegasus Enum。
以下是一些具有单个ID字段的示例URN:
urn:li:dataPlatform:kafka
urn:li:corpuser:jdoe
DatasetUrn是复杂的嵌套URN的示例。它包含3个ID字段:platform,name和fabric,其中platform是另一个URN。这里有些例子
urn:li:dataset:(urn:li:dataPlatform:kafka,PageViewEvent,PROD)
urn:li:dataset:(urn:li:dataPlatform:hdfs,PageViewEvent,EI)
6.datahub的试用
6.1.登录
http://192.168.123.80:9001/#/login

账号密码都是 datahub
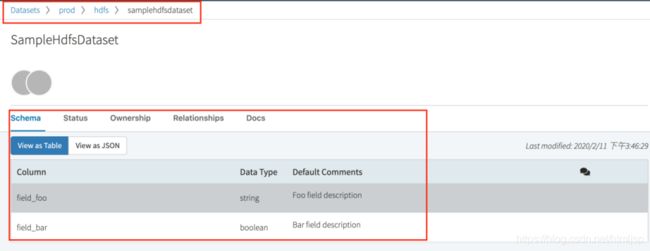
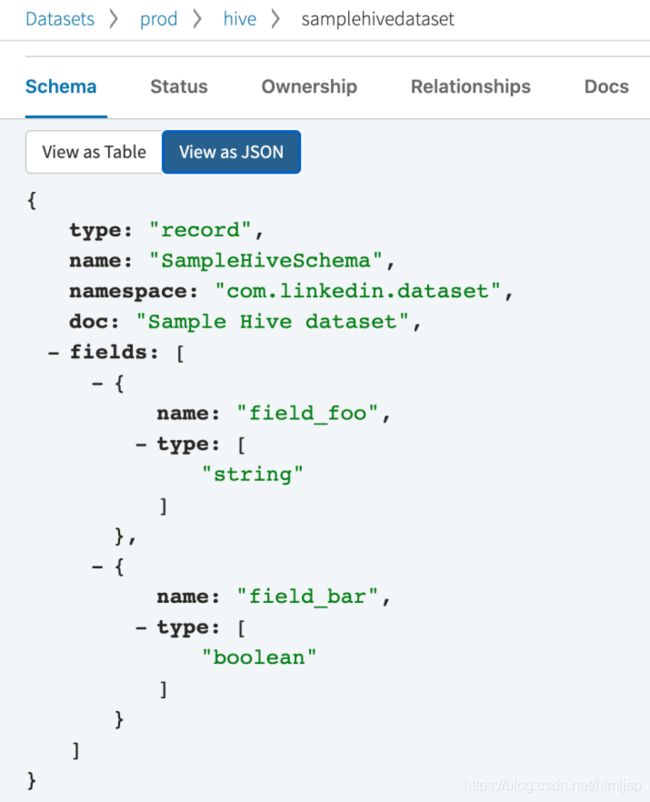
6.2.检索元数据

开源的datahub仅支持数据集和用户两种元数据类型


7.datahub优缺点总结
优点:
架构体系满足数据量庞大及扩展的需求、且重复为数据的应用场景匹配最为合适的软件系统;
体系完备(权限、图检索那neo4j、全文检索es、实时更新、完整API 等);
linkedin公司使用验证;
建模语言的统一;
用户的元数据参与度较高,用户类型和权限标注明确;
有数据血缘的展示,但力度尚有待提升。
缺点
使用的建模语言尚未普及,使得二次开发的扩展和使用困难;
开源和内部使用版本差距尚大,开源对数据类型的支持尚不足;
过重依赖于linkin内部组件;
使用文档不足,经验分享等内容缺乏;
系统体系过大、技术引进、资源开销与应用场景和数据体量尚未匹配。
数据血缘不能使用脚本等处理过程进行关联,而是使用sql相关语义。
8.Docker 命令记录
与docker相关的本地资源都放在/var/lib/docker/目录下
docker container ls
docker inspect 9c9a (docker inspect 容器/镜像 命令查看该镜像的相关路径信息)
docker commit 保存一下修改
docker build -t 标签名称 dockefile的路径 命令进行创建镜像
docker run --name 镜像别名 镜像名称
(HOST) # docker exec -it container-id/container-name bash
(CONTAINER) root@1f608dc4e5b4:/# echo hello docker > /message.txt
(CONTAINER) root@1f608dc4e5b4:/# cat /message.txt
hello docker
(CONTAINER) root@1f608dc4e5b4:/# exit
docker-compose -p datahub down
docker-compose -p datahub up
docker logs <
docker rm container_name 删除容器实例
9.Refer:
- https://github.com/linkedin/datahub
- https://engineering.linkedin.com/blog/2020/open-sourcing-datahub–linkedins-metadata-search-and-discovery-p
- https://engineering.linkedin.com/blog/2019/data-hub
- https://github.com/linkedin/datahub/tree/5dc61658f822be5ef3fe4da1efd581974a45c3b2/gms
- https://zhuanlan.zhihu.com/p/80459081 知乎详细翻译
- https://github.com/linkedin/datahub/blob/master/docs/what/urn.md
URN介绍