2.1 pytorch官方demo(Lenet)
实现一个图像分类器
pytorch官方demo
TRAINING A CLASSIFIER
PytorchDemo—LeNet 介绍

Convolutions – 卷积 Subsampling – 下采样 Full connection – 全连接
LeNet 结构就是 一个卷积 一个下采样 一个卷积 一个下采样 接三个全连接层
图中显示的INPUT是一个灰度图像,只有一个维度
pytorch中的Tensor通道排列顺序是:[batch, channel, height, width]
demo的流程
- model.py ——定义LeNet网络模型
- train.py ——加载数据集并训练,训练集计算loss,测试集计算accuracy,保存训练好的网络参数
- predict.py——得到训练好的网络参数后,用自己找的图像进行分类测试
1. model.py
# 使用torch.nn包来构建神经网络.
import torch.nn as nn
import torch.nn.functional as F

class LeNet(nn.Module): 					# 定义一个类LeNet,继承于nn.Module这个父类
    def __init__(self):						# 初始化网络结构
        super(LeNet, self).__init__()    	# 多继承需用到super函数
        self.conv1 = nn.Conv2d(3, 16, 5)    # 定义第一个卷积层
        self.pool1 = nn.MaxPool2d(2, 2)
        self.conv2 = nn.Conv2d(16, 32, 5)
        self.pool2 = nn.MaxPool2d(2, 2)
        self.fc1 = nn.Linear(32*5*5, 120)
        self.fc2 = nn.Linear(120, 84)
        self.fc3 = nn.Linear(84, 10)

    def forward(self, x):			 # 正向传播过程
        x = F.relu(self.conv1(x))    # input(3, 32, 32) output(16, 28, 28) N=(32-5+0)/1+1 = 28
        x = self.pool1(x)            # output(16, 14, 14)                  N=(28-2+0)/2+1 = 14
        x = F.relu(self.conv2(x))    # output(32, 10, 10)                  N=(14-5+0)/1+1 = 10
        x = self.pool2(x)            # output(32, 5, 5)                    N=(10-2+0)/2+1 = 5
        x = x.view(-1, 32*5*5)       # output(32*5*5)
        x = F.relu(self.fc1(x))      # output(120)
        x = F.relu(self.fc2(x))      # output(84)
        x = self.fc3(x)              # output(10)
        return x
1.1 卷积 Conv2d
常用的卷积(Conv2d)在pytorch中对应的函数是:
torch.nn.Conv2d(in_channels, out_channels, kernel_size, stride=1, padding=0, dilation=1, groups=1, bias=True, padding_mode='zeros')
in_channels参数代表输入特征矩阵的深度即channel,比如输入一张RGB彩色图像,那in_channels=3
out_channels参数代表卷积核的个数,使用n个卷积核输出的特征矩阵深度即channel就是n
kernel_size参数代表卷积核的尺寸,输入可以是int类型如3 代表卷积核的height=width=3,也可以是tuple类型如(3, 5)代表卷积核的height=3,width=5
stride参数代表卷积核的步距默认为1,和kernel_size一样输入可以是int类型,也可以是tuple类型
padding参数代表在输入特征矩阵四周补零的情况默认为0,同样输入可以为int型如1 代表上下方向各补一行0元素,左右方向各补一列0像素(即补一圈0),如果输入为tuple型如(2, 1) 代表在上方补两行下方补两行,左边补一列,右边补一列。padding[0]是在H高度方向两侧填充的,padding[1]是在W宽度方向两侧填充的
bias参数表示是否使用偏置(默认使用)
dilation、groups是高阶用法这里不做讲解,如有需要可以参看官方文档
1.2 池化 MaxPool2d
最大池化(MaxPool2d)在 pytorch 中对应的函数是:
MaxPool2d(kernel_size, stride)
1.3 Tensor的展平:view()
在经过第二个池化层后,数据还是一个三维的Tensor (32, 5, 5),需要先经过展平后(3255)再传到全连接层:
 x = self.pool2(x)            # output(32, 5, 5)
  x = x.view(-1, 32*5*5)       # output(32*5*5)
  x = F.relu(self.fc1(x))      # output(120)
1.4 全连接 Linear
全连接( Linear)在 pytorch 中对应的函数是:
Linear(in_features, out_features, bias=True)
在卷积操作过程中,我们知道矩阵经卷积操作后的尺寸由以下几个因数决定:
输入图片大小 W×W
Filter大小 F×F
步长 S
padding的像素数 P
经卷积后的矩阵尺寸大小计算公式为:
N = (W − F + 2P ) / S + 1
本Demo中分析
input(in_channels,w,w)
Conv2d(in_channels, out_channels,kernel_size,stride=1,padding=0)
output(out_channels, N,N)
若是输入图片为input(3, 32,32)
经过conv1=nn.Conv2d(3, 16, 5)卷积后 矩阵的大小为N=(32-5+0)/1+1=28
output(16, 28,28)
经过下采样层pool1 = nn.MaxPool2d(2, 2)池化后 矩阵的大小为
N=(28-2+0)/2+1=14
output(16,14,14)

2. train.py
2.1 导入数据集
import torch
import torchvision
import torch.nn as nn
from model import LeNet
import torch.optim as optim
import torchvision.transforms as transforms
import matplotlib.pyplot as plt
import numpy as np
import time
数据预处理
ToTensor
对输入的图像数据做预处理,即由shape (H x W x C) in the range [0, 255] → shape (C x H x W) in the range [0.0, 1.0]
Normalize
使用均值和标志差标志化Tensor
transform = transforms.Compose(
        [transforms.ToTensor(),          # convert a PLT image or numpy.ndarray(H*W*C)in range(0,255) to (C*H*W) in range(0.0,1.0)
         transforms.Normalize((0.5, 0.5, 0.5), (0.5, 0.5, 0.5))])  # 使用均值和标志差进行标准化 output[channel]=(input[channel]-mean[chan])/std[chan]
数据集介绍
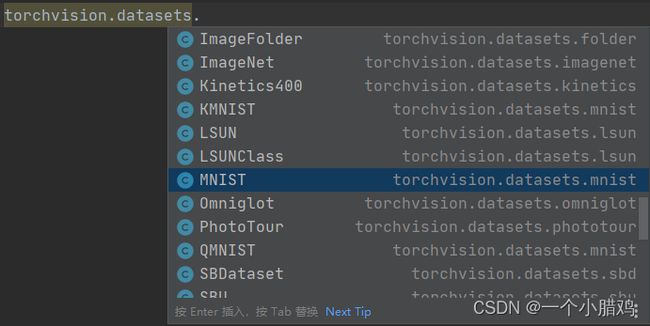
利用torchvision.datasets函数可以在线导入pytorch中的数据集,包含一些常见的数据集如MNIST等
此demo用的是CIFAR10数据集,也是一个很经典的图像分类数据集,由 Hinton 的学生 Alex Krizhevsky 和 Ilya Sutskever 整理的一个用于识别普适物体的小型数据集,一共包含 10 个类别的 RGB 彩色图片。

导入、加载 训练集
train_set = torchvision.datasets.CIFAR10(root='./data', train=True,
                                             download=False, transform=transform)
root=‘./data’ 将数据集下载到root后的地址,在当前目录的data文件夹下
train=True 将会导入CEFAR10的训练集样本
download=True 将会自动下载数据集 下载完后手动调为False
transform=transform 即对数据集进行预处理
# 加载训练集,实际过程需要分批次(batch)训练
train_loader = torch.utils.data.DataLoader(train_set, 	  # 导入的训练集
										   batch_size=50, # 每批训练的样本数
                                          shuffle=False,  # 是否打乱训练集
                                          num_workers=0)  # 使用线程数,在windows下设置为0
导入、加载 测试集
# 导入10000张测试图片
test_set = torchvision.datasets.CIFAR10(root='./data',
										train=False,	# 表示是数据集中的测试集
                                        download=False,transform=transform)
# 加载测试集

```python
# 导入10000张测试图片
test_set = torchvision.datasets.CIFAR10(root='./data',
										train=False,	# 表示是数据集中的测试集
                                        download=False,transform=transform)
# 加载测试集
test_loader = torch.utils.data.DataLoader(test_set,
										  batch_size=10000, # 每批用于验证的样本数
										  shuffle=False, num_workers=0)
# 获取测试集中的图像和标签,用于accuracy计算
test_data_iter = iter(test_loader)                  #将加载的测试集转换成可迭代的迭代器
test_image, test_label = test_data_iter.next()     #next()可获得一批数据的图像和标签值
数据集的分类(此处在工程中不需要)
# classes = ('plane', 'car', 'bird', 'cat',
    #            'deer', 'dog', 'frog', 'horse', 'ship', 'truck')
展示一些测试集图片 (此处在工程中不需要)
import matplotlib.pyplot as plt
import numpy as np

# functions to show an image
def imshow(img):
    img = img / 2 + 0.5     # unnormalize 反标准化
    npimg = img.numpy()
    plt.imshow(np.transpose(npimg, (1, 2, 0)))  #Tensor通道排序是[channel,height,width] 此处将标准化后的shape (C x H x W)转换成输入图像形式的(H x W x C)
    plt.show()


# get some random training images
dataiter = iter(test_loader)
test_image, test_label = dataiter.next()

# print labels
print(' '.join(f'{classes[test_label[j]]:5s}' for j in range(batch_size)))
# show images
imshow(torchvision.utils.make_grid(test_image))
2.2 训练过程
名词 定义
epoch 对训练集的全部数据进行一次完整的训练,称为 一次 epoch
batch 由于硬件算力有限,实际训练时将训练集分成多个批次训练,每批数据的大小为 batch_size
iteration 或 step 对一个batch的数据训练的过程称为 一个 iteration 或 step
以本demo为例,训练集一共有50000个样本,batch_size=50,那么完整的训练一次样本:iteration或step=1000,epoch=1
net = LeNet()						  				# 定义训练的网络模型
loss_function = nn.CrossEntropyLoss() 				# 定义损失函数为交叉熵损失函数
optimizer = optim.Adam(net.parameters(), lr=0.001)  # 定义优化器(训练参数,学习率)

for epoch in range(5):  # 一个epoch即对整个训练集进行一次训练  此处训练5次
    running_loss = 0.0   # 累加的损失值
    # time_start = time.perf_counter()

    for step, data in enumerate(train_loader, start=0):   # 遍历训练集,返回训练集的data和步数,step从0开始计算
        inputs, labels = data 	# 获取训练集的图像和标签
        optimizer.zero_grad()   # 清除历史损失梯度 如果,就会对计算的历史梯度进行累加(通过这个特性,能够实现一个很大batch的训练)

        # forward + backward + optimize
        outputs = net(inputs)  				  # 正向传播  输入图像传入网络模型得到输出(预测)图像
        loss = loss_function(outputs, labels) # 计算损失   outputs预测的值  labels标签值 两者之间的损失
        loss.backward() 					  # 反向传播
        optimizer.step() 					  # 优化器更新参数

        # 打印耗时、损失、准确率等数据
        running_loss += loss.item()
        if step % 500 == 499:    # print every 1000 mini-batches,每500步打印一次
            with torch.no_grad(): # 在以下步骤中(验证过程中)不用计算每个节点的损失梯度,防止内存占用
                outputs = net(test_image) 				 # 测试集传入网络(test_batch_size=10000),output维度为[10000,10]  [batch,channel]
                predict_y = torch.max(outputs, dim=1)[1] # 以output中值最大位置对应的索引(标签)作为预测输出     寻找预测值最大可能的标签是10个中的哪个 dim=1对应channel [1]代表索引
                accuracy = (predict_y == test_label).sum().item() / test_label.size(0) # (predict_y == test_label)预测值和标签值相同为1,不同为0  .sum进行求和  前面的为Tensor形式  .item得到数值
                print('[%d, %5d] train_loss: %.3f  test_accuracy: %.3f' %  # 打印epoch,step,loss,accuracy
                      (epoch + 1, step + 1, running_loss / 500, accuracy))

                print('%f s' % (time.perf_counter() - time_start))        # 打印耗时
                running_loss = 0.0

print('Finished Training')

# 保存训练得到的参数
save_path = './Lenet.pth'
torch.save(net.state_dict(), save_path)
2.3 使用GPU/CPU训练
使用下面语句可以在有GPU时使用GPU,无GPU时使用CPU进行训练
device = torch.device("cuda" if torch.cuda.is_available() else "cpu")
print(device)
也可以直接指定
device = torch.device("cuda")
# 或者
# device = torch.device("cpu")
对应的,需要用to()函数来将Tensor在CPU和GPU之间相互移动,分配到指定的device中计算
net = LeNet()
net.to(device) # 将网络分配到指定的device中
loss_function = nn.CrossEntropyLoss()
optimizer = optim.Adam(net.parameters(), lr=0.001)

for epoch in range(5):

    running_loss = 0.0
    time_start = time.perf_counter()
    for step, data in enumerate(train_loader, start=0):
        inputs, labels = data
        optimizer.zero_grad()
        outputs = net(inputs.to(device))				  # 将inputs分配到指定的device中
        loss = loss_function(outputs, labels.to(device))  # 将labels分配到指定的device中
        loss.backward()
        optimizer.step()
        running_loss += loss.item()
        if step % 500 == 499:
            with torch.no_grad():
                outputs = net(test_image.to(device)) # 将test_image分配到指定的device中
                predict_y = torch.max(outputs, dim=1)[1]
                accuracy = (predict_y == test_label.to(device)).sum().item() / test_label.size(0) # 将test_label分配到指定的device中

                print('[%d, %5d] train_loss: %.3f  test_accuracy: %.3f' %
                      (epoch + 1, step + 1, running_loss / 1000, accuracy))

                print('%f s' % (time.perf_counter() - time_start))
                running_loss = 0.0

print('Finished Training')

save_path = './Lenet.pth'
torch.save(net.state_dict(), save_path)
打印信息如下:(服务器暂时没了,借用的Fun’的结果)
[1,  1000] train_loss: 1.537  test_accuracy: 0.541
35.345407 s
[2,  1000] train_loss: 1.198  test_accuracy: 0.605
40.532376 s
[3,  1000] train_loss: 1.048  test_accuracy: 0.641
44.144097 s
[4,  1000] train_loss: 0.954  test_accuracy: 0.647
41.313228 s
[5,  1000] train_loss: 0.882  test_accuracy: 0.662
41.860646 s
Finished Training
3. predict.py
# 导入包
import torch
import torchvision.transforms as transforms
from PIL import Image
from model import LeNet

# 数据预处理
transform = transforms.Compose(
    [transforms.Resize((32, 32)), # 首先需resize成跟训练集图像一样的大小
     transforms.ToTensor(),
     transforms.Normalize((0.5, 0.5, 0.5), (0.5, 0.5, 0.5))])

# 导入要测试的图像(自己找的,不在数据集中),放在源文件目录下
im = Image.open('horse.jpg')
im = transform(im)  # [C, H, W]
im = torch.unsqueeze(im, dim=0)  # 对数据增加一个新维度,因为tensor的参数是[batch, channel, height, width]

# 实例化网络,加载训练好的模型参数
net = LeNet()
net.load_state_dict(torch.load('Lenet.pth'))

# 预测
classes = ('plane', 'car', 'bird', 'cat',
           'deer', 'dog', 'frog', 'horse', 'ship', 'truck')
with torch.no_grad():
    outputs = net(im)
    predict = torch.max(outputs, dim=1)[1].data.numpy()
print(classes[int(predict)])
输出即为预测的标签。
其实预测结果也可以用 softmax 表示,输出10个概率:
with torch.no_grad():
    outputs = net(im)
    predict = torch.softmax(outputs, dim=1)
print(predict)