Spring Boot学习篇(八)
Spring Boot学习篇(八)
1.thymeleaf模板引擎使用篇(二)
1.1 配置通过地址栏直接访问html页面
1.1.1 在zlz包下创建filter包,其目录结构如下所示

1.1.2 在filter包下创建HTMLFilter类,其内容如下所示
package com.zlz.filter;

import javax.servlet.*;
import javax.servlet.http.HttpServletRequest;
import java.io.IOException;
//①实现Filter接口 是javax下的这个
public class HTMLFilter implements Filter {
    //②重写doFilter方法
    @Override
    public void doFilter(ServletRequest servletRequest, ServletResponse servletResponse, FilterChain filterChain) throws IOException, ServletException {
        //③ 拿到请求的地址,
        HttpServletRequest request=(HttpServletRequest) servletRequest;
        /*getRequestURI方法只拿localhost:8080后面的地址
        如http:localhost:8080/abc/index.html 拿的内容是/abc/index.html
        */
        String requestURI = request.getRequestURI();
        System.out.println("当前地址:"+requestURI);
        //④判断是否是html请求,若是则对信息出来后转发到控制器中,通过控制器去进行页面的跳转
        if (requestURI.endsWith(".html")){
            /*将页面名称截取下来 找到的.的位置 lastIndexOf也是可以的*/
            String pageName=requestURI.substring(1,requestURI.indexOf(".html"));
            System.out.println("截取的代码"+pageName);
            request.setAttribute("pageName", pageName);
            request.getRequestDispatcher("/tohtml").forward(request, servletResponse);
            /*阻止继续向后执行*/
            return;
        }
        //⑤若不是html请求就放行
        filterChain.doFilter(request, servletResponse);
    }
}
1.1.3 在WelcomeController类中加入如下代码(通过视图解析器去进行页面跳转)
/*专门跳页面的控制器方法*/
@RequestMapping("tohtml")
public String tohtml(HttpServletRequest request){
    return  (String)request.getAttribute("pageName");
}
1.1.4 完整的WelcomeController类代码如下所示
package com.zlz.controller;

import org.springframework.stereotype.Controller;
import org.springframework.web.bind.annotation.RequestMapping;

import javax.servlet.http.HttpServletRequest;

@Controller
public class WelcomeController {
    //访问localhost:8080 默认进入b.html,默认没有配置视图解析器
    @RequestMapping("/")
    public String welcome(){
        //默认进入扫描页面
        return "b";
    }
    /*专门跳页面*/
    @RequestMapping("tohtml")
    public String tohtml(HttpServletRequest request){
        return  (String)request.getAttribute("pageName");
    }

}
1.1.5 在config包下创建FilterConfig类(配置页面过滤),其内容如下所示
package com.zlz.config;

import com.zlz.filter.HTMLFilter;
import org.springframework.boot.web.servlet.FilterRegistrationBean;
import org.springframework.context.annotation.Bean;
import org.springframework.context.annotation.Configuration;
//①加上Configuration注解
@Configuration
public class FilterConfig {
    /*②加上Bean注解 代表在容器中创建FilterRegistrationBean类型的组件*/
    @Bean
    public FilterRegistrationBean<HTMLFilter> html(){
        FilterRegistrationBean<HTMLFilter> html=new FilterRegistrationBean<>();
        //③ 设置过滤器处理类
        html.setFilter(new HTMLFilter());
        //④ 设置过滤器的过滤器地址,其含义如下
        /*  /*是会拦截所有文件的(含js文件、css文件等静态资源文件以及.html文件)
     然后拦截后交由HTMlFilter类里面的doFilter方法去进行处理*/
        html.addUrlPatterns("/*");
        return html;
    }
}
1.1.6 访问测试(出现如下图所示界面,代表配置成功)

1.2 获取域中的数据
1.2.0 SongsController类的基本结构
package com.zlz.controller;

import org.springframework.ui.Model;
import org.springframework.web.bind.annotation.RequestMapping;
import org.springframework.stereotype.Controller;
@Controller
@RequestMapping("/songs")
public class SongsController {
}
1.2.1 request域
a SongsController类中的代码
@RequestMapping("find01")
public String find01(Model m){
   /*保存在model中的数据的有效范围是转发,视图解析器走的就是转发*/
   m.addAttribute("name","zlz");
   return "getdata";
}
b 在templates文件夹下创建getdata.html文件,其内容如下所示
DOCTYPE html>
<html lang="en" xmlns:th="http://www.thymeleaf.org">
<head>
    <meta charset="UTF-8">
    <title>测试在thymeleaf中获取数据title>
head>
<body>

    <h3 th:text="'您的姓名'+${name}">h3>
body>
html>
c 启动程序并在地址栏中输入localhost:8080/songs/find01地址后

1.2.2 session域
a SongsController类中的代码
  @RequestMapping("find02")
    public String find02(HttpSession session) {
        /*设置到session域中的方法是setAttribute,设置到request域中的方法是addAttribute*/
        session.setAttribute("age",22);
        return "getdata";
    }
b 在templates文件夹下创建getdata.html文件,其内容如下所示
DOCTYPE html>
<html lang="en" xmlns:th="http://www.thymeleaf.org">
<head>
    <meta charset="UTF-8">
    <title>测试在thymeleaf中获取数据title>
head>
<body>

    <h3 th:text="'您的年龄: '+${session.age}">h3>
body>
html>
c 启动程序并在地址栏中输入localhost:8080/songs/find02地址后

1.3 if条件判断
1.3.1 SongsController类的内容如下所示
package com.zlz.controller;

import org.springframework.ui.Model;
import org.springframework.web.bind.annotation.RequestMapping;
import org.springframework.stereotype.Controller;

import javax.servlet.http.HttpSession;
@Controller
@RequestMapping("/songs")
public class SongsController {
    //if条件测试
    @RequestMapping("ifcondition")
    public String ifcondition(HttpSession session) {
        session.setAttribute("age",23);
        return "ifcondition";
    }
}
1.3.2 ifcondition.html代码
DOCTYPE html>
<html lang="en" xmlns:th="http://www.thymeleaf.org">
<head>
<meta charset="UTF-8">
<title>if条件判断的使用title>
head>
<body>
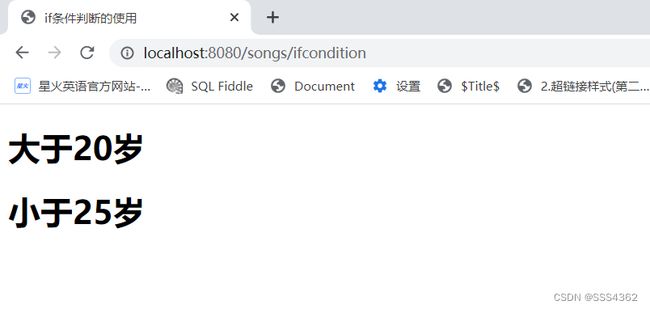
<h1 th:if="${session.age>=20}">大于20岁h1>
<h1 th:unless="${session.age>=25}">小于25岁h1>
body>
html>
1.3.3 启动程序并在地址栏中输入localhost:8080/songs/ifconditon地址后
1.4 单选框按钮,默认选中
1.4.1 SongsController类的内容如下所示
package com.zlz.controller;

import org.springframework.ui.Model;
import org.springframework.web.bind.annotation.RequestMapping;
import org.springframework.stereotype.Controller;

import javax.servlet.http.HttpSession;
@Controller
@RequestMapping("/songs")
public class SongsController {
    //单选框默认选中
    @RequestMapping("radioTest")
    public String radioTest(HttpSession session) {
        session.setAttribute("sex","男");
        return "radioTest";
    }
}
1.4.2 radioTest.html代码
DOCTYPE html>
<html lang="en" xmlns:th="http://www.thymeleaf.org">
<head>
    <meta charset="UTF-8">
    <title>单选框默认选中测试title>
head>
<body>

     <input type="radio" name="sex" th:checked="${session.sex=='男'}" value="男">男
     <input type="radio" name="sex" th:checked="${session.sex eq '女'}" value="女">女
body>
html>
1.4.3 启动程序并在地址栏中输入localhost:8080/songs/radioTest地址后

1.5 复选框按钮,默认选中
1.5.0 判断list集合是否有该元素的语法
${#lists.contains(集合对象, 要判断的值)}
1.5.1 SongsController类的内容如下所示
package com.zlz.controller;

import org.springframework.ui.Model;
import org.springframework.web.bind.annotation.RequestMapping;
import org.springframework.stereotype.Controller;

import javax.servlet.http.HttpSession;
import java.util.ArrayList;
import java.util.List;
@Controller
@RequestMapping("/songs")
public class SongsController {
    //复选框默认选中
    @RequestMapping("checkboxTest")
    public String checkboxTest(HttpSession session)
    {
        List list=new ArrayList();
        list.add("song");
        list.add("dance");
        list.add("basketball");
        session.setAttribute("habits", list);
        return "checkboxTest";
    }
}
1.5.2 checkboxTest.html代码
DOCTYPE html>
<html lang="en" xmlns:th="http://www.thymeleaf.org">
<head>
    <meta charset="UTF-8">
    <title>复选框默认选中测试title>
head>
<body>
      <input type="checkbox" name="habbit" value="songs" th:checked="${#lists.contains(session.habits,'song')}">唱歌
      <input type="checkbox" name="habit" value="dance" th:checked="${#lists.contains(session.habits,'dance')}">跳舞
      <input type="checkbox" name="habit" value="basketball" th:checked="${#lists.contains(session.habits,'basketball')}">打篮球
body>
html>
1.5.3 启动程序并在地址栏中输入localhost:8080/songs/checkboxTest地址后

1.6 下拉框 默认选中
1.6.1 SongsController类的内容如下所示
package com.zlz.controller;

import org.springframework.ui.Model;
import org.springframework.web.bind.annotation.RequestMapping;
import org.springframework.stereotype.Controller;

import javax.servlet.http.HttpSession;
import java.util.ArrayList;
import java.util.HashMap;
import java.util.List;
import java.util.Map;

@Controller
@RequestMapping("/songs")
public class SongsController {
    //下拉框默认选中
    @RequestMapping("selectTest")
    public String selectTest(HttpSession session)
    {
        Map<String,String> provinces=new HashMap();
        provinces.put("001", "湖北省");
        provinces.put("002", "湖南省");
        provinces.put("003", "江西省");
        provinces.put("004", "浙江省");
        provinces.put("005", "江苏省");
        //把需要在下拉框展示的数据保存在session域名
        session.setAttribute("provinces", provinces);
        //存储默认选中的值
        session.setAttribute("choice", "湖南省");
        return "selectTest";
    }
}
1.6.2 selectTest.html代码
DOCTYPE html>
<html lang="en" xmlns:th="http://www.thymeleaf.org">
<head>
    <meta charset="UTF-8">
    <title>Titletitle>
head>
<body>
      <select name="province">
          <option value="0">请选择省份option>

          <option th:each="p:${session.provinces}"
                  th:value="${p.key}"
                  th:text="${p.value}"
                  th:selected="${session.choice} eq ${p.value}"
          >option>
      select>
body>
html>
1.6.3 启动程序并在地址栏中输入localhost:8080/songs/selectTest地址后

1.7 自定义分页显示数据
1.7.1 SongsController类的内容如下所示
package com.zlz.controller;

import com.baomidou.mybatisplus.core.metadata.IPage;
import com.baomidou.mybatisplus.extension.plugins.pagination.Page;
import com.zlz.entity.Songs;
import com.zlz.service.ISongsService;
import org.springframework.beans.factory.annotation.Autowired;
import org.springframework.ui.Model;
import org.springframework.web.bind.annotation.PathVariable;
import org.springframework.web.bind.annotation.RequestMapping;
import org.springframework.stereotype.Controller;

import javax.servlet.http.HttpSession;
import java.util.ArrayList;
import java.util.HashMap;
import java.util.List;
import java.util.Map;

@Controller
@RequestMapping("/songs")
public class SongsController {
    //分页展示数据
    @Autowired
    ISongsService songsService;
    @RequestMapping({"find03/{pageIndex}","find03"})
    public String find03(HttpSession session, @PathVariable(required = false) Integer pageIndex){
        if (pageIndex == null) {
            pageIndex=1;
        }
        IPage<Songs> page=new Page(pageIndex,10);
        songsService.page(page);
        //查完数据后,page对象有了总页码数、当前页码数、分页条数这些数据,具体数据在records里面
        session.setAttribute("page", page);
        System.out.println(page);
        return "paging";
    }

}
1.7.2 paging.html代码
DOCTYPE html>
<html lang="en" xmlns:th="http://www.thymeleaf.org">
<head>
    <meta charset="UTF-8">
    <title>分页展示数据库的数据title>
head>
<body>
    <table border="1px" cellspacing="0" width="90%">
        <tr>
            <th>编号th>
            <th>歌曲名th>
            <th>歌手名th>
            <th>发行时间th>
            <th>编辑th>
        tr>

        <tr th:each="p:${session.page.records}">
            <th th:text="${p.id}">th>
            <th th:text="${p.name}">th>
            <th th:text="${p.singerName}">th>
            <th th:text="${p.releaseDate}">th>
            <th>th>
        tr>
    table>
    <div style="text-align: center">
        当前页面<span th:text="${session.page.current}">span>
        共<span th:text="${session.page.pages}">span>页
        <div>

            <a href="/songs/find03/1">首页a>
            <a th:href="'/songs/find03/'+${session.page.current -1}">上一页a>
            <a th:href="'/songs/find03/'+${session.page.current+1}">下一页a>
            <a th:href="'/songs/find03/'+${session.page.pages}">尾页a>
        div>
    div>
body>
html>
1.7.3 启动程序并在地址栏中输入localhost:8080/songs/find03地址后

1.7.4 测试分页效果
a 点击下一页两次后,进入如下界面

b 接着点击上一页界面,进入如下界面

c 点击尾页,进入如下界面

d 点击首页,进入如下界面

1.8 js脚本中(内部式)获取域中的值
1.8.0 注意点
①这个js脚本只能是内部js脚本写法,不能是外部js脚本
②如果想要在外部js脚本中获取域中的值时,应采取下列步骤来实现
  a 通过${}获取到域中的值并把值存放在一个隐藏域标签中
  b 在外部js脚本中通过选择器找到标签并取出值,此时域中的值就能在js脚本中使用了
1.8.1 关键语法
 在script标签中加上th:inline="javascript"
 获取值的方法: [[${域对象}]]
1.8.2 SongsController类的内容如下所示
package com.zlz.controller;

import com.baomidou.mybatisplus.core.metadata.IPage;
import com.baomidou.mybatisplus.extension.plugins.pagination.Page;
import com.zlz.entity.Songs;
import com.zlz.service.ISongsService;
import org.springframework.beans.factory.annotation.Autowired;
import org.springframework.ui.Model;
import org.springframework.web.bind.annotation.PathVariable;
import org.springframework.web.bind.annotation.RequestMapping;
import org.springframework.stereotype.Controller;

import javax.servlet.http.HttpSession;
import java.util.ArrayList;
import java.util.HashMap;
import java.util.List;
import java.util.Map;

@Controller
@RequestMapping("/songs")
public class SongsController {
    //测试js脚本中获取值
    @RequestMapping("find04")
    public String find04(Model m,HttpSession session) {
        m.addAttribute("name","zlz");
        session.setAttribute("motto", "世上无难事,只怕有心人");
        List list=new ArrayList();
        list.add("1");
        list.add("4");
        list.add("3");
        session.setAttribute("numbers",list);
        Map map=new HashMap();
        map.put("001","长沙");
        map.put("002","株洲");
        map.put("003","湘潭");
        session.setAttribute("citys", map);
        return "jsTest";
    }

}
1.8.3 jsTest.html代码
DOCTYPE html>
<html lang="en" xmlns:th="http://www.thymeleaf.org">
<head>
    <meta charset="UTF-8">
    <title>js内部脚本中测试拿到域中的值title>
head>
<body>
    <h3>js内部脚本获取域中的值h3>

    <script th:inline="javascript">
        var name=[[${name}]];
        var motto=[[${session.motto}]];
        var numbers=[[${session.numbers}]];
        var citys=[[${session.citys}]];
        console.log("名字: "+name);
        console.log("格言: "+motto);
        //使用forEach遍历arrayList集合
        numbers.forEach(function(value,index){
            /*index是下标*/
            console.log(value);
        })
        /*通过for in获取map集合的值*/
        for(var key in citys){
            console.info(key+":"+citys[key]);
        }
    script>
body>
html>
1.8.4 启动程序并在地址栏中输入localhost:8080/songs/find04地址后

1.9 如何在一个网页中引入另外一个网页???
1.9.0 注意点
引入公共页面,本质上是需要啥就引入啥,并不会把整个公共页面都给引入进去
公共页面中可以有公共头部、公共尾部啥的
1.9.1 公共的页面代码general.html
DOCTYPE html>
<html lang="en" xmlns:th="http://www.thymeleaf.org">
<body>


    <div th:fragment="header">

        <style>
            body{
                margin:0;
            }
            header{height: 100px;background-color: deepskyblue}
        style>
       <header>
           这里是头部
       header>
    div>

    <div th:fragment="footer">

        <style>
            body{
                margin:0;
            }
            footer{height: 100px;background-color: red}
        style>
        <footer>
            这里是尾部
        footer>
    div>
body>
html>
1.9.2 常用的三种引入方式
a 引入本标签及其引用片段
a.1 语法
th:insert="公共页面名称::引入的片段名"
a.2 测试页面代码
DOCTYPE html>
<html lang="en" xmlns:th="http://www.thymeleaf.org">
<head>
    <meta charset="UTF-8">
    <title>引入页面测试title>
head>
<body>
     <div th:insert="general::header" id="a1">div>
     <h3>引入页面测试h3>
body>
html>
a.3 测试结果

b 仅引入引用片段(替换本标签)
b.1 语法
th:replace="公共页面名称::引入的片段名"
b.2 测试页面代码
DOCTYPE html>
<html lang="en" xmlns:th="http://www.thymeleaf.org">
<head>
    <meta charset="UTF-8">
    <title>引入页面测试title>
head>
<body>

     <h3>引入页面测试h3>
     <div th:replace="general::footer" id="b1">div>
body>
html>
b.3 测试结果

c 保留原标签和引用标签的内容
c.1 语法
th:include="公共页面名称::引入的片段名"
c.2 测试页面代码
DOCTYPE html>
<html lang="en" xmlns:th="http://www.thymeleaf.org">
<head>
    <meta charset="UTF-8">
    <title>引入页面测试title>
head>
<body>

     <h3>引入页面测试h3>

     <div th:include="general::footer" id="b1">div>
body>
html>
c.3 测试结果

2 简单使用redis
2.1 在pom.xml文件中导入以下依赖
<dependency>
    <groupId>org.springframework.bootgroupId>
    <artifactId>spring-boot-starter-data-redisartifactId>
dependency>
2.2 在config包下创建redisConfig配置类
2.2.1 配置原因
增强redis数据的可读性,默认有jdk序列化器但是redis数据可读性很低
2.2.2 redisconfig配置类内容如下所示
package com.zlz.config;

import org.springframework.context.annotation.Bean;
import org.springframework.context.annotation.Configuration;
import org.springframework.data.redis.connection.RedisConnectionFactory;
import org.springframework.data.redis.core.RedisTemplate;
import org.springframework.data.redis.serializer.GenericJackson2JsonRedisSerializer;
import org.springframework.data.redis.serializer.StringRedisSerializer;

@Configuration
public class RedisConfig {
    @Bean
    public RedisTemplate<String,Object> redisTemplate(RedisConnectionFactory rcf){
        RedisTemplate<String,Object> redis = new RedisTemplate<>();
        redis.setConnectionFactory(rcf);
        // 创建序列化器
        StringRedisSerializer string = new StringRedisSerializer();
        // 值 使用的序列化器 实体类不需要实现序列化
        GenericJackson2JsonRedisSerializer jack = new GenericJackson2JsonRedisSerializer();
        // 设置序列化器
        redis.setKeySerializer(string);
        redis.setHashKeySerializer(string);
        redis.setValueSerializer(jack);
        redis.setHashValueSerializer(jack);
        return redis;
    }
}
2.2.3 在test包下的java文件夹下创建MyTest.java文件,其内容如下所示
@Autowired
RedisTemplate<String,Object> redisTemplate;
@Test
public void redis(){
    Songs s = songsService.getById(888);
    redisTemplate.opsForValue().set("songs:888", s);
}
2.2.4 测试
a 打开redis服务,正常打开的界面如下所示

b.点击redis方法运行后,控制台截图如下所示

c. 进入redis客户端查看数据是否保存成功了
