Mac开发配置各种问题记录(安装VSCode、安装postman、安装git、git生成SSH公钥、安装NVM和Homebrew、安装NVM和Homebrew)
目录
-
- 一、 连接公司的VPN
- 二、安装VSCode
- 三、解决Mac电脑上无法访问github问题
- 四、安装postman
- 五、安装git
- 六、git生成SSH公钥,克隆项目到本地关联远程仓库
- 七、安装NVM和Homebrew
- 八、使用nvm安装node
今天拿到公司的mac电脑,没用过mac的我,开启了新手小白艰难又烫手配置开发环境的一天,配置了一天表示很心累,记录一下,以后换电脑好配置
一、 连接公司的VPN
各自公司都不一样在这里就不展示了哈
二、安装VSCode
这个也不演示了,除了下载慢一点没啥大毛病,这里附上安装包:
链接:https://pan.baidu.com/s/1zWzUJdMo4KFi-w4wg_WycA
提取码:9k85

只要在旧电脑上的vscode上登陆自己的github账号,同步自己的配置信息,就可以在新电脑的VSCode上同步旧电脑的配置(从这里开始开启了我访问github漫长的斗争,挣扎半天就是访问不了!!!)
三、解决Mac电脑上无法访问github问题
1.打开mac电脑终端
好的,没用过mac的我不会,又开始了百度,参考链接:Mac电脑打开终端的三种方法
2.修改hosts文件输入sudo vi /etc/hosts ,此时需要输入密码
3.点击电脑上的i插入以下文本,完成后点击esc然后输入:wq退出
185.199.108.154              github.githubassets.com
140.82.112.21                central.github.com
185.199.108.133              desktop.githubusercontent.com
185.199.108.153              assets-cdn.github.com
185.199.108.133              camo.githubusercontent.com
185.199.108.133              github.map.fastly.net
151.101.1.194                github.global.ssl.fastly.net
140.82.113.3                 gist.github.com
185.199.108.153              github.io
140.82.112.4                 github.com
140.82.114.5                 api.github.com
185.199.108.133              raw.githubusercontent.com
185.199.108.133              user-images.githubusercontent.com
185.199.108.133              favicons.githubusercontent.com
185.199.108.133              avatars5.githubusercontent.com
185.199.108.133              avatars4.githubusercontent.com
185.199.108.133              avatars3.githubusercontent.com
185.199.108.133              avatars2.githubusercontent.com
185.199.108.133              avatars1.githubusercontent.com
185.199.108.133              avatars0.githubusercontent.com
185.199.108.133              avatars.githubusercontent.com
140.82.113.9                 codeload.github.com
3.5.8.193                    github-cloud.s3.amazonaws.com
52.216.43.217                github-com.s3.amazonaws.com
3.5.3.216                    github-production-release-asset-2e65be.s3.amazonaws.com
3.5.6.131                    github-production-user-asset-6210df.s3.amazonaws.com
3.5.17.101                   github-production-repository-file-5c1aeb.s3.amazonaws.com
185.199.108.153              githubstatus.com
140.82.114.18                github.community
185.199.108.133              media.githubusercontent.com
185.199.108.133              objects.githubusercontent.com
185.199.108.133              raw.github.com
20.80.64.28                  copilot-proxy.githubusercontent.com
124.160.65.50 github.com
192.30.253.112 github.com
151.101.113.194 github.global.ssl.fastly.net
199.232.68.133 raw.githubusercontent.com
185.199.109.133 raw.githubusercontent.com
4.终端中输入sudo killall -HUP mDNSResponder 刷新dns
此时已经可以访问github了
参考链接:GitHub加速
Mac安装Homebrew
四、安装postman
安装也很简单,傻瓜式安装,跳过不演示了,安装包在此
链接:https://pan.baidu.com/s/1zWzUJdMo4KFi-w4wg_WycA
提取码:9k85

五、安装git
一开始我看的是这个Mac安装Git,让我安装homebrew,安装了一个世纪都安装不来下来,最后我放弃了,我选择佛系安装。
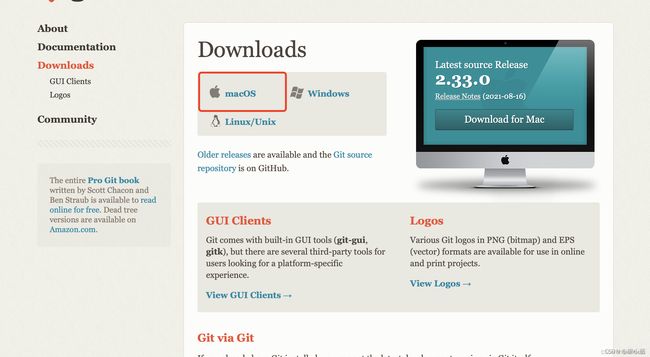
1.首先来到git的官方网址链接: git下载链接。点击macOS。
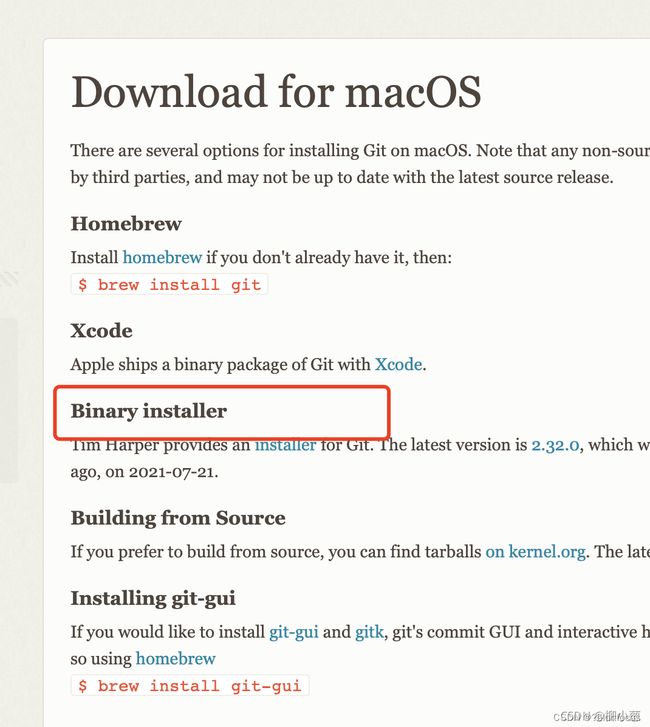
2.选择安装方式,因为我没有homebrew,所以我就选择文件直接安装,点击installer。
3.点击download即可
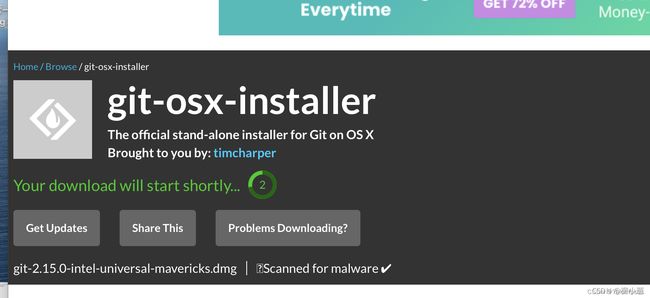
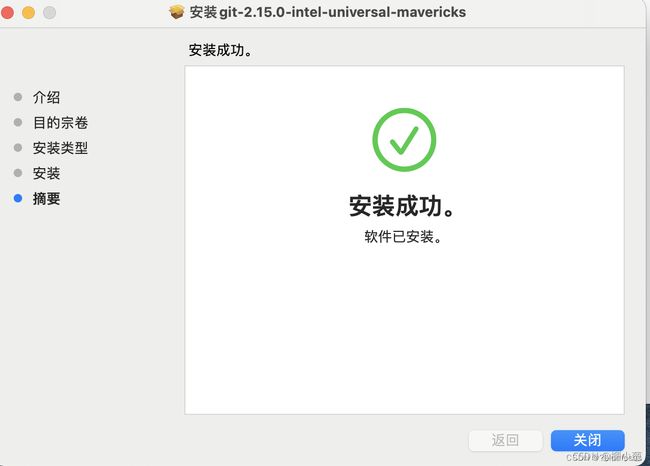
5. 在终端中输入git --version出现版本号即可。
![]()
下不下来的同学,安装包在此
链接:https://pan.baidu.com/s/1zWzUJdMo4KFi-w4wg_WycA
提取码:9k85
参考链接:
参考一:MacBook安装git教程,git学习这一篇就够了!
参考二:三种常见的 Mac 安装 git 工具的方法
六、git生成SSH公钥,克隆项目到本地关联远程仓库
如果是已经有过ssh公钥的:
1.进入.ssh目录
打开Mac终端(Terminal),输入以下命令:
cd ~/.ssh
2.查看是否有已存在的公钥
输入以下命令查看目录下的所有文件
ls
3.输入一下命令获取到公钥
cat id_rsa.pub
如果有公钥,想要新的公钥
4.删除旧公钥
依次输入以下命令删除旧公钥:
mkdir key_backup
cp id_rsa* key_backup
rm id_rsa*
如果还未有ssh公钥
1.打开终端连接到自己的github账户
git config --global user.name "xxxx"
git config --global user.email "[email protected]"
2.通过终端命令创建ssh key
ssh-keygen -t rsa -C "你的邮箱"
然后会要求确认路径和输入密码,我们这使用默认的一路回车就行。成功的话会在~/下生成.ssh文件夹。(如果你设置了密码,以后一些git操作会需要密码,如:提交代码)
3.完成公钥的设置后
前往**~/.ssh/id_rsa.pub**,打开id_rsa.pub
cat id_rsa.pub
查看生成的新公钥,复制里面的内容
4、添加ssh密钥,把复制的内容放入密钥中,最后点击添加密钥
5、选择要clone的文件,复制ssh命令
6、终端cd到要保存文件的路径下面
是的没错,终端里面clone,我没找到git bash here
git clone [email protected]:xxxx.git
参考链接:
参考一:Mac环境下git生成SSH公钥,克隆项目到本地关联远程仓库
参考二:<Mac>使用git clone到本地
七、安装NVM和Homebrew
是的,你没看错,上面我放弃的的地方,我又开始继续斗争了,原因是我想安装node,但是开发可能会切换不同版本的node,所以我选择安装nvm,根据官网的方法我安装不下来,所以,最后还是要安装homebrew
好的,接下来开始我心酸的安装过程
1.安装nvm
终端输入以下命令
curl -o- https://raw.githubusercontent.com/nvm-sh/nvm/v0.39.1/install.sh | bash
好的开始报错:
报错一:
curl: (35) LibreSSL SSL_connect: SSL_ERROR_SYSCALL in connection to
raw.githubusercontent.com:443
fatal: unable to access ‘https://github.com/nvm-sh/nvm.git/’: LibreSSL
SSL_connect: SSL_ERROR_SYSCALL in connection to github.com:443 Failed
to clone nvm repo. Please report this!
试了好几遍,都是上面两个错,经过以上两个报错后,我又看到这篇文章:Mac配置nvm包管理,最终我还是选择下载homebrew
2.开始安装homebrew
/bin/bash -c "$(curl -fsSL https://raw.githubusercontent.com/Homebrew/install/HEAD/install.sh)"
没想到吧,我又报错了,又是尝试好几遍,一直报错
error: RPC failed; curl 56 LibreSSL SSL_read: Connection reset by
peer, errno 54 fatal: The remote end hung up unexpectedly fatal: early
EOF fatal: index-pack failed Failed during: git fetch --force origin
refs/heads/master:refs/remotes/origin/master

好的,一直报错一直尝试,最后的最后,找了一堆,终于让我看到了这篇文章:MacOS 安装homebrew报错:curl: (35) LibreSSL SSL_connect: SSL_ERROR_SYSCALL in connection to raw.githubusercontent.com:443,简直救我狗命,重点来了!!!
终端输入:
/bin/bash -c "$(curl -fsSL https://gitee.com/cunkai/HomebrewCN/raw/master/Homebrew.sh)"
               开始执行Brew自动安装程序
              [[email protected]]
           ['2021-12-15 06:51:31']['12.1']
        https://zhuanlan.zhihu.com/p/111014448


请选择一个下载镜像,例如中科大,输入1回车。
源有时候不稳定,如果git克隆报错重新运行脚本选择源。cask非必须,有部分人需要。
1、中科大下载源 2、清华大学下载源 3、北京外国语大学下载源  4、腾讯下载源(不推荐) 5、阿里巴巴下载源(不推荐 缺少cask源)

请输入序号: 1(选择一个镜像源)

  你选择了中国科学技术大学下载源

!!!此脚本将要删除之前的brew(包括它下载的软件),请自行备份。
->是否现在开始执行脚本(N/Y)Y
然后就一直等待安装,最后显示 本地软件库列表:brew ls 查找软件:brew search
google(其中google替换为要查找的关键字) 查看brew版本:brew -v 更新brew版本:brew update
安装cask软件:brew install --cask firefox 把firefox换成你要安装的欢迎右键点击下方地址-打开URL 来给点个赞 https://zhuanlan.zhihu.com/p/111014448安装成功 但还需要重启终端 或者 运行 source /Users/baiying/.zprofile 否则可能无法使用
终端运行source /Users/baiying/.zprofile ,重启终端,输入brew -v
惊不惊喜,意不意外我又报错了
atal: unsafe repository
(‘/opt/homebrew/Library/Taps/homebrew/homebrew-core’ is owned by
someone else) To add an exception for this directory, call:git config --global --add safe.directory
/opt/homebrew/Library/Taps/homebrew/homebrew-core
Homebrew/homebrew-core (no Git repository) fatal: unsafe repository
(‘/opt/homebrew/Library/Taps/homebrew/homebrew-cask’ is owned by
someone else) To add an exception for this directory, call:git config --global --add safe.directory
/opt/homebrew/Library/Taps/homebrew/homebrew-cask
Homebrew/homebrew-cask (no Git repository)
git config --global --add safe.directory /opt/homebrew/Library/Taps/homebrew/homebrew-core
git config --global --add safe.directory /opt/homebrew/Library/Taps/homebrew/homebrew-cask
输入brew -v,至此homebrew安装完成
参考链接:mac 安装SVN报错Error: Command failed with exit 128: git
3.重新开始安装nvm
1)终端输入brew install nvm
又开始报错,好的没事,我已经习惯了(失败乃成功他祖宗)
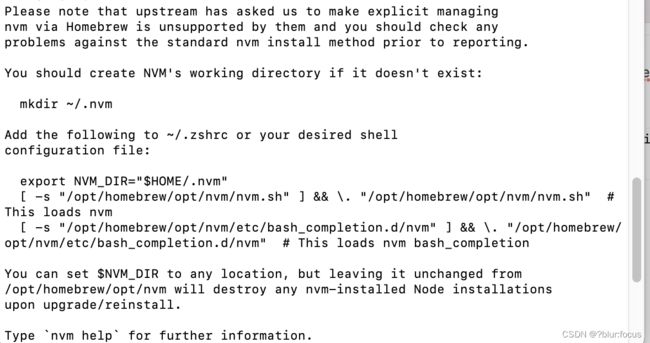
Please note that upstream has asked us to make explicit managing nvm
via Homebrew is unsupported by them and you should check any problems
against the standard nvm install method prior to reporting.You should create NVM’s working directory if it doesn’t exist:
mkdir ~/.nvm
Add the following to ~/.zshrc or your desired shell configuration
file:export NVM_DIR=“$HOME/.nvm” [ -s “/opt/homebrew/opt/nvm/nvm.sh” ]
&& . “/opt/homebrew/opt/nvm/nvm.sh” # This loads nvm [ -s
“/opt/homebrew/opt/nvm/etc/bash_completion.d/nvm” ] && .
“/opt/homebrew/opt/nvm/etc/bash_completion.d/nvm” # This loads nvm
bash_completionYou can set $NVM_DIR to any location, but leaving it unchanged from
/opt/homebrew/opt/nvm will destroy any nvm-installed Node
installations upon upgrade/reinstall.Type
nvm helpfor further information.
解决方法:
终端输入
vim ~/.zshrc
添加以下内容
export NVM_DIR="$HOME/.nvm"
[ -s "$NVM_DIR/nvm.sh" ] && \. "$NVM_DIR/nvm.sh"  # This loads nvm
[ -s "$NVM_DIR/bash_completion" ] && \. "$NVM_DIR/bash_completion"  # This loads nvm bash_completion
然后执行 source ~/.zshrc
2.最后再次输入brew install nvm安装nvm
输入nvm -v
安装成功,留下激动的泪水
![]()
八、使用nvm安装node
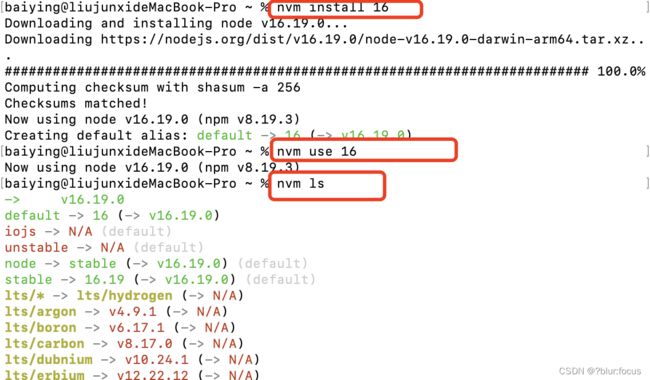
这里只做简单描述,网上有很多教程,自己去找吧,我累了。。。
1.nvm install 你想下的node版本
2.nvm use 你刚刚下的node版本
3.node -v npm-v 查看是否安装成功

注意:给出的参考链接,建议出现问题的同学都看一遍,因为我们的情况有可能不一样,我能解决的方法,你们不一定能解决

