SpringBoot 自定义实现一个启动器starter 教程。
说明:springboot 官方给我们提供了很多启动器如:elasticsearch,aop,redis...等等
但是实际开发中,可能不同公司的业务不同需要定制化一个通用的专属的启动器来满足公司内部使用,提高开发效率。
本文将介绍怎么自定义实现一个启动器的demo流程。
一:项目结构,模式。
空项目:mystarter(用来把 启动器和自动配置模块 项目放在一起,明了)
里面有两个module:
1:启动器 sglhello-spring-boot-starter
作用:只用来做依赖导入(启动器里面依赖自动配置模块,这样外部项目直接引用启动器就可以了);
命名规范:
springboot官方的启动器: spring-boot-starter-XXX 如:spring-boot-starter-jdbc
我们自定义的启动器:XXX-spring-boot-starter 如:sglhello-spring-boot-starter
2:自动配置模块 sglhello-spring-boot-starter-autoconfigurer
作用:具体实现启动器的业务逻辑
命名规范:
XXX-spring-boot-starter-autoconfigurer
XXX最好跟启动器的XXX保持一致!
二:项目创建
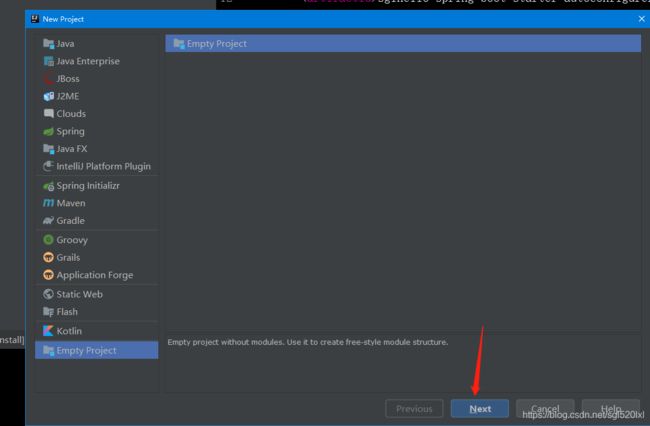
idea里面 File -- New -- Project...
然后选择创建一个空项目:
project name写:mytarter
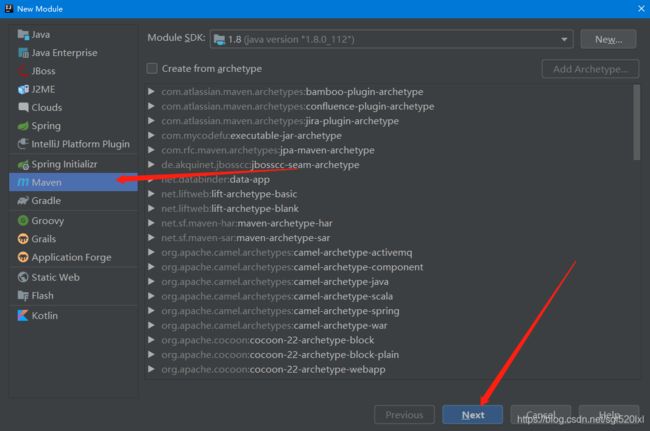
1:先创建一个启动器项目module:
选择普通的Maven项目
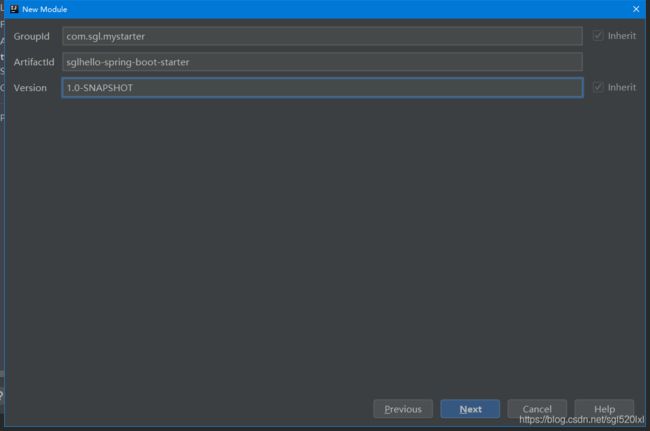
GroupId:com.sgl.mystarter
ArtifactId:sglhello-spring-boot-starter(也就是按照自定义启动器的命名规范创建 XXX-spring-boot-starter)
next之后需要调整下项目名称和路径:
调整为:
然后点击完成,这样启动器我们就创建好了;
2:接着创建一个自动配置模块项目module:
选择 SpringInitializr 然后next
GroupId:com.sgl.mystarter
ArtifactId:sglhello-spring-boot-starter-autoconfigurer
(按照自定配置模块的命名规范创建 XXX-spring-boot-starter-autoconfigurer)
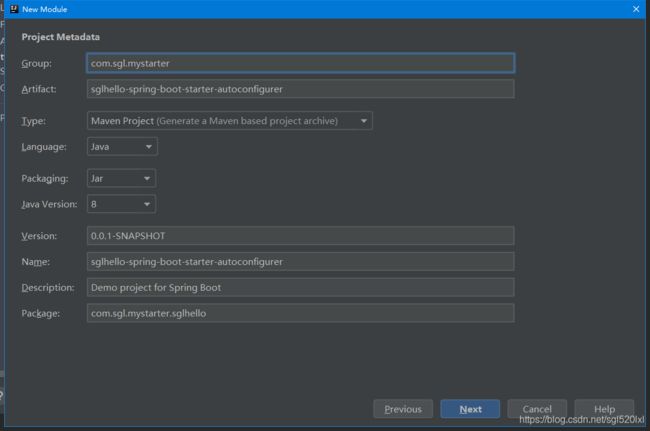
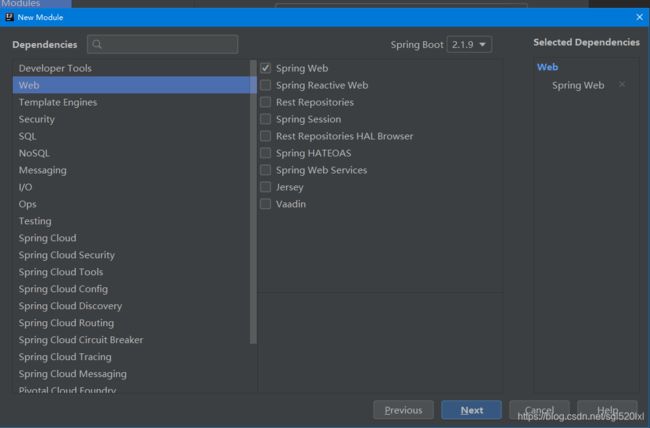
勾选Web -- Spring Web
然后next 然后点finish完成自动配置模块的创建。
三:项目配置
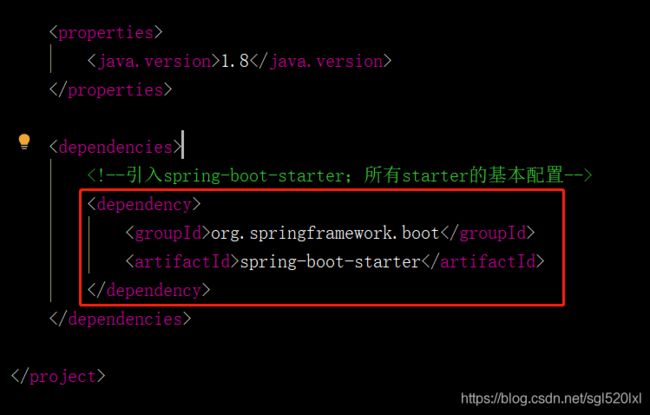
1:配置启动器依赖(启动器配置文件里面添加对自动配置模块项目的依赖)
2:配置自动配置模块项目依赖
注意:这里我们把 dependencies 里面只留一个最基础的springboot对starter的支持就行了
插件的引用,web的依赖都去掉
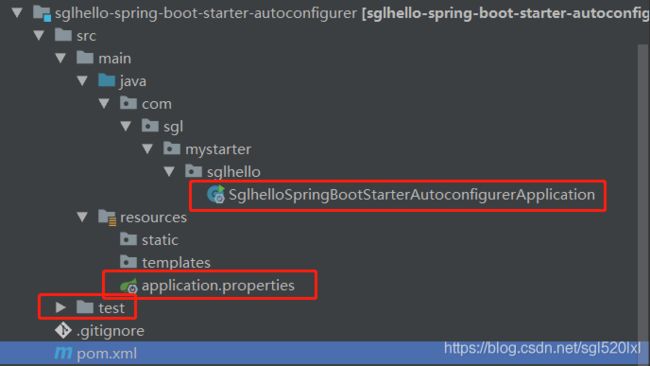
然后我们去掉了web依赖需要清理下目录结构
删除掉test目录,配置文件,和springboot的启动类,这些都不需要
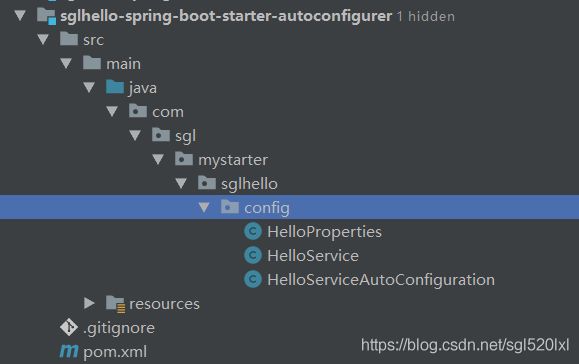
四:编写自动配置模块里的业务逻辑
HelloProperties:
/**
 *@ClassName HelloProperties
 *@Description TODO 读取配置文件里面 sglhello.hello 的内容 并绑定到 HelloProperties对象上
 *@Author Ni Klaus
 *@Date 2019/10/10 0010 下午 19:29
 *@Version 1.0
 */

@ConfigurationProperties(prefix = "sglhello.hello")
public class HelloProperties {
    private String start;
    private String end;

    public String getStart() {
        return start;
    }

    public void setStart(String start) {
        this.start = start;
    }

    public String getEnd() {
        return end;
    }

    public void setEnd(String end) {
        this.end = end;
    }
}
HelloService:
/**
 *@ClassName HelloService
 *@Description TODO 简单业务逻辑实现
 *@Author Ni Klaus
 *@Date 2019/10/10 0010 下午 19:47
 *@Version 1.0
 */
public class HelloService {
    //读取配置类里面的配置信息
    HelloProperties helloProperties;

    public HelloProperties getHelloProperties() {
        return helloProperties;
    }
    //赋值配置对象
    public void setHelloProperties(HelloProperties helloProperties) {
        this.helloProperties = helloProperties;
    }
    //简单业务逻辑
    public String sayHellSgl(String name){
        return helloProperties.getStart()+"-" +name + helloProperties.getEnd();
    }
}
HelloServiceAutoConfiguration:
/**
 *@ClassName HelloServiceAutoConfiguration
 *@Description TODO
 *@Author Ni Klaus
 *@Date 2019/10/10 0010 下午 19:48
 *@Version 1.0
 */
@Configuration//申明这是一个配置类
@ConditionalOnWebApplication//引用启动器的项目是web应用此自动配置模块才生效
@EnableConfigurationProperties(HelloProperties.class)//加载配置对象到容器
public class HelloServiceAutoConfiguration {
    //注入配置对象
    @Autowired
    HelloProperties helloProperties;

    @Bean//方法返回结果对象加载到容器
    public HelloService helloService(){
        //新建业务逻辑处理对象,并返回加载到容器中,
        // 这样引用启动器的项目就可以 @Autowired  HelloService 对象直接使用了
        HelloService helloService = new HelloService();
        helloService.setHelloProperties(helloProperties);
        return helloService;
    }
}
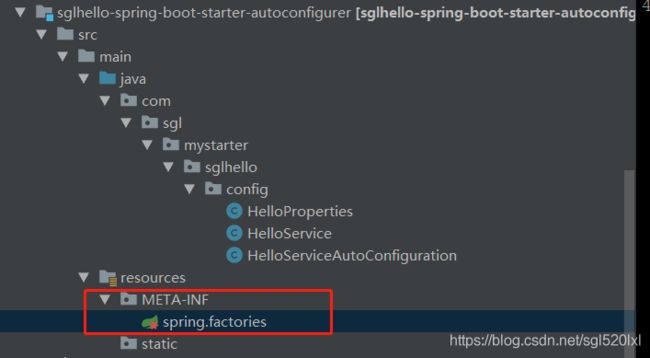
创建XXXAutoConfiguration的扫秒配置
应为springboot再启动的过程中会去扫描项目和所有项目依赖引用的jar包 类路径下的META-INF目录下的 spring.factories
配置读取所有的拦截器,过滤器,自动配置XXXAutoConfiguration 等等
# Auto Configure
org.springframework.boot.autoconfigure.EnableAutoConfiguration=\
com.sgl.mystarter.sglhello.config.HelloServiceAutoConfiguration
流程:
这样其他springboot 项目 引用了启动器,因为启动器 依赖 自动配置模块,然后也会扫描 自动配置模块 的 类路径下的META-INF目录下的 spring.factories HelloServiceAutoConfiguration配置类就会被拿到,然后里面的 helloService() 方法返回的HelloService对象就会被创建并且被@Bean 注解注册到ioc容器里面,这样 springboot 项目 里面就可以 通过@Autowired 注解使用 HelloService 对象了。
五:打包并在其它项目上面引入启动器
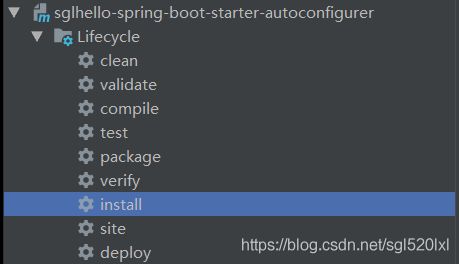
使用maven 的 install 分别顺序 的把 自动配置模块项目 和 启动器 项目 安装到你的本机maven仓库里面
(应为启动器是依赖自动配置模块的,所以先install 自动配置模块再install 启动器)
(如果你的启动器是给开发组用的,最好把 配置模块项目 和 启动器 项目 安装到相应的maven私服仓库就行,这样别的项目引用直接引用启动器就可以了)
六:测试使用
只需要在springboot的项目里添加启动器依赖
            com.sgl.mystarter
            sglhello-spring-boot-starter
            1.0-SNAPSHOT
编写一个测试登录入口:
@RestController
public class Login {
    //直接注入使用启动器已经加载到容器里面的HelloService 对象
    @Autowired
    HelloService helloService;
    @RequestMapping("/login")
    public String login(){
        return helloService.sayHellSgl("科比");
    }
}
然后我们启动这个springboot项目
访问http://127.0.0.1:8080/login
发现我们的启动器已经有效果了,只是没读取到配置信息
想配置什么我只需要在当前这个springboot项目的主配置文件里面配置好就行
应为我们自动配置模块里面设置的sglhello.hello对象相关属性
所以我们可以添加如下配置文件
如:
sglhello.hello.start=NBA
sglhello.hello.end=最棒的篮球运动员
继续启动项目,访问http://127.0.0.1:8080/login
好了,已经可以了!嘿嘿
本教程只是一个SpringBoot 自定义实现一个启动器starter 的demo,如果你的业务逻辑比较复杂,只需要在你的自动配置模块项目里完成你要处理的业务逻辑就行!
本项目源码地址:https://github.com/Hak-L/mystarter

