dlib【正面人脸检测】【特征点检测】【旋转】
需要安装dlib,参考:dlib安装踩坑记录
我想干啥:我想实现人脸识别。
需要做啥:人脸检测、人脸识别
本人只学了python,对于人工智能算是零了解。参考了网上的代码,一点一点的拆解开代码来理解的。适合和我一样的新手来看。路过的大哥发现不对的,欢迎指正。原文参考自:https://blog.csdn.net/liuxiao214/article/details/83411820
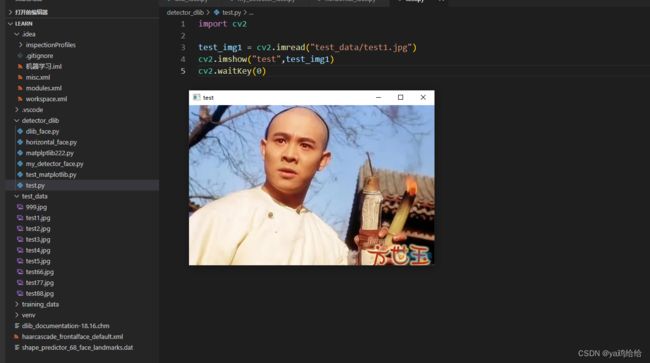
首先我们需要了解如何读取图片并展示:
上代码:
import cv2

test_img1 = cv2.imread("test_data/test1.jpg")  # 会返回一个numpy矩阵,下面的代码就是理解图片像素和矩阵的关系
cv2.imshow("test",test_img1) # 第一个参数是给图片指定一个名字,第二个是要传入一个矩阵
cv2.waitKey(0) # 如果参数为0,则等待用户键盘操作。可以输入具体时间,单位是ms

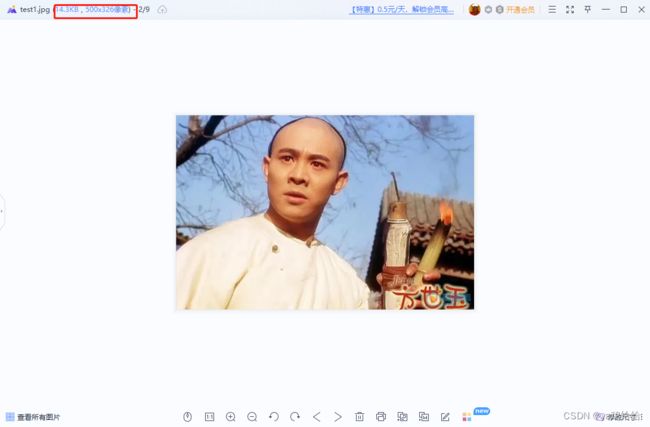
使用matplotlib操作打开图片:可以发现y轴越靠近x轴,值越大。而且有三个属性值,分别为326 500 3
所以,像素500*362的图片,被转换成矩阵后,就变成了326行500列的矩阵。可以打印矩阵长度和单行的长度来验证一下。

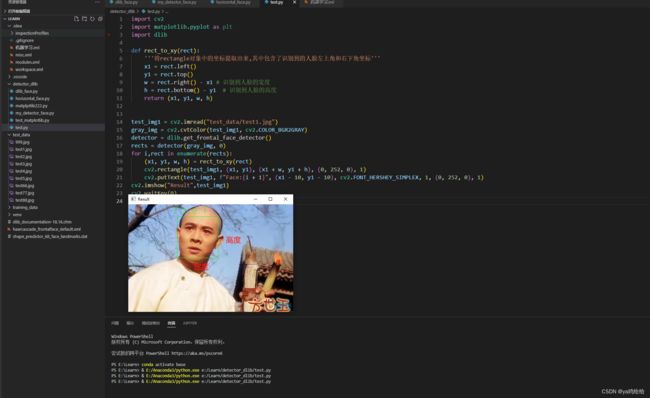
接下来我们对人脸进行检测并画图
上代码:具体字体不需要记住,网上查就行了字体链接
import cv2
import matplotlib.pyplot as plt
import dlib

def rect_to_xy(rect):
    '''将rectangle对象中的坐标提取出来,其中包含了识别到的人脸左上角和右下角坐标'''
    x1 = rect.left()
    y1 = rect.top()
    w = rect.right() - x1 # 识别到人脸的宽度
    h = rect.bottom() - y1  # 识别到人脸的高度
    return (x1, y1, w, h)


test_img1 = cv2.imread("test_data/test1.jpg")
gray_img = cv2.cvtColor(test_img1, cv2.COLOR_BGR2GRAY) # 需要先对图片进行灰度处理
detector = dlib.get_frontal_face_detector() # 获取dlib的正面人脸检测器
rects = detector(gray_img, 0) # 将灰度图片传入  会返回rectangle对象
for i,rect in enumerate(rects): # 循环遍历rectangle对象得到坐标
    (x1, y1, w, h) = rect_to_xy(rect)
    # 参数分别为 图片矩阵,左上角坐标,右下角坐标,框体颜色,框体那个线的粗细
    cv2.rectangle(test_img1, (x1, y1), (x1 + w, y1 + h), (0, 252, 0), 1) # 根据左上角和右下角坐标进行画图
    # 在人脸左上角的上方进行文字描述。参数分别为图片矩阵,具体文字描述,文字坐标,字体,字号,颜色,粗细
    cv2.putText(test_img1, f"Face:{i + 1}", (x1 - 10, y1 - 10), cv2.FONT_HERSHEY_SIMPLEX, 1, (0, 252, 0), 1)
cv2.imshow("Result",test_img1)
cv2.waitKey(0)
下面是图片中含有多张人脸的检测结果:可以发现有三张人脸没有识别到。排查后发现是第17行代码的第二个参数为0导致的,改成1就可以都识别到了。具体什么原因,我也不是很清楚。。。有知道的大哥可以科普一下

将参数改成1之后:

总结:
a.调用cv2.imread读入图片,得到矩阵
b.进行灰度处理
c.获取人脸检测器
d.进行人脸检测,得到rectangle对象
e.处理rectangle对象得到左上角和右下角坐标
f.根据坐标进行绘图并文字描述
识别到人脸之后,我们需要对人脸的68个特征点进行检测并标注
上代码:人脸特征点检测器可以在这下载:在链接最下方
import cv2
import matplotlib.pyplot as plt
import dlib

def rect_to_xy(rect):
    '''将rectangle对象中的坐标提取出来,其中包含了识别到的人脸左上角和右下角坐标'''
    x1 = rect.left()
    y1 = rect.top()
    w = rect.right() - x1 # 识别到人脸的宽度
    h = rect.bottom() - y1  # 识别到人脸的高度
    return (x1, y1, w, h)


test_img1 = cv2.imread("test_data/test5.jpg")
gray_img = cv2.cvtColor(test_img1, cv2.COLOR_BGR2GRAY)
detector = dlib.get_frontal_face_detector()
predictor = dlib.shape_predictor("shape_predictor_68_face_landmarks.dat") # 实例化人脸特征点检测器
rects = detector(gray_img, 1)
for i,rect in enumerate(rects):
    (x1, y1, w, h) = rect_to_xy(rect)
    face = test_img1[y1: y1 + h, x1: x1 + w] # 将人脸区域矩阵切片出来
    rec = dlib.rectangle(0, 0, face.shape[0], face.shape[1]) # 相当于给定一个新区域,定义人脸左上角坐标为(0,0)右下角坐标为像素值
    shape = predictor(face, rec) # 在该区域内进行检测,得到该人脸的68个特征点
    for j in range(68):
        cv2.circle(face, (shape.part(j).x, shape.part(j).y), 1, (0, 0, 252), -1) # 根据索引取出x和y的值进行画图
    cv2.rectangle(test_img1, (x1, y1), (x1 + w, y1 + h), (0, 252, 0), 1)
    cv2.putText(test_img1, f"Face:{i + 1}", (x1 - 10, y1 - 10), cv2.FONT_HERSHEY_SIMPLEX, 1, (0, 252, 0), 1)
cv2.imshow("Result",test_img1)
cv2.waitKey(0)

总结:
a.获取人脸特征点检测器
b.当识别到人脸时,根据坐标对图片进行切片操作获取人脸部分矩阵
c.根据人脸矩阵初始化一个rectangle对象
d.将人脸矩阵和rectangle对象传入predictor中进行特征点检测
e.循环得到1-68个特征点并进行画图
旋转:因为人脸可能会偏左/偏右
上代码:
import cv2
import matplotlib.pyplot as plt
import dlib
import math


def rect_to_xy(rect):
    '''将rectangle对象中的坐标提取出来,其中包含了识别到的人脸左上角和右下角坐标'''
    x1 = rect.left()
    y1 = rect.top()
    w = rect.right() - x1 # 识别到人脸的宽度
    h = rect.bottom() - y1  # 识别到人脸的高度
    return (x1, y1, w, h)

heent = [36, 45, 30, 48, 54] # 分别代表左眼 右眼 鼻子 左嘴 右嘴的索引位置
test_img1 = cv2.imread("test_data/test5.jpg")
gray_img = cv2.cvtColor(test_img1, cv2.COLOR_BGR2GRAY)
detector = dlib.get_frontal_face_detector()
predictor = dlib.shape_predictor("shape_predictor_68_face_landmarks.dat")
rects = detector(gray_img, 1)
for i,rect in enumerate(rects):
    (x1, y1, w, h) = rect_to_xy(rect)
    face = test_img1[y1: y1 + h, x1: x1 + w]
    rec = dlib.rectangle(0, 0, face.shape[0], face.shape[1])
    shape = predictor(face, rec)
    # for j in range(1,69):
    #     cv2.circle(face, (shape.part(j).x, shape.part(j).y), 1, (0, 0, 252), -1)
    left_eye = (shape.part(36).x, shape.part(36).y) # 获取到左眼的坐标
    right_eye = (shape.part(46).x, shape.part(46).y) # 获取到右眼的坐标
    center_eyes = ((left_eye[0]+right_eye[0]) // 2, (left_eye[1] + right_eye[1]) // 2) # 获取到两眼中间的坐标
    a = right_eye[1] - left_eye[1] # 计算两眼差距,y轴 也就是偏移角度的对边长度
    b = right_eye[0] - left_eye[0] # 计算两眼差距,x轴
    degress = math.atan2(a, b) * 180 / math.pi # 该公式可以计算出a边所对应的角度的具体值
    # print(left_eye,right_eye,center_eyes,degress)
    RotateMatrix = cv2.getRotationMatrix2D(center_eyes, degress, scale=1) # 计算放射矩阵
    RotImg = cv2.warpAffine(face, RotateMatrix, (face.shape[0], face.shape[1]))  # 进行放射变换,即旋转
    cv2.rectangle(test_img1, (x1, y1), (x1 + w, y1 + h), (0, 252, 0), 1)
    cv2.putText(test_img1, f"Face:{i + 1}", (x1 - 10, y1 - 10), cv2.FONT_HERSHEY_SIMPLEX, 1, (0, 252, 0), 1)
    cv2.imshow(f"Face:{ i + 1}",RotImg) # 将每一个转换过后的图片展示出来
cv2.imshow("Result:",test_img1)
cv2.waitKey(0)

总结:
a.根据获取到的68个人脸特征点,取到索引36和45的点为左眼和右眼坐标
b.根据两个点,计算偏移角度
c.根据偏移角度和中心点计算出偏移矩阵
d.进行旋转
下面是我整体的代码:
import cv2
import dlib
import matplotlib.pyplot as plt
import math
import numpy as np

def get_degress(a,b):
    '''返回是三角形边a的对角角度'''
    return math.atan2(a,b) * 180. / math.pi


def dealWithRectangle(rect):
    x1 = rect.left()
    y1 = rect.top()
    w = rect.right() - x1 # 长度
    h = rect.bottom() - y1 # 高度
    return (x1, y1, w, h)

def detector(*args):
    '''此方法用来检测人脸并画图,返回面部信息矩阵'''
    img_tuple = args
    detector = dlib.get_frontal_face_detector()
    predictor = dlib.shape_predictor("shape_predictor_68_face_landmarks.dat")
    for img in img_tuple:
        gray_img = cv2.cvtColor(img, cv2.COLOR_BGR2GRAY)
        rects = detector(gray_img, 1)
        RotImgs = []
        for i, rect in enumerate(rects):
            (x1, y1, w, h) = dealWithRectangle(rect)
            cv2.rectangle(img, (x1, y1), (x1 + w, y1 + h), (0, 252, 0), 1)
            cv2.putText(img, f"Face:{i + 1}", (x1 - 10, y1 - 10), cv2.FONT_HERSHEY_SIMPLEX, 0.5, (0, 252, 0), 1)
            face = img[y1: y1 + h, x1: x1 + w]
            RotImg = shapePredictor(predictor, img, face)
            RotImgs.append(RotImg)
        cv2.imshow("rect result:",img)
        for i, RotImg in enumerate(RotImgs):
            cv2.imshow(f"Degress{i + 1}:", RotImg)
        cv2.waitKey(0)


def shape_to_np(shape, dtype='int'):
    coords = np.zeros((68, 2), dtype=dtype)
    for i in range(68):
        coords[i] = (shape.part(i).x, shape.part(i).y)
    return coords


def shapePredictor(predictor, img, face):
    heent = [36, 45, 30, 48, 54] # 左眼 右眼 鼻子 左嘴 右嘴
    rec = dlib.rectangle(0, 0, face.shape[0], face.shape[1])
    shape = predictor(face, rec)
    shape = shape_to_np(shape)
    for i in range(len(shape)):
        if i in heent:# 五官画红点
            cv2.circle(face, (shape[i][0], shape[i][1]), 1, (0, 0, 252), 1)
        else:
            cv2.circle(face, (shape[i][0], shape[i][1]), 1, (0, 252, 0), 1)
    left_eye = (shape[36][0], shape[36][1])
    right_eye = (shape[45][0], shape[45][1])
    print(left_eye,right_eye)
    dx = right_eye[0] - left_eye[0]
    dy = right_eye[1] - left_eye[1]
    print(dy,dx)
    center_eyes = ((left_eye[0]+right_eye[0]) / 2, (left_eye[1] + right_eye[1]) / 2)
    degress = get_degress(dy, dx)
    print(degress)
    RotateMatrix = cv2.getRotationMatrix2D(center_eyes, degress, scale=1)
    RotImg = cv2.warpAffine(face, RotateMatrix, (face.shape[0], face.shape[1]))  # 进行放射变换,即旋转
    return RotImg


test_img77 = cv2.imread("test_data/test5.jpg")
test_img2 = cv2.imread("test_data/test2.jpg")

detector(test_img77,test_img2)

