WebSocket整合springboot显示进度条
参考如下文档,主要为了方面查找,因此把参考内容都在此文章中重新写一遍:
SpringBoot整合WebScoket显示进度条 - 钟小嘿 - 博客园
1.问题描述
对于大文件上传解析,若直接上传,会超时,可使用WebSocket长链接方式实时显示文件的上传状态,实际上是从文件上传到内容解析完成存入数据库的过程,各个阶段的进度可自定义。
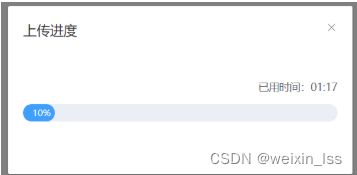
本文使用SpringBoot+WebSocket+vue2.0+Element+nginx实现文件实时上传显示进度条,上传的截图如下:
2.解决方案
1)导入依赖
    org.springframework.boot
    spring-boot-starter-websocket
2)开启WebSocket的支持,并把该类注入到spring容器中
package com.zxh.example.config;

import org.springframework.context.annotation.Bean;
import org.springframework.context.annotation.Configuration;
import org.springframework.web.socket.server.standard.ServerEndpointExporter;

//开启WebSocket的支持,并把该类注入到spring容器中
@Configuration
public class WebSocketConfig {

    @Bean
    public ServerEndpointExporter serverEndpointExporter() {
        return new ServerEndpointExporter();
    }

}
3)编写WebSocket服务
package com.zxh.example.service;

import com.alibaba.fastjson.JSON;
import com.alibaba.fastjson.JSONObject;
import lombok.extern.slf4j.Slf4j;
import org.apache.commons.lang3.StringUtils;
import org.springframework.stereotype.Component;

import javax.websocket.*;
import javax.websocket.server.PathParam;
import javax.websocket.server.ServerEndpoint;
import java.io.IOException;
import java.util.concurrent.ConcurrentHashMap;


/**
 * @author zhengkai.blog.csdn.net
 */
@ServerEndpoint("/wsServer/{userId}")
@Component
@Slf4j
public class WebSocketServer {

    /**
     * 静态变量,用来记录当前在线连接数。应该把它设计成线程安全的。
     */
    private static int onlineCount = 0;
    /**
     * concurrent包的线程安全Set,用来存放每个客户端对应的MyWebSocket对象。
     */
    private static ConcurrentHashMap webSocketMap = new ConcurrentHashMap<>();
    /**
     * 与某个客户端的连接会话,需要通过它来给客户端发送数据
     */
    private Session session;
    /**
     * 接收userId
     */
    private String userId = "";

    /**
     * 连接建立成功调用的方法
     */
    @OnOpen
    public void onOpen(Session session, @PathParam("userId") String userId) {
        this.session = session;
        this.userId = userId;
        if (webSocketMap.containsKey(userId)) {
            webSocketMap.remove(userId);
            webSocketMap.put(userId, this);
            //加入set中
        } else {
            webSocketMap.put(userId, this);
            //加入set中
            addOnlineCount();
            //在线数加1
        }

        log.info("用户连接:" + userId + ",当前在线人数为:" + getOnlineCount());

        try {
            sendMessage("连接成功");
        } catch (IOException e) {
            log.error("用户:" + userId + ",网络异常!!!!!!");
        }
    }

    /**
     * 连接关闭调用的方法
     */
    @OnClose
    public void onClose() {
        if (webSocketMap.containsKey(userId)) {
            webSocketMap.remove(userId);
            //从set中删除
            subOnlineCount();
        }
        log.info("用户退出:" + userId + ",当前在线人数为:" + getOnlineCount());
    }

    /**
     * 收到客户端消息后调用的方法
     *
     * @param message 客户端发送过来的消息
     */
    @OnMessage
    public void onMessage(String message, Session session) {
        log.info("用户消息:" + userId + ",报文:" + message);
        //可以群发消息
        //消息保存到数据库、redis
        if (StringUtils.isNotBlank(message)) {
            try {
                //解析发送的报文
                JSONObject jsonObject = JSON.parseObject(message);
                //追加发送人(防止串改)
                jsonObject.put("fromUserId", this.userId);
                String toUserId = jsonObject.getString("toUserId");
                //传送给对应toUserId用户的websocket
                if (StringUtils.isNotBlank(toUserId) && webSocketMap.containsKey(toUserId)) {
                    webSocketMap.get(toUserId).sendMessage(jsonObject.toJSONString());
                } else {
                    log.error("请求的userId:" + toUserId + "不在该服务器上");
                    //否则不在这个服务器上,发送到mysql或者redis
                }
            } catch (Exception e) {
                e.printStackTrace();
            }
        }
    }

    /**
     * 出现错误
     *
     * @param session
     * @param error
     */
    @OnError
    public void onError(Session session, Throwable error) {
        log.error("用户错误:" + this.userId + ",原因:" + error.getMessage());
        error.printStackTrace();
    }

    /**
     * 实现服务器主动推送
     */
    public void sendMessage(String message) throws IOException {
        this.session.getBasicRemote().sendText(message);
    }


    /**
     * 发送自定义消息
     */
    public static void sendInfo(String message, @PathParam("userId") String userId) throws IOException {
        log.info("发送消息到:" + userId + ",报文:" + message);
        if (StringUtils.isNotBlank(userId) && webSocketMap.containsKey(userId)) {
            webSocketMap.get(userId).sendMessage(message);
        } else {
            log.error("用户" + userId + ",不在线!");
        }
    }

    public static synchronized int getOnlineCount() {
        return onlineCount;
    }

    public static synchronized void addOnlineCount() {
        WebSocketServer.onlineCount++;
    }

    public static synchronized void subOnlineCount() {
        WebSocketServer.onlineCount--;
    }
}
4)编写文件上传的controller
package com.zxh.example.controller;

import com.zxh.example.service.TestService;
import lombok.extern.slf4j.Slf4j;
import org.springframework.beans.factory.annotation.Autowired;
import org.springframework.web.bind.annotation.PostMapping;
import org.springframework.web.bind.annotation.RequestMapping;
import org.springframework.web.bind.annotation.RestController;
import org.springframework.web.multipart.MultipartFile;

@RestController
@RequestMapping("/api")
@Slf4j
public class TestController {

    @Autowired
    private TestService testService;


    @PostMapping("/upload")
    public String upload(MultipartFile file) {
        return testService.upload(file);
    }

}
5)编写文件上传的实现类,实时解析文件并发送通知
package com.zxh.example.service;

import cn.afterturn.easypoi.handler.inter.IReadHandler;
import com.zxh.example.entity.User;
import com.zxh.example.util.ExcelUtils;
import lombok.extern.slf4j.Slf4j;
import org.springframework.stereotype.Service;
import org.springframework.web.multipart.MultipartFile;

import java.io.IOException;
import java.util.ArrayList;
import java.util.List;

@Service
@Slf4j
public class TestService {

    public String upload(MultipartFile file) {
        Integer[] percent = {1};
        sendMessage(percent[0]);
        Integer percentMax1 = 20;
        Integer percentMax2 = 100;
        // 读取Excel中的数据到list集合中
        List list = new ArrayList<>();
        //解析excel,解析1%~20%
        ExcelUtils.importExcelBySax(file, User.class, 2, new IReadHandler() {
            @Override
            public void handler(User o) {
                list.add(o);
                //每读取指定行,推送1
                if (list.size() % 10000 == 0 && percent[0] < percentMax1) {
                    percent[0]++;
                    sendMessage(percent[0]);
                }
            }

            @Override
            public void doAfterAll() {
                //解析成功
                percent[0] = percentMax1;
                sendMessage(percent[0]);
            }
        });

        //模拟数据插入,每1000条发送一次消息 21%~100%
        Integer maxSize = 1000;
        Integer queryCnt = list.size() % maxSize == 0 ? list.size() / maxSize : (list.size() / maxSize) + 1;
        Integer sendCnt = 10;
        for (int i = 0; i < queryCnt; i++) {
            Integer endIndex = (i + 1) * maxSize;
            if (endIndex > list.size()) {
                endIndex = list.size();
            }
            //集合截取
            List tempList = new ArrayList<>(list.subList(i * maxSize, endIndex));
            //模拟数据查询

            if (queryCnt % sendCnt == 0 && percent[0] < percentMax2) {
                percent[0]++;
                sendMessage(percent[0]);
            }
        }
        percent[0] = percentMax2;
        sendMessage(percent[0]);
        return "success";
    }

    /**
     * 自定义封装的发送方法
     * @param msg
     */
    private void sendMessage(Integer msg) {
        try {
            WebSocketServer.sendInfo(msg.toString(), "111");
        } catch (IOException e) {
            log.error("消息发送异常:" + e.getMessage());
            e.printStackTrace();
        }
    }
}
6)编写全局的global.js,可在全局使用,方便各个页面都能获取到消息
export default {
    //websocket
    webSocket: {},
    setWs: function (ws) {
        this.webSocket = ws
    },
    wsUrl: `${location.protocol === 'https:' ? 'wss' : 'ws'}://${location.host}/wsServer/`,

}
7)在main.js中注入global.js中的方法
import global from './global'
Vue.prototype.global = global
8)在Vue的App.vue创建webscoketd对象,并注册到全局
9)在vue.config.js配置协议,转发到后台服务(本地开发)
module.exports = {
  devServer: {
    host: '0.0.0.0',
    // //设置端口号
    port: 8006,
    //自动打开浏览器
    open: true,
    proxy: {
      '/api': {
        target: 'http://localhost:8080',
      },
      //websocket配置,正式环境设置nginx代理
      '/wsServer': {
        target: 'http://localhost:8080'
      },
    },
  },


}
10)编写上传文件的页面
导入
已用时间:{{timesStr}}
3.注意事项
3.1nginx代理配置
11)在上线时是需要使用nginx代理的,故需使用nginx代理前端的WebSocket
在nginx.conf做如下配置:
...
 #请求体大小
 client_max_body_size 20M;
 ...

server {
        listen       81;
        server_name  localhost;


        location / {
            root html;
            try_files $uri $uri/ /index.html;
        }

        location ~^/api/ {
            proxy_pass http://127.0.0.1:8080;
            proxy_read_timeout 600s; #默认是60s,若不配置则超过60s会出现504状态码
        }

        #websocket代理配置
        location ~^/wsServer/ {
            proxy_pass http://127.0.0.1:8080;
            # 开启nginx对websocket的支持
            proxy_http_version 1.1;
            proxy_set_header Upgrade $http_upgrade;
            proxy_set_header Connection "upgrade";
           proxy_read_timeout 36000s; #10小时未传输数据则关闭连接
        }
...
默认情况下,如果代理服务器在60秒内未传输任何数据,则连接将关闭。请求体的大小根据实际情况修改。若不配置,则上传文件超过默认值1MB时就会出现413错误状态码。
3.2多节点问题
在单节点服务时,上述即可满足需求,但多节点服务时,通过nginx代理,若连接和请求都在同一台服务器时,可正常使用,但也会出现和A服务器连接了WebSocket,但在导入时请求的是B服务器的情况,此时B服务器并不会发送消息给前端,导致导入时不显示进度。此时就需要使用分布式的通知方式,下面使用redis的发布订阅功能进行消息的通知。
1)导入redis依赖
    org.springframework.boot
    spring-boot-starter-data-redis
2)创建redis消息实体,
package com.zxh.model;

import lombok.Data;
import lombok.experimental.Accessors;

import java.util.List;

/**
 * redis发布订阅的消息实体
 */
@Data
@Accessors(chain = true)
public class RedisMessage {
    //消息类型,1全部广播,2个人信息
    private Integer category;
    //消息
    private String message;
    //要发送的用户组
    private List userList;
}
方便消息的封装。
2)创建业务处理类,监听redis消息发布
主要用于监听消息的发布,收到消息时进行相关业务的处理。
package com.zxh.common.listener;

import com.alibaba.fastjson.JSON;
import com.zxh.common.util.CollectionUtil;
import com.zxh.model.RedisMessage;
import com.zxh.server.WebSocketServer;
import lombok.SneakyThrows;
import lombok.extern.slf4j.Slf4j;
import org.springframework.data.redis.connection.Message;
import org.springframework.data.redis.connection.MessageListener;
import org.springframework.stereotype.Component;

import java.io.IOException;

/**
 * redis消息订阅-业务处理
 */
@Component
@Slf4j
public class RedisMessageListener implements MessageListener {

    //重写onMessage,处理相关发布订阅的业务
    @SneakyThrows
    @Override
    public void onMessage(Message message, byte[] bytes) {
        String body = new String(message.getBody(), "UTF-8");
        RedisMessage redisMessage = JSON.parseObject(body, RedisMessage.class);

        if (redisMessage != null) {
            Integer category = redisMessage.getCategory();
            //个人信息
            if (category == 2) {
                //根据用户id消息
                if (CollectionUtil.isNotEmpty(redisMessage.getUserList())) {
                    redisMessage.getUserList().stream().forEach(userId -> {
                        try {
                            WebSocketServer.sendInfo(redisMessage.getMessage(),userId);
                        } catch (IOException e) {
                            e.printStackTrace();
                        }
                    });
                } else {
                    log.warn("无用户信息,发送信息失败");
                }
            } else if (category == 1) {
            }
        }
    }
}
3)配置redis发布订阅
package com.zxh.configure;

import com.zxh.common.SystemConst;
import com.zxh.common.listener.RedisMessageListener;
import org.slf4j.Logger;
import org.slf4j.LoggerFactory;
import org.springframework.cache.annotation.EnableCaching;
import org.springframework.context.annotation.Bean;
import org.springframework.context.annotation.Configuration;
import org.springframework.data.redis.connection.RedisConnectionFactory;
import org.springframework.data.redis.core.StringRedisTemplate;
import org.springframework.data.redis.listener.PatternTopic;
import org.springframework.data.redis.listener.RedisMessageListenerContainer;
import org.springframework.data.redis.listener.adapter.MessageListenerAdapter;

/**
 * redis发布订阅配置
 */

@Configuration
@EnableCaching
public class RedisPubSubConfig {

    Logger logger = LoggerFactory.getLogger(this.getClass());

    /**
     * 配置 交换机消息,添加多个 messageListener参数,配置不同的交换机
     *
     * @param connectionFactory
     * @param listenerAdapter
     * @return
     */
    @Bean
    RedisMessageListenerContainer container(RedisConnectionFactory connectionFactory,
                                            MessageListenerAdapter listenerAdapter) {
        RedisMessageListenerContainer container = new RedisMessageListenerContainer();
        container.setConnectionFactory(connectionFactory);
        container.addMessageListener(listenerAdapter, new PatternTopic("channel:test1"));
        return container;
    }

    /**
     * 消息监听器适配器,绑定消息处理器,利用反射技术调用消息处理器的业务方法
     *
     * @param listener 业务处理类
     * @return
     */
    @Bean
    MessageListenerAdapter listenerAdapter(RedisMessageListener listener) {
        logger.info("redis消息监听器加载成功--------->>>>>>");
        // onMessage 就是方法名,基于反射调用
        return new MessageListenerAdapter(listener, "onMessage");
    }

    @Bean
    StringRedisTemplate template(RedisConnectionFactory connectionFactory) {
        return new StringRedisTemplate(connectionFactory);
    }

}
4)调用redis的发布功能
修改TestService的sendMessage的方法,把使用WebSocket发送信息改为把消息发布到redis中。
@Service
@Slf4j
public class TestService {
   .....

    @Autowired
    private StringRedisTemplate stringRedisTemplate;

    private void sendMessage(Integer msg) {
        List userList = Arrays.asList("1111");//使用redis的发布订阅发送消息
        RedisMessage redisMessage = new RedisMessage().setCategory(2);
        redisMessage.setMessage(msg.toString()).setUserList(userList);
        stringRedisTemplate.convertAndSend("channel:test1", JSON.toJSONString(redisMessage));
    }

}
redis发布后,监听器监听到有消息时,使用WebSocket进行消息推送。每台服务器都会推送,只有服务连接成功的一台服务器才能通知到前台成功