【OpenCV应用】python处理行李图像匹配项目——图像直方图应用与明暗变换
OpenCV——图像直方图与明暗变换应用记录
- 图像直方图应用与明暗变换
-
- 简单伽马变换与直方图显示
- MASK特定区域直方图显示
- OPENCV: 直方图均衡化
- 有限对比度自适应直方图均衡
- 二维直方图
- 直方图反向投影
- 交互式的亮度调整和对比组件
- 线性变换--图像增强
图像直方图应用与明暗变换
从之前的图像轮廓可以看出,行李箱的亮度分布不均匀,图像暗面部分细节不明显,从轮廓提取中可以看出,是否能够通过处理完善图像明暗程度分布优化。
https://docs.opencv.org/master/de/db2/tutorial_py_table_of_contents_histograms.html
简单伽马变换与直方图显示
https://blog.csdn.net/yawdd/article/details/80180848
https://docs.opencv.org/master/d1/db7/tutorial_py_histogram_begins.html
伽马变换:用来图像增强,提升了暗部细节,简单来说就是通过非线性变换,让图像从暴光强度的线性响应变得更接近人眼感受的响应,即将漂白(相机曝光)或过暗(曝光不足)的图片,进行矫正。
伽马值小于1时,会拉伸图像中灰度级较低的区域,同时会压缩灰度级较高的部分
伽马值大于1时,会拉伸图像中灰度级较高的区域,同时会压缩灰度级较低的部分
# 图像伽马变换
gamma=copy.deepcopy(gray)
rows=img.shape[0]
cols=img.shape[1]
for i in range(rows):
    for j in range(cols):
        gamma[i][j]=3*pow(gamma[i][j],0.8)
# 显示三色直方图
color = ('b','g','r')
for i,col in enumerate(color):
    histr = cv.calcHist([img],[i],None,[256],[0,256])
    plt.plot(histr,color = col)
    plt.xlim([0,256])
图像实际上的效果更倾向于整体都变亮了
MASK特定区域直方图显示
We used cv.calcHist() to find the histogram of the full image. What if you want to find histograms of some regions of an image? Just create a mask image with white color on the region you want to find histogram and black otherwise. Then pass this as the mask.
可以通过标记mask区域以研究特定区域的直方图,使用小白标记好的图像
hist_full = cv.calcHist([img],[0],None,[256],[0,256])
hist_mask = cv.calcHist([img],[0],mask,[256],[0,256])
直方图的处理上似乎有问题没有解决
OPENCV: 直方图均衡化
Histogram Equalization: https://docs.opencv.org/master/d5/daf/tutorial_py_histogram_equalization.html
Consider an image whose pixel values are confined to some specific range of values only. For eg, brighter image will have all pixels confined to high values. But a good image will have pixels from all regions of the image. So you need to stretch this histogram to either ends (as given in below image, from wikipedia) and that is what Histogram Equalization does (in simple words). This normally improves the contrast of the image.
img = cv.imread('packAirport/image/'+'001.jpg',0)
hist,bins = np.histogram(img.flatten(),256,[0,256])
cdf = hist.cumsum()		# 按照所给定的轴参数返回元素的梯形累计和
cdf_normalized = cdf * float(hist.max()) / cdf.max()
# 直方图均衡化
cdf_m = np.ma.masked_equal(cdf,0)
cdf_m = (cdf_m - cdf_m.min())*255/(cdf_m.max()-cdf_m.min())
cdf = np.ma.filled(cdf_m,0).astype('uint8')
img2 = cdf[img]
效果似乎和伽马变换相似
有限对比度自适应直方图均衡
CLAHE (Contrast Limited Adaptive Histogram Equalization)
https://docs.opencv.org/master/d5/daf/tutorial_py_histogram_equalization.html
The first histogram equalization we just saw, considers the global contrast of the image. In many cases, it is not a good idea. (之前的直方图均衡化是考虑的整张图像,而小白的抠图会把透明当成255读入似乎更不准确,而之前的mask不成熟因而先不使用)The histogram is not confined to a particular region as we saw in previous cases (Try to plot histogram of input image, you will get more intuition).
So to solve this problem, adaptive histogram equalization is used.
In a small area, histogram would confine to a small region (unless there is noise). If noise is there, it will be amplified. To avoid this, contrast limiting is applied.(emmm,简单来说应该就是会根据不同的小区域分别进行直方图均衡化)
# create a CLAHE object (Arguments are optional).
clahe = cv.createCLAHE(clipLimit=2.0, tileGridSize=(8,8))
cl1 = clahe.apply(img)
这个效果似乎有点像恐怖片啊,不过看上去效果好了不少,但他需要转化成灰度图
二维直方图
find color histograms where two features are Hue & Saturation values
For color histograms, we need to convert the image from BGR to HSV. (Remember, for 1D histogram, we converted from BGR to Grayscale). For 2D histograms, its parameters will be modified as follows:
- channels = [0,1] because we need to process both H and S plane.
- bins = [180,256] 180 for H plane and 256 for S plane.
- range = [0,180,0,256] Hue value lies between 0 and 180 & Saturation lies between 0 and 256.
—官网解释—:
Below is the input image and its color histogram plot. X axis shows S values and Y axis shows Hue.
In histogram, you can see some high values near H = 100 and S = 200. It corresponds to blue of sky. Similarly another peak can be seen near H = 25 and S = 100. It corresponds to yellow of the palace. You can verify it with any image editing tools like GIMP.
hsv = cv.cvtColor(img,cv.COLOR_BGR2HSV)
hist = cv.calcHist( [hsv], [0, 1], None, [180, 256], [0, 180, 0, 256] )
直方图反向投影
Histogram Backprojection
https://docs.opencv.org/master/dc/df6/tutorial_py_histogram_backprojection.html
https://segmentfault.com/a/1190000015676940
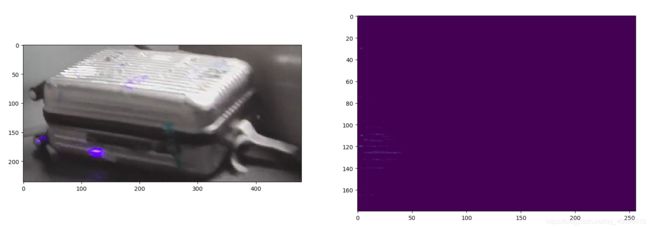
看上去有些类似于填充的泛洪操作,不过应该是更高级,是否能够用于行李箱从背景的分割或行李箱三个面的分别分割?
直方图反向投影用于图像分割或查找图像中感兴趣的对象,简单来说,它会创建一个与输入图像大小相同(单个通道)的图像,其中每个像素对应于属于我们对象该像素的概率.输出图像将使我们感兴趣的对象比其余部分更明显.
首先,我们创建一个包含我们感兴趣对象的图像的直方图,对象应尽可能填充图像以获得更好的结果,颜色直方图比灰度直方图更受青睐,因为对象的颜色比灰度强度更能定义对象,然后我们将这个直方图“反投影”到我们需要找到对象的测试图像上.
# calculating object histogram
roihist = cv.calcHist([hsv],[0, 1], None, [180, 256], [0, 180, 0, 256] )

# normalize histogram and apply backprojection
cv.normalize(roihist,roihist,0,255,cv.NORM_MINMAX)
dst = cv.calcBackProject([hsvt],[0,1],roihist,[0,180,0,256],1)

# Now convolute with circular disc
disc = cv.getStructuringElement(cv.MORPH_ELLIPSE,(5,5))
cv.filter2D(dst,-1,disc,dst)
效果和预想的不相符啊,可能需要进行修改
交互式的亮度调整和对比组件
https://www.cnblogs.com/lfri/p/10753019.html
可以用来尝试一下图像的亮度和对比度的调整效果。
线性变换–图像增强
https://blog.csdn.net/m0_38007695/article/details/82718107 部分省略
图像增强主要解决由于图像的灰度级范围较小造成的对比度较低的问题,目的就是将输出图像的灰度级放大到指定的程度,使得图像中的细节看起来增加清晰。对比度增强有几种常用的方法,如线性变换、分段线性变换、伽马变换、直方图正规化、直方图均衡化、局部自适应直方图均衡化等。
效果并不好,应该要仔细设计变换函数
out = 2.0 * img
# 进行数据截断,大于255的值截断为255
out[out > 255] = 255
# 数据类型转换
out = np.around(out)
out = out.astype(np.uint8)


