centos7 从零开始安装 Pytorch并配置 jupyter
安装python3.8
安装编译相关工具
yum -y groupinstall "Development tools"
yum -y install zlib-devel bzip2-devel openssl-devel ncurses-devel sqlite-devel readline-devel tk-devel gdbm-devel db4-devel libpcap-devel xz-devel
yum install libffi-devel -y
下载安装Python3.8
wget https://www.python.org/ftp/python/3.8.3/Python-3.8.3.tgz
tar -zxvf  Python-3.8.3.tgz
mkdir /usr/local/python3 #创建编译安装目录
cd Python-3.8.3
./configure --prefix=/usr/local/python3
make && make install
需要注意的是,如果make过程中使用了其他命令出现错误,可以用make clean命令清除上次的make命令所产生的object文件(后缀为“.o”的文件)及可执行文件。
创建软连接
默认系统安装的是python2.7
删除python软连接并配置软连接为python3
rm -rf /usr/bin/python
ln -s /usr/local/python3/bin/python3 /usr/bin/python
删除默认pip软连接,并添加pip3新的软连接
rm -rf /usr/bin/pip
#添加 pip3 的软链接
ln -s /usr/local/python3/bin/pip3 /usr/bin/pip
更改yum配置
因为其要用到python2才能执行,否则会导致yum不能正常使用
vi /usr/bin/yum
把 #! /usr/bin/python 修改为 #! /usr/bin/python2
vi /usr/libexec/urlgrabber-ext-down
把 #! /usr/bin/python 修改为 #! /usr/bin/python2
vi /usr/bin/yum-config-manager
#!/usr/bin/python 改为 #!/usr/bin/python2
安装Conda
wget -c https://repo.continuum.io/miniconda/Miniconda3-latest-Linux-x86_64.sh
chmod 777 Miniconda3-latest-Linux-x86_64.sh
bash Miniconda3-latest-Linux-x86_64.sh
安装完成后输入conda命令,如果出现conda: command not found,则需要进行以下更改:
vim ~/.bashrc
export PATH=$PATH:【你的安装目录】
source ~/.bashrc此时再运行conda info --envs,就不会再出现错误。
其次需要配置软件源
#添加清华园镜像:
conda config --add channels https://mirrors.tuna.tsinghua.edu.cn/anaconda/cloud/pytorch/
conda config --add channels https://mirrors.tuna.tsinghua.edu.cn/anaconda/pkgs/free/
conda config --add channels https://mirrors.tuna.tsinghua.edu.cn/anaconda/pkgs/main/
conda config --set show_channel_urls yes #(这个命令的意思是从channel中安装包时显示channel的url,这样就可以知道包的安装来源了)
安装Pytorch
在pytorch官网拿到符合自己安装要求的命令,例如:
conda install pytorch torchvision torchaudio cudatoolkit=10.2 -c pytorch 要想使用添加的镜像源进行安装,则需要将命令最后的-c pytorch去掉;
等待安装完毕即可。
最后测试一下:
import torch
print(torch.__version__)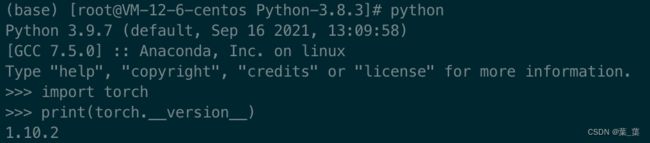
如果在服务器端,需要使用jupyter,按照以下步骤:
conda install jupyter

jupyter notebook --generate-config #要开启Jupyter notebook的远程访问,首先要生成配置文件
#该命令会创建配置文件~/.jupyter/jupyter_notebook_config.py
jupyter notebook password #设置远程访问的密码

#使用以下命令打开配置文件
vim ~/.jupyter/jupyter_notebook_config.py

#修改部分设置
c.NotebookApp.ip='*'
c.NotebookApp.open_browser=False
c.NotebookApp.port=8889
#修改完毕后,保存配置文件并退出

#使用nohup运行jupyter notebook命令
nohup jupyter notebook --allow-root > jupyter.log 2>&1 &
如果需要主动关闭jupyter,使用以下命令:
ps -aux | grep jupyter
kill -9 PID