【anaconda】centos7安装python3+anaconda+pytorch+pycharm
完整安装一遍之后,得知anaconda包含python且自带python编辑器jupyter notebook,安装了anaconda就不需要再安装python了!可以忽略第一步安装Python3!
一、安装Python3
1、首先安装依赖环境
yum -y install zlib-devel bzip2-devel openssl-devel ncurses-devel sqlite-devel readline-devel tk-devel gdbm-devel db4-devel libpcap-devel xz-devel libffi-devel
2、下载python3的源码
版本根据自己需求选择,官网网址:https://www.python.org/downloads/source/,下载taz格式的压缩包文件

3、下载完成后,把安装包解压到/usr用户目录中
tar -zxvf /home/xxx/Downloads/Python-3.8.11.tgz -C /usr
4、建立一个空文件夹python3,用于存放后面变编译的python源码
mkdir /opt/python3
5、进入解压后的python3安装包文件夹,编译,编译安装
cd /usr/Python-3.8.11
./configure --prefix=/opt/python3
make && make install
若报错
configure: error: in `/usr/Python-3.8.11':
configure: error: no acceptable C compiler found in $PATH
See `config.log' for more details
是因为由于本机缺少gcc编译环境,yum安装gcc编译环境:
yum install -y gcc
6、安装成功
python安装在之前新建的/opt/python3路径中

7、建立软链接
whereis python
python: /usr/bin/python /usr/bin/python2.7 /usr/lib/python2.7 /usr/lib64/python2.7 /etc/python /usr/include/python2.7 /opt/python3/bin/python3.8 /opt/python3/bin/python3.8-config /usr/share/man/man1/python.1.gz
ln -s /opt/python3/bin/python3.8 /usr/bin/python3
ln -s /opt/python3/bin/pip3.8 /usr/bin/pip3
8、添加环境变量
编辑/etc/profile文件
vim /etc/profile
在最后一行添加
export PATH=$PATH:/opt/python3/bin
使环境变量生效
source /etc/profile
9、测试python3和pip3是否可用
命令行输出python3

命令行输出pip3

二、安装pytorch
1、安装Anaconda
(1)下载安装包
官网下载x64版安装包:https://www.anaconda.com/products/individual#download-section
Anaconda Linux安装包地址:https://repo.anaconda.com/archive/Anaconda3-2021.05-Linux-x86_64.sh
(2)下载到/home/xxx/Downloads文件夹下,赋予bash文件权限
chmod 777 Anaconda3-2021.05-Linux-x86_64.sh
(3)安装anaconda
bash Anaconda3-2021.05-Linux-x86_64.sh
Welcome to Anaconda3 2021.05

In order to continue the installation process, please review the license
agreement.
Please, press ENTER to continue
>>>
===================================
End User License Agreement - Anaconda Individual Edition
===================================

Copyright 2015-2021, Anaconda, Inc.

All rights reserved under the 3-clause BSD License:
.......
Anaconda reserves all rights not expressly granted to you in this Agreement.

Redistribution and use in source and binary forms, with or without modification, are permit
ted provided that the following conditions are met:

  * Redistributions of source code must retain the above copyright notice, this list of con
ditions and the following disclaimer.
......
一直按回车键,直到
The Intel Math Kernel Library contained in Anaconda Individual Edition is classified by Int
el as ECCN 5D992.c with no license required for export to non-embargoed countries.

The following packages listed on https://www.anaconda.com/cryptography are included in the
repository accessible through Anaconda Individual Edition that relate to cryptography.

Last updated April 5, 2021

Do you accept the license terms? [yes|no]
[no] >>>
输入yes,按enter
Anaconda3 will now be installed into this location:
/root/anaconda3

  - Press ENTER to confirm the location
  - Press CTRL-C to abort the installation
  - Or specify a different location below

[/root/anaconda3] >>> /opt/anaconda3
输入anaconda安装路径
PREFIX=/opt/anaconda3
Unpacking payload ...
Collecting package metadata (current_repodata.json): done
Solving environment: done
Preparing transaction: done
Executing transaction: done
installation finished.
Do you wish the installer to initialize Anaconda3
by running conda init? [yes|no]
[no] >>>
输入yes,回车
Thank you for installing Anaconda3!

===========================================================================

Working with Python and Jupyter notebooks is a breeze with PyCharm Pro,
designed to be used with Anaconda. Download now and have the best data
tools at your fingertips.

PyCharm Pro for Anaconda is available at: https://www.anaconda.com/pycharm
(5)使环境变量生效
source ~/.bashrc
(6)查看anaconda是否安装成功
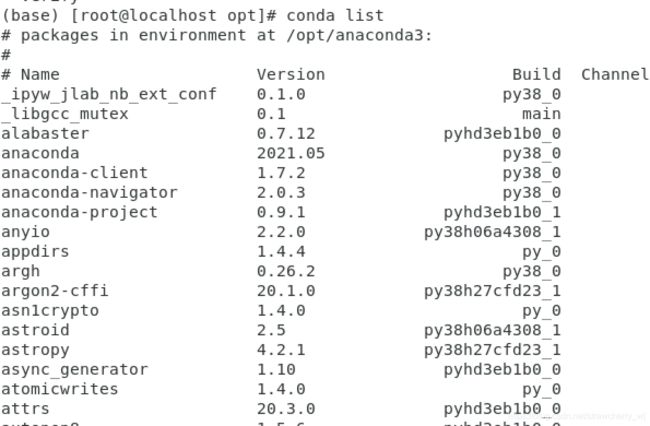
conda
conda list
touch ~/.condarc
source ~/.bashrc
jupyter notebook
出现权限问题
(base) [root@localhost anaconda]# jupyter notebook
[I 21:37:19.531 NotebookApp] Writing notebook server cookie secret to /root/.local/share/jupyter/runtime/notebook_cookie_secret
[I 2021-08-08 21:37:20.459 LabApp] JupyterLab extension loaded from /opt/anaconda3/lib/python3.8/site-packages/jupyterlab
[I 2021-08-08 21:37:20.459 LabApp] JupyterLab application directory is /opt/anaconda3/share/jupyter/lab
[C 21:37:20.463 NotebookApp] Running as root is not recommended. Use --allow-root to bypass.
使用 jupyter notebook --generate-config 命令生成jupyter配置文件,将会提示当前生成的配置文件的存放路径,一般为 ~/.jupyter/jupyter_notebook_config.py
vim ~/.jupyter/jupyter_notebook_config.py打开配置文件,找到 #c.NotebookApp.allow_root = False ,去掉#,并修改为True
## Whether to allow the user to run the notebook as root.
#  Default: False
c.NotebookApp.allow_root = True
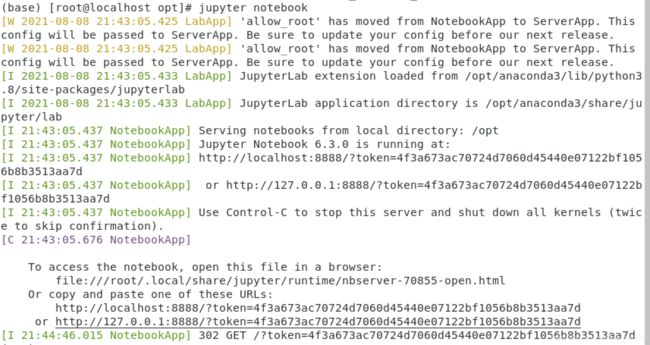
保存该文件,启动jupyter notebook

复制网址到浏览器即可打开jupyter notebook

2、安装pytorch
# 安装pytorch和torchvision
conda install pytorch -c pytorch
conda install torchvision -c pytorch
测试一下
(base) [root@localhost opt]# python
Python 3.8.8 (default, Apr 13 2021, 19:58:26)
[GCC 7.3.0] :: Anaconda, Inc. on linux
Type "help", "copyright", "credits" or "license" for more information.
>>> import torch
>>> x=torch.rand(5,3)
>>> print(x)
tensor([[0.1521, 0.1508, 0.4489],
        [0.8602, 0.4759, 0.7634],
        [0.9307, 0.6808, 0.3035],
        [0.9490, 0.9632, 0.3540],
        [0.8841, 0.5200, 0.0960]])
>>> exit()
三、安装pycharm
1、下载安装包
官网链接:https://www.jetbrains.com/pycharm/download/#section=linux
2、将压缩包解压至目标文件夹
tar -zxvf /home/wwj/Downloads/pycharm-professional-2021.2.tar.gz -C /opt
3、运行pycharm.sh
cd /opt/pycharm-2021.2/bin
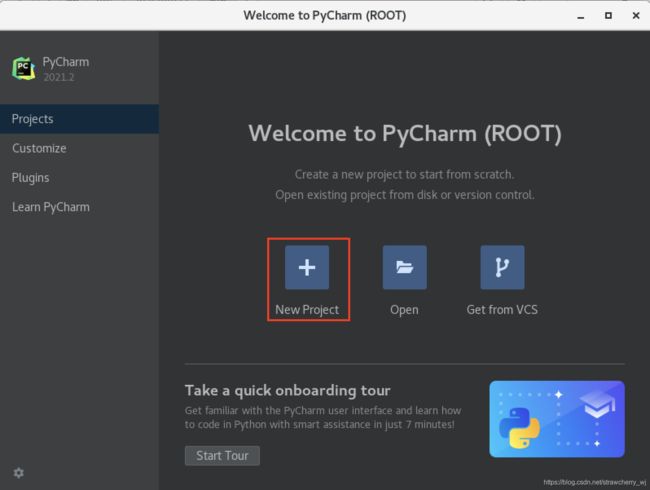
./pycharm.sh
4、新建一个python项目

5、修改自定义项目存储路径Location以及关联Python解释器Base interpreter
解释器选择anaconda3文件夹下的python.exe文件

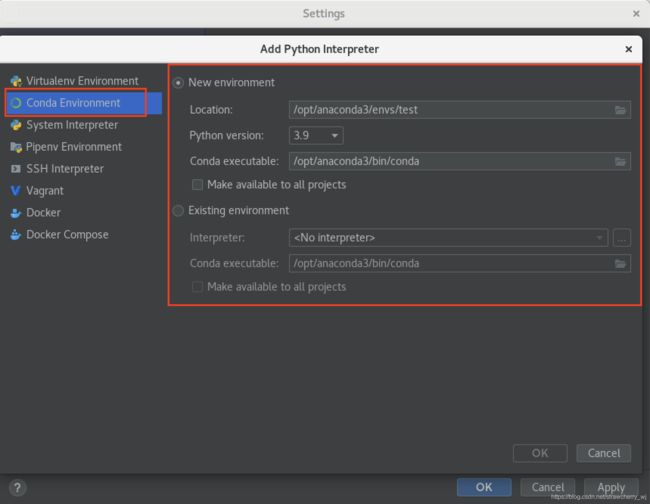
6、在项目中配置解释器
点击【File】—>【setting】—>【Project Interpreter】

python interpreter选择conda environment

点击OK即可

