【xilinx xfopencv】Vivado_HLS_ov5640_threshold_hdmi(图像二值化)第一部分
文章目录
- 写在前面
- 目的
- 介绍
-
- OpenCv
-
- 二值化函数threshold
- Xilinx xfopencv
-
- threshold函数
- otsuthreshold函数
- 工具
- 一、创建项目
- 二、步骤
-
- 测试 threshold 函数
-
- 1.添加示例代码
- 2.Project Settings
- 3.仿真结果
- 测试 otsuthreshold 函数
-
- 1.添加示例代码
- 2.Project Settings
- 3.仿真结果
- 测试自己创建的函数
-
- 1.添加文件
- 2.Project Settings
- 3.仿真结果
- 不同maxval值的结果对比
- 总结
写在前面
本人是参考赛灵思官方文档核例程、网上相关教程和内容,所有参考、转载会标明出处,希望文章对大家有所帮助,感谢各位!
目的
使用 Vivado HLS 实现一个图像处理的 IP 核,该 IP 核能利用 xfopencv 将 OV5640 摄像头产生的 RGB 彩色图像转换成灰度图像,进一步实现二值化图像,并在 Vivado 中对 IP 核进行验证,最后通过 HDMI 实时显示。
介绍
OpenCv
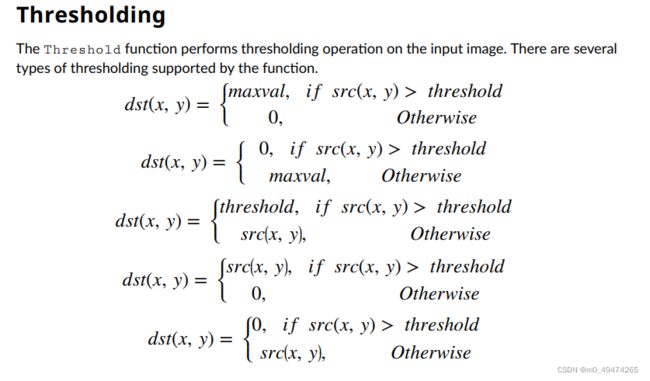
二值化函数threshold
OpenCV二值化函数threshold 介绍参考
参考:https://blog.csdn.net/morewindows/article/details/8239678
参数 maxval 解释
参考:https://www.cnblogs.com/CoverCat/p/5043833.html#:~:text=value%20%3D%20value%20%3E%20threshold%20%3F%20max_value%20%3A,%3D%20value%20%3E%20threshold%20%3F%200%20%3A%20max_value
Xilinx xfopencv
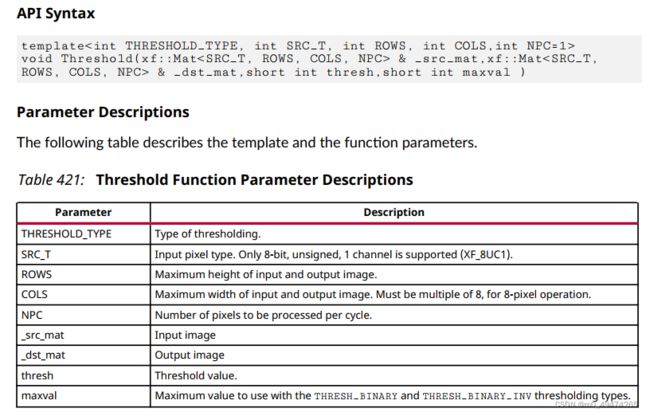
threshold函数
第一类的大概意思是:当前像素点(x,y)的值大于阈值(threshold),则把maxval值赋给当前像素点(x,y),否则赋予0。
参考:https://docs.xilinx.com/v/u/en-US/ug1233-xilinx-opencv-user-guide
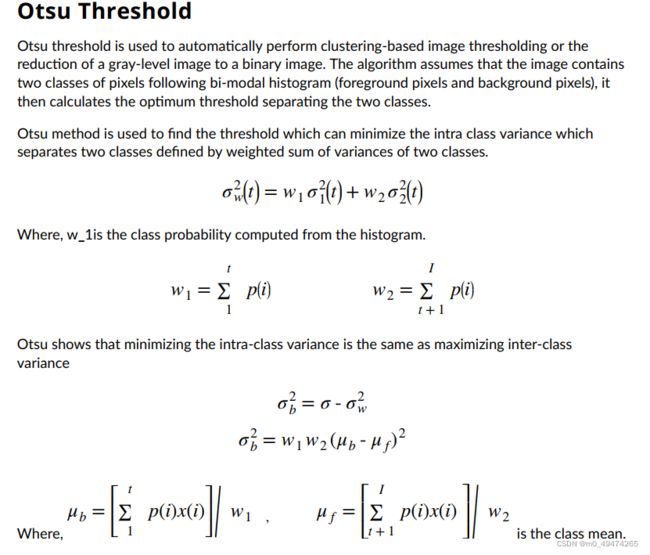
otsuthreshold函数
大津阈值用于自动执行基于聚类的图像阈值或将灰度图像降为二值图像。该算法假设图像包含双峰直方图后面的两类像素(前景像素和背景像素),然后计算两类像素之间的最优阈值。
采用大津法,求出以方差加权和定义的两类间方差最小的阈值。

工具
- Vivado 2019.1
- xfopencv-2019.1_release.zip
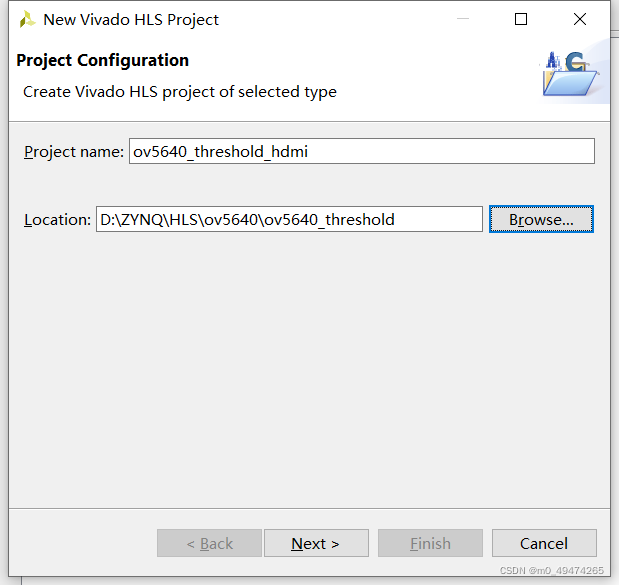
一、创建项目
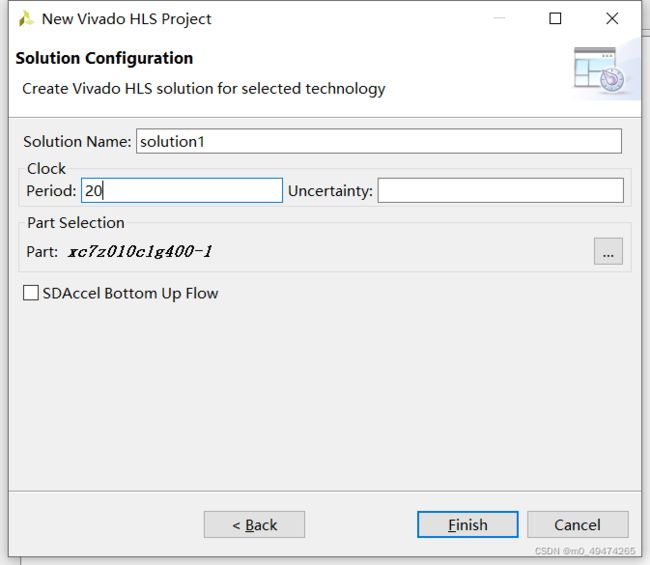
打开 Vivado HLS 2019.1,创建项目 ov5640_threshold_hdmi。
二、步骤
测试 threshold 函数
1.添加示例代码
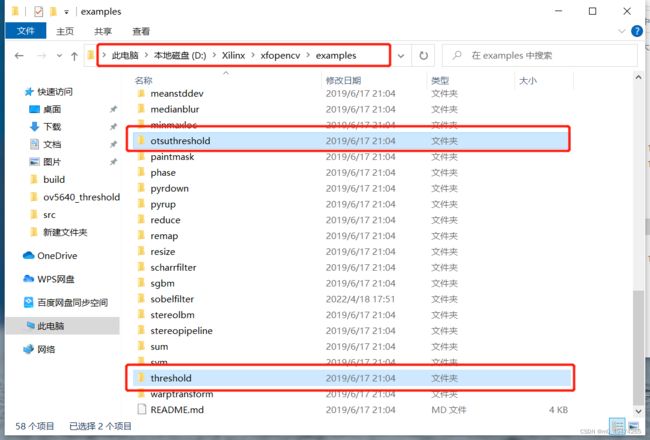
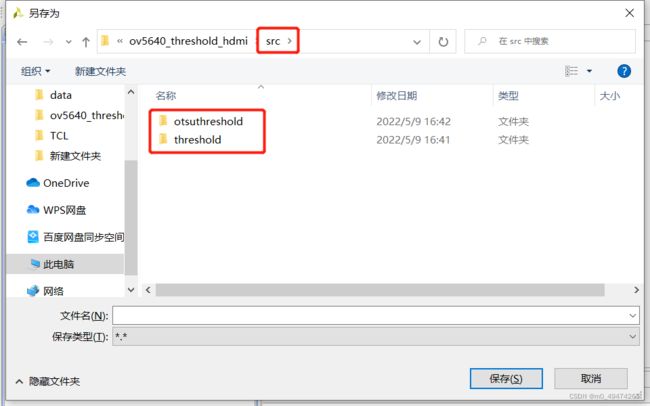
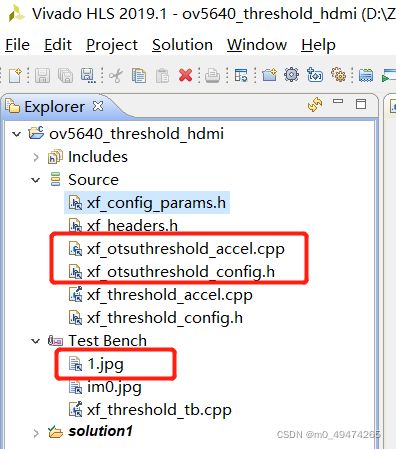
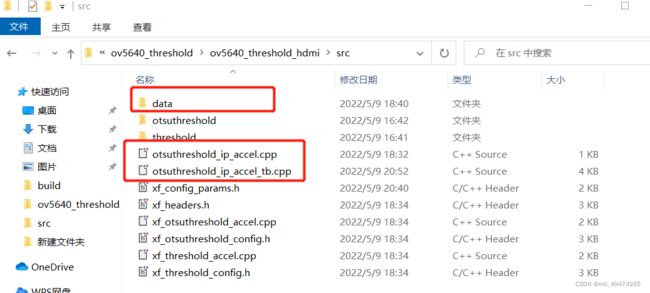
创建好之后,在项目文件夹的根目录下添加一个 src 文件夹,添加 xfopencv>examples 文件夹如下图的两个函数文件夹。
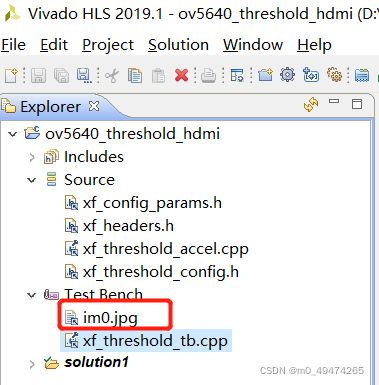
在Source 和 Test Bench 中添加下列文件,im0.jpg位于data文件夹下。
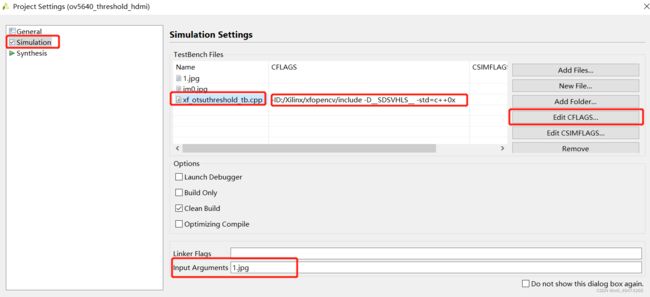
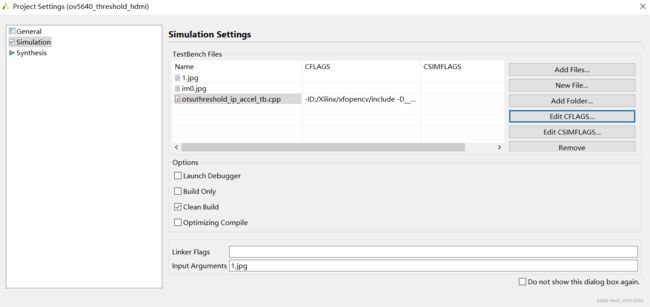
2.Project Settings
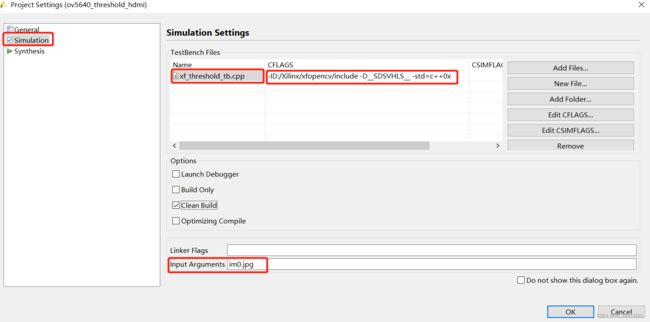
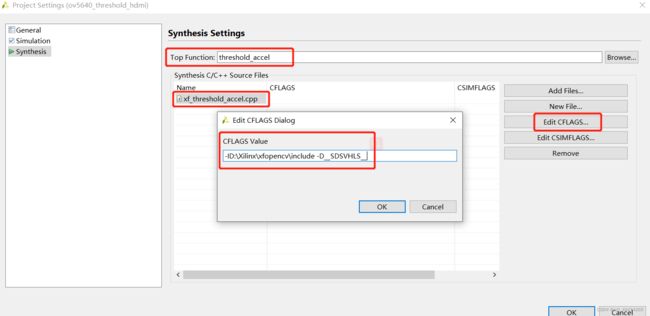
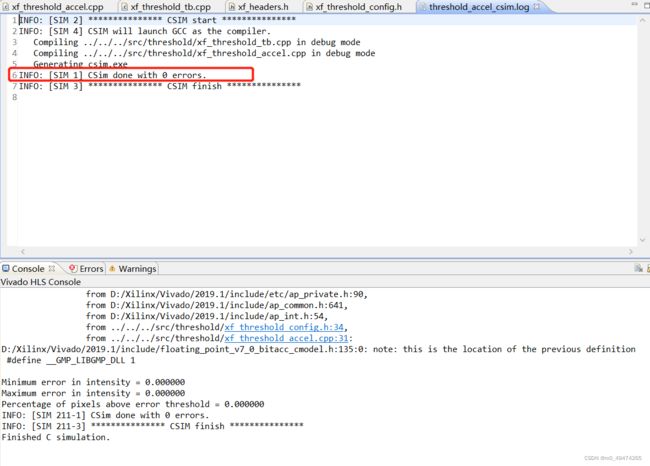
3.仿真结果
仿真报告
仿真生成的文件

任意导入一张图片(1.jpg),利用原来代码中给的阈值( short int maxval=50; short int thresh=100;),查看二值化后效果。
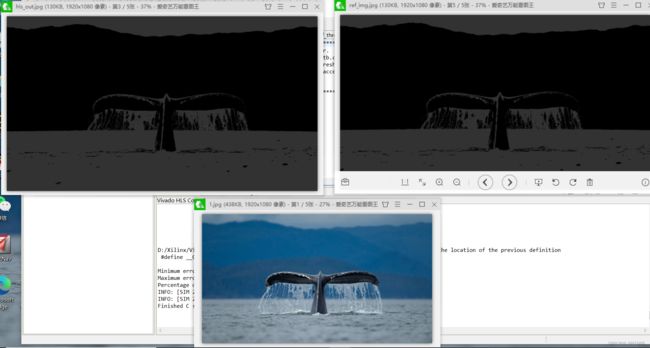
仿真看下来,将仿真出来的结果进行对比,HLS和OpenCv的效果几乎无差异。
测试 otsuthreshold 函数
利用 otsuthreshold 函数计算出 1.jpg 的二值化阈值,
1.添加示例代码
提示:截屏失误。
将xf_threshold_tb.cpp 换成xf_otsuthreshold_tb.cpp
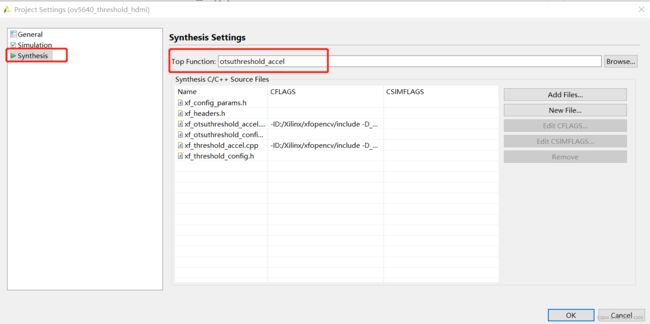
2.Project Settings
这里注意:Top Function 要换成otsuthreshold_accel
3.仿真结果
这里可以看到,otsuthreshold 求得的阈值为 104 。

测试自己创建的函数
创建otsuthreshold_ip_accel 和otsuthreshold_ip_accel_tb 函数,功能:调用otsuthreshold 函数产生的阈值做图像二值化处理。
1.添加文件
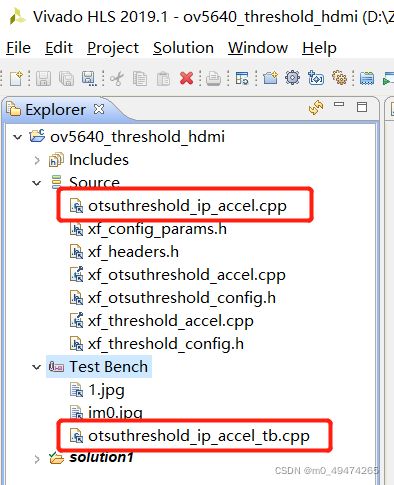
参考 xf_otsuthreshold_tb.cpp ,稍作修改,添加 otsuthreshold_ip_accel_tb.cpp 代码。
#include "xf_headers.h"
#include "xf_threshold_config.h"
#include "xf_otsuthreshold_config.h"
int main(int argc, char** argv)
{
if (argc != 2)
{
fprintf(stderr,"Invalid Number of Arguments!\nUsage:\n");
fprintf(stderr," \n" );
return -1;
}
cv::Mat in_img, out_img, ocv_ref, in_gray, diff;
unsigned short in_width,in_height;
uint8_t Otsuval;// 本人添加
/* reading in the color image */
in_img = cv::imread(argv[1],0);
if (in_img.data == NULL)
{
fprintf(stderr,"Cannot open image at %s\n",argv[1]);
return 0;
}
in_width = in_img.cols;
in_height = in_img.rows;
ocv_ref.create(in_img.rows,in_img.cols,in_img.depth());
out_img.create(in_img.rows,in_img.cols,in_img.depth());
diff.create(in_img.rows,in_img.cols,in_img.depth());
short int maxval=50;
// HLS TOP function call
static xf::Mat<XF_8UC1, HEIGHT, WIDTH, NPIX> imgInput(in_img.rows,in_img.cols);
static xf::Mat<XF_8UC1, HEIGHT, WIDTH, NPIX> imgOutput(in_img.rows,in_img.cols);
imgInput.copyTo(in_img.data);
#if __SDSCC__
perf_counter hw_ctr1;
hw_ctr1.start();
#endif
otsuthreshold_accel(imgInput,Otsuval);
threshold_accel(imgInput, imgOutput, Otsuval, maxval);//本人修改,调用otsuthreshold_accel的输出值Otsuval
#if __SDSCC__
hw_ctr1.stop();
uint64_t hw_cycles1 = hw_ctr1.avg_cpu_cycles();
#endif
opencv reference code
//short int thresh=100;
#if __SDSCC__
perf_counter hw_ctr;
hw_ctr.start();
#endif
cv::threshold(in_img,ocv_ref,Otsuval,maxval,THRESH_TYPE);//本人修改,调用otsuthreshold_accel的输出值Otsuval
#if __SDSCC__
hw_ctr.stop();
uint64_t hw_cycles = hw_ctr.avg_cpu_cycles();
#endif*/
// end opencv reference code//
// Write output image
xf::imwrite("hls_out.jpg",imgOutput);
cv::imwrite("ref_img.jpg", ocv_ref); // reference image
xf::absDiff(ocv_ref, imgOutput, diff);
imwrite("diff_img.jpg",diff); // Save the difference image for debugging purpose
float err_per;
xf::analyzeDiff(diff, 0, err_per);
if(err_per > 0.0f)
{
return 1;
}
return 0;
}
2.Project Settings
如果Top Function里找不到otsuthreshold_ip_accel,先在otsuthreshold_ip_accel.cpp文件中简单写一些初始代码,例如:
void otsuthreshold_ip_accel(){

}

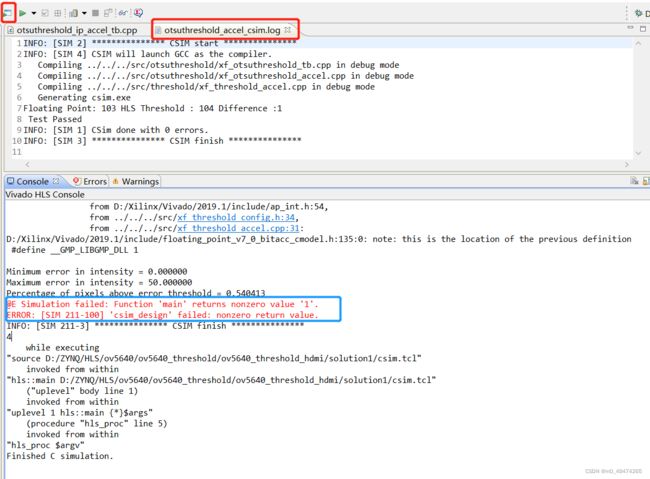
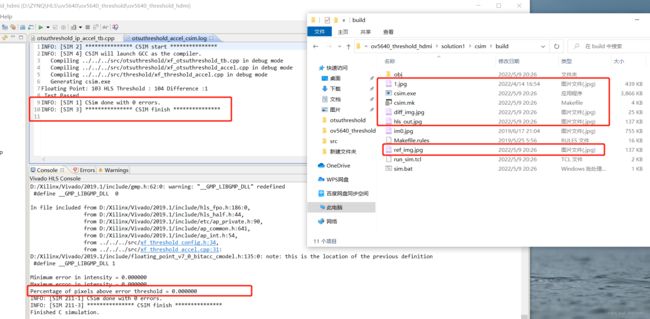
3.仿真结果
注意:如果出现 fatal error: xf_headers.h: No such file or directory #include “xf_headers.h”,则应该是文件体系出错。
将使用到的文件放在一个文件夹内。
下面这张仿真报告图,是因为在tb文件里,使用了不同的阈值,最后造成返回值为1(可能是两张图片区别太大)。
不同maxval值的结果对比
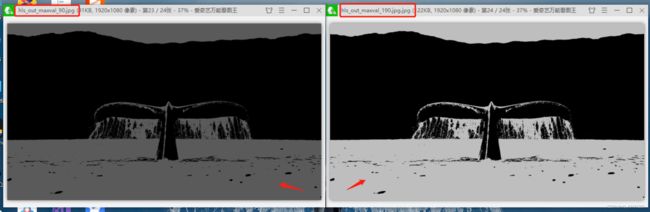
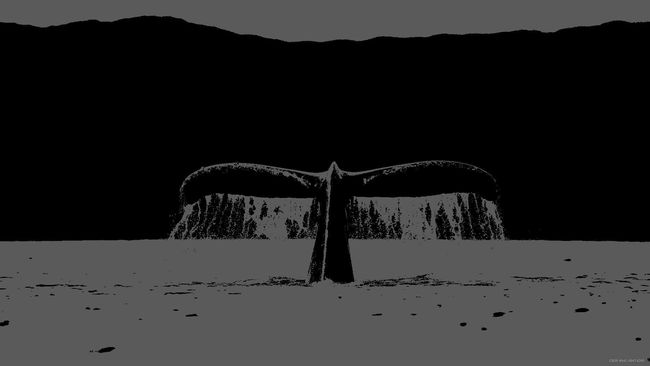
一开始不太理解参数maxval,后面将代码中maxval的值做了修改,进行对比。
左边的图,maxval值为90;右边的图,maxval的值为190。

总结
关于图像二值化的部分,先到这。
后面继续更新…