YOLO5.0
YOLO5.0
ultralytics/yolov5: YOLOv5 in PyTorch > ONNX > CoreML > TFLite (github.com)

1.环境配置
1.配置pytorch虚拟环境
下载anaconda:Index of / (anaconda.com)

在 Windows 上安装 — Anaconda 文档
2.搭建虚拟环境
conda create -n pytorch python=3.6

3.下载显卡驱动(可省)
官方 GeForce 驱动程序 | NVIDIA
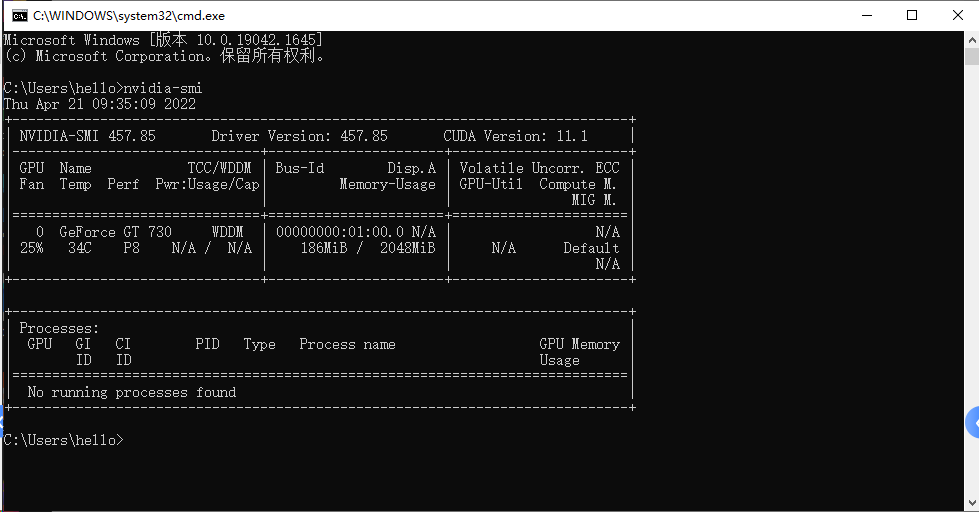
查看显卡:

查看CUDA版本:nVidia-smi,
4.下载配置pytorch
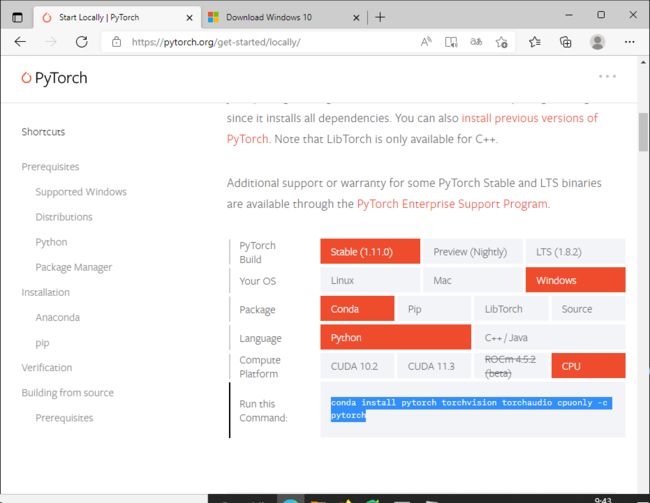
PyTorch
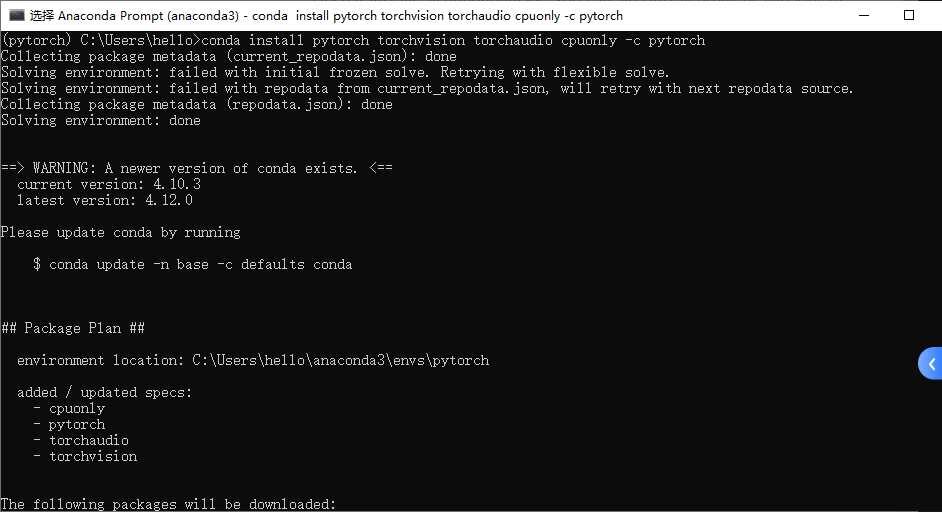
下载命令:
conda install pytorch torchvision torchaudio cpuonly -c pytorch
或CUDA=9.2版本
conda install pytorch torchvision cudatoolkit=9.2 -c pytorch -c defaults -c numba/label/dev
如果不配置GPU下载命令为:
conda install pytorch torchvision cpuonly -c pytorch
检验安装:
pip list
python
>>>import torch
>>>torch.cuda.is_available()
False(Ture代表下载了Gpu驱动)

2.导入所需要的包
激活虚拟环境
conda activate pytorch
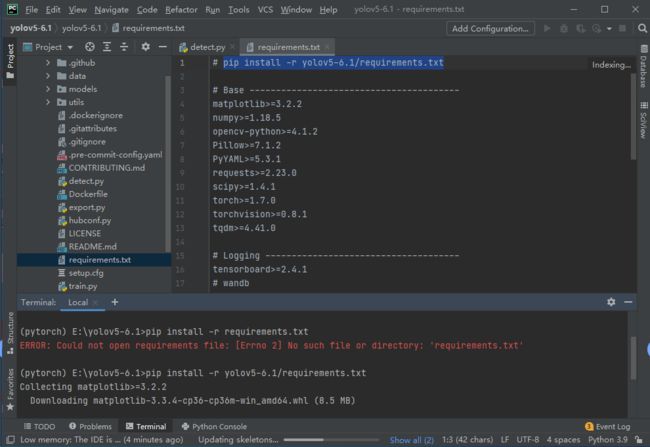
导入项目所需要的包
pip install -r requirements.txt
报错:ERROR: Could not open requirements file: [Errno 2] No such file or directory: 'requirements.txt'
右键.txt文件替换成根路径或绝对路径即可
报错:
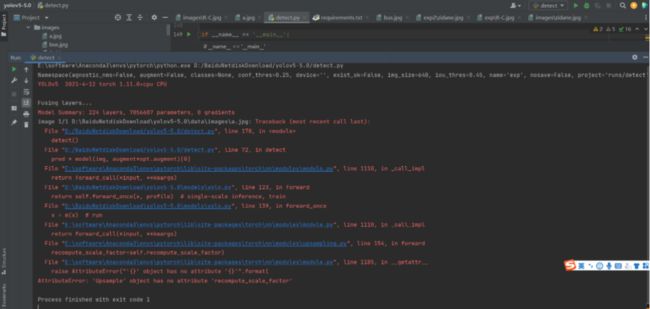
解决方法:点击下面这个报错的方法,进入修改代码即可

2.利用YOLO5—6.1预测
配置好环境后直接运行detect.py即可.pt文件代表已经训练好的模型
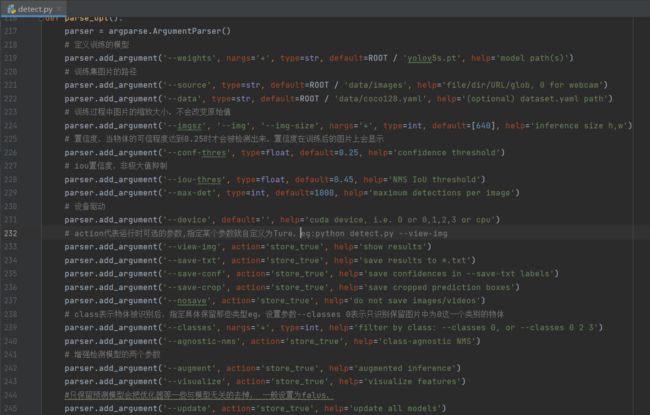
def parse_opt():
    parser = argparse.ArgumentParser()
    # 定义训练的模型
    parser.add_argument('--weights', nargs='+', type=str, default=ROOT / 'yolov5s.pt', help='model path(s)')
    # 训练集图片的路径
    parser.add_argument('--source', type=str, default=ROOT / 'data/images', help='file/dir/URL/glob, 0 for webcam')
    parser.add_argument('--data', type=str, default=ROOT / 'data/coco128.yaml', help='(optional) dataset.yaml path')
    # 训练过程中图片的缩放大小,不会改变原始值
    parser.add_argument('--imgsz', '--img', '--img-size', nargs='+', type=int, default=[640], help='inference size h,w')
    # 置信度,当物体的可信程度达到0.25时才会被检测出来,置信度在训练后的图片上会显示
    parser.add_argument('--conf-thres', type=float, default=0.25, help='confidence threshold')
    # iou置信度,非极大值抑制
    parser.add_argument('--iou-thres', type=float, default=0.45, help='NMS IoU threshold')
    parser.add_argument('--max-det', type=int, default=1000, help='maximum detections per image')
    # 设备驱动
    parser.add_argument('--device', default='', help='cuda device, i.e. 0 or 0,1,2,3 or cpu')
    # action代表运行时可选的参数,指定某个参数就自定义为Ture, eg:python detect.py --view-img
    parser.add_argument('--view-img', action='store_true', help='show results')
    parser.add_argument('--save-txt', action='store_true', help='save results to *.txt')
    parser.add_argument('--save-conf', action='store_true', help='save confidences in --save-txt labels')
    parser.add_argument('--save-crop', action='store_true', help='save cropped prediction boxes')
    parser.add_argument('--nosave', action='store_true', help='do not save images/videos')
    # class表示物体被识别后,指定具体保留那些类型eg:设置参数--classes 0表示只识别保留图片中为0这一个类别的物体
    parser.add_argument('--classes', nargs='+', type=int, help='filter by class: --classes 0, or --classes 0 2 3')
    parser.add_argument('--agnostic-nms', action='store_true', help='class-agnostic NMS')
    # 增强检测模型的两个参数
    parser.add_argument('--augment', action='store_true', help='augmented inference')
    parser.add_argument('--visualize', action='store_true', help='visualize features')
    #只保留预测模型会把优化器等一些与模型无关的去掉, 一般设置为falus,
    parser.add_argument('--update', action='store_true', help='update all models')
    # 结果保留的位置
    parser.add_argument('--project', default=ROOT / 'runs/detect', help='save results to project/name')
    # 结果保留名
    parser.add_argument('--name', default='exp', help='save results to project/name')
    # 将结果自动设置为一个文件夹,ture表示将所有结果保存到一个文件夹
    parser.add_argument('--exist-ok', action='store_true', help='existing project/name ok, do not increment')
    parser.add_argument('--line-thickness', default=3, type=int, help='bounding box thickness (pixels)')
    parser.add_argument('--hide-labels', default=False, action='store_true', help='hide labels')
    parser.add_argument('--hide-conf', default=False, action='store_true', help='hide confidences')
    parser.add_argument('--half', action='store_true', help='use FP16 half-precision inference')
    parser.add_argument('--dnn', action='store_true', help='use OpenCV DNN for ONNX inference')
    opt = parser.parse_args()
    opt.imgsz *= 2 if len(opt.imgsz) == 1 else 1  # expand
    print_args(FILE.stem, opt)
    return opt

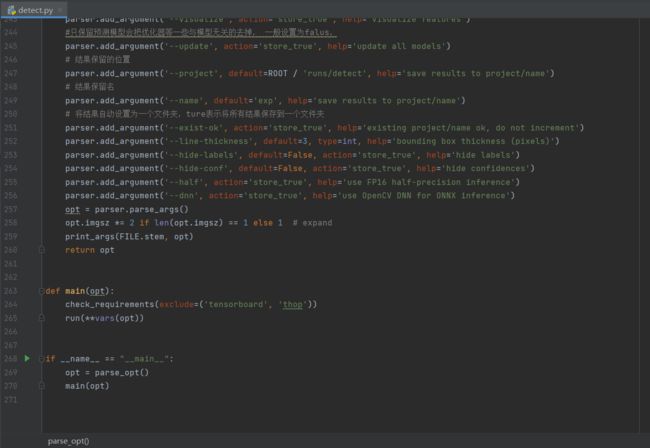

多个可选参数之间用空格隔开

3.训练YOLO模型
1.本地训练
打开train.py文件
自动下载coco数据集128,是coco数据集的前128张
def parse_opt(known=False):
    parser = argparse.ArgumentParser()
    # 存放自己训练好的模型路径
    parser.add_argument('--weights', type=str, default=ROOT / 'yolov5s.pt', help='initial weights path')
    # 设置模型参数初始化配置文件在models文件夹里面
    parser.add_argument('--cfg', type=str, default='', help='model.yaml path')
    # 存放训练数据,自己的数据集要先配置数据集的.yaml文件,具体参照data/coco.yaml的配置
    parser.add_argument('--data', type=str, default=ROOT / 'data/coco128.yaml', help='dataset.yaml path')
    # 调参数,hyp.scratch~.yaml表示从头开始训练,其他表示对数据进行微调
    parser.add_argument('--hyp', type=str, default=ROOT / 'data/hyps/hyp.scratch-low.yaml', help='hyperparameters path')
    #训练多少轮
    parser.add_argument('--epochs', type=int, default=300)
    #数据集打包的个数,即数据集分成多少批(batch)送到网络中训练
    parser.add_argument('--batch-size', type=int, default=16, help='total batch size for all GPUs, -1 for autobatch')
    parser.add_argument('--imgsz', '--img', '--img-size', type=int, default=640, help='train, val image size (pixels)')
    #表示用矩阵的训练方式
    parser.add_argument('--rect', action='store_true', help='rectangular training')
    # 指定在那个模型上继续训练eg:default=‘yolov5-6.1/runs/train/exp/weights/last.pt‘
    parser.add_argument('--resume', nargs='?', const=True, default=False, help='resume most recent training')
    # ture设置保存最后一次训练的模型
    parser.add_argument('--nosave', action='store_true', help='only save final checkpoint')
    # ture设置只在最后一个文件进行测试
    parser.add_argument('--noval', action='store_true', help='only validate final epoch')
    # 训练时命令行添加–noautoanchor,表示不计算anchor(锚点),直接使用配置文件里的默认的anchor,不加该参数表示训练之前会自动计算
    parser.add_argument('--noautoanchor', action='store_true', help='disable AutoAnchor')
    # 寻找最优参数,默认用广度搜索的方式
    parser.add_argument('--evolve', type=int, nargs='?', const=300, help='evolve hyperparameters for x generations')
    # 通过谷歌云盘下载数据
    parser.add_argument('--bucket', type=str, default='', help='gsutil bucket')
    # 图片缓存
    parser.add_argument('--cache', type=str, nargs='?', const='ram', help='--cache images in "ram" (default) or "disk"')
    # 对上一轮测试图片训练不佳的图片加权重
    parser.add_argument('--image-weights', action='store_true', help='use weighted image selection for training')
    # 指定Gpu
    parser.add_argument('--device', default='', help='cuda device, i.e. 0 or 0,1,2,3 or cpu')
    # 训练过程中对图片尺寸进行变换
    parser.add_argument('--multi-scale', action='store_true', help='vary img-size +/- 50%%')
    # 表示训练的数据集是单类别还是多类别,faluse代表多类别
    parser.add_argument('--single-cls', action='store_true', help='train multi-class data as single-class')
    # 优化器的选择
    parser.add_argument('--optimizer', type=str, choices=['SGD', 'Adam', 'AdamW'], default='SGD', help='optimizer')
    # DDP是否进行分布式训练
    parser.add_argument('--sync-bn', action='store_true', help='use SyncBatchNorm, only available in DDP mode')
    # 设置了DDP在设置这个,表示同时进行的线程数
    parser.add_argument('--workers', type=int, default=0, help='max dataloader workers (per RANK in DDP mode)')
    # 训练好的图片存放处,及下面那个参数是保存的文件名
    parser.add_argument('--project', default=ROOT / 'runs/train', help='save to project/name')
    parser.add_argument('--name', default='exp', help='save to project/name')
    # 设置是否把训练好的图片保存到当前文件夹
    parser.add_argument('--exist-ok', action='store_true', help='existing project/name ok, do not increment')
    # 对数据处理的方式ture和faluse代表两种不同的处理方式,具体看官网
    parser.add_argument('--quad', action='store_true', help='quad dataloader')
    # 调整学习速率
    parser.add_argument('--cos-lr', action='store_true', help='cosine LR scheduler')
    # 标签平滑,防止过拟合
    parser.add_argument('--label-smoothing', type=float, default=0.0, help='Label smoothing epsilon')
    parser.add_argument('--patience', type=int, default=100, help='EarlyStopping patience (epochs without improvement)')
    parser.add_argument('--freeze', nargs='+', type=int, default=[0], help='Freeze layers: backbone=10, first3=0 1 2')
    # 对模型打上日志标签,-1代表不开启
    parser.add_argument('--save-period', type=int, default=-1, help='Save checkpoint every x epochs (disabled if < 1)')
    parser.add_argument('--local_rank', type=int, default=-1, help='DDP parameter, do not modify')

    # Weights & Biases arguments
    # W&B框架类似于trouthflow下面这几个参数代表是否使用这个框架
    parser.add_argument('--entity', default=None, help='W&B: Entity')
    parser.add_argument('--upload_dataset', nargs='?', const=True, default=False, help='W&B: Upload data, "val" option')
    parser.add_argument('--bbox_interval', type=int, default=-1, help='W&B: Set bounding-box image logging interval')
    parser.add_argument('--artifact_alias', type=str, default='latest', help='W&B: Version of dataset artifact to use')

    opt = parser.parse_known_args()[0] if known else parser.parse_args()
    return opt
4.制作和训练自己的数据集
数据集来源:coco(https://cocodataset.org/)
和鲸(https://www.heywhale.com/home)
kaggle(https://www.kaggle.com/)
仿真数据集(synthetic data objetc detection。eg:( https://github.com/Unity-Technologies/SynthDet)
人工标注自定义数据集:
Train Custom Data · ultralytics/yolov5 Wiki (github.com)

1.配置.yaml文件
# Train/val/test sets as 1) dir: path/to/imgs, 2) file: path/to/imgs.txt, or 3) list: [path/to/imgs1, path/to/imgs2, ..]
path: ../datasets/coco128  # dataset root dir
train: images/train2017  # train images (relative to 'path') 128 images
val: images/train2017  # val images (relative to 'path') 128 images
test:  # test images (optional)

# Classes
nc: 80  # number of classes
names: [ 'person', 'bicycle', 'car', 'motorcycle', 'airplane', 'bus'......]  # class names
s/coco128 # dataset root dir
train: images/train2017 # train images (relative to ‘path’) 128 images
val: images/train2017 # val images (relative to ‘path’) 128 images
test: # test images (optional)
Classes
nc: 80 # number of classes
names: [ ‘person’, ‘bicycle’, ‘car’, ‘motorcycle’, ‘airplane’, ‘bus’…] # class names