uniapp自定义底部导航tabBar,实现不同权限不同tabBar
文章目录
- 问题与需求
- 解决
-
- 一、在page.json中配置tabbar
- 二、创建自定义tabbarData.js文件
- 三、配置store
- 四、在自定义tabbar(tabbar.vue)中使用
- 五、在界面中使用自定义tabbar作为组件
问题与需求
需求:有多个角色,需要通过判定角色来展示相对应的不同tabbar。
问题:如果用自带的tabbar只能写一个tabbar(包括五项)
解决:采用自定义tabbar
解决
一、在page.json中配置tabbar
注意1:这里list只能放5个path,所以如果要有不同的tabbar就需要在这个index里面在根据不同的权限调用不同的界面(不同权限对应的界面此时作为子组件出现,而不是跳转)
简单做文件结构示例
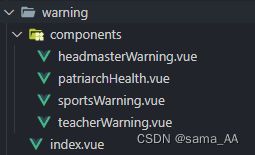
这里是index里面根据角色选择子界面(组件)的示例

注意2:“custom”: true,说明启用自定义tabbar
下面是配置的具体代码
"tabBar": {
    "custom": true,
    "color": "#666",
    "selectedColor": "#6847f5",
    "borderStyle": "white",
    "list": [
      {
        "pagePath": "pages/fourth/index"
      },
      {
        "pagePath": "pages/home/index"
      },
      {
        "pagePath": "pages/warning/index"
      },
      {
        "pagePath": "pages/data/index"
      },
      {
        "pagePath": "pages/userInfo/index"
      }
    ]
  }
二、创建自定义tabbarData.js文件
创建位置在utils文件夹下面。这里记录了每种tabbar的信息。
**注意1:**这里的页面路径必须是上面配置的路径,因为只有在page.json中配置过的路径才能用uni.switchTab跳转。
**注意2:**顺序就是从左到右显示的顺序。
代码示例如下:(由于源代码太长,这里只放了两个角色的简化版)
const teacherTabList = [
  {
    // 未点击图标
    iconPath: require('@/static/images/icon/icon1.png'),
    // 点击后图标
    selectedIconPath: require('@/static/images/icon/icon2.png'),
    // 显示文字
    text: '健康',
    // 是否使用自定义图标
    customIcon: true,
    // 页面路径
    pagePath: '/pages/warning/index'
  },
  {
    iconPath: require('@/static/images/icon/icon3.png'),
    selectedIconPath: require('@/static/images/icon/icon4.png'),
    text: '家校',
    customIcon: true,
    pagePath: '/pages/home/index'
  }
];
const patriarchTabList = [
  {
    iconPath: require('@/static/images/icon/icon19.png'),
    selectedIconPath: require('@/static/images/icon/icon20.png'),
    text: '警报',
    customIcon: true,
    pagePath: '/pages/warning/index'
  },
  {
    iconPath: require('@/static/images/icon/icon3.png'),
    selectedIconPath: require('@/static/images/icon/icon4.png'),
    text: '家校',
    customIcon: true,
    pagePath: '/pages/home/index'
  }
];
export default {
  teacherTabList,
  patriarchTabList
};
三、配置store
目的:在全局使用(主要是自定义tabbar那个文件)经过这里确定的tabbarlist
以下示例也只保留了关键内容
import tabBer from "@/utils/tabbarData";
let type = uni.getStorageSync("role") === 1 ? "teacherTabList" : "patriarchTabList"
const state = {
  list: tabBer[type],
};
const mutations = {
  putTabBerList(state, value) {
    state.list = value;
  },
  putUserMsg(state, value) {
    state.userMsg = value;
  },
};
const actions = {
  async putUserMsg({ commit }, value) {
    const data = await userDetail();
    if (!data || (!data.name && !data.phone)) {
      if (!uni.getStorageSync("userFlag")) {
        uni.redirectTo({ url: "/subPages/bindInfo/index" });
      }
      return false;
    } else {
      commit("putUserMsg", value);
      if (!uni.getStorageSync("userFlag")) {
        switch (uni.getStorageSync("role")) {
          case 1:
            commit("putTabBerList", tabBer["teacherTabList"]);
            uni.switchTab({ url: "/pages/warning/index" });
            break;
          case 2:
            commit("putTabBerList", tabBer["patriarchTabList"]);
            uni.switchTab({ url: "/pages/data/index" });
            break;
        }
      }
    }
  },
};
const getters = {
  tabBerList: (state) => state.list
};

export default {
  state,
  getters,
  actions,
  mutations,
};
四、在自定义tabbar(tabbar.vue)中使用
注意: 使用…mapGetters([‘tabBerList’]) 使得在自定义tabbar的文件中能检测到实时的tabbarlist是哪一种并使用。
顺便附上自定义tabbar的代码。实现的效果:有选中和非选中图标的区别
<template>
  <view class="tabbar-style">
    <u-tabbar
      :value="value"
      :fixed="true"
      :placeholder="true"
      :border="false"
      activeColor="#6847F5"
      inactiveColor="#ADA9C1"
      :safeAreaInsetBottom="true"
    >
      <u-tabbar-item
        v-for="(item, index) of tabBerList"
        :key="index"
        :text="item.text"
        @click="clickTabChange(item, index)"
      >
        <image class="tab-icon" slot="active-icon" :src="item.iconPath"></image>
        <image
          class="tab-icon"
          slot="inactive-icon"
          :src="item.selectedIconPath"
        ></image>
      </u-tabbar-item>
    </u-tabbar>
  </view>
</template>

<script>
import { mapGetters } from 'vuex';
export default {
  props: {//使用tabbar的界面的传参,value决定了是tabbar的第几个正在被选中。
    value: Number
  },
  computed: {
    ...mapGetters(['tabBerList'])
  },
  methods: {
    clickTabChange(e, i) {
      uni.switchTab({ url: e.pagePath });
    }
  }
};
</script>
<style lang="less" scoped>
.tabbar-style {
  position: fixed;
  bottom: 0;
  width: 100%;
  z-index: 9;
}
.tab-icon {
  .square(38rpx; 38rpx);
}
</style>
五、在界面中使用自定义tabbar作为组件
注意: 其中传入的value是从0开始计的,代表了选中了当前tabbar的第几个
<template>
  <view>
	...
    <tab-bar :value="2" />
  </view>
</template>
<script>
import TabBar from '@/components/TabBar';
components: { TabBar },
</script>