【短信发送】实现腾讯云发送短信功能--工具类和SpringBoot配置两种方法实现
实现腾讯云发送短信功能--工具类和SpringBoot配置两种方法实现
- 一、开通腾讯云短信服务
- 二、工具类--使用qcloudsms实现短信发送
- 三、Spring Boot项目引入短信发送功能
我们发现,大多数系统的登陆验证以及数据安全都以手机号为主,因此,许多的系统都采用绑定手机号或者手机号验证的类似功能,因此,本篇介绍并提供短信发送功能的实现内容。
一、开通腾讯云短信服务
1.通过个人微信公众号申请开通短信服务,首次开通可以免费获赠100条国内短信。
微信公众平台:https://mp.weixin.qq.com,先要注册个人订阅号。
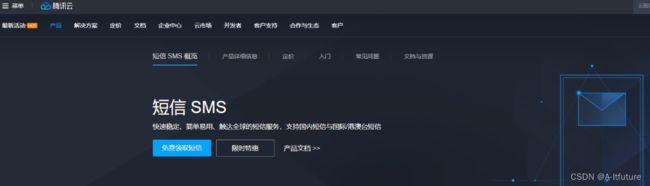
2.然后登录腾讯云,在界面的右上角点击控制台进入,鼠标移到左上角的云产品,搜索短信进入短信模块,申请开通,点击开始接入。

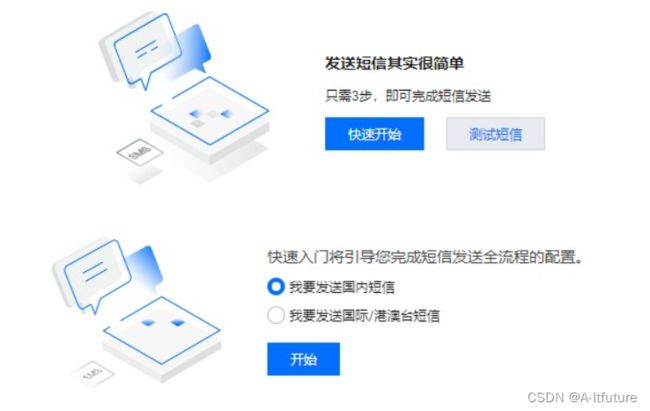
3.快速开始,开始。
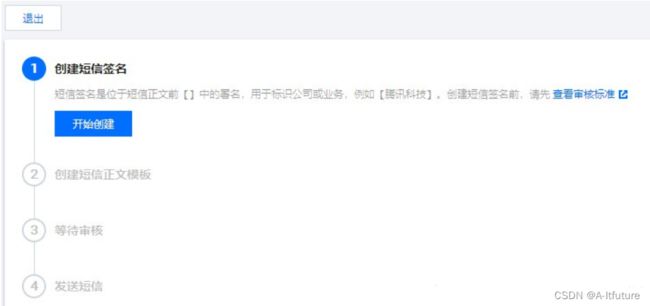
4.开始创建短信签名。
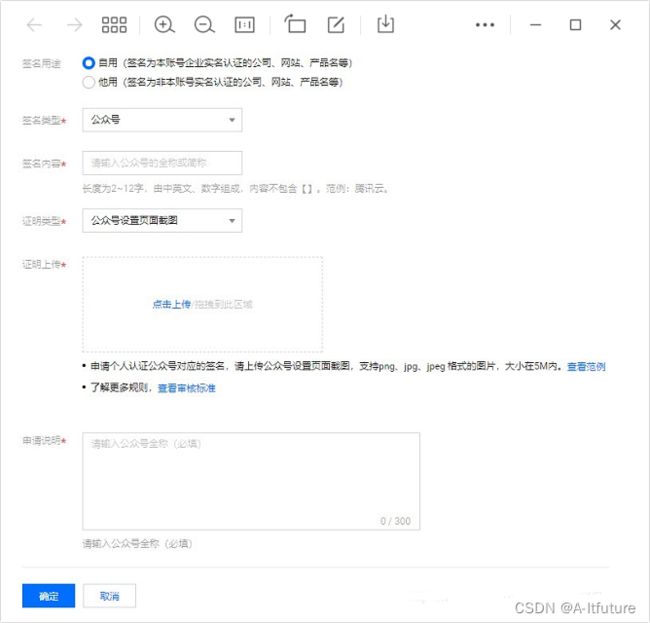
5.这里签名用途选择自用,签名类型选公众号,签名内容写你的公众号名称,证明类型选公众号设置页面截图,可以查看范例,截图上传,申请说明写公众号全称。
6.等待十几分钟后,签名通过,就可以创建正文模板了。记下签名的内容,后面发送短信要用到(配置yml的时候用)。

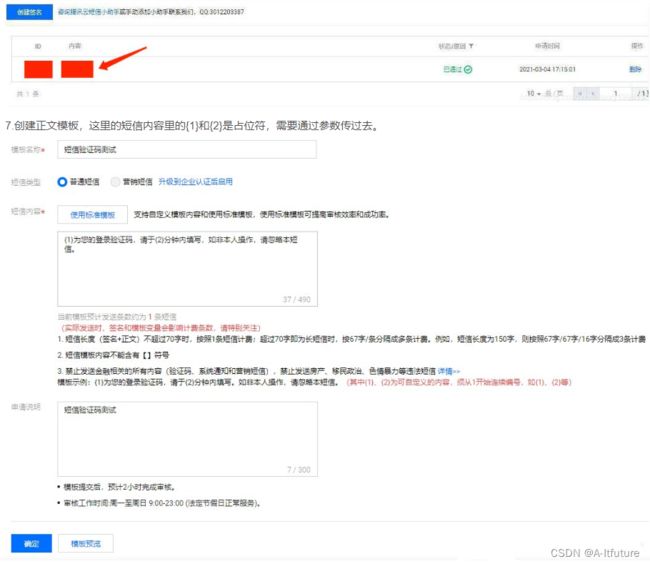
7.创建正文模板,这里的短信内容里的{1}和{2}是占位符,需要通过参数传过去。
8.等待十几分钟后,正文模板审核通过。记下正文模板的ID,后面发送短信要用到(配置yml的时候用)。
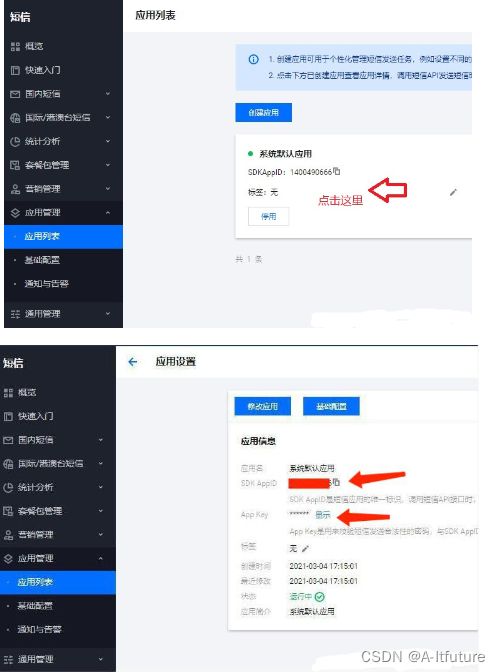
9.最后再到应用管理中的应用列表,拿到你的SDK AppID和App Key(配置yml的时候用),就可以测试发送短信了。
短信服务的腾讯云服务就开通好了。
二、工具类–使用qcloudsms实现短信发送
首先提供工具类的方式去实现短信发送功能。
需要的依赖包是com.github.qcloudsms下的qcloudsms。
具体如下(里面的应用ID、key、模板id都是自已在开通云服务时设置好的,填自己的就行):
import com.alibaba.fastjson.JSONException;
import com.github.qcloudsms.SmsSingleSender;
import com.github.qcloudsms.SmsSingleSenderResult;
import com.github.qcloudsms.httpclient.HTTPException;

import java.io.IOException;

/**自定义发送短信的工具类 (项目不用该类,使用sprinboot自动配置类)
 * @Description:
 * @Author wxh
 * @Version 1.0
 * @Date Created in 2021-01-03 13:05
 */
public class SMSUtil {

    // 短信应用 SDK AppID
    private static int appid = 14002568; // SDK AppID 以1400开头
    // 短信应用 SDK AppKey
    private static  String appkey = "应用App Key";
    // 需要发送短信的手机号码
//    String[] phoneNumbers = {"13025468745","145827485"};
    // 短信模板 ID,需要在短信应用中申请
    private static  int templateId1 = 1264448; // NOTE: 这里的模板 ID`7839`只是示例,真实的模板 ID 需要在短信控制台中申请
    private static  int templateId2 = 1265837; // NOTE: 这里的模板 ID`7839`只是示例,真实的模板 ID 需要在短信控制台中申请
    // 签名
    private static  String smsSign = "Itfuture栈"; // NOTE: 签名参数使用的是`签名内容`,而不是`签名ID`。这里的签名"腾讯云"只是示例,真实的签名需要在短信控制台申请

    public static boolean QCloudSmsSend(String phoneNumber,String code){
        try {
            String[] params = new String[1];
            params[0] =code;
            SmsSingleSender ssender = new SmsSingleSender(appid, appkey);
            //sendWithParm:     传入国家码 电话号码 模板id 模板参数 签名 扩展码为空 返回参数为空
            SmsSingleSenderResult result = ssender.sendWithParam("86", phoneNumber,
                    templateId1, params, smsSign, "", "");
            if(result.result==0){
                return true;
            }else{
                System.out.println("短信发送失败,原因:"+result.errMsg);
            }
        } catch (HTTPException e) {
            // HTTP 响应码错误
            e.printStackTrace();
        } catch (JSONException e) {
            // JSON 解析错误
            e.printStackTrace();
        } catch (IOException e) {
            // 网络 IO 错误
            e.printStackTrace();
        }
        return false;
    }

    public static boolean loginSmsSend(String phoneNumber,String code){
        try {
            String[] params = new String[1];
            params[0] =code;
            SmsSingleSender ssender = new SmsSingleSender(appid, appkey);
            //sendWithParm:     传入国家码 电话号码 模板id 模板参数 签名 扩展码为空 返回参数为空
            SmsSingleSenderResult result = ssender.sendWithParam("86", phoneNumber,
                    templateId2, params, smsSign, "", "");
            if(result.result==0){
                return true;
            }else{
                System.out.println("短信发送失败,原因:"+result.errMsg);
            }
        } catch (HTTPException e) {
            // HTTP 响应码错误
            e.printStackTrace();
        } catch (JSONException e) {
            // JSON 解析错误
            e.printStackTrace();
        } catch (IOException e) {
            // 网络 IO 错误
            e.printStackTrace();
        }
        return false;
    }
}
三、Spring Boot项目引入短信发送功能
接下来主要是如何在spring boot项目使用该功能
1.在项目代码的commons层导入依赖;
<dependency>
    <groupId>com.github.qcloudsms</groupId>
    <artifactId>qcloudsms</artifactId>
    <version>1.0.6</version>
</dependency>
2.application.yml参数设置,放在项目名称下。
# 短信发送参数
txsms:
  AppId: 1400616 # 你的系统默认应用SDK AppID
  AppKey: "应用App Key" # 你的系统默认应用App Key
  TemplateId1: 12648 # 你的正文模板ID1
  TemplateId2: 12637 # 你的正文模板ID2
  signName: "Itfuture栈" # 你的签名内容
3.SpringBoot自动装配(springboot最大特点)
/**
 * 自动配置类
 * 配置工具类 template
 */
@Configuration
@EnableConfigurationProperties({TxProperties.class})
public class CommonsAutoConfiguration {

    /*
    * 创建发送短信的工具类
    * 将TxProperties对象注入到容器中
    * 要配置CommonsAutoConfiguration到resources/META-INF/spring.factories中
    * */
    @Bean
    public TxSmsTemplate txSmsTemplate(TxProperties txProperties) {
        return new TxSmsTemplate(txProperties);
    }
}
4.创建参数配置类TxProperties.java
/**腾讯云发送短信
 * 参数配置类
 * @author: wxh
 * @version:v1.0
 * @date: 2022/11/11 21:12
 */
@Data
// 读取application.yml中的项目名称.txsms的属性
@ConfigurationProperties("e.txsms")
public class TxProperties {
    // AppId  1400开头的
    private int AppId;
    // 短信应用SDK AppKey
    private String AppKey;
    // 短信模板ID1
    private int TemplateId1;
    // 短信模板ID2
    private int TemplateId2;
    // 签名
    private String signName;
}
5.创建TxSmsTemplate.java
模板里面主要定义自己所需要的业务功能(即不同模板可以实现不同功能),比如:我定义了两个模板,一个实现发送取件码功能,一个实现登陆注册验证功能。
package com.itfuture.e.sms;

import com.alibaba.fastjson.JSONException;
import com.github.qcloudsms.SmsSingleSender;
import com.github.qcloudsms.SmsSingleSenderResult;
import com.github.qcloudsms.httpclient.HTTPException;
import lombok.extern.slf4j.Slf4j;
import org.springframework.stereotype.Component;

import java.io.IOException;

/**腾讯云发送短信模板对象,封装了发送短信的api
 * @author: wxh
 * @version:v1.0
 * @date: 2022/11/11 21:15
 */
@Slf4j
@Component
public class TxSmsTemplate {

    private TxProperties txProperties;

    public TxSmsTemplate(TxProperties txProperties) {
        this.txProperties = txProperties;
    }

    /**
     * 发送取件码
     * @param phoneNumber 手机号
     * @param code 取件码
     * @return
     */
    public boolean sendMsgCode(String phoneNumber,String code) {
        try {
            // 接收生成的验证码,设置5分钟内填写
            String[] params = {code, "5"};

            // 构建短信发送器
            SmsSingleSender ssender = new SmsSingleSender(txProperties.getAppId(), txProperties.getAppKey());
            //sendWithParm:     传入国家码 电话号码 模板id 模板参数 签名 扩展码为空 返回参数为空
            SmsSingleSenderResult result = ssender.sendWithParam("86", phoneNumber,
                    txProperties.getTemplateId1(), params, txProperties.getSignName(), "", ""); // 签名参数未提供或者为空时,会使用默认签名发送短信

            if(result.result==0){
                return true;
            }else{
                System.out.println("短信发送失败,原因:"+result.errMsg);
            }
        } catch (HTTPException e) {
            // HTTP响应码错误
            log.info("短信发送失败,HTTP响应码错误!");
            // e.printStackTrace();
        } catch (JSONException e) {
            // json解析错误
            log.info("短信发送失败,json解析错误!");
            //e.printStackTrace();
        } catch (IOException e) {
            // 网络IO错误
            log.info("短信发送失败,网络IO错误!");
            // e.printStackTrace();
        }
        return false;
    }


    /**
     * 登陆、注册验证
     * @param phoneNumber 手机号
     * @param code 验证码
     * @return
     */
    public boolean loginSmsSend(String phoneNumber,String code){
        try {
            // 接收生成的验证码,设置5分钟内填写
            String[] params = {code, "5"};

            // 构建短信发送器
            SmsSingleSender ssender = new SmsSingleSender(txProperties.getAppId(), txProperties.getAppKey());
            //sendWithParm:     传入国家码 电话号码 模板id 模板参数 签名 扩展码为空 返回参数为空
            SmsSingleSenderResult result = ssender.sendWithParam("86", phoneNumber,
                    txProperties.getTemplateId2(), params, txProperties.getSignName(), "", ""); // 签名参数未提供或者为空时,会使用默认签名发送短信

            if(result.result==0){
                return true;
            }else{
                System.out.println("短信发送失败,原因:"+result.errMsg);
            }
        } catch (HTTPException e) {
            // HTTP响应码错误
            log.info("短信发送失败,HTTP响应码错误!");
            // e.printStackTrace();
        } catch (JSONException e) {
            // json解析错误
            log.info("短信发送失败,json解析错误!");
            //e.printStackTrace();
        } catch (IOException e) {
            // 网络IO错误
            log.info("短信发送失败,网络IO错误!");
            // e.printStackTrace();
        }
        return false;
    }
}
6.测试
@RunWith(SpringRunner.class)
@SpringBootTest
public class TestSms {

    @Autowired
    private TxSmsTemplate txSmsTemplate;

    /**
     * 腾讯云发送短信测试
     */
    @Test
    public void TxSmsTest(){
        // 参数1: 手机号(正文模板中的参数{1})
        // 参数2: 验证码(正文模板中的参数{2})
        boolean Msg = txSmsTemplate.sendMsgCode("用户手机号码", "验证码");
        System.out.println(Msg);
    }
}
声明:本文中所有的AppId以及AppKey都是假的,只是为了更加真实,便于理解。