Windows系统下编译安装MMDeploy
Windows系统下编译安装MMDeploy
在Windows系统下编译安装MMDeploy模型部署工具,并转换为ONNX(IR),进而转换为TensorRT进行推理的一整套流程,内容来源于官方文档,做了少量精简和修改。
完成这个教程,你可以:
- 使用MMDeploy将torch模型转换为onnx(IR)
- 使用MMDeploy将onnx(IR)转换为TensorRT(engine)模型
- 集成MMDeploy提供的SDK到自己的应用开发中
基础环境准备
- Shell:Powershell 7,以管理员身份打开,否则CMake可能会出问题,这是一种常见的失败原因
- Python发行版本:MiniConda3 —> Python 3.8.13
- 配置C/C++编译器:安装Visual Studio 2019勾选
- 使用C++的桌面开发
- Windows 10 SDK
- 配置CMake编译工具链:将Visual Studio 2019安装目录下,即"${install_dir}/2019/Community/Common7/IDE/CommonExtensions/Microsoft/CMake/CMake/bin"加入环境变量
- 安装并配置cuda与cudnn:默认安装即可(一定要勾选
Visual Studio Integration,后面会用到)- 建议将cudnn解压后与cuda合并在一起,这样不用再单独配置cudnn的环境变量,只要保证cuda的环境变量配置好即可。
MMCV环境准备
-
使用conda新建一个虚拟环境
conda create --name mmdeploy_backup python=3.8.13 conda activate mmdeploy_backup -
安装PyTorch,GPU版本,使用pip安装
pip install torch==1.12.1+cu113 torchvision==0.13.1+cu113 torchaudio==0.12.1 --extra-index-url https://download.pytorch.org/whl/cu113 -
安装mmcv-full
pip install openmim min install mmcv-full -
安装OpenCV
-
下载OpenCV
-
将build目录加入环境变量
-
安装opencv-python
pip install opencv-python -
-
安装pplcv,这一步是本人花费时间最长的一步…
-
克隆pplcv仓库
git clone https://github.com/openppl-public/ppl.cv.git cd ppl.cv git checkout tags/v0.7.0 -b v0.7.0 $env:PPLCV_DIR = "$pwd" mkdir pplcv-build cd pplcv-build -
编译pplcv
首先:
cmake .. -G "Visual Studio 16 2019" -T v142 -A x64 -DCMAKE_BUILD_TYPE=Release -DCMAKE_INSTALL_PREFIX=install -DPPLCV_USE_CUDA=ON -DPPLCV_USE_MSVC_STATIC_RUNTIME=OFF输出错误:
Checking Build System Creating directories for 'hpcc-populate' Performing download step (download, verify and extract) for 'hpcc-populate' -- Downloading... dst='D:/py-projects/Deploy_backup/ppl.cv/deps/hpcc-subbuild/hpcc-populate-prefix/src/800a280b41228df99a3d585d27b3fd962e780414.zip' timeout='none' inactivity timeout='none' -- Using src='https://github.com/openppl-public/hpcc/archive/800a280b41228df99a3d585d27b3fd962e780414.zip' CMake Error at hpcc-subbuild/hpcc-populate-prefix/src/hpcc-populate-stamp/download-hpcc-populate.cmake:170 (message): Each download failed! CUSTOMBUILD : error : downloading 'https://github.com/openppl-public/hpcc/archive/800a280b41228df99a3d585d27b3fd962e780414.zip' failed [D:\py-projects\Deploy_backup\ppl.cv\deps\hpcc-subbuild\hpcc-populate.vcxproj] status_code: 35 status_string: "SSL connect error" log: --- LOG BEGIN --- timeout on name lookup is not supported Trying 20.205.243.166:443... Connected to github.com (20.205.243.166) port 443 (#0) schannel: ALPN, offering h2 schannel: ALPN, offering http/1.1 schannel: failed to receive handshake, SSL/TLS connection failed Closing connection 0 schannel: shutting down SSL/TLS connection with github.com port 443 Send failure: Connection was reset schannel: failed to send close msg: Failed sending data to the peer (bytes written: -1) --- LOG END ---根据错误信息可以知道,在编译的过程中,需要在Github下载几个zip文件,等待时间过长,引发了错误。我们可以修改CMake文件,使用代理进行下载,找到
ppl.cv/cmake/deps.cmake使用编辑器查找
https://github.com,然后将其替换为https://ghproxy.com/https://github.com再次运行:
cmake .. -G "Visual Studio 16 2019" -T v142 -A x64 -DCMAKE_BUILD_TYPE=Release -DCMAKE_INSTALL_PREFIX=install -DPPLCV_USE_CUDA=ON -DPPLCV_USE_MSVC_STATIC_RUNTIME=OFF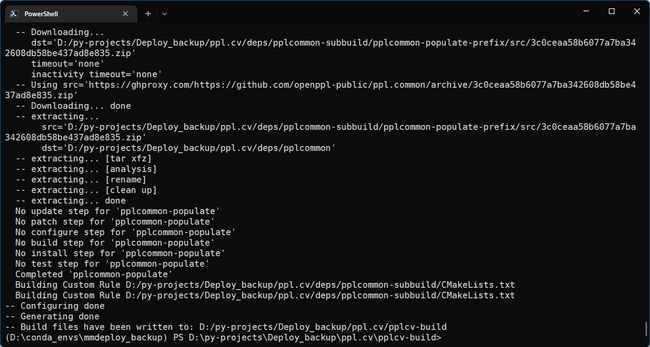
成功!
编译:
cmake --build . --config Release -- /m让风扇转几分钟,编译成功!
安装:
cmake --install . --config Release
-
安装推理引擎
ONNXRuntime
-
安装python包
pip install onnxruntime==1.8.1 -
配置预编译包
- 下载地址:Github
- 解压后将
$ONNXRuntime_DIR/lib加入环境变量
TensorRT
-
按官方文档下载并安装TensorRT的zip版本
我这里只安装了TensorRT一个包,graphsurgeon与onnx_graphsurgeon并没有安装,最后也能运行成功
-
安装pycuda
pip install pycuda
编译安装MMDeploy
- 克隆MMDeploy仓库
注意:这里使用–recursive安装了子仓库
git clone -b master [email protected]:open-mmlab/mmdeploy.git --recursive
编译获得Converter
cd \the\root\path\of\MMDeploy
$env:MMDEPLOY_DIR="$pwd"
-
编译安装onnxruntime自定义算子库
mkdir build -ErrorAction SilentlyContinue cd build cmake .. -G "Visual Studio 16 2019" -A x64 -T v142 -DMMDEPLOY_TARGET_BACKENDS="trt" -DTENSORRT_DIR="$env:TENSORRT_DIR" -DCUDNN_DIR="$env:CUDNN_DIR" cmake --build . --config Release -- /m cmake --install . --config Release -
编译安装TensorRT自定义算子库
cmake .. -G "Visual Studio 16 2019" -A x64 -T v142 -DMMDEPLOY_TARGET_BACKENDS="trt" -DTENSORRT_DIR="$env:TENSORRT_DIR"
cmake --build . --config Release -- /m
cmake --install . --config Release
编译获得SDK
这一步让我郁闷了很长时间,经本人实测,如果编译了多个SDK,那么只有第一个有用,所以目前最好只编译一个SDK,我编译的是TensorRT。
在mmdeploy/build目录下:
-
如果编译onnxruntime:
cmake .. -G "Visual Studio 16 2019" -A x64 -T v142 ` -DMMDEPLOY_BUILD_SDK=ON ` -DMMDEPLOY_BUILD_EXAMPLES=ON ` -DMMDEPLOY_BUILD_SDK_PYTHON_API=ON ` -DMMDEPLOY_TARGET_DEVICES="cpu" ` -DMMDEPLOY_TARGET_BACKENDS="ort" ` -DONNXRUNTIME_DIR="$env:ONNXRUNTIME_DIR" cmake --build . --config Release -- /m cmake --install . --config Release -
如果编译TensorRT:
cmake .. -G "Visual Studio 16 2019" -A x64 -T v142 `
  -DMMDEPLOY_BUILD_SDK=ON `
  -DMMDEPLOY_BUILD_EXAMPLES=ON `
  -DMMDEPLOY_BUILD_SDK_PYTHON_API=ON `
  -DMMDEPLOY_TARGET_DEVICES="cuda" `
  -DMMDEPLOY_TARGET_BACKENDS="trt" `
  -Dpplcv_DIR="$env:PPLCV_DIR/pplcv-build/install/lib/cmake/ppl" `
  -DTENSORRT_DIR="$env:TENSORRT_DIR" `

cmake --build . --config Release -- /m
cmake --install . --config Release
大功告成!
安装SDK
-
下载地址:Github
-
安装:解压后,找到与自己Python版本匹配的wheel文件
mmdeploy-0.12.0-windows-amd64-cuda11.1-tensorrt8.2.3.0\sdk\python\mmdeploy_python-0.12.0-cp38-none-win_amd64.whl -
在当前环境中安装:
pip install mmdeploy_python-0.12.0-cp38-none-win_amd64.whl
验证与测试
1. 转换mmdetection的torch模型为TensorRT
-
安装mmdetection
因为要用到里面的相关配置文件
git clone https://github.com/open-mmlab/mmdetection.git
cd mmdetection
pip install -v -e .
cd ..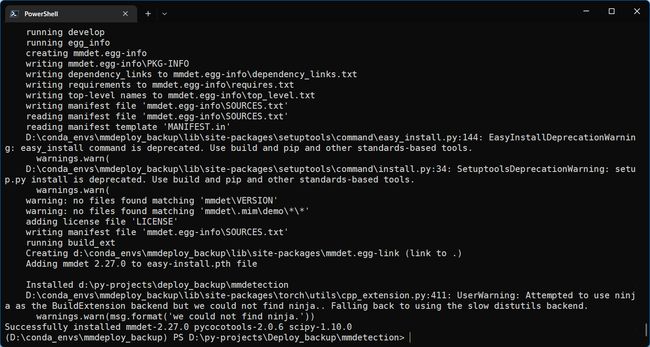
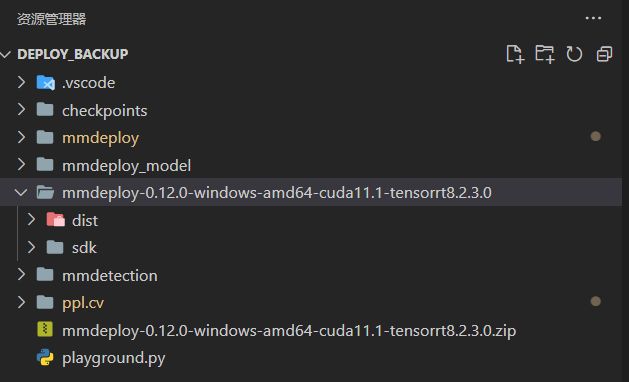
目前我的目录结构如下:

-
获取Faster R-CNN权重
可以手动下载,也可以使用Windows下的Wget工具
wget -P checkpoints https://download.openmmlab.com/mmdetection/v2.0/faster_rcnn/faster_rcnn_r50_fpn_1x_coco/faster_rcnn_r50_fpn_1x_coco_20200130-047c8118.pth -
进行转换
python mmdeploy/tools/deploy.py `
    mmdeploy/configs/mmdet/detection/detection_tensorrt_dynamic-320x320-1344x1344.py `
    mmdetection/configs/faster_rcnn/faster_rcnn_r50_fpn_1x_coco.py `
    checkpoints/faster_rcnn_r50_fpn_1x_coco_20200130-047c8118.pth `
    mmdetection/demo/demo.jpg `
    --work-dir mmdeploy_model/faster-rcnn `
    --device cuda `
    --dump-info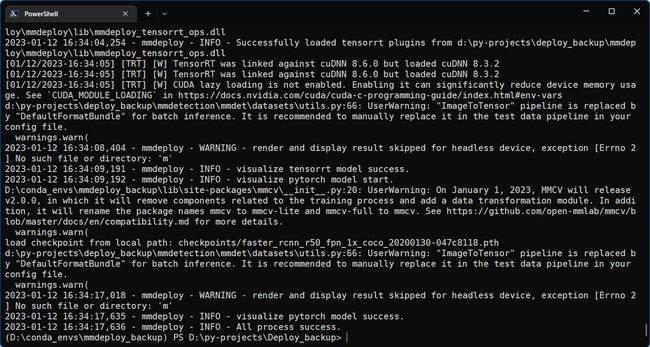
转换成功!
2. 使用mmdeploy.apis进行验证
代码:
from mmdeploy.apis import inference_model
from pprint import pprint
result = inference_model(
    model_cfg="mmdetection/configs/faster_rcnn/faster_rcnn_r50_fpn_1x_coco.py",
    deploy_cfg="mmdeploy/configs/mmdet/detection/detection_tensorrt_dynamic-320x320-1344x1344.py",
    backend_files=["mmdeploy_model/faster-rcnn/end2end.engine"],
    img="mmdetection/demo/demo.jpg",
    device="cuda:0",
)
pprint(result)
输出:
(D:\conda_envs\mmdeploy_backup) PS D:\py-projects\Deploy_backup> python .\playground.py
D:\conda_envs\mmdeploy_backup\lib\site-packages\mmcv\__init__.py:20: UserWarning: On January 1, 2023, MMCV will release v2.0.0, in which it will remove components related to the training process and add a data transformation module. In addition, it will rename the package names mmcv to mmcv-lite and mmcv-full to mmcv. See https://github.com/open-mmlab/mmcv/blob/master/docs/en/compatibility.md for more details.                                                                                                                             warnings.warn(
2023-01-12 16:42:23,887 - mmdeploy - INFO - Successfully loaded tensorrt plugins from d:\py-projects\deploy_backup\mmdeploy\mmdeploy\l
ib\mmdeploy_tensorrt_ops.dll                                                                                                          2023-01-12 16:42:23,887 - mmdeploy - INFO - Successfully loaded tensorrt plugins from d:\py-projects\deploy_backup\mmdeploy\mmdeploy\l
ib\mmdeploy_tensorrt_ops.dll                                                                                                          [01/12/2023-16:42:25] [TRT] [W] TensorRT was linked against cuDNN 8.6.0 but loaded cuDNN 8.3.2
[01/12/2023-16:42:25] [TRT] [W] TensorRT was linked against cuDNN 8.6.0 but loaded cuDNN 8.3.2
[01/12/2023-16:42:25] [TRT] [W] CUDA lazy loading is not enabled. Enabling it can significantly reduce device memory usage. See `CUDA_
MODULE_LOADING` in https://docs.nvidia.com/cuda/cuda-c-programming-guide/index.html#env-vars                                          d:\py-projects\deploy_backup\mmdetection\mmdet\datasets\utils.py:66: UserWarning: "ImageToTensor" pipeline is replaced by "DefaultForm
atBundle" for batch inference. It is recommended to manually replace it in the test data pipeline in your config file.                  warnings.warn(
[[array([[3.75254608e+02, 1.19857513e+02, 3.82289551e+02, 1.32836258e+02,
        1.35454774e-01],
       [5.32362000e+02, 1.09554726e+02, 5.40526550e+02, 1.25222633e+02,
        8.88780579e-02],
       [3.61124298e+02, 1.09049202e+02, 3.68625610e+02, 1.22483063e+02,
        7.20726550e-02]], dtype=float32),
  array([], shape=(0, 5), dtype=float32),
  array([[6.08830139e+02, 1.13267967e+02, 6.34865662e+02, 1.37447113e+02,
        9.88358736e-01],
       [4.81773712e+02, 1.10480995e+02, 5.22459717e+02, 1.30407104e+02,
        9.87157404e-01],
 ...
成功!
3. 使用Python SDK进行推理
目前文件目录结构为:
代码:
cd .\mmdeploy-0.12.0-windows-amd64-cuda11.1-tensorrt8.2.3.0\
python sdk/example/python/object_detection.py cuda ../mmdeploy_model/faster-rcnn ../mmdetection/demo/demo.jpg
4. 集成SDK的Detector检测器到自己的应用中
from mmdeploy_python import Detector
import cv2

# 读取图片
img = cv2.imread("mmdetection/demo/demo.jpg")

# 创建检测器
detector = Detector(model_path="mmdeploy_model/faster-rcnn", device_name="cuda", device_id=0)
# 执行推理
bboxes, labels, _ = detector(img)
# 使用阈值过滤推理结果,并绘制到原图中
indices = [i for i in range(len(bboxes))]
for index, bbox, label_id in zip(indices, bboxes, labels):
    [left, top, right, bottom], score = bbox[0:4].astype(int), bbox[4]
    if score < 0.3:
        continue
    cv2.rectangle(img, (left, top), (right, bottom), (0, 255, 0))

cv2.imwrite("output_detection.png", img)
在web开发中,由于http协议是无状态的,所以需要预先将模型权重加载到内存/显存里面,然后来一张图片处理一张,不用每次都重新加载模型,对图片进行分类/检测/分割。在上面的SDK中,Detector检测器发挥了这个作用。
总结
总体来看,整个安装过程包含以下内容:
-
基础软件环境准备
- PowerShell 7,以管理员身份运行
- Python环境,教程用的是conda创建的Python 3.8.13
- 安装C/C++编译器MSVC,配置编译工具链CMake,CMake路径一定要加入环境变量
- 安装cuda与cudnn,并将它们加入环境变量
-
安装配置计算机视觉库
- MMCV:无脑
- OpenCV、OpenCV-Python
- OpenCV需要添加环境变量
- PPLCV
- 需要添加环境变量
-
推理引擎安装
- ONNXRuntime
- Python库
- 自定义算子库
- 需要添加环境变量
- TensorRT
- Python库
- 自定义算子库
- 需要添加环境变量
- ONNXRuntime
-
编译安装MMDeploy
这一步是核心,用到了前面添加的诸多环境变量
- 编译获得Converter,由于OpenMMlab算法库中有很多自定义算子,所以需要使用CMake编译自定义算子库
- ONNXRuntime
- TensorRT
- 编译获得SDK
- ONNXRuntime
- TensorRT
- 任选一个,编译的第一个才有效
- 安装SDK
- 从Github下载MMDeploy的预构建包,解压后获得对应wheel文件。
- 也可以使用C/C++ SDK
- 编译获得Converter,由于OpenMMlab算法库中有很多自定义算子,所以需要使用CMake编译自定义算子库
一个脚本构建
使用此脚本需要几个前提条件:
- 大概理解整个安装过程以及Python虚拟环境
- 已成功安装OpenCV
- 已成功使用CMake编译安装PPLCV
- 已成功安装了cuda与cudnn,并添加环境变量
- 已成功构建Python虚拟环境,并在虚拟环境中成功安装了与自己cuda版本适配的pytorch版本
- 已成功安装了ONNXRuntime/TensorRT推理引擎
- 并且成功使用pip安装了TensorRT API
- 网络条件良好,这是为了确保能够成功从Github克隆仓库
# 说明:xxx是需要填空的内容
# 配置相关安装目录,配置后下面会自动将相关内容加入环境变量
# 如果已经添加某项到环境变量,请注释该项
$env:OPENCV_DIR="xxx"
$env:PPLCV_DIR="xxx"
$env:ONNXRUNTIME_DIR="xxx"
$env:TENSORRT_DIR="xxx"
$env:VS2019_DIR="xxx"

# 克隆MMDeploy仓库
git clone -b master git@github.com:open-mmlab/mmdeploy.git --recursive
$env:MMDEPLOY_DIR="$pwd\mmdeploy"

# 将OpenCV的build目录添加到环境变量
$env:path = "$env:OPENCV_DIR\build;" + "$env:path"

# 将onnxruntime的lib加入环境变量
$env:path = "$env:ONNXRUNTIME_DIR\lib;" + "$env:path"

# 将onnxruntime的lib加入环境变量
$env:path = "$env:TENSORRT_DIR\lib;" + "$env:path"

# 将CMake加入环境变量
$env:path = "$env:VS2019_DIR\Common7\IDE\CommonExtensions\Microsoft\CMake\CMake\bin;" + "$env:path"


# 安装mmcv
pip install openmim
mim install mmcv-full

# 安装相关python库
pip install opencv-python onnxruntime==1.8.1 pycuda

# 编译安装ONNXRuntime自定义算子库
mkdir build -ErrorAction SilentlyContinue
cd build
cmake .. -G "Visual Studio 16 2019" -A x64 -T v142 -DMMDEPLOY_TARGET_BACKENDS="ort" -DONNXRUNTIME_DIR="$env:ONNXRUNTIME_DIR"
cmake --build . --config Release -- /m
cmake --install . --config Release

# 编译安装TensorRT自定义算子库
cmake .. -G "Visual Studio 16 2019" -A x64 -T v142 -DMMDEPLOY_TARGET_BACKENDS="trt" -DTENSORRT_DIR="$env:TENSORRT_DIR"
cmake --build . --config Release -- /m
cmake --install . --config Release

# 安装MMDeploy
cd $env:MMDEPLOY_DIR
pip install -e .

# 构建ONNXRuntime推理SDK,前往:mmdeploy/build
# cd "$env:MMDEPLOY_DIR\build"
# cmake .. -G "Visual Studio 16 2019" -A x64 -T v142 `
#     -DMMDEPLOY_BUILD_SDK=ON `
#     -DMMDEPLOY_BUILD_EXAMPLES=ON `
#     -DMMDEPLOY_BUILD_SDK_PYTHON_API=ON `
#     -DMMDEPLOY_TARGET_DEVICES="cpu" `
#     -DMMDEPLOY_TARGET_BACKENDS="ort" `
#     -DONNXRUNTIME_DIR="$env:ONNXRUNTIME_DIR"

# cmake --build . --config Release -- /m
# cmake --install . --config Release

# 构建TensorRT推理SDK,前往:mmdeploy/build
cd "$env:MMDEPLOY_DIR\build"
cmake .. -G "Visual Studio 16 2019" -A x64 -T v142 `
  -DMMDEPLOY_BUILD_SDK=ON `
  -DMMDEPLOY_BUILD_EXAMPLES=ON `
  -DMMDEPLOY_BUILD_SDK_PYTHON_API=ON `
  -DMMDEPLOY_TARGET_DEVICES="cuda" `
  -DMMDEPLOY_TARGET_BACKENDS="trt" `
  -Dpplcv_DIR="$env:PPLCV_DIR/pplcv-build/install/lib/cmake/ppl" `
  -DTENSORRT_DIR="$env:TENSORRT_DIR" `

cmake --build . --config Release -- /m
cmake --install . --config Release
注:以上脚本并没有安装SDK,如果需要,请参考相关内容,手动安装。