基于线性回归实现手写数字识别
一、关于数据集
从官网 上下载并解压数据集
第一步、下载得到的是四个压缩文件。
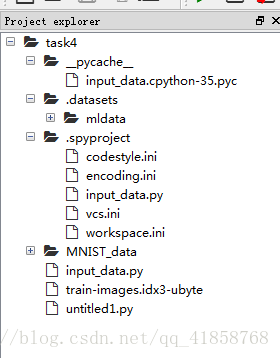
将这四个压缩文件全部进行解压,得到下列一共八个文件,并将这个文件夹改名为MNIST_data,之后将这个文件夹放到你的项目里。
第二步、新建一个.py文件,起名为input_data.py
将下面的代码复制粘贴到input_data.py中
# Copyright 2015 The TensorFlow Authors. All Rights Reserved.
#
# Licensed under the Apache License, Version 2.0 (the "License");
# you may not use this file except in compliance with the License.
# You may obtain a copy of the License at
#
#     http://www.apache.org/licenses/LICENSE-2.0
#
# Unless required by applicable law or agreed to in writing, software
# distributed under the License is distributed on an "AS IS" BASIS,
# WITHOUT WARRANTIES OR CONDITIONS OF ANY KIND, either express or implied.
# See the License for the specific language governing permissions and
# limitations under the License.
# ==============================================================================

"""Functions for downloading and reading MNIST data."""
from __future__ import absolute_import
from __future__ import division
from __future__ import print_function

import gzip
import os
import tempfile

import numpy
from six.moves import urllib
from six.moves import xrange  # pylint: disable=redefined-builtin
import tensorflow as tf
from tensorflow.contrib.learn.python.learn.datasets.mnist import read_data_sets
第三步、新建一个python项目,将input_data.py放入到你的项目中
本文采用的是anaconda里自带的sypder。
之后,我们使用下面这两行命令,就可以使得到minist数据集了。
import input_data
mnist = input_data.read_data_sets("MNIST_data", one_hot=True)
以上,就是我们调用mnist数据集的全过程。
二、关于算法和代码
第一步、导入包和数据import input_data
import numpy as np
import os
from sklearn import linear_model
mnist = input_data.read_data_sets("MNIST_data", one_hot=True) #mnist数据
这其中包括三个包,和一个我们刚才写的input_data.py。
os.environ['TF_CPP_MIN_LOG_LEVEL'] = '2' #指定log配置,只显示warnning 和error。第二步、对数据进行一些处理
第一步、先提取出我们的训练数据和测试数据
train_x = mnist.train.images[:5000]
train_y = mnist.train.labels[:5000]
test_x = mnist.test.images[:5000]  # 图片
test_y = mnist.test.labels[:5000]  # 标签
第二步、将测试数据进行处理
原始的数据的y项中,[0,0,0,0,0,0,0,0,0,1]代表0,[0,0,0,0,0,0,0,0,1,0]代表1,以此类推,分别代表了1~9。这种数组不能进行进行拟合,所以我们要将其转化为阿拉伯数字,方便我们之后的工作。
[col,xol]= train_y.shape
[col2,xol2]= test_y.shape

train_yy = []
test_yy = []


for x in range(col):
    for y in range(10):
        if train_y[x][y] == 1.:
            train_yy.append(y)

for x in range(col2):
    for y in range(10):
        if test_y[x][y] == 1.:
test_yy.append(y)第三步、构造拟合器
logreg = linear_model.LogisticRegression(C=1e5, solver='lbfgs', multi_class='multinomial') solver = 'lbfgs'是选择拟牛顿法的一种,利用损失函数二阶导数来迭代优化损失函数,multi_class='multinomial代表多分类。logreg.fit(train_x, train_yy) #进行拟合prediction = logreg.predict(test_x) #用拟合好的模型来进行测试print("accuracy score: ")
print(accuracy_score(test_yy, prediction)) 

