hive安装及整合hbase
hive安装及整合hbase
(1). 上传hive安装包并解压
tar -zxvf apache-hive-3.1.3-bin.tar.gz -C /export/server/
(2). 配置hive环境变量 sudo vim /etc/profile
|
# 配置hive环境变量 export HIVE_HOME=/export/server/apache-hive-3.1.3-bin export PATH=$PATH:$HIVE_HOME/bin |
(3) .修改hive的配置文件(4个)
hive-env.sh、hive-site.xml、hive-log4j2.properties、
hive-exec-log4j2.properties(复制conf目录下相应template文件重命名可得)
①修改hive-env.sh文件(文末添加)
|
# jdk安装目录 export JAVA_HOME=/export/server/jdk1.8.0_131 # hadoop安装目录 export HADOOP_HOME=/export/server/hadoop-3.3.2 # Hive安装路径 export HIVE_HOME=/export/server/apache-hive-3.1.3-bin # Hive配置文件路径 export HIVE_CONF_DIR=${HIVE_HOME}/conf export HIVE_AUX_JARS_PATH=/export/server/apache-hive-3.1.3-bin/lib |
②修改hive-log4j2.properties文件(只修改标红部分其他内容不变)
|
status = INFO name = HiveLog4j2 packages = org.apache.hadoop.hive.ql.log # list of properties property.hive.log.level = INFO property.hive.root.logger = DRFA # hive的日志路径 property.hive.log.dir = /export/server/apache-hive-3.1.3-bin/logs property.hive.log.file = hive.log property.hive.perflogger.log.level = INFO # 以下省略了未做修改的原文 |
③修改hive-exec-log4j2.properties文件(只修改标红部分其他内容不变)
|
status = INFO name = HiveExecLog4j2 packages = org.apache.hadoop.hive.ql.log # list of properties property.hive.log.level = INFO property.hive.root.logger = FA property.hive.query.id = hadoop property.hive.log.dir =/export/server/apache-hive-3.1.3-bin/logs property.hive.log.file = ${sys: hive.log.dir }/${hive.query.id}.log #以下省略未修改原文 |
④修改hive-site.xml文件
|
|
说明(操作完第本文第(5)步后才能启动相关服务):
① 启动hive的元数据服务:hive --service metastore(需先启动hadoop集群)
#后台启动 nohup hive --service metastore>log.txt 2>&1 &
(指定了metastore uri 时开启该服务才能访问hive)
② 启动hiveserver2服务:hive --service hiveserver2
#后台启动 nohup hive --service hiveserver2 1>/dev/null 2>&1 &
(使用beeline访问hive时需要先开启该服务)
beeline连接hive命令:beeline -u jdbc:hive2://node1:10000
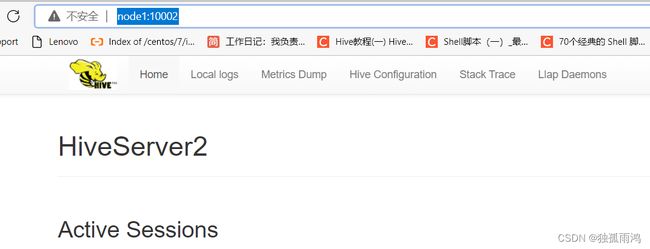
网页端访问:http://node1:10002/
③ 关闭hive --service metastore/ hiveserver2服务(如果是另开shell开启的服务,CTRL+c即可关闭)
a、查出Hiveserver进程:ps -aux| grep hiveserver2
b、kill掉进程 kill -9 PID
(4) . 修改hadoop的core-site.xml文件(设置用户访问hive权限)
vim $HADOOP_HOME/etc/hadoop/core-site.xml
|
|
说明:其中的ljr是hadoop的超级用户
(5). 初始化元数据
①将MySQL的jdbc驱动jar包放到$HIVE_HOME/lib中
驱动下载地址:MySQL :: Download MySQL Connector/J (Archived Versions)
选择驱动版本,下载tar.gz文件上传到Linux系统解压即可得jar包,这里用的版本是
mysql-connector-java-8.0.8-dmr-bin.jar
②进入hive的bin目录cd $HIVE_HOME/bin
③执行命令初始化元数据schematool -dbType derby -initSchema --verbose
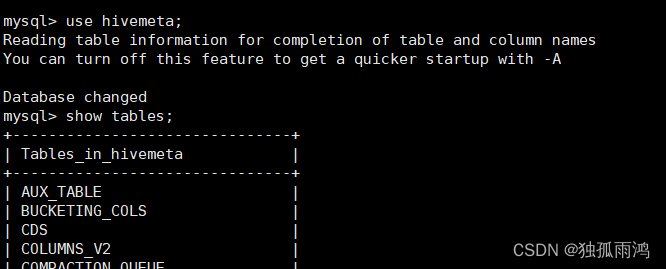
此时再登录MySQL可以发现多了一个数据库hivemeta(库名由hive-site.xml指定)
(ps:此处本人踩坑了,初始化元数据用了derby数据库,正确的执行命令应为
schematool -dbType mysql -initSchema --verbose)
(6)访问hive
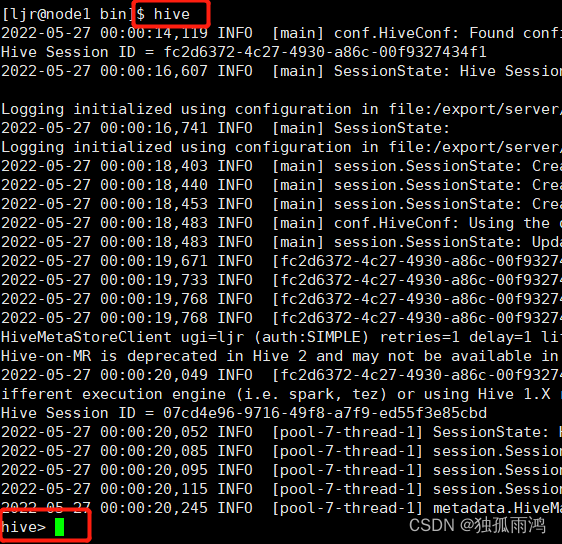
访问hive方式①HiveCLI客户端访问,输入hive
出现以上ConnectException: Connection refused报错是由于未开启metastore服务
开启服务后jps查看可发现多了一个RunJar进程在运行(注意开启hiveserver2运行的进程也叫RunJar)
![]()
开启metastore/hivesever2服务时报错:
MissingTableException: Required table missing : "`DBS`" in Catalog "" Schema "". DataNucleus requires this table to perform its persistence operations. Either your MetaData is incorrect, or you need to enable "datanucleus.schema.autoCreateTables"
原因分析:未初始化元数据引起,进入$HIVE_HOME/bin进行初始化(completed表示初始化完成,不放心可以进入mysql,use hivemeta;show tables查看是否存在表进行验证)
schematool -dbType mysql -initSchema --verbose
注:本人在第(5)步时执行的初始化命令是
schematool -dbType derby -initSchema --verbose
完成上述操作重新开启metastore/hivesever2服务后,再输入hive
![]()
注:此时使用show databases;输出defualt
创建库hive> create database test;
![]()
查看库 show databases;
使用test库 use test;
创建employee表
create table employee (id int,name string,salary int,position string) row format delimited fields terminated by '\t';
![]()
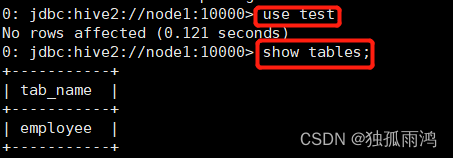
查看表 show tables;
![]()
访问hive方式②(beeline 需要先开启metastore服务再开启hiveserver2服务)
beeline -u jdbc:hive2://node1:10000 【-n 用户名】
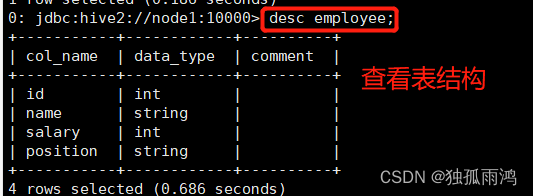
查看表结构 desc 表名
退出beeline命令行:!exit 或者 !quit
方式①与方式②访问hive对比:方式②输出数据更加结构化,便于阅读
(7). Hive整合hbase
整合原理:
Hive与HBase整合的实现是利用两者本身对外的API(应用程序编程接口)互相通信来完成的, HBase作为分布式的NOSQL数据库,并不支持传统的SQL查询,通过将Hive框架与HBase进行集成,我们可以实现使用HQL对HBase的数据进行操作,当我们使用HBase与Hive集成,其本质是Hive作为HBase的客户端。
整合意义:
①通过Hive把数据加载到HBase中,数据源可以是文件也可以是Hive中的表。
②通过整合,让HBase支持JOIN、GROUP等SQL查询语法。
③通过整合,不仅可完成HBase的数据实时查询,也可以使用Hive查询HBase中的数据完成复杂的数据分析。
整合步骤:
①在hive-site.xml中添加以下内容(本人在安装hive时已配置hive-site.xml)
|
|
注:本人安装的hive访问hbase依赖的jar包,不需要再做步骤②操作,这里说明一下hive整合hbase时需要做的步骤作为了解学习
②采用软链接的方式将$HBASE_HOME/lib下的对应的common、server、client、protocol、it、htrace-core(hbase-2.4.12中没有此包)等8个包链接到$HIVE_HOME/lib下(或者直接将hbase lib目录下的所有文件复制到hive lib目录中):
ln -s hbase-client-2.4.12.jar $HIVE_HOME/lib/
ln -s hbase-protocol-2.4.12.jar $HIVE_HOME /lib/
ln -s hbase-it-2.4.12 $HIVE_HOME /lib/
ln -s hbase-server-2.4.12.jar $HIVE_HOME /lib/
ln -s hbase-common-2.4.12.jar $HIVE_HOME /lib/
ln -s hbase-hadoop2-compat-2.4.12.jar $HIVE_HOME /lib/
ln -s hbase-hadoop-compat-2.4.12.jar $HIVE_HOME /lib/
③在hive中创建映射表(创建后hbase中会自动生成该表)
Create database test;创建test库
Use test;转到test库
创建内部表
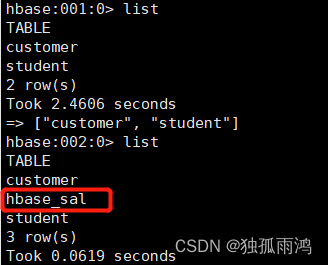
CREATE TABLE hive_hbase_sal(id int,name string,sal int,deptno int) STORED BY 'org.apache.hadoop.hive.hbase.HBaseStorageHandler' WITH SERDEPROPERTIES ("hbase.columns.mapping" = ":key,info:name,info:sal,info:deptno ") TBLPROPERTIES ("hbase.table.name" = "hbase_sal ");建映射表hive_hbase_sal → hbase_sal
可以看到在hbase shell 中通过list 可以看到hbase_sal表已经创建,此时在hive中删除hive_hbase_sal表hbase_sal表也会一并删除
为hbase中的customer表创建外部表
Hbase中查看customer表结构
desc 'customer';
在hive中创建外部表(关键词external)(这种方式可以关联hbase中已经存在的表)
create external table hive_hbase_customer(id int,name string)stored by 'org.apache.hadoop.hive.hbase.HBaseStorageHandler' with serdeproperties("hbase.columns.mapping"="id:id,name:name") tblproperties("hbase.table.name"="customer");
Error: Error while processing statement: FAILED: Execution Error, return code 1 from org.apache.hadoop.hive.ql.exec.DDLTask. java.lang.RuntimeException: MetaException(message:org.apache.hadoop.hive.serde2.SerDeException org.apache.hadoop.hive.hbase.HBaseSerDe: columns has 2 elements while hbase.columns.mapping has 3 elements (counting the key if implicit)) (state=08S01,code=1)
创建外部表失败,原因分析:上面我们查看hbase的customer表结构的时候可以看到该表包含了两个列族,再加上key,一共三个元素,所以在映射表时除了id,name外还要添加一个键值(以下下暂以iid为列名)
create external table hive_hbase_customer(iid int,id int,name string)stored by 'org.apache.hadoop.hive.hbase.HBaseStorageHandler' with serdeproperties("hbase.columns.mapping"=":key,id:id,name:name") tblproperties("hbase.table.name"="customer");
hive_hbase_customer不能直接编辑/导入数据,需要建立一个中间表
报错:A non-native table cannot be used as target
新建customer_put表作为中间表
create table customer_put(iid int,id int,name string) row format delimited fields terminated by ';';
customer_put表导入数据:load data local inpath'/export/data/input.txt' overwrite into table customer_put;
注意文件编码要与hive表编码一致,设置方法为在vim编辑器末行模式输入
set fileencoding=utf-8(通常hive表的默认编码为utf-8)
将数据插入hive_hbase_customer表
insert overwrite/into table hive_hbase_customer select * from customer_put;(执行时间较长,耐心等待)(overwrite覆盖原表,into在原表追加内容)
Hbase中查看数据
scan 'customer';
至此,hive hive安装及整合hbase完成!
(8)hive metastore/hiveserver2服务的启停脚本
|
#!/bin/bash if [ $# -lt 1 ] then echo "No Args Input..." exit ; fi case $1 in "start") echo " ======= 启动 hive服务=======" echo " --------------- 启动 metastore服务 ---------------" nohup hive --service metastore>log.txt 2>&1 & #设置静默输出的第一种方法 echo " --------------- 启动 hiveserver2服务 ---------------" ps -aux|grep metastore|sed '/--color=auto/d'|sed '/hiveserver2/d'|cut -d' ' -f8,9>&/dev/null&&echo “启动metastore成功,正启动hiveserver2” nohup hive --service hiveserver2 1>/dev/null 2>&1 & #设置静默输出的第二种方法 sleep 5 #hiveserver2启动需要较长时间,睡眠5秒 ps -aux|grep hiveserver2|sed '/--color=auto/d'|cut -d' ' -f8,9>&/dev/null&&echo "hiveserver2成功启动,正在连接hive"&&beeline -u jdbc:hive2://node1:10000 -n ljr||echo “请稍后手动连接hive beeline -u jdbc:hive2://node1:10000” ;; "stop") echo " ======= 关闭 hive服务=======" echo " --------------- 停止 hiveserver2服务 ---------------" PID=$( ps -aux|grep hiveserver2|sed '/--color=auto/d'|cut -d' ' -f8,9) kill -9 $PID >&/dev/null&&echo "hiveserver2已关闭"||echo “进程不存在” echo " --------------- 停止metastore服务 ---------------" PID2=$( ps -aux|grep metastore|sed '/--color=auto/d'|sed '/hiveserver2/d'|cut -d' ' -f8,9) kill -9 $PID2 >&/dev/null&&echo "metastore已关闭"||echo “进程不存在” # >&/dev/null设置静默输出的第三种方法 ;; *) echo "Input Args Error..." ;; esac |
总结:修改hive运行的其他程序的配置时,修改后记得重启修改过配置的程序,否则运行hive的时候大概率会出现报错,本人在这方面就吃过大亏,因修改了配置未重启,排查各种报错原因花费了大量的时间和精力!!!不过吃的这些亏也可为后续排错提供一种思路——检查是否修改了配置。
