Asp.net MVC 和 IIS5.1 IIS6.0
I’ve seen a lot of reports where people have trouble getting ASP.NET MVC up and running on IIS 6. Sometimes the problem is a very minor misconfiguration, sometimes it’s a misunderstanding of how IIS 6 works.
In this post, I want to provide a definitive guide to getting ASP.NET MVC running on IIS 6. I will walk through using the .mvc or .aspx file extension for URLs first, then I will walkthrough using extension-less URLs.
If you’re running into problems with IIS 6 and ASP.NET MVC, I recommend trying to walk through all the steps in this post, even if you’re not interested in using the .mvc or .aspx mapping. Some of the lessons learned here have more to do with how ASP.NET itself works with IIS 6 than anything specific to ASP.NET MVC.
Initial Setup
To make this easy, start Visual Studio and create a new ASP.NET MVC Web Application Project on the machine with IIS 6. If your IIS 6 machine is on a different machine, you can skip this step. We can deploy the site to the machine later.
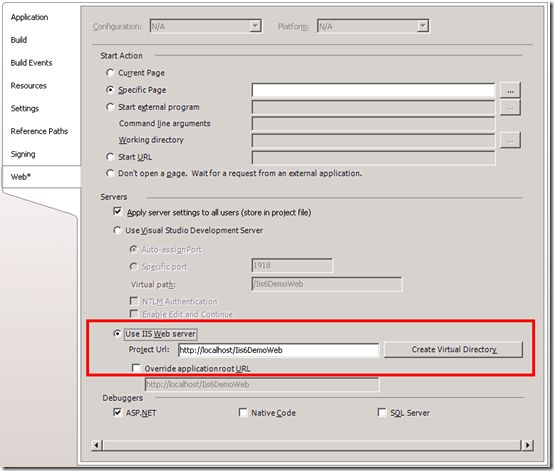
After you create the project, right click the project and select Properties. The project properties editor will open up. Select the Web tab and select Use IIS Web Server. Click on the image for a full size view.
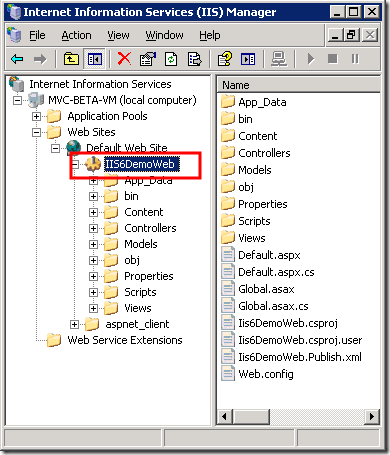
In the project URL, I gave it a virtual application name of Iis6DemoWeb and then checked Create Virtual Directory. A dialog box should appear and you should now have an IIS virtual application (note this is different than a virtual directory, as indicated by the gear looking icon) under your Default Web Site.
Using a URL File Extensions
When you run the ASP.NET MVC installer, it will set up an ISAPI mapping in IIS 6 to map the .mvc extension to the aspnet_isapi.dll. This is necessary in order for IIS to hand off requests using the .mvc file extension to ASP.NET.
If you’re planning to use extension-less URLs, you can skip this section, but it may be useful to read anyways as it has some information you’ll need to know when setting up extension-less URLs.
Mapping .mvc to ASP.NET
If you plan to use the .mvc URL extension, and are going to deploy to IIS 6 on a machine that does not have ASP.NET MVC installed, you’ll need to create this mapping by performing the following steps.
One nice benefit of using the .aspx extension instead of .mvc is that you don’t have to worry about mapping the .aspx extension. It should already be mapped assuming you have ASP.NET installed properly on the machine.
For the rest of you, start by right clicking on the Virtual Application node (IIS6DemoWeb in this case) and select Properties. You should see the following dialog.
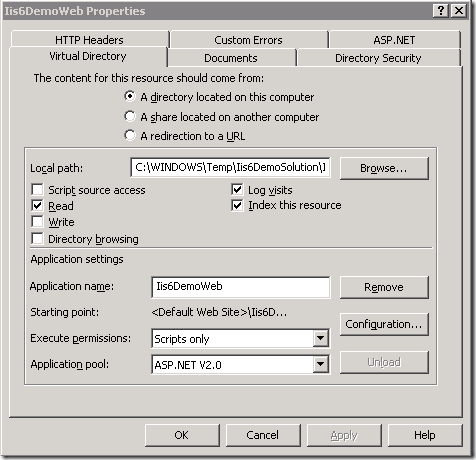
Make sure you’re on the Virtual Directory tab and select Configuration. Note that you can also choose to make this change on the root website, in which case the tab you’re looking for is Home Directory not Virtual Directory.
This will bring up the Application Configuration dialog which displays a list of ISAPI mappings. Scroll down to see if .mvc is in the list.
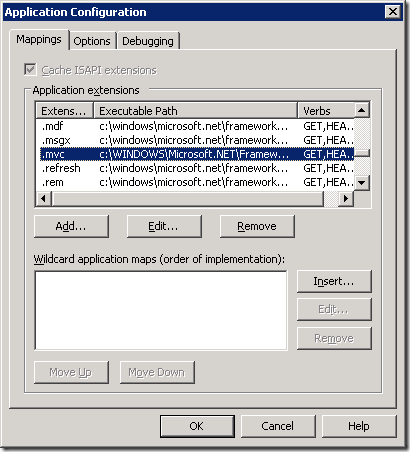
In the screenshot, you can see that .mvc is in the list. If it is in the list on your machine, you can skip ahead to the next section. If it’s not in the list for you, let’s add it to the list. You’re going to need to know the path to the aspnet_isapi.dll first. On my machine, it is:
c:\windows\microsoft.net\framework\v2.0.50727\aspnet_isapi.dll
It might differ on your machine. One easy way to find out is to find the .aspx extension in the list and double click it to bring up the mapping dialog.
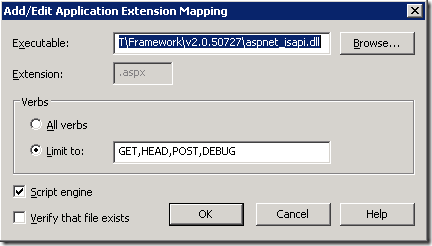
Now you can copy the path in the Executable text box to your clipboard. This is the path you’ll want to map .mvc to.
Click Cancel to go back to the Application Configuration dialog and then click Add which will bring up an empty Add/Edit Application Extension Mapping dialog.
Fill in the fields with the exact same values as you saw for .aspx, except the extension should be “.mvc” without the quotes. Click OK and you’re done with the mapping.
Specifying Routes with an Extension
Before we run the application, we need to update the default routes to look for the file extension we chose, whether it be .mvc or .aspx extension. Here is the RegisterRoutes method in my Global.asax.cs file using the .mvc extension. If you want to use the .aspx extension, just replace {controller}.mvc with {controller}.aspx.
public static void RegisterRoutes(RouteCollection routes)
{
  routes.IgnoreRoute("{resource}.axd/{*pathInfo}");

  routes.MapRoute(
    "Default",
    "{controller}.mvc/{action}/{id}",
    new { action = "Index", id = "" }
  );

  routes.MapRoute(
    "Root",
    "",
    new { controller = "Home", action = "Index", id = "" }
  );
}
Note that because the second route, “Default”, has a literal extension as part of the URL segment, it cannot match a request for the application root. That’s why I have a third route named “Root” which can match requests for the application root.
Now, I can hit CTRL+F5 (or browse my website) and I should see the following home page.
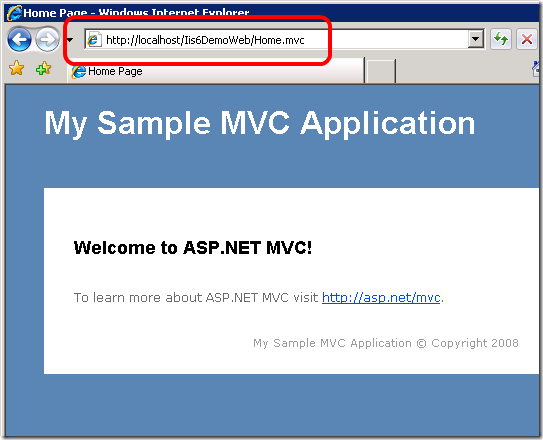
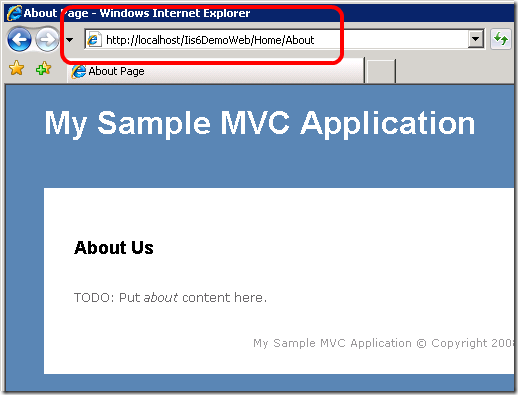
And about page.
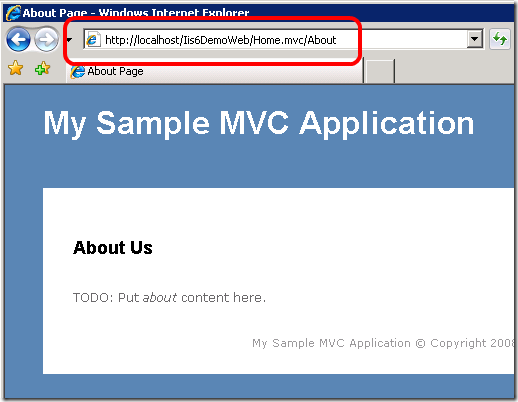
Notice that the URLs contain the .mvc extension.
Uh oh, Houston! We have a problem
Of course, you’re going to want to be able to navigate to the web root for your project. Notice what happens when you navigate to /Iis6DemoWeb.
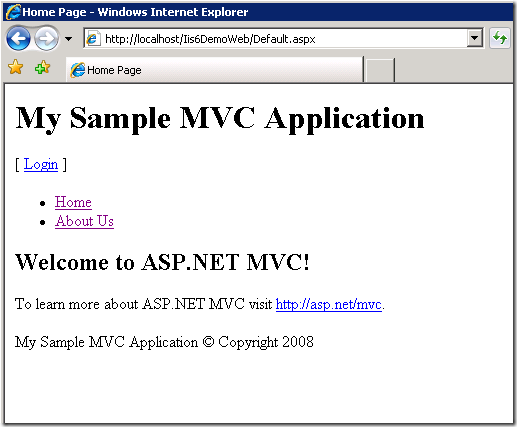
This is a bug in the Default.aspx.cs file included with our default template which I discovered as I was writing this walkthrough. We’ll fix it right away, but I can provide the fix here as it’s insanely easy.
Note: If you received a File Not Found error when visiting the root, then you might not have Default.aspx mapped as a default document. Follow these steps to add Default.aspx as a default document.
As I’ve written before, this file is necessary for IIS 6, IIS 7 Classic Mode, and pre SP1 Cassini, but not IIS 7 Integrated. So if you’re using Cassini with Visual Studio 2008 SP1 and deploying to IIS 7 Integrated, you can delete Default.aspx and its sub-files.
In the meanwhile, the fix is to make the following change.
Change:
HttpContext.Current.RewritePath(Request.ApplicationPath);
To
HttpContext.Current.RewritePath(Request.ApplicationPath, false);
If you created your website in the IIS root rather than a virtual application, you would never have noticed this issue. But in the virtual application, the URL to the stylesheet rendered contained the virtual application name, when it shouldn’t. Changing the second argument to false fixes this.
IIS6 Extension-less URLs
Ok, now we’re ready to try this with extension-less URLs using the infamous “Star mapping” or “Wildcard mapping” feature of IIS 6. I say infamous because there is a lot of concern over the performance implications of doing this. Of course, you should measure the performance of your site for yourself to determine if it is really a problem.
The first step is to go back to the Application Configuration Properties dialog like we did when configuring the .mvc ISAPI mapping (see, I told you that information might come in useful later).

Next to the Wildcard application maps section, click the Insert… button.

This brings up the wildcard application mapping dialog. Enter the path to the aspnet_isapi.dll. You can follow the trick we mentioned earlier for getting this path.
Don’t forget to uncheck the Verify that file exists checkbox! This is one of the most common mistakes people make.
If you’ve been following along everything in this post, you’ll need to go back and reset the routes in your Global.asax.cs file to the default routes. You no longer need the .mvc file extension in the routes. At this point, you can also remove Default.aspx if you’d like. It’s not needed.
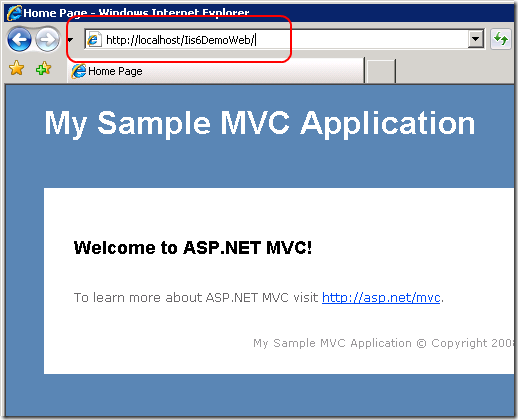
Now when you browse your site, your URLs will not have a file extension as you can see in the following screenshots.
Final Tips
One thing to understand is that an ASP.NET project is scoped to the Website or Virtual Application in which it resides. For example, in the example I have here, we pointed a Virtual Application named IIS6DemoWeb to the directory containing my ASP.NET MVC web application.
Thus, only requests for that virtual application will be handled by my web application. I cannot make a request for http://localhost/ in this case and expect it to be handled by my application. Nor can I expect routing in this application to handle requests for another root directory such as http://localhost/not-my-app/.
This might seem like an obvious thing to say, but I know it trips some people up. Also, in the example I did here, I used a virtual application for demonstration purposes. It’s very easy to point a root Website in IIS to my application and run it in http://localhost/ rather than a virtual application. This is not a problem. I hope you found this helpful.
摘自:http://haacked.com/archive/2008/11/26/asp.net-mvc-on-iis-6-walkthrough.aspx
