【浅学Java】Spring对象的存储和读取
Spring对象的读取和存储
- 1. 回顾前面Spring对象存储方式
- 2. 新的存储方式——添加注解
- 5. 五大类注解
-
- @Controller——控制器存储
- @Service——服务层
- @Repository——仓库
- @Component——组件
- @Configuration——配置
- 1. 为什么需要这么多的类注解?
- 2. 类注解之间的关系?
- 3. 五大类注解Bean命名规则
-
- 一般规则
- 特殊情况
- 3. 方法注解——@Bean
-
- 1. 使用步骤
- 2. 方法注解Bean命名规则
- 3. @Bean重命名的方式
- 4. @Bean注解注意事项总结
- 4. 获取Bean对象——用@Autowired注入
-
- 1. 属性注入
- 2. Setter注入
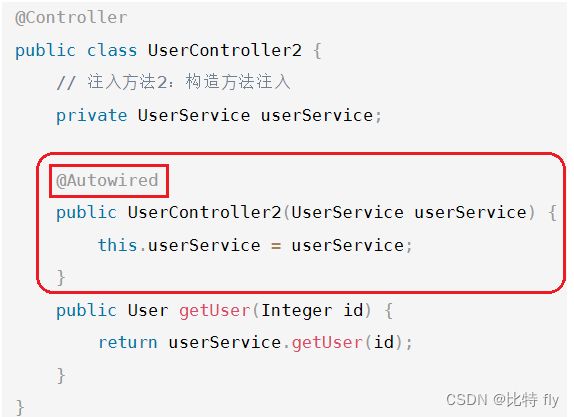
- 3.构造方法注入
- 4. 三种注入方式的优缺点分析
- 5. @Resource——另一种注入关键字
- 6. 同⼀类型多个 Bean 报错处理
-
- 使⽤ @Resource(name="XXX")
- 使用@Qualifier
- 7. 综合示例
1. 回顾前面Spring对象存储方式
之前我们通过 bean 标签将对象存储到Spring当中:
<beans xmlns="http://www.springframework.org/schema/beans"
       xmlns:xsi="http://www.w3.org/2001/XMLSchema-instance"
       xsi:schemaLocation="http://www.springframework.org/schema/beans http://www.springframework.org/schema/beans/spring-beans.xsd">
    <bean id="user" class="com.myclass.User">bean>
beans>
这种方法确实是可以实现Spring对象的存储,但是这种方法操作起来还是比较的麻烦,每存储一个对象,就得在xml文件中手动加入这个对象对象的类。
下面我们将学习更为方便的一种Spring对象的存储和读取方式。
2. 新的存储方式——添加注解
这里我们介绍一种新的存储方式,就是添加类注解或者方法注解
将上面的xml文件更换成下面这种形式:
<beans xmlns="http://www.springframework.org/schema/beans"
       xmlns:xsi="http://www.w3.org/2001/XMLSchema-instance"
       xmlns:content="http://www.springframework.org/schema/context"
       xsi:schemaLocation="http://www.springframework.org/schema/beans http://www.springframework.org/schema/beans/spring-beans.xsd http://www.springframework.org/schema/context https://www.springframework.org/schema/context/spring-context.xsd">
    <content:component-scan base-package="com.myfile">content:component-scan>

beans>

给需要存入的对象加上 类注解 或者 方法注解:
测试结果:
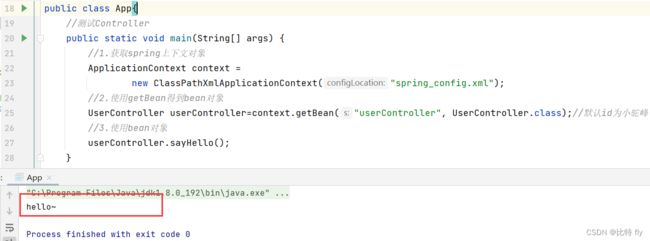
下面我们开始介绍“五大类注解”和“方法注解”。
5. 五大类注解
@Controller——控制器存储
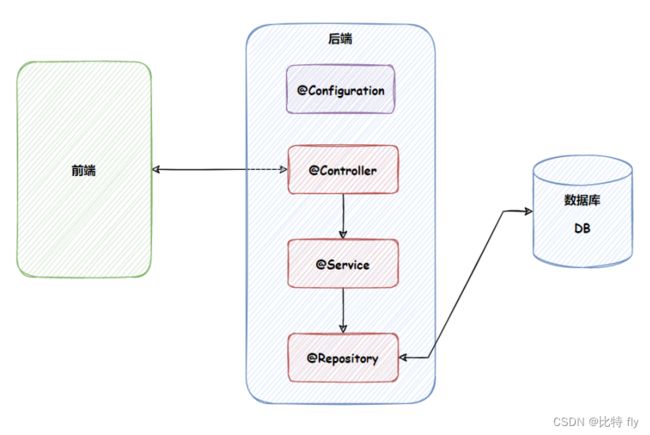
在前后端交互的时候,前端将请求先发到Controller,Controller先对其进行检查,如果请求不合理就直接返回错误,即被Controller修饰的类起到一个安检的作用。
@Service——服务层
是一个服务的编排和汇总。比如:某程序规定修改个人头像之后,需要对应修改两张表的信息,一个是修改用户表的头像字段,一个是在积分表上加上5分,但是这两个表先执行哪一个呢?这里就得服务层做出计划,看看先调用哪个接口。
@Repository——仓库
直接操作数据库。由服务层调用,进行数据的修改。
@Component——组件
和程序的业务没有关系,一般是通用化的类
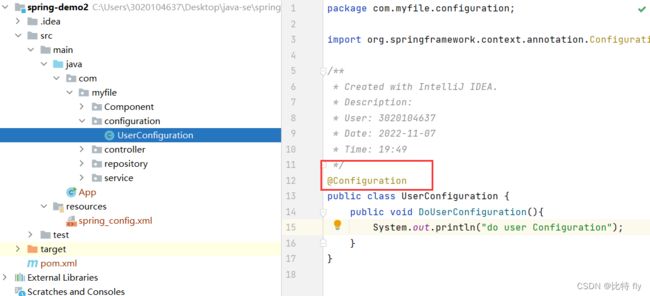
@Configuration——配置
项目中的所有配置都会放在被Configuration注解的类里面
1. 为什么需要这么多的类注解?
让程序员看到类注解之后,就能直接了解当前类的⽤途,他们之间的调用关系如下:
2. 类注解之间的关系?
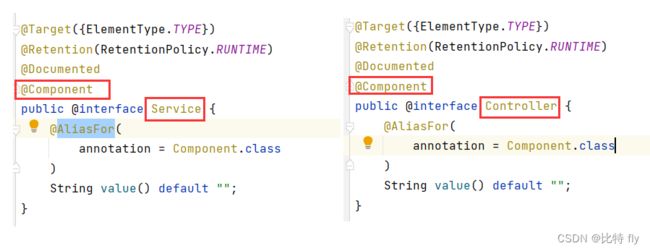
其实这些注解⾥⾯都有⼀个注解 @Component,说明它们本身就是属于 @Component 的“⼦类”。
3. 五大类注解Bean命名规则
一般规则
public static void main(String[] args) {
        //1.获取spring上下文对象
        ApplicationContext context =
                new ClassPathXmlApplicationContext("spring_config.xml");
        //2.使用getBean得到bean对象
        UserController userController=context.getBean("userController", UserController.class);//默认id为小驼峰
        //3.使用bean对象
        userController.sayHello();
}
特殊情况
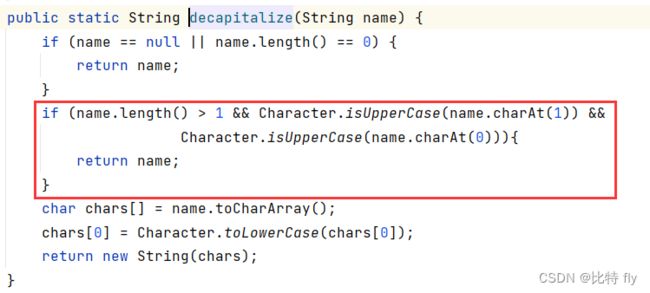
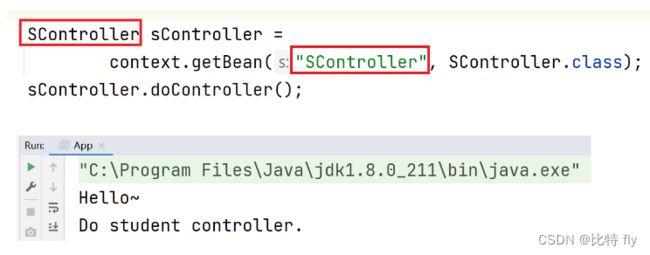
但是有一种特殊情况:当首字母和第二个字母都是大写的时候,那么bean的id就是类名本身。
3. 方法注解——@Bean
1. 使用步骤
方法注解就是:将某个方法返回的对象存储在Spring里面
使用方法示例:

测试结果:

很明显,代码出问题了,user并没有被存储到Spring当中,这时为什么呢?
因为:@Bean要配合“五大类注解”进行使用
2. 方法注解Bean命名规则
方法注解Bean命名规则 和 五大类注解Bean命名规则 是不一样的,它默认的bean名称是方法名
如果两个类中有名字相同的方法时:

这种情况下,如果采用方法名作为默认Bean名称,就无法控制拿到哪一个类中的User了,为了解决这个问题,就引入了Bean的重命名,示范如下:

运行结果:

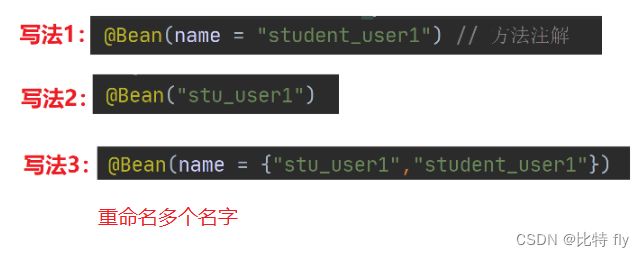
3. @Bean重命名的方式
4. @Bean注解注意事项总结
- 必须配合五大类注解使用
- @Bean方法注解只能使用在无参的方法上(Spring初始化存储时,没办法提供相应的参数)
- @重命名只之后,使用方法名就无法获取到Bean对象了
4. 获取Bean对象——用@Autowired注入
获取Bean对象也叫做对象装配,是把对象取出来放入某个类中,有时候也叫做对象注入。
对象注入的实现方式:
- 属性注入
- Setter注入
- 构造方法注入
1. 属性注入
属性注入是使用@Autowired实现的,将Service类注入到Controller类中。
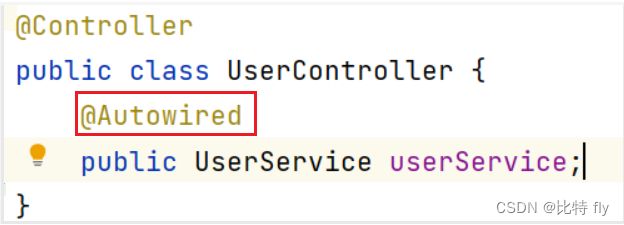
将userService注入到UserController中。
2. Setter注入
3.构造方法注入
4. 三种注入方式的优缺点分析
这里暂不分析,详见: 三种注入方式的优缺点分析。
只是简单说一下实际中三种的使用,官方主推构造方法注入,但是在实际开发中主要还是用的属性注入,只有在特殊情况下才会考虑构造方法注入。
5. @Resource——另一种注入关键字
它的使用方式和@Autowoired一致
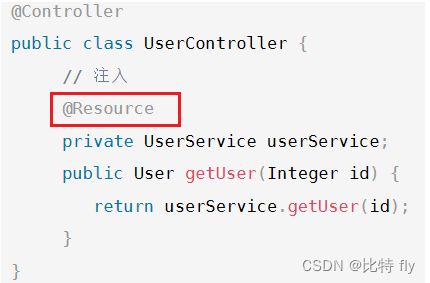
但是他和@Autowoired是有一定的区别的,主要区别如下:
- 来源不同:@Autowoired来自Spring,@Resource来自于JDK。
- 使⽤时设置的参数不同:相⽐于 @Autowired 来说,@Resource ⽀持更多的参数设置,例如name 设置,根据名称获取 Bean。
- @Autowoired可用于Setter注入、构造函数注⼊和属性注⼊,@Resource 只能⽤于 Setter 注⼊和属性注⼊,不能⽤于构造函数注⼊
详见: @Autowired 和 @Resource 有什么区别
6. 同⼀类型多个 Bean 报错处理
解决同⼀个类型,多个 bean 的解决⽅案有以下两个:
- 使⽤ @Resource(name=“user1”) 定义。
- 使⽤ @Qualifier 注解定义名称。
使⽤ @Resource(name=“XXX”)
@Controller
class UserController4 {
	 // 注⼊
	 @Resource(name = "user1")
	 private User user;
	 public User getUser() {
	 	return user;
	 }
}
使用@Qualifier
@Controller
public class UserController5 {
	 // 注⼊
	 @Autowired
	 @Qualifier(value = "user2")
	 private User user;
	 public User getUser() {
	 	return user;
	 }
}
7. 综合示例
在 Spring 项⽬中,通过 main ⽅法获取到 Controller 类,调⽤ Controller ⾥⾯通过注⼊的⽅式调⽤Service 类,Service 再通过注⼊的⽅式获取到 Repository 类,Repository 类⾥⾯有⼀个⽅法构建⼀个 User 对象,返回给 main ⽅法。
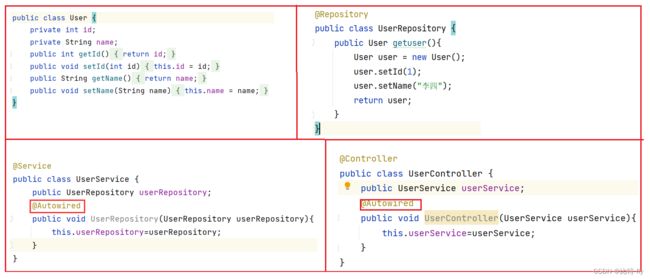
main:

运行结果:


