yolov3实现Kitti baseline(含评估代码:easy、moderate和hard的AP计算,fps计算)(下)
yolov3实现Kitti baseline(含评估代码:easy、moderate和hard的AP计算,fps计算)
上篇博客谈到如何训练基于kitti的yolov3模型,这篇主要讨论如何使用模型参数进行前向推理,如何实现kitti 2d目标的easy、moderate和hard计算。
1. 测试数据集的准备
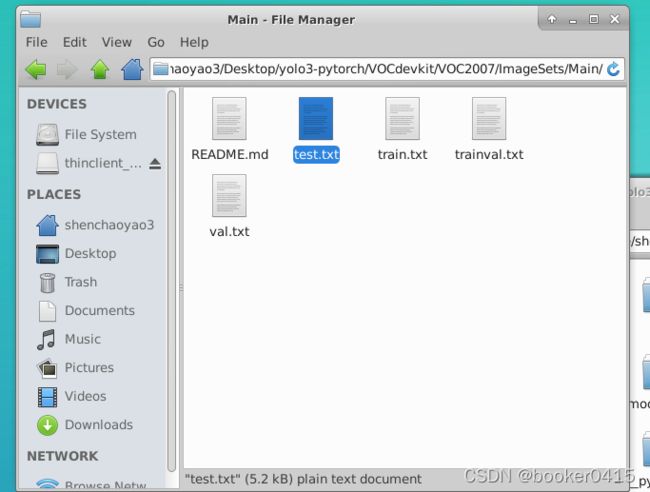
前面运行train.py的代码时候,会在VOCdevkit/VOC2007/ImageSets/Main的文件夹下有一个test.txt文件,里面保存了用于测试的图片的编号,如下图所示。
1-1. 测试集图片的生成
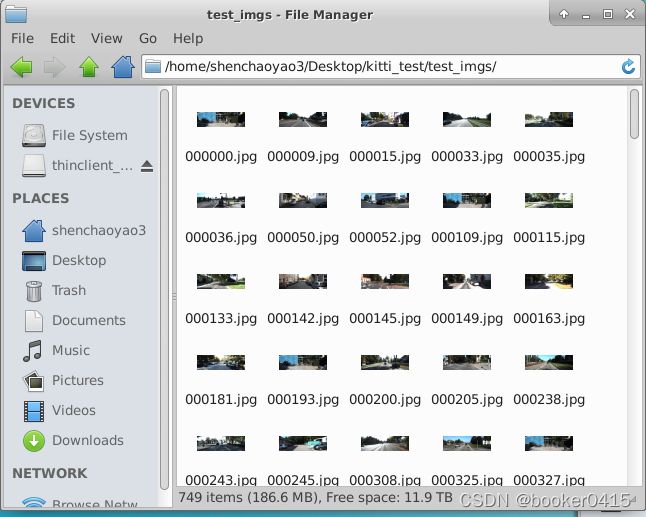
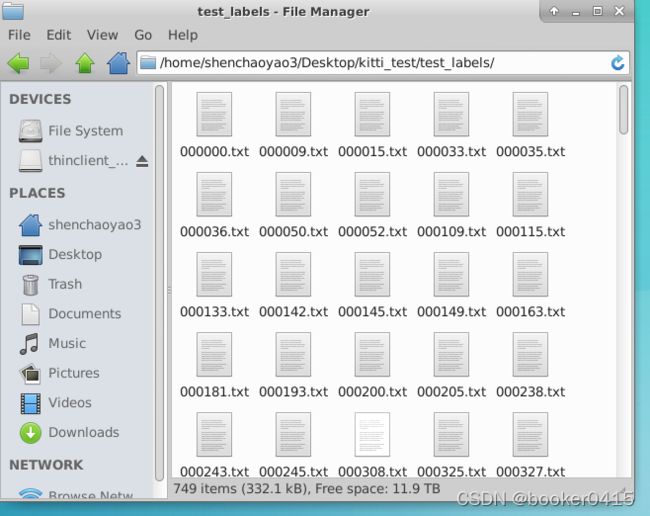
创建一个名为kitti_test的文件夹,all_imgs里面存放所有的7841张图片(使用命令拷贝过来,参考前面两篇博客),all_labels里面存放所有的7841个txt标签信息(使用命令拷贝过来,参考前面两篇博客),test_imgs用于存放生成的测试集图片,test_labels用于存放生成的测试集txt标签信息,get_testimgs.py是一个获取测试集图片的脚本,get_testlabels.py是一个获取测试集txt标签的脚本,text.txt是上述会在VOCdevkit/VOC2007/ImageSets/Main的文件夹下存放测试集编号信息的txt文件。
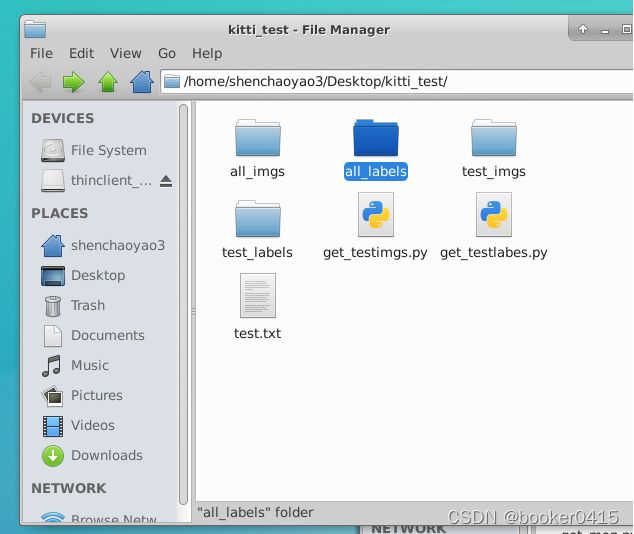

运行get_testimgs.py脚本,生成test_imgs用于测试的图片,代码如下。
import shutil

# 根据txt中文件的名字批量提取对应的文件名并保存到另一个文件夹

data = []
for line in open("/home/shenchaoyao3/Desktop/kitti_test/test.txt", "r"):  # 设置文件对象并读取每一行文件
    data.append(line)

for a in data:
    src = '/home/shenchaoyao3/Desktop/kitti_test/all_imgs/{}.jpg'.format(a[:-1])
    dst = '/home/shenchaoyao3/Desktop/kitti_test/test_imgs/{}.jpg'.format(a[:-1])
    shutil.copy(src, dst)
1-2. 测试集txt标签的生成
运行get_testlabels.py,获取测试集txt标签,代码如下。
import shutil

# 根据txt中文件的名字批量提取对应的文件名并保存到另一个文件夹

data = []
for line in open("/home/shenchaoyao3/Desktop/kitti_test/test.txt", "r"):  # 设置文件对象并读取每一行文件
    data.append(line)

for a in data:
    src = '/home/shenchaoyao3/Desktop/kitti_test/all_labels/{}.txt'.format(a[:-1])
    dst = '/home/shenchaoyao3/Desktop/kitti_test/test_labels/{}.txt'.format(a[:-1])
    shutil.copy(src, dst)
2.前向推理预测
将获取的测试集图片拷贝到yolo3-pytorch项目库下,并创建文件夹命名test_imgs


修改predict.py的文件路径、模式,以及模型配置,yolo.py的帧率测试函数和图像检测函数,这里直接放代码,后面有疑问可以私聊解释。
yolo.py
#-----------------------------------------------------------------------#
#   predict.py将单张图片预测、摄像头检测、FPS测试和目录遍历检测等功能
#   整合到了一个py文件中,通过指定mode进行模式的修改。
#-----------------------------------------------------------------------#
import time

import cv2
import numpy as np
from PIL import Image

from yolo import YOLO

if __name__ == "__main__":
    yolo = YOLO()
    #----------------------------------------------------------------------------------------------------------#
    #   mode用于指定测试的模式:
    #   'predict'表示单张图片预测,如果想对预测过程进行修改,如保存图片,截取对象等,可以先看下方详细的注释
    #   'video'表示视频检测,可调用摄像头或者视频进行检测,详情查看下方注释。
    #   'fps'表示测试fps,使用的图片是img里面的street.jpg,详情查看下方注释。
    #   'dir_predict'表示遍历文件夹进行检测并保存。默认遍历img文件夹,保存img_out文件夹,详情查看下方注释。
    #----------------------------------------------------------------------------------------------------------#
    mode = "fps"
    #----------------------------------------------------------------------------------------------------------#
    #   video_path用于指定视频的路径,当video_path=0时表示检测摄像头
    #   想要检测视频,则设置如video_path = "xxx.mp4"即可,代表读取出根目录下的xxx.mp4文件。
    #   video_save_path表示视频保存的路径,当video_save_path=""时表示不保存
    #   想要保存视频,则设置如video_save_path = "yyy.mp4"即可,代表保存为根目录下的yyy.mp4文件。
    #   video_fps用于保存的视频的fps
    #   video_path、video_save_path和video_fps仅在mode='video'时有效
    #   保存视频时需要ctrl+c退出或者运行到最后一帧才会完成完整的保存步骤。
    #----------------------------------------------------------------------------------------------------------#
    video_path      = 0
    video_save_path = ""
    video_fps       = 25.0
    #-------------------------------------------------------------------------#
    #   test_interval用于指定测量fps的时候,图片检测的次数
    #   理论上test_interval越大,fps越准确。
    #-------------------------------------------------------------------------#
    test_interval   = 100
    #-------------------------------------------------------------------------#
    #   dir_origin_path指定了用于检测的图片的文件夹路径
    #   dir_save_path指定了检测完图片的保存路径
    #   dir_origin_path和dir_save_path仅在mode='dir_predict','fps'时有效
    #-------------------------------------------------------------------------#
    dir_origin_path = "test_imgs/"
    dir_save_path   = "img_out/"

    if mode == "predict":
        '''
        1、如果想要进行检测完的图片的保存,利用r_image.save("img.jpg")即可保存,直接在predict.py里进行修改即可。
        2、如果想要获得预测框的坐标,可以进入yolo.detect_image函数,在绘图部分读取top,left,bottom,right这四个值。
        3、如果想要利用预测框截取下目标,可以进入yolo.detect_image函数,在绘图部分利用获取到的top,left,bottom,right这四个值
        在原图上利用矩阵的方式进行截取。
        4、如果想要在预测图上写额外的字,比如检测到的特定目标的数量,可以进入yolo.detect_image函数,在绘图部分对predicted_class进行判断,
        比如判断if predicted_class == 'car': 即可判断当前目标是否为车,然后记录数量即可。利用draw.text即可写字。
        '''
        while True:
            img = input('Input image filename:')
            number=str(img)
            number=number.split('/')[1].split('.')[0]
            try:
                image = Image.open(img)
            except:
                print('Open Error! Try again!')
                continue
            else:
                predicted_class, top, left, bottom, right, score = yolo.detect_image(image,number)
                # r_image.show()

    elif mode == "video":
        capture = cv2.VideoCapture(video_path)
        if video_save_path!="":
            fourcc  = cv2.VideoWriter_fourcc(*'XVID')
            size    = (int(capture.get(cv2.CAP_PROP_FRAME_WIDTH)), int(capture.get(cv2.CAP_PROP_FRAME_HEIGHT)))
            out     = cv2.VideoWriter(video_save_path, fourcc, video_fps, size)

        ref, frame = capture.read()
        if not ref:
            raise ValueError("未能正确读取摄像头(视频),请注意是否正确安装摄像头(是否正确填写视频路径)。")

        fps = 0.0
        while(True):
            t1 = time.time()
            # 读取某一帧
            ref, frame = capture.read()
            if not ref:
                break
            # 格式转变,BGRtoRGB
            frame = cv2.cvtColor(frame,cv2.COLOR_BGR2RGB)
            # 转变成Image
            frame = Image.fromarray(np.uint8(frame))
            # 进行检测
            frame = np.array(yolo.detect_image(frame))
            # RGBtoBGR满足opencv显示格式
            frame = cv2.cvtColor(frame,cv2.COLOR_RGB2BGR)

            fps  = ( fps + (1./(time.time()-t1)) ) / 2
            print("fps= %.2f"%(fps))
            frame = cv2.putText(frame, "fps= %.2f"%(fps), (0, 40), cv2.FONT_HERSHEY_SIMPLEX, 1, (0, 255, 0), 2)

            cv2.imshow("video",frame)
            c= cv2.waitKey(1) & 0xff
            if video_save_path!="":
                out.write(frame)

            if c==27:
                capture.release()
                break

        print("Video Detection Done!")
        capture.release()
        if video_save_path!="":
            print("Save processed video to the path :" + video_save_path)
            out.release()
        cv2.destroyAllWindows()

    elif mode == "fps":
        # img = Image.open('img/000114.jpg')
        # tact_time = yolo.get_FPS(img, test_interval)
        # print(str(tact_time) + ' seconds, ' + str(1/tact_time) + 'FPS, @batch_size 1')

        import os

        from tqdm import tqdm
        time_total=0
        times=0
        img_names = os.listdir(dir_origin_path)
        for img_name in tqdm(img_names):
            if img_name.lower().endswith(('.bmp', '.dib', '.png', '.jpg', '.jpeg', '.pbm', '.pgm', '.ppm', '.tif', '.tiff')):
                image_path = os.path.join(dir_origin_path, img_name)
                image = Image.open(image_path)
                tact_time = yolo.get_FPS(image, test_interval)
                time_total=time_total+tact_time
                times=times+1
        time_final=time_total/times
        print(str(time_final) + ' seconds, ' + str(1 / time_final) + 'FPS, @batch_size 1')

    elif mode == "dir_predict":
        import os

        from tqdm import tqdm

        img_names = os.listdir(dir_origin_path)
        for img_name in tqdm(img_names):
            if img_name.lower().endswith(('.bmp', '.dib', '.png', '.jpg', '.jpeg', '.pbm', '.pgm', '.ppm', '.tif', '.tiff')):
                image_path  = os.path.join(dir_origin_path, img_name)
                number = str(image_path)
                number = number.split('/')[1].split('.')[0]
                image       = Image.open(image_path)
                predicted_class, top, left, bottom, right, score    = yolo.detect_image(image,number)
                # if not os.path.exists(dir_save_path):
                #     os.makedirs(dir_save_path)
                # r_image.save(os.path.join(dir_save_path, img_name))

    else:
        raise AssertionError("Please specify the correct mode: 'predict', 'video', 'fps' or 'dir_predict'.")
yolo.py
import colorsys
import os
import time

import numpy as np
import torch
import torch.nn as nn
from PIL import ImageDraw, ImageFont

from nets.yolo import YoloBody
from utils.utils import (cvtColor, get_anchors, get_classes, preprocess_input,
                         resize_image)
from utils.utils_bbox import DecodeBox
import os
os.environ["CUDA_VISIBLE_DEVICES"]="5"
'''
训练自己的数据集必看注释!
'''
class YOLO(object):
    _defaults = {
        #--------------------------------------------------------------------------#
        #   使用自己训练好的模型进行预测一定要修改model_path和classes_path!
        #   model_path指向logs文件夹下的权值文件,classes_path指向model_data下的txt
        #
        #   训练好后logs文件夹下存在多个权值文件,选择验证集损失较低的即可。
        #   验证集损失较低不代表mAP较高,仅代表该权值在验证集上泛化性能较好。
        #   如果出现shape不匹配,同时要注意训练时的model_path和classes_path参数的修改
        #--------------------------------------------------------------------------#
        "model_path"        : 'logs/ep100-loss2.670-val_loss4.087.pth',
        "classes_path"      : 'model_data/cls_classes.txt',
        #---------------------------------------------------------------------#
        #   anchors_path代表先验框对应的txt文件,一般不修改。
        #   anchors_mask用于帮助代码找到对应的先验框,一般不修改。
        #---------------------------------------------------------------------#
        "anchors_path"      : 'model_data/yolo_anchors.txt',
        "anchors_mask"      : [[6, 7, 8], [3, 4, 5], [0, 1, 2]],
        #---------------------------------------------------------------------#
        #   输入图片的大小,必须为32的倍数。
        #---------------------------------------------------------------------#
        "input_shape"       : [416, 416],
        #---------------------------------------------------------------------#
        #   只有得分大于置信度的预测框会被保留下来
        #---------------------------------------------------------------------#
        "confidence"        : 0.5,
        #---------------------------------------------------------------------#
        #   非极大抑制所用到的nms_iou大小
        #---------------------------------------------------------------------#
        "nms_iou"           : 0.3,
        #---------------------------------------------------------------------#
        #   该变量用于控制是否使用letterbox_image对输入图像进行不失真的resize,
        #   在多次测试后,发现关闭letterbox_image直接resize的效果更好
        #---------------------------------------------------------------------#
        "letterbox_image"   : False,
        #-------------------------------#
        #   是否使用Cuda
        #   没有GPU可以设置成False
        #-------------------------------#
        "cuda"              : True,
    }

    @classmethod
    def get_defaults(cls, n):
        if n in cls._defaults:
            return cls._defaults[n]
        else:
            return "Unrecognized attribute name '" + n + "'"

    #---------------------------------------------------#
    #   初始化YOLO
    #---------------------------------------------------#
    def __init__(self, **kwargs):
        self.__dict__.update(self._defaults)
        for name, value in kwargs.items():
            setattr(self, name, value)

        #---------------------------------------------------#
        #   获得种类和先验框的数量
        #---------------------------------------------------#
        self.class_names, self.num_classes  = get_classes(self.classes_path)
        self.anchors, self.num_anchors      = get_anchors(self.anchors_path)
        self.bbox_util                      = DecodeBox(self.anchors, self.num_classes, (self.input_shape[0], self.input_shape[1]), self.anchors_mask)

        #---------------------------------------------------#
        #   画框设置不同的颜色
        #---------------------------------------------------#
        hsv_tuples = [(x / self.num_classes, 1., 1.) for x in range(self.num_classes)]
        self.colors = list(map(lambda x: colorsys.hsv_to_rgb(*x), hsv_tuples))
        self.colors = list(map(lambda x: (int(x[0] * 255), int(x[1] * 255), int(x[2] * 255)), self.colors))
        self.generate()

    #---------------------------------------------------#
    #   生成模型
    #---------------------------------------------------#
    def generate(self):
        #---------------------------------------------------#
        #   建立yolov3模型,载入yolov3模型的权重
        #---------------------------------------------------#
        self.net    = YoloBody(self.anchors_mask, self.num_classes)
        device      = torch.device('cuda' if torch.cuda.is_available() else 'cpu')
        self.net.load_state_dict(torch.load(self.model_path, map_location=device))
        self.net    = self.net.eval()
        print('{} model, anchors, and classes loaded.'.format(self.model_path))

        if self.cuda:
            self.net = nn.DataParallel(self.net)
            self.net = self.net.cuda()

    #---------------------------------------------------#
    #   检测图片
    #---------------------------------------------------#
    def detect_image(self, image, number):
        image_shape = np.array(np.shape(image)[0:2])
        #---------------------------------------------------------#
        #   在这里将图像转换成RGB图像,防止灰度图在预测时报错。
        #   代码仅仅支持RGB图像的预测,所有其它类型的图像都会转化成RGB
        #---------------------------------------------------------#
        image       = cvtColor(image)
        #---------------------------------------------------------#
        #   给图像增加灰条,实现不失真的resize
        #   也可以直接resize进行识别
        #---------------------------------------------------------#
        image_data  = resize_image(image, (self.input_shape[1],self.input_shape[0]), self.letterbox_image)
        #---------------------------------------------------------#
        #   添加上batch_size维度
        #---------------------------------------------------------#
        image_data  = np.expand_dims(np.transpose(preprocess_input(np.array(image_data, dtype='float32')), (2, 0, 1)), 0)

        with torch.no_grad():
            images = torch.from_numpy(image_data)
            if self.cuda:
                images = images.cuda()
            #---------------------------------------------------------#
            #   将图像输入网络当中进行预测!
            #---------------------------------------------------------#
            outputs = self.net(images)
            outputs = self.bbox_util.decode_box(outputs)
            #---------------------------------------------------------#
            #   将预测框进行堆叠,然后进行非极大抑制
            #---------------------------------------------------------#
            results = self.bbox_util.non_max_suppression(torch.cat(outputs, 1), self.num_classes, self.input_shape,
                        image_shape, self.letterbox_image, conf_thres = self.confidence, nms_thres = self.nms_iou)

            if results[0] is None:
                return image

            top_label   = np.array(results[0][:, 6], dtype = 'int32')
            top_conf    = results[0][:, 4] * results[0][:, 5]
            top_boxes   = results[0][:, :4]
        #---------------------------------------------------------#
        #   设置字体与边框厚度
        #---------------------------------------------------------#
        font        = ImageFont.truetype(font='model_data/simhei.ttf', size=np.floor(3e-2 * image.size[1] + 0.5).astype('int32'))
        thickness   = int(max((image.size[0] + image.size[1]) // np.mean(self.input_shape), 1))

        #---------------------------------------------------------#
        #   图像绘制
        #---------------------------------------------------------#
        for i, c in list(enumerate(top_label)):
            predicted_class = self.class_names[int(c)]
            box             = top_boxes[i]
            score           = top_conf[i]

            top, left, bottom, right = box
            # top     = max(0, np.floor(top).astype('int32'))
            # left    = max(0, np.floor(left).astype('int32'))
            # bottom  = min(image.size[1], np.floor(bottom).astype('int32'))
            # right   = min(image.size[0], np.floor(right).astype('int32'))
            #
            # label = '{} {:.2f}'.format(predicted_class, score)
            # draw = ImageDraw.Draw(image)
            # label_size = draw.textsize(label, font)
            # label = label.encode('utf-8')
            src = 'pre_imgs/{}.txt'.format(number)
            f = open(src, 'a')
            f.write("{} {:.2f} {:.2f} {:.2f} {:.2f} {:.2f}".format(predicted_class, left, top, right, bottom, score))
            f.write('\n')
            # print(label, top, left, bottom, right)
            #
            # if top - label_size[1] >= 0:
            #     text_origin = np.array([left, top - label_size[1]])
            # else:
            #     text_origin = np.array([left, top + 1])
            #
            # for i in range(thickness):
            #     draw.rectangle([left + i, top + i, right - i, bottom - i], outline=self.colors[c])
            # draw.rectangle([tuple(text_origin), tuple(text_origin + label_size)], fill=self.colors[c])
            # draw.text(text_origin, str(label,'UTF-8'), fill=(0, 0, 0), font=font)
            # del draw
        f.close()
        # return image
        return predicted_class,top,left,bottom,right,score

    def get_FPS(self, image, test_interval):
        image_shape = np.array(np.shape(image)[0:2])
        #---------------------------------------------------------#
        #   在这里将图像转换成RGB图像,防止灰度图在预测时报错。
        #   代码仅仅支持RGB图像的预测,所有其它类型的图像都会转化成RGB
        #---------------------------------------------------------#
        image       = cvtColor(image)
        #---------------------------------------------------------#
        #   给图像增加灰条,实现不失真的resize
        #   也可以直接resize进行识别
        #---------------------------------------------------------#
        image_data  = resize_image(image, (self.input_shape[1],self.input_shape[0]), self.letterbox_image)
        #---------------------------------------------------------#
        #   添加上batch_size维度
        #---------------------------------------------------------#
        image_data  = np.expand_dims(np.transpose(preprocess_input(np.array(image_data, dtype='float32')), (2, 0, 1)), 0)
        with torch.no_grad():
            images = torch.from_numpy(image_data)
            if self.cuda:
                images = images.cuda()
            #---------------------------------------------------------#
            #   将图像输入网络当中进行预测!
            #---------------------------------------------------------#
            outputs = self.net(images)
            outputs = self.bbox_util.decode_box(outputs)
            #---------------------------------------------------------#
            #   将预测框进行堆叠,然后进行非极大抑制
            #---------------------------------------------------------#
            results = self.bbox_util.non_max_suppression(torch.cat(outputs, 1), self.num_classes, self.input_shape,
                        image_shape, self.letterbox_image, conf_thres=self.confidence, nms_thres=self.nms_iou)

        t1 = time.time()
        for _ in range(test_interval):
            with torch.no_grad():
                #---------------------------------------------------------#
                #   将图像输入网络当中进行预测!
                #---------------------------------------------------------#
                outputs = self.net(images)
                outputs = self.bbox_util.decode_box(outputs)
                #---------------------------------------------------------#
                #   将预测框进行堆叠,然后进行非极大抑制
                #---------------------------------------------------------#
                results = self.bbox_util.non_max_suppression(torch.cat(outputs, 1), self.num_classes, self.input_shape,
                            image_shape, self.letterbox_image, conf_thres=self.confidence, nms_thres=self.nms_iou)

        t2 = time.time()
        tact_time = (t2 - t1) / test_interval
        return tact_time

    def get_map_txt(self, image_id, image, class_names, map_out_path):
        f = open(os.path.join(map_out_path, "detection-results/"+image_id+".txt"),"w")
        image_shape = np.array(np.shape(image)[0:2])
        #---------------------------------------------------------#
        #   在这里将图像转换成RGB图像,防止灰度图在预测时报错。
        #   代码仅仅支持RGB图像的预测,所有其它类型的图像都会转化成RGB
        #---------------------------------------------------------#
        image       = cvtColor(image)
        #---------------------------------------------------------#
        #   给图像增加灰条,实现不失真的resize
        #   也可以直接resize进行识别
        #---------------------------------------------------------#
        image_data  = resize_image(image, (self.input_shape[1],self.input_shape[0]), self.letterbox_image)
        #---------------------------------------------------------#
        #   添加上batch_size维度
        #---------------------------------------------------------#
        image_data  = np.expand_dims(np.transpose(preprocess_input(np.array(image_data, dtype='float32')), (2, 0, 1)), 0)

        with torch.no_grad():
            images = torch.from_numpy(image_data)
            if self.cuda:
                images = images.cuda()
            #---------------------------------------------------------#
            #   将图像输入网络当中进行预测!
            #---------------------------------------------------------#
            outputs = self.net(images)
            outputs = self.bbox_util.decode_box(outputs)
            #---------------------------------------------------------#
            #   将预测框进行堆叠,然后进行非极大抑制
            #---------------------------------------------------------#
            results = self.bbox_util.non_max_suppression(torch.cat(outputs, 1), self.num_classes, self.input_shape,
                        image_shape, self.letterbox_image, conf_thres = self.confidence, nms_thres = self.nms_iou)

            if results[0] is None:
                return

            top_label   = np.array(results[0][:, 6], dtype = 'int32')
            top_conf    = results[0][:, 4] * results[0][:, 5]
            top_boxes   = results[0][:, :4]

        for i, c in list(enumerate(top_label)):
            predicted_class = self.class_names[int(c)]
            box             = top_boxes[i]
            score           = str(top_conf[i])

            top, left, bottom, right = box
            if predicted_class not in class_names:
                continue

            f.write("%s %s %s %s %s %s\n" % (predicted_class, score[:6], str(int(left)), str(int(top)), str(int(right)),str(int(bottom))))

        f.close()
        return
运行predict.py,模式为dir_predict会在pre_imgs文件夹下生成预测的txt标签信息,至此就有预测标签和争取标签信息的对比文件,接下来编写脚本,对比两个文件信息,计算相应难度的AP;而模式为fps的话就会计算test_imgs文件夹内的所有图片的帧率。

3. 评估——easy、moderate和hard的AP计算
创建kitti_evaluation_for_2d_detection文件夹,并在其内创建pre_labels存放之前pre_imgs文件夹下的预测txt标签信息,test_labels文件夹下存放真实的txt标签信息。
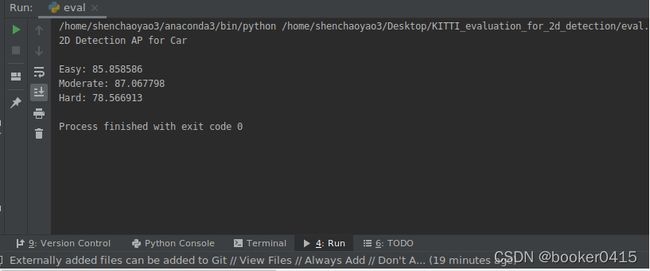
运行以下代码eval.py,生成Car和Pedestrain三个难度的预测信息。
import numpy as np
import os
import matplotlib.pyplot as plt


# VALID_CLASSES = ['Car', 'Van', 'Pedestrian', 'Person_sitting', 'Cyclist', 'DontCare']
VALID_CLASSES = ['Car',  'Pedestrian', 'Cyclist']
CLS_DICT = {'Car':0, 'Pedestrian':1, 'Cyclist':2}

MIN_HEIGHT = [40, 25, 25]
MAX_OCCLUSION = [0, 1, 2]
MAX_TRUNCATION = [0.15, 0.3, 0.5]
MIN_OVERLAP = {'Car':0.7,'Pedestrian':0.5,'Cyclist': 0.5}
N_SAMPLE_PTS = 41


def load_gt(filename):
    f = open(filename, 'r')
    lines = f.readlines()
    f.close()
    record_list = []

    for line in lines:
        line = line.strip().split(' ')
        if len(line) == 0:
            continue
        if line[0] not in VALID_CLASSES:
            continue

        record = {}
        record['class'] = line[0]
        record['trunc'] = float(line[1])
        record['occ'] = float(line[2])
        record['box'] = [float(c) for c in line[4:8]]
        record_list.append(record)
    return record_list


def load_pred(filename):
    f = open(filename, 'r')
    lines = f.readlines()
    f.close()
    record_list = []

    for line in lines:
        line = line.strip().split(' ')
        if len(line) == 0:
            continue
        if line[0] not in VALID_CLASSES:
            continue

        record = {}
        record['class'] = line[0]
        record['box'] = [float(c) for c in line[1:5]]
        record['score'] = float(line[-1])
        record_list.append(record)
    return record_list


def get_thresholds(v, n_groundTruth):
    v = np.array(v)
    sort_ind_desc = np.argsort(v * -1)
    vs = v[sort_ind_desc]

    t = []
    current_recall = 0

    for i in range(vs.shape[0]):
        l_recall = (i+1)/n_groundTruth

        if i < vs.shape[0] - 1:
            r_recall = (i+2)/n_groundTruth
        else:
            r_recall = l_recall

        if (r_recall - current_recall) < (current_recall - l_recall) and i < (vs.shape[0] - 1):
            continue
        t.append(vs[i])
        current_recall += 1.0 / (N_SAMPLE_PTS - 1.0)
    return t


def get_iou(gt, pred, union=True):
    gxmin, gymin, gxmax, gymax = gt['box']
    pxmin, pymin, pxmax, pymax = pred['box']

    ixmin = np.maximum(gxmin, pxmin)
    iymin = np.maximum(gymin, pymin)
    ixmax = np.minimum(gxmax, pxmax)
    iymax = np.minimum(gymax, pymax)

    ih = np.maximum(0., iymax - iymin)
    iw = np.maximum(0., ixmax - ixmin)

    gvol = (gxmax - gxmin) * (gymax - gymin)
    pvol = (pxmax - pxmin) * (pymax - pymin)
    ivol = iw * ih

    if union:
        iou = ivol / (gvol + pvol - ivol)
    else:
        iou = ivol / pvol
    return iou


def clean_data(gts, preds, cls, diff):
    ignore_gt = []
    ignore_pred = []
    dontcare = []

    n_gt = 0

    #clean ground truth
    for gt in gts:
        #set ignore
        if cls == gt['class']:
            valid_class = 1
        else:
            if gt['class'] == 'Van' and cls == 'Car':
                valid_class = 0
            elif gt['class'] == 'Person_sitting' and cls == 'Pedestrian':
                valid_class = 0
            else:
                valid_class = -1

        height = gt['box'][3] - gt['box'][1]

        if gt['occ'] > MAX_OCCLUSION[diff] or gt['trunc'] > MAX_TRUNCATION[diff] or height < MIN_HEIGHT[diff]:
            ignore = True
        else:
            ignore = False

        if valid_class == 1 and not ignore:
            n_gt += 1
            ignore_gt.append(0)
        elif valid_class == 0 or (ignore and valid_class == 1):
            ignore_gt.append(1)
        else:
            ignore_gt.append(-1)

        #set Don't care
        if gt['class'] == 'DontCare':
            dontcare.append(True)
        else:
            dontcare.append(False)

    #clean predictions
    for pred in preds:
        if pred['class'] == cls:
            valid_class = 1
        else:
            valid_class = 0
        height = pred['box'][3] - pred['box'][1]

        if height < MIN_HEIGHT[diff]:
            ignore_pred.append(1)
        elif valid_class == 1:
            ignore_pred.append(0)
        else:
            ignore_pred.append(-1)

    return ignore_gt, dontcare, ignore_pred, n_gt


def compute_statistics(gts, preds, dontcare, ignore_gt, ignore_pred, compute_fp, threshold, cls, diff):
    n_gt = len(gts)
    n_pred = len(preds)

    assigned_detection = [False for _ in range(n_pred)]
    TP, FP, FN = 0, 0, 0
    vs = []

    ignore_threshold = []
    if compute_fp:
        for pred in preds:
            if pred['score'] < threshold:
                ignore_threshold.append(True)
            else:
                ignore_threshold.append(False)
    else:
        for pred in preds:
            ignore_threshold.append(False)

    for i in range(n_gt):
        if ignore_gt[i] == -1:
            continue

        det_idx = -1
        valid_detection = -1
        max_iou = 0.
        assigned_ignored_det = False

        for j in range(n_pred):
            if ignore_pred[j] == -1:
                continue
            if assigned_detection[j]:
                continue
            if ignore_threshold[j]:
                continue

            iou = get_iou(gts[i], preds[j])

            if not compute_fp and iou > MIN_OVERLAP[cls] and preds[j]['score'] > threshold:
                det_idx = j
                valid_detection = preds[j]['score']
            elif compute_fp and iou > MIN_OVERLAP[cls] and (iou > max_iou or assigned_ignored_det) and ignore_pred[j] == 0:
                max_iou = iou
                det_idx = j
                valid_detection = 1
                assigned_ignored_det = False
            elif compute_fp and iou > MIN_OVERLAP[cls] and valid_detection == -1. and ignore_pred[j] == 1:
                det_idx = j
                valid_detection = 1
                assigned_ignored_det = True

        if valid_detection == -1 and ignore_gt[i] == 0:
            FN += 1
        elif valid_detection != -1 and (ignore_gt[i] == 1 or ignore_pred[det_idx]==1):
            assigned_detection[det_idx] = True
        elif valid_detection != -1:
            TP += 1
            vs.append(preds[det_idx]['score'])
            assigned_detection[det_idx] = True

    if compute_fp:
        for i in range(n_pred):
            if not (assigned_detection[i] or ignore_pred[i]==-1 or ignore_pred[i]==1 or ignore_threshold[i]):
                FP += 1

        n_stuff = 0
        for i in range(n_gt):
            if not dontcare[i]:
                continue
            for j in range(n_pred):
                if assigned_detection[j]:
                    continue
                if ignore_pred[j] == -1 or ignore_pred[j] == 1:
                    continue
                if ignore_threshold[j]:
                    continue
                iou = get_iou(preds[j], gts[i], union=False)
                if iou > MIN_OVERLAP[cls]:
                    assigned_detection[j] = True
                    n_stuff += 1

        FP -= n_stuff

    return TP, FP, FN, vs


def eval_class(gt_list, pred_list, cls, diff):
    ignore_gt_list = []
    ignore_pred_list = []
    dontcare_list = []
    total_gt_num = 0

    #clean data
    vs = []
    for i in range(len(gt_list)):
        ignore_gt, dontcare, ignore_pred, n_gt_ = clean_data(gt_list[i], pred_list[i], cls, diff)
        ignore_gt_list.append(ignore_gt)
        ignore_pred_list.append(ignore_pred)
        dontcare_list.append(dontcare)
        total_gt_num += n_gt_

        _, _, _, vs_ = compute_statistics(gt_list[i], pred_list[i], dontcare, ignore_gt, ignore_pred, False, 0, cls, diff)
        vs = vs + vs_
    thresholds = get_thresholds(vs, total_gt_num)
    len_th = len(thresholds)
    TPs = [0.] * len_th
    FPs = [0.] * len_th
    FNs = [0.] * len_th

    for i in range(len(gt_list)):
        for t, th in enumerate(thresholds):
            TP, FP, FN, _, = compute_statistics(gt_list[i], pred_list[i], dontcare_list[i], ignore_gt_list[i], ignore_pred_list[i], True, th, cls, diff)
            TPs[t] += TP
            FPs[t] += FP
            FNs[t] += FN

    precisions = [0.] * N_SAMPLE_PTS
    recalls = []

    for t, th in enumerate(thresholds):
        r = TPs[t] / (TPs[t] + FNs[t])
        recalls.append(r)
        precisions[t] = TPs[t] / (TPs[t] + FPs[t])

    for t, th in enumerate(thresholds):
        precisions[t] = np.max(precisions[t:])

    return  precisions, recalls


def plot_and_compute(precisions,cls, plot):
    if plot:
        Xs = np.arange(0., 1., 1./len(precisions[0]))

        l_easy = plt.plot(Xs, precisions[0], c='green')[0]
        l_moderate = plt.plot(Xs, precisions[1], c='blue')[0]
        l_hard = plt.plot(Xs, precisions[2], c='red')[0]

        labels = ['Easy','Moderate','Hard']
        plt.legend(handles=[l_easy,l_moderate,l_hard],labels=labels,loc='best')
        plt.xlabel('Recall')
        plt.ylabel('Precision')
        plt.title(cls)
        plt.ylim((0,1.0))
        plt.grid()
        plt.savefig('2d_result.png')
        plt.show()
        plt.close()

    val_easy, val_moderate, val_hard = 0., 0., 0.
    for i in range(0, N_SAMPLE_PTS,4):
        val_easy += precisions[0][i]
        val_moderate += precisions[1][i]
        val_hard += precisions[2][i]

    ap_easy = 100. * val_easy / 11.
    ap_moderate = 100. * val_moderate / 11.
    ap_hard = 100. * val_hard / 11.

    print('2D Detection AP for %s\n'%cls)
    print('Easy: %f'%ap_easy)
    print('Moderate: %f'%ap_moderate)
    print('Hard: %f'%ap_hard)


def eval(gt_dir, pred_dir, cls):
    gt_list = []
    pred_list = []

    for f in os.listdir(pred_dir):
        record_pred = load_pred(os.path.join(pred_dir, f))
        record_gt = load_gt(os.path.join(gt_dir, f))
        pred_list.append(record_pred)
        gt_list.append(record_gt)

    recall_all_diff = []
    precision_all_diff = []
    for diff in range(3):
        precisions, recalls = eval_class(gt_list, pred_list, cls, diff)
        precision_all_diff.append(precisions)
        recall_all_diff.append(recalls)

    plot_and_compute(precision_all_diff, cls, plot=True)


if __name__ == '__main__':
    gt_dir = '/home/shenchaoyao3/Desktop/KITTI_evaluation_for_2d_detection/test_labels/'
    pred_dir = '/home/shenchaoyao3/Desktop/KITTI_evaluation_for_2d_detection/pre_labels/'
    #Car,  Pedestrian, Cyclist
    cls = 'Pedestrian'
    eval(gt_dir, pred_dir, cls)
