Python自动化办公--Pandas玩转Excel数据分析【三】
相关文章:
Python自动化办公--Pandas玩转Excel【一】
Python自动化办公--Pandas玩转Excel数据分析【二】
python处理Excel实现自动化办公教学(含实战)【一】
python处理Excel实现自动化办公教学(含实战)【二】
python处理Excel实现自动化办公教学(数据筛选、公式操作、单元格拆分合并、冻结窗口、图表绘制等)【三】
python入门之后须掌握的知识点(模块化编程、时间模块)【一】
python入门之后须掌握的知识点(excel文件处理+邮件发送+实战:批量化发工资条)【二】
pandas玩转excel码源.zip-数据挖掘文档类资源-CSDN下载
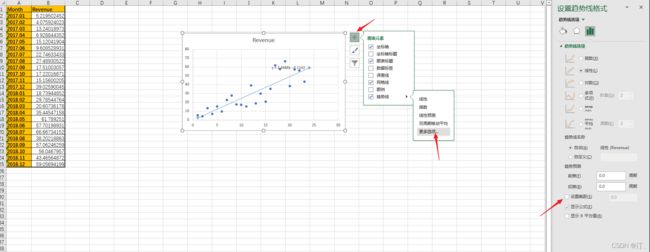
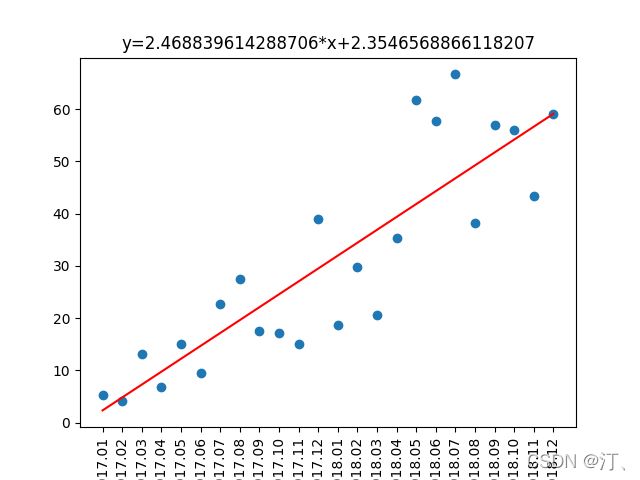
1.线性回归,简单的数据预测
import pandas as pd
import matplotlib.pyplot as plt
from scipy.stats import linregress

sales = pd.read_excel('Sales.xlsx', dtype={'Month': str, 'Revenue': float})
print(sales)

slope, intercept, r_value, p_value, std_err = linregress(
    sales.index, sales.Revenue)  # 斜率 截距 R P 方差  sales.index, sales.Revenue分别为xy轴
exp = sales.index * slope + intercept #期望方程

plt.scatter(sales.index, sales.Revenue)
plt.plot(sales.index, exp, color='red')
plt.title(f"y={slope}*x+{intercept}")
plt.xticks(sales.index, sales.Month, rotation=90)
plt.show()
预测的话就直接输入x代入方程,这是deme仅供参考,更多的可以采用机器学习的一些算法进行求解。
数据挖掘---汽车车交易价格预测[一](测评指标;EDA)_汀、的博客-CSDN博客题目出自阿里天池赛题链接:https://tianchi.aliyun.com/competition/entrance/231784/introduction1.简介:比赛要求参赛选手根据给定的数据集,建立模型,二手汽车的交易价格。来自 Ebay Kleinanzeigen 报废的二手车,数量超过 370,000,包含 20 列变量信息,为了保证 比赛的公平性,将会从中抽取 10 万条作为训练集,5 万条作为测试集 A,5 万条作为测试集 B。同时会对名称、车辆类型、变速箱、model、燃油类型、https://blog.csdn.net/sinat_39620217/article/details/120144775
2.条件格式【数据背景色设置,数据条、渐变色等】
Seaborn(seaborn是python中的一个可视化库,是对matplotlib进行二次封装而成,既然是基于matplotlib,所以seaborn的很多图表接口和参数设置与其很是接近)
导入库 import seaborn as snsseaborn风格多变的另一大特色就是支持个性化的颜色配置。颜色配置的方法有多种,常用方法包括以下两个:
color_palette,基于RGB原理设置颜色的接口,可接收一个调色板对象作为参数,同时可以设置颜色数量;hls_palette,基于Hue(色相)、Luminance(亮度)、Saturation(饱和度)原理设置颜色的接口,除了颜色数量参数外,另外3个重要参数即是hls
import pandas as pd
import seaborn as sns

def low_score_red(s):
    color="red" if s<60 else "black"
    return f'color:{color}'

def highest_score_green(col):
    return ["background-color:green" if s==col.max()
           else 'background-color:white' for s in col]


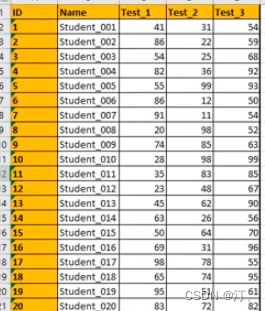
students = pd.read_excel('Students5.xlsx', index_col='ID')
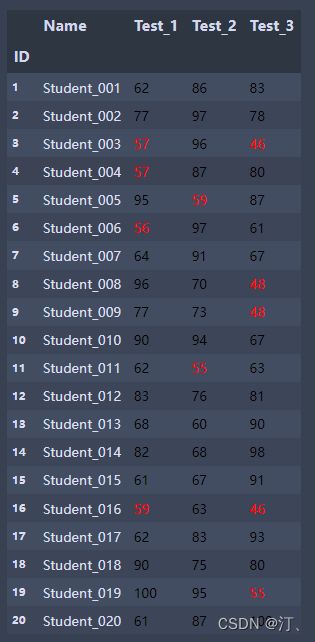
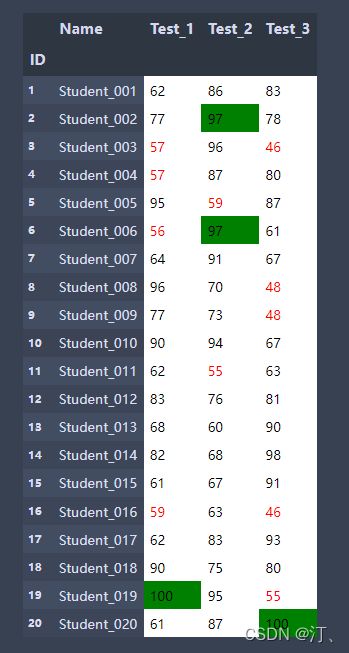
students.style.applymap(low_score_red,subset=['Test_1', 'Test_2', 'Test_3'])
#subset选择数据区域

students.style.applymap(low_score_red,subset=['Test_1', 'Test_2',
 'Test_3']).apply(highest_score_green,subset=['Test_1', 'Test_2', 'Test_3'])
1.低于60分标红 2.最高分标绿(背景色)其余背景色为白色
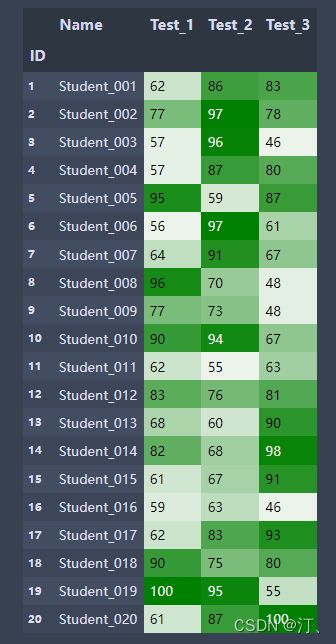
渐变色设置:
import pandas as pd
import seaborn as sns

color_map=sns.light_palette('green', as_cmap=True)#调色板
students = pd.read_excel('Students5.xlsx', index_col='ID')
students.style.background_gradient(color_map,subset=['Test_1', 'Test_2', 'Test_3']) #subset选择数据区域
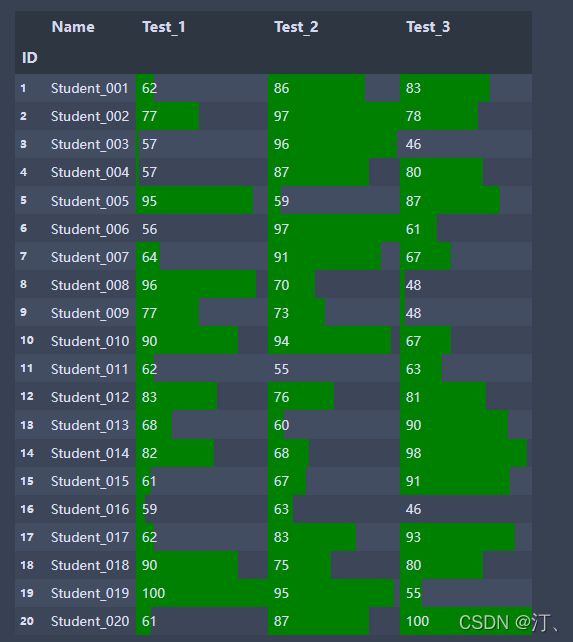
数据条设置
import pandas as pd

students = pd.read_excel('Students5.xlsx', index_col='ID')
students.style.bar(color="green",subset=['Test_1', 'Test_2', 'Test_3']) #subset选择数据区域
3.行操作集锦【插入、追加、删除、更改】
import pandas as pd

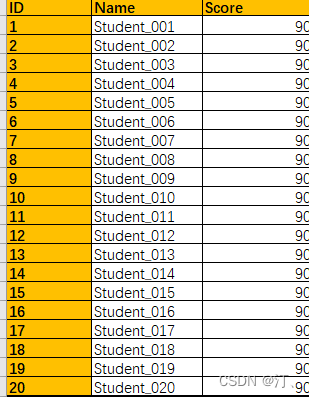
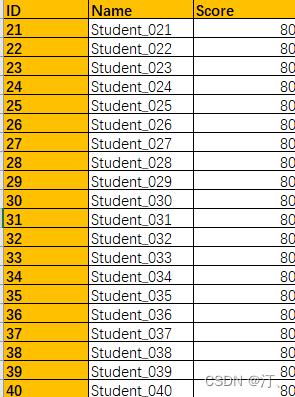
page_001 = pd.read_excel('Students6.xlsx', sheet_name='Page_001')
page_002 = pd.read_excel('Students6.xlsx', sheet_name='Page_002')

# 追加已有
students = page_001.append(page_002).reset_index(drop=True)  # 重制index并删除原来的
students = pd.concat([page_001,page_002]).reset_index(drop=True)
# 追加新建
stu = pd.Series({'ID': 41, 'Name': 'Abel', 'Score': 90})
students = students.append(stu, ignore_index=True)  # ignore_index

# 删除(可切片)
students = students.drop(index=[39, 40])

students = students.drop(index=students[0:10].index, inplace=True)  # 切片删除

# 插入
stu = pd.Series({'ID': 100, 'Name': 'Bailey', 'Score': 100})
part1 = students[:21]  # .iloc[] is the same
part2 = students[21:]
students = part1.append(stu, ignore_index=True).append(
    part2).reset_index(drop=True)

# 更改两种方法直接改或者替换
students.at[39, "Name"] = "aaaa"
students.at[39, "Score"] = "120"


stu = pd.Series({'ID': 101, 'Name': 'Danni', 'Score': 101})
students.iloc[39] = stu


# 设置空值
for i in range(5, 15):
    students['Name'].at[i] = ''

# 去掉空值
missing = students.loc[students['Name'] == '']  # loc索引
students.drop(missing.index, inplace=True)

print(students)
loc和at的区别:
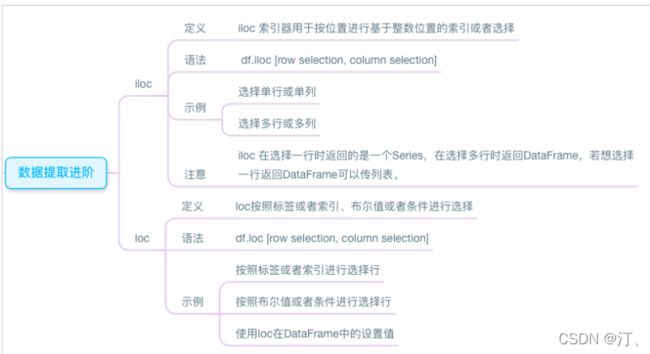
loc可以取多个值,at只能取一个格子里面的值,
.loc[[start:end],[start:end]]和.iloc[[start:end],[start:end]]
区别在于.loc使用的是行列标签(定义的具体行名和列名),而.iloc使用的是行列整数位置(从零开始)
4.列操作集锦【插入、追加、删除、更改】
数据源参考3中
import pandas as pd
import numpy as np


page_001 = pd.read_excel('Students5.xlsx', sheet_name='Page_001')
page_002 = pd.read_excel('Students5.xlsx', sheet_name='Page_002')

# 合并列
# students = pd.concat([page_001,page_002]).reset_index(drop=True)
students = pd.concat([page_001, page_002], axis=1)

# 追加列
students['Age'] = 25
students['Age'] = np.repeat(25, len(students))

# 删除列
students.drop(columns=['Score', 'Age'], inplace=True)

# 插入列
students.insert(1, column='Foo', value=np.repeat('foo', len(students)))

# 改列名
students.rename(columns={'Foo': 'FOO', 'Name': 'NAME'}, inplace=True)

# 设置空值
students['ID'] = students['ID'].astype(float)
for i in range(5, 15):
    students['ID'].at[i] = np.nan

# 去掉空值
students.dropna(inplace=True)  # 横向读取每一行删除空值

print(students)
5.链接SQL.Server数据库
这里仅以链接SQL Server为例
关于mysql相关教学参考:
https://blog.csdn.net/sinat_39620217/category_11377602.html![]() https://blog.csdn.net/sinat_39620217/category_11377602.html连接数据库:pyodbc
https://blog.csdn.net/sinat_39620217/category_11377602.html连接数据库:pyodbc
python pyodbc使用方法_Jack2013tong的博客-CSDN博客_pyodbc
建立与数据库的连接:sqlalchemy
SQLAlchemy 是 Python 著名的 ORM 工具包。通过 ORM,开发者可以用面向对象的方式来操作数据库,不再需要编写 SQL 语句。本篇不解释为什么要使用 ORM,主要讲解 SQLAlchemy 的用法。SQLAlchemy 支持多种数据库,除 sqlite 外,其它数据库需要安装第三方驱动
import pyodbc
import sqlalchemy
import pandas as pd

connection = pyodbc.connect('DRIVER={SQL Server}; SERVER=(local); DATABASE=AdventureWorks;USER=sa;PASSWORD=123456')
engine = sqlalchemy.create_engine('mssql+pyodbc://sa:123456@(local)/AdventureWorks?driver=SQL+Server')

query = 'SELECT FirstName, LastName FROM Person.Person'
df1 = pd.read_sql_query(query, connection)
df2 = pd.read_sql_query(query, engine)

pd.options.display.max_columns = 999
print(df1.head())
print(df2.head())
6.稍微复杂计算列【以计算长方形外接圆为例】
import pandas as pd
import numpy as np


def get_circumcircle_area(l, h):
    r = np.sqrt(l ** 2 + h ** 2) / 2
    return r ** 2 * np.pi


def wrapper(row):
    return get_circumcircle_area(row['Length'], row['Height'])


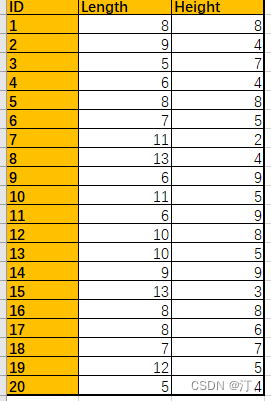
rects = pd.read_excel('Rectangles.xlsx', index_col='ID')
rects['Circumcircle Area'] = rects.apply(wrapper, axis=1)
print(rects)
import pandas as pd
import numpy as np


def get_circumcircle_area(l, h):
    r = np.sqrt(l ** 2 + h ** 2) / 2
    return r ** 2 * np.pi


# def wrapper(row):
#     return get_circumcircle_area(row['Length'], row['Height'])


rects = pd.read_excel('Rectangles.xlsx', index_col='ID')
rects['Circumcircle Area'] = rects.apply(lambda row:get_circumcircle_area(row['Length'], row['Height']), axis=1)
print(rects)
Length Height Circumcircle Area
ID
1 8 8 100.530965
2 9 4 76.183622
3 5 7 58.119464
4 6 4 40.840704
5 8 8 100.530965
6 7 5 58.119464
7 11 2 98.174770
8 13 4 145.298660
9 6 9 91.891585
10 11 5 114.668132
11 6 9 91.891585
12 10 8 128.805299
13 10 5 98.174770
14 9 9 127.234502
15 13 3 139.800873
16 8 8 100.530965
17 8 6 78.539816
18 7 7 76.969020
19 12 5 132.732290
20 5 4 32.201325