Chimera的简单应用_图文流程
UCSF Chimera的简单应用
翻译自:https://dasher.wustl.edu/bio5357/software/chimera/chimera-getting-started.pdf
Fetch打开
File→Fetch by ID and type 1zik in the PDB ID field
Presets→Interactive 2 (all atoms)
应用交互式预置#2,这将按元素显示除碳以外的所有原子和颜色代码原子(氧红色、氮蓝色等)碳保留初始模型颜色,在本例中为棕褐色。
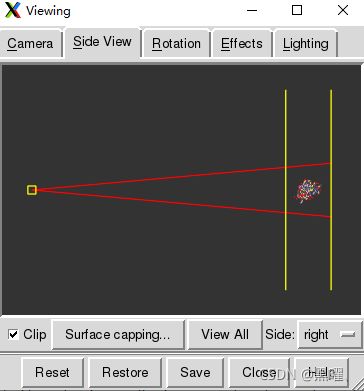
Side View
Tools→Viewing Controls→Side View
侧视图显示了该结构的一个微型版本。在侧视图中,尝试使用鼠标左键移动眼睛位置(小正方形)和剪裁平面(垂直线)。
鼠标
默认情况下,鼠标左键控制旋转,鼠标中键控制XY平移,鼠标右键控制缩放。
将鼠标光标悬停在原子或键上将弹出显示标识信息。当光标移开时,气球将消失。
与控制(Ctrl)键结合使用时,鼠标按键还具有其他功能。
默认情况下,在按住Ctrl键的同时,用鼠标左键(BTN1)单击感兴趣的原子或键,即可从屏幕中拾取。要选择多个,同时按住Ctrl+Shift键。所选内容以绿色突出显示,点击窗口右下角的绿色放大镜图标上,会弹出所选内容的报告。
要大面积选择区域,也可以使用Ctrl-BTN1组合键进行拖拽。与前面一样,可以使用Ctrl-Shift-BTN1。
按↑键都会将选择范围扩大到下一个可用级别。
同样,可以使用↓键缩小选择范围。
按→键可以反转选择,反之亦然。
取消选择所有内容的简单方法是在图形窗口的任何空白区域使用Ctrl-BTN1组合键。

选择上色
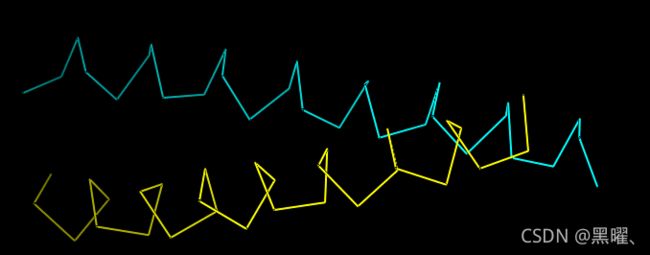
清除选择并仅显示链轨迹:
Select→Clear Selection
Actions→Atoms/Bonds→backbone only→chain trace
给两条链涂上不同的颜色:
Select→Chain→A
Actions→Color→cyan
通过拾取链中的任何原子或键来选择链A,然后按两次↑键,一次将选择扩展到整个残基,另一次将其扩展到整个链。显示其完整的主链:
Actions→Atoms/Bonds→backbone only→full
仅显示链A的所有原子(仍被选中):
Actions→Atoms/Bonds→show only
显示所有原子并按元素对其进行着色:
Select→Clear Selection
Actions→Atoms/Bonds→show
Actions→Color→by element
模型和模型状态
通常,在Chimera中打开的每个坐标文件都会成为一个模型,并带有相关的模型标识号。模型被分配以0开始的连续数字。模型面板显示当前模型,并允许对其进行许多操作。
Tools→General Controls→Model Panel.
Model Panel的 A(ctive) 列中的复选框显示模型已被激活进行运动;取消选中该框会使其无法移动。
单击close关掉模型
或用命令:
Command: close 0
Command: stop
分子表面
File→Fetch by ID and type 1d86 in the PDB ID field
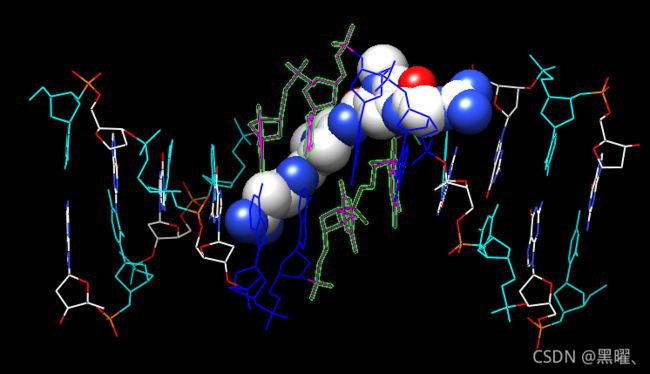
该结构包含双螺旋脱氧核糖核酸结合的分子网络蛋白。
Presets→Interactive 2 (all atoms)
将碳着色为白色,然后不显示水:
Select→Chemistry→element→C
Actions→Color→white
Select→Structure→solvent
Actions→Atoms/Bonds→hide
隐藏原子不会取消选择它们;它们将保持选中状态,直到该选择被清除或被新选择替换。
给不同的核苷酸涂上不同的颜色。例如,将腺嘌呤脱氧核苷酸染成蓝色:
Select→Residue→DA
Actions→Color→blue
类似地,将胞嘧啶脱氧核苷酸(DC残基)染成青色cyan,将鸟嘌呤脱氧核苷酸(DG残基)染成黄色yellow,将胸腺嘧啶脱氧核苷酸(DT残基)染成洋红色magenta。使用“选择”→“清除选择”或通过在空白处拾取来清除选择。
Representations
原子/键:线、棒、球&棒和球体:
Atoms/Bonds: wire, stick, ball & stick, and sphere

接下来,尝试一些不同的显示样式或表示。
Actions→Atoms/Bonds→sphere
Select→Chain→A
Actions→Atoms/Bonds→ball & stick
Select→Clear Selection
Actions→Atoms/Bonds→stick

丝带:平的、有边的和圆的:
Ribbon: flat, edged, and rounded
显示ribbon带状物会自动隐藏主链(主链)原子。
Actions→Ribbon→show
Actions→Ribbon→edged
Actions→Ribbon→rounded
DNA可以用特殊的nucleotide objects来显示。我们将展示“棒棒糖lollipops”,boxes和ladder。
Actions→Atoms/Bonds→nucleotide objects→settings
1. set Show side (sugar/base) as to tube/slab
2. set Show base orientation to false
3. click Slab Style tab, set slab style to skinny
4. click Slab Options tab, set Slab object to ellipsoid
5. click Apply; these are the “lollipops”
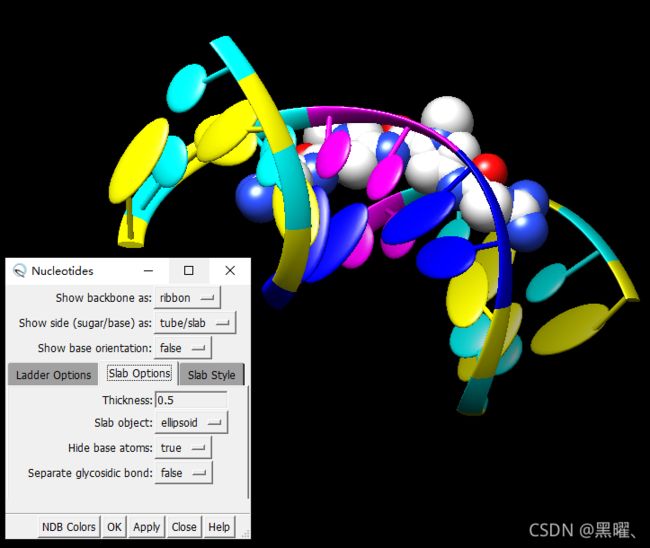
核苷酸设置可以只应用于选定的残基(不一定是所有的脱氧核糖核酸)。选择特定残基的一种方法是在序列工具中:
Favorites→Sequence
1. set Show base orientation to true
2. set Slab object to box
3. click Apply; base orientations are shown with “bumps”
1. set Show side (sugar/base) as to ladder
2. in the Ladder Options, set Rung radius to 0.3 Å
3. click OK (which will also dismiss the dialog)
OK会关闭对话框

要返回更通用的显示样式,请关闭nucleotide objects:
Actions→Atoms/Bonds→nucleotide objects→off
隐藏ribbons,并将所有内容显示为球状和棒状:
Actions→Ribbon→hide
Actions→Atoms/Bonds→ball & stick
Surfaces
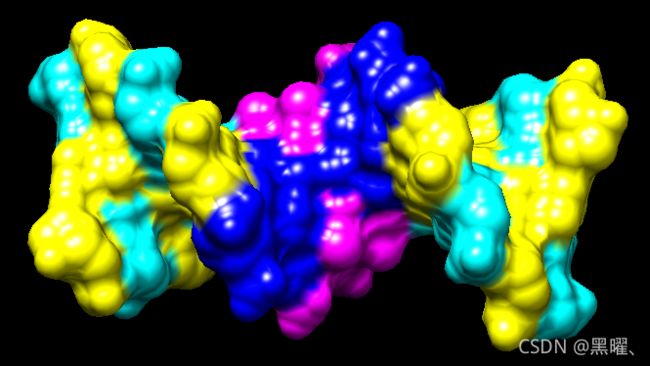
最后分子表面。结构中有内置的类别,如主体main和配体ligand;未选择任何内容时,Actions→Surface→show显示主界面main的表面。
Actions→Surface→show
Actions→Surface→hide
Select→Structure→ligand
Actions→Surface→show
Actions→Surface→mesh

表面颜色可以与底层原子的颜色分开指定。配体表面是棕褐色和白色的,因为最初的模型颜色(棕褐色),没有明确重新着色的原子表面。仍然选择配体,选择Actions→Color→all options…打开“Color Actions”对话框。在该对话框中:
Actions→Color→all options...
1. change the Coloring applies to (target) setting to surfaces
2. click red
3. click Close (which will automatically reset the coloring target back to all of the above)
作为更复杂的选择过程的示例,仅显示B链中 A腺嘌呤和 T胸腺嘧啶脱氧核苷酸的表面(先用append追加,再用intersect相交):
1. change the selection mode: Select→Selection Mode→append
2. Select→Residue→DA
3. Select→Residue→DT
4. change the selection mode: Select→Selection Mode→intersect
5. Select→Chain→B
6. Actions→Surface→show
等效的命令行要简洁得多,但需要原子规范语法的一些知识:
Tools→General Controls→Command Line
Command: surf :da.b,dt.b
要准备任何后续操作,请恢复选择模式并清除选择:
Select→Selection Mode→replace
Select→Clear Selection
有时使表面透明会有所帮助:
Actions→Surface→transparency→50%

从菜单中选择File→Quit以终止Chimera session。
应用
1. Choose File→Fetch by ID and fetch PDB entry 1d86
2. Use the all atoms preset:
   Presets→Interactive 2 (all atoms)
3. Set the display style to stick:
   Actions→Atoms/Bonds→stick
4. Delete the waters:
   Select→Structure→solvent
   Actions→Atoms/Bonds→delete
5. Color the residues:
   Select→Residue→DA
   Actions→Color→blue
   Select→Residue→DC
   Actions→Color→cyan
   Select→Residue→DG
   Actions→Color→yellow
   Select→Residue→DT
   Actions→Color→magenta
   Select→Residue→NT
   Actions→Color→white
6.将选择范围扩大到整个链,然后扩大到整个模型(配体和主模型),显示曲面,使其透明:
   Select→Broaden
   Select→Broaden
   Actions→Surface→Show
   Actions→Surface→transparency→40%
7.仅将着色设置为surfaces,使其为浅灰色:
Actions→Color→all options...
change the Coloring applies to (target) setting to surfaces
click light gray (keep the dialog open)
8.再次选择netropsin,仅使其表面为红色:
   Select→Residue→NT
   in the Color Actions dialog:
   click red (keep the dialog open)
   Select→Clear Selection
9.仅将颜色设置为背景,使其为白色:
 in the Color Actions dialog:
    change the coloring target to background
    click white
    click Close (which will automatically reset the coloring target back to all of the above)
10.根据需要调整视图
11.保存图像:
File→Save Image
命令行操作:
Commands:操作、选择和链
使用工具显示命令行:
 Tools→General Controls→Command Line
 Command: open 1zik
 Command: preset apply int 2
 Command: start Side View
同前文一样打开结构,是两个肽形成的亮氨酸拉链。
应用交互式预置#2。
显示侧视图。
Chimera命令包含参数和目标(或原子规范)。例如,在下面的color命令:
Command: color hot pink :lys

hot pink是指定颜色名称的参数,target :lys指定所有名为lys的残基。(要查看内置颜色及其名称,请从菜单中选择Actions→Color→all colors)如果未指定目标,该命令将作用于所有适用的项目。例如:
Command: color hot pink
许多命令都有“~”版本,执行相反的功能。例如,将结构更改回其默认颜色:
Command: ~color
命令help可用于显示任何命令的手动页面。例如:
Command: help color
显示命令color的manual page。
从菜单中选择Help→Tutorials,点击“Chimera Quick Reference Guide”链接,即可访问。
Commands:展示
仅显示名为CA(α-碳)的原子:
Command: show @ca
试着挑选两个α碳。标记您选择的原子(第一行)
label命令显示原子信息(默认情况下是原子名称)。不显示原子标签,然后显示包含所选原子的残基的标签(第二行):
Command: ~label
Command: rlabel sel
每个残基标签的形式为:
res_name res_number.chain
一个肽是A链,另一个是B链。清除选择并取消显示残基标签:
Command: ~select
Command: ~rlabel
给两条链涂上不同的颜色:
Command: color cyan :.a
Command: col yellow :.b
上色还可以指定:
Command: col orange :5-9.a,12.a,8.b
Command: col magenta :14-18
Command: disp :leu.b
Command: col green :leu.b@cb
该结构还包括水,展示:
Command: disp solvent
 -OR- (equivalent)
Command: disp :hoh
显示链A的完整主链:
Command: disp :.a@n,ca,c,o
仅显示链A中的所有原子:
Command: show :.a
显示所有原子并按元素对其进行着色:
Command: disp
Command: color byelement
Commands:表面
还是打开1d86结构,使用“all atoms”预设,将DNA显示为线,将netropsin显示为球::
Command: open 1d86
Command: preset apply int 2
将碳着色为白色,然后不显示水:
Command: color white C
Command: ~disp solvent
通过残基名称上色:
Command: color blue :da
Command: color magenta :dt
Command: color yellow :dg
Command: color cyan :dc
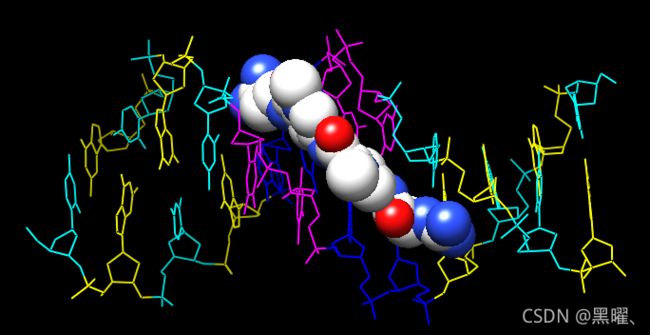
命令可以缩写,如repr或rep,只要是唯一的就可以。
不同的显示样式:
Command: represent sphere
Command: repr bs :.a
Command: rep stick
显示 ribbon会自动隐藏主链(backbone)原子。
Command: ribbon
Command: ribrep edged
Command: ribr rounded

DNA可以用特殊的nucleotide objects来显示。我们将展示“棒棒糖lollipops”,boxes with orientation bumps,然后是ladder。可以使用上下箭头键或Ctrl-p(上一个)和Ctrl-n(下一个)来访问过去的命令:
Command: nuc side tube/slab shape ellipsoid orient false style skinny
Command: nuc side tube/slab shape box orient true style skinny :8-10.a
Command: nuc side ladder radius 0.3
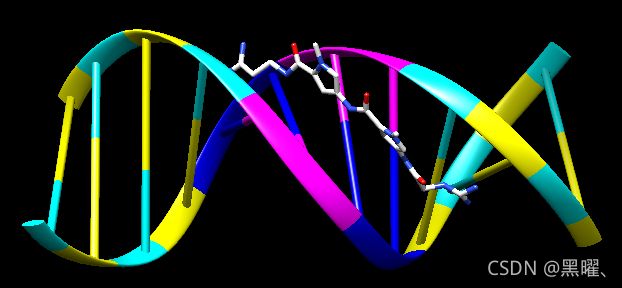
要返回更通用的显示样式,请关闭nucleotide objects(nuc),隐藏ribbons,并将所有内容显示为球状和棒状:
Command: ~nuc
Command: ~ribbon
Command: rep bs
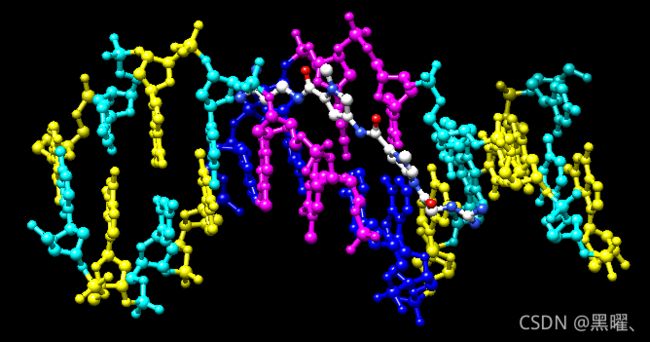
最后是surfaces。结构中有内置的类别:如main和ligand;未指定任何内容时,surface显示main的表面。
Command: surface
Command: ~surf
Command: surf ligand
 -OR- (equivalent)
Command: surf :nt
表面颜色可以与下面原子的颜色是分开指定的。
将配体表面显示为红色网格:
Command: surfrep mesh
Command: color red,s ligand
Command: surfrep solid
可以显示部分表面:
Command: ~surf
Command: surf :da,dt
Command: ~surf
Command: surf :da.b,dt.b
使表面透明:
Command: transp 50,s
完成后,退出Chimera:
Command: stop now
Commands:应用
1. Fetch 1d86:
   Command: open 1d86
2. Use the all atoms preset:
   Command: preset apply int 2
3. Set the display style to stick:
   Command: repr stick
4. Delete the waters:
   Command: del solvent
5. Color the residues:
   Command: color blue :da
   Command: color cyan :dc
   Command: color yellow :dg
   Command: color magenta :dt
   Command: color white :nt
6. Show surfaces for the whole model (both ligand and main), make them transparent:
   Command: surf #0
   Command: surftrans 40
7. Color the main (DNA) surface light gray and the ligand (netropsin) surface red:
   Command: color light gray,s main
   Command: color red,s ligand
8. Change the background color to white:
   Command: set bg_color white
9. Adjust the view as desired
10. Save the image:
   Command: copy png file ~/Desktop/myfile.png
待续


