Coot Cryo-EM教程2:Fitting和Mutating
Coot Cryo-EM教程2:Fitting和Mutating
翻译自:
https://pemsley.github.io/coot/blog/2020/10/20/Coot-Cryo-EM-main.html
本教程专为0.9.1或更高版本而设计。
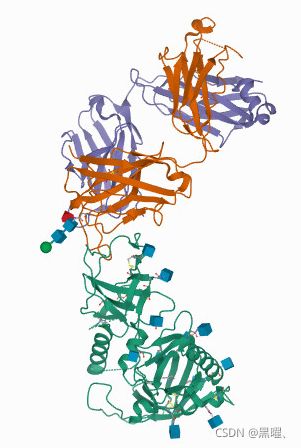
目的:我们将fit Cleavage and Polyadenylation Factor的domain
1: Setting Up
1.1 Fetch the Files
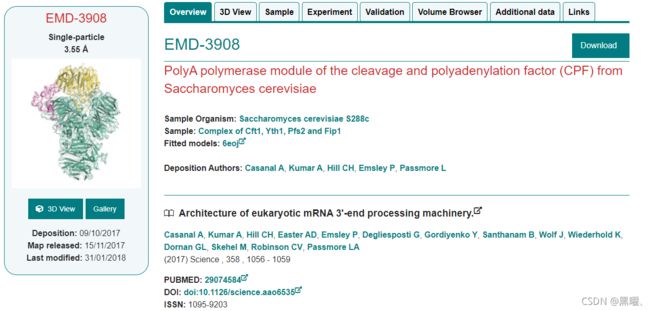
使用Web浏览器下载EMD-3908 bundle:
http://www.ebi.ac.uk/pdbe/entry/emdb/EMD-3908
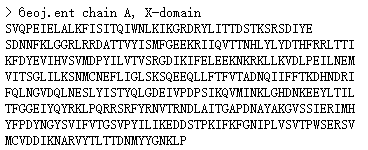
下载结构的sequence of a fragment:
https://www2.mrc-lmb.cam.ac.uk/personal/pemsley/coot/files/CPF-X-domain.seq
将序列文件移动到当前目录(便于访问)。
启动coot:
coot --map EMD-3908/map/emd_3908.map
1.2 Map Manipulation
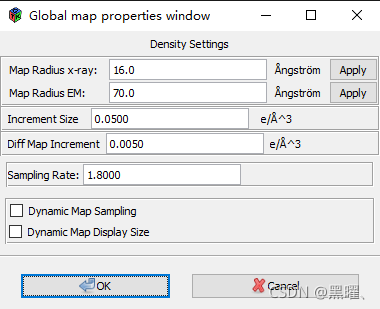
观察map:
Edit → Map Parameters → Map Radius EM → 70
OK
应用smoother map:
Calculate → Modules → Cryo-EM
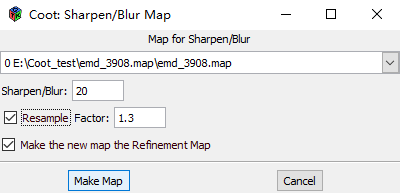
Cryo-EM → Sharpen/Blur…
activate the “Resample” checkbutton
Make Map
Close
现在应该有一个额外的map(“emd_3908.map Blur 20.00”)。把这张map与原来的map比较一下。你会发现新的(smooth)map更容易理解。
使用Display Manager 删除第一个(mrc)map。

更改新Map的contour Step:
Display Manager → Properties → Change by rmsd 0.33 → OK
根据经验,较好的default/starting contour level为5.5 rmsd。
1.3 Get the Homolog:
File → Open Coordinates… coot_tutorial_2/6f9n.pdb
如果Coot弹出“Nomenclature Errors”对话框,只需点击 “Cancel”
用Display Manager来改变显示方式:
将 “Bonds (Colour by Atom)” 换成 “C-alphas/Backbone”
把map移回中间:
Cryo-EM → Go To Map Molecule Middle
现在将homolog移动到这里(map的中心):
Calculate → Move Molecule Here
选择“6f9n” 分子
Move It
还可以更改颜色:
Display Manager → Properties → Colour
Edit → Bond Colours [滑动滑块]
作者偏向使用蓝色map和橙色或绿色model(这是比较好的working配色方案,但不适用于screenshots used in presentations)。
Jiggle
Morph → Jiggle Fit This Molecule with Fourier Filter
现在应该大致fit了。如果没有,再试一次或两次jiggling。

3: Extract Our Fragment
提取最差拟合(WD40)域:
你可以看到有两条链。
我们想要从larger A链中提取一个WD40 domain
使用Jones'Rainrow,找到domain start 和 end 的残基编号(您正在尝试寻找符合这个doughnut-shaped density的doughnut-shaped分子)
假设您认为结构域末端的残基是517和1011:
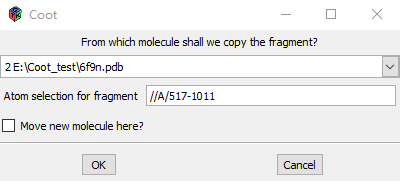
Edit → Copy Fragment → [Use 6f9n molecule:] //A/517-1011 → OK
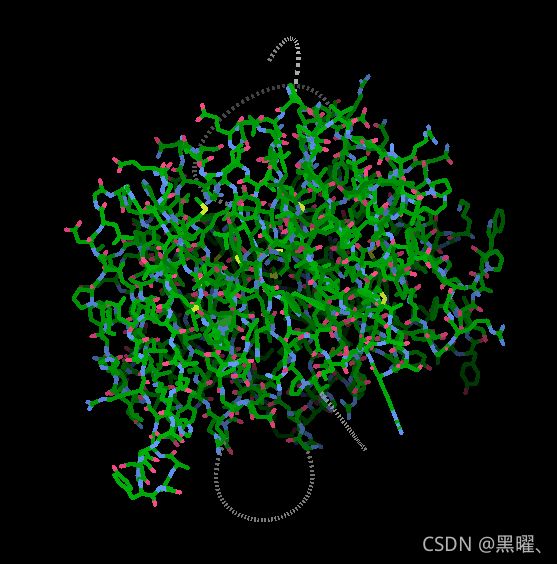
让我们研究这个片段:
Display Manager → Last Only
Reset View
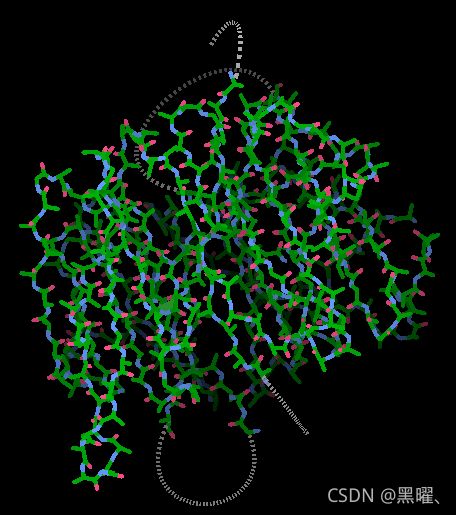
让我们从 atom selection molecule中删除侧链(通常为number 4):
Calculate → Modelling → Delete Side-chains for Active Chain
对于最新的model(列表底部),在Display Manager使用:
C-alphas/Backbone
OK [关闭Display Manager]
4: Setup Refinement
我们需要根据模型调整map的权重:
R/RC → Refinement Weight → 60.00 → OK (不要单击“Estimate”我们目前需要tighter weights)
让我们添加一些local distance restraints:
Calculate → Modules → Restraints
通常5.0A 对于没有侧链的模型很有效:
Restaints → Generate All Molecule Self Restraints 5.0
{Coot以细长的灰色线条显示新的self-restraints} 简要查看这些约束,然后取消显示:
Restaints → Undisplay Extra Distance Restraints
让我们 tighten up Geman-McConstraints:
Refine → Set Geman-McClure alpha 0.01
5: Refinement
我想在这里指出的是,在一台拥有多核和线程的现代计算机上,这是一种令人愉快的体验。如果这与您的计算机不同,则以下部分可能会令人困惑和沮丧。
Refine → Chain Refine
{请等待并观察,如果您愿意,您可以翻转视图(注意不要单击原子)… 在我的计算机(2019年的PC)上大约需要20秒}
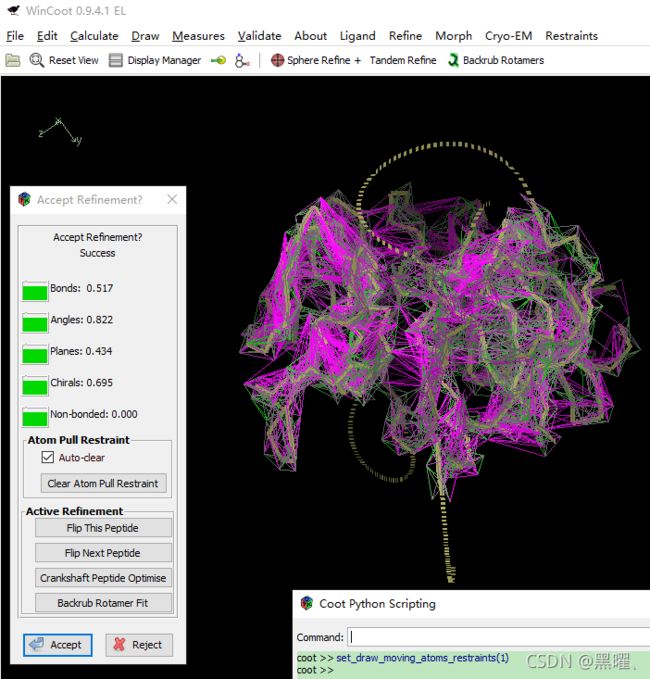
细化对话框显示“Success”时:
现在就Accept,让我们在不那么严格的Geman-McClure约束下再改进一次:
Refine → Set Geman-McClure alpha 0.1
Refine → Chain Refine
{等待并观看大概10秒}
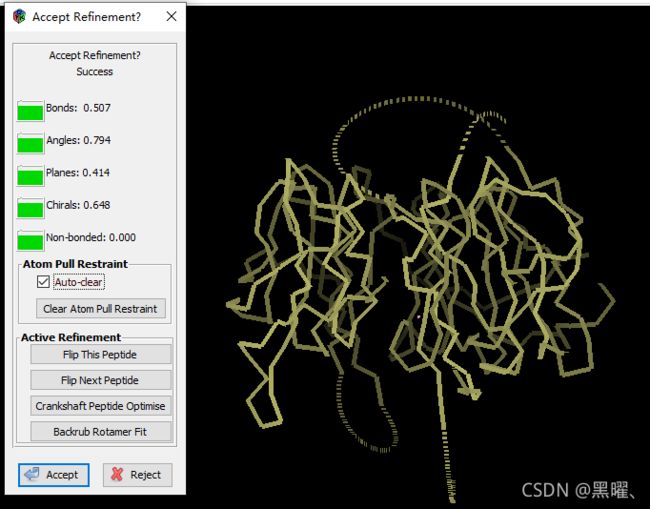
(关于“拉动”的一个注解:指的是“平稳的位移”,而不是急转直下的位移。)
当细化对话框显示“Success”时,这时我们还没有按Accept…。仔细检查模型,小心不要不经意地拉动了一个原子。也许你会发现有一个不适合的区域,如果是这样的话,拉上最适合的CA,把它拉到你认为它应该去的地方。
双击一个原子将释放拉力约束
当您高兴时,请忽略“优化”对话框:Accept
5.1 Redo
决定需要移动什么以及如何移动它可能不是一件微不足道的事。需要撤销修改,并再次实践。

在显示距离限制的情况下:
撤消(左箭头图标)
Calculate → Scripting → Python
set_draw_moving_atoms_restraints(1)
Refine → Chain Refine
根据需要拉动
OK
或者使用不同的Geman-McClure cut-off,或者使用不同的Geman-McClure约束的Alpha,或者使用不同的weight for the map。或者不同的blur for the map。
可以使用Restraints → Delete All Extra Restraints来删除当前的所有额外约束。
尝试proportial editing比例编辑:在激活Real Space Refinement的情况下,使用Ctrl鼠标中键滚动更改受原子拉动位移影响的原子半径。
Test, play, refine, yank 直到 satisfied。
将Geman-McClure Alpha重置为1:
Refine → Set Geman-McClure alpha 1
6: Review and Trim
在查看时,您会注意到model的某些部分与map不符。试着用Tandem Refine把它们拽来拽去。模型的其他部分没有密度-所以删除residue range-可能有助于接下来的 alignment 。
也许density fit validation dialog会有用。您可能需要重置权重:1.5似乎是个不错的数字:
Validate → Density Fit Analysis(选择“atom selection from pdb6f9n”)
7: Mutate
这是Coot’s版本的“Homology Modelling”–只是模型几何优化是在经验数据的背景下进行的:
我们已经完成了 “Self Restraints” - 删掉:
Restraints → Delete Extra Restraints
Coot将显示一个molecule chooser dialog:
选择 “atom selection from pdb6f9n.ent”分子
OK
Calculate → Use ClustalW for Alignment, Then Mutate
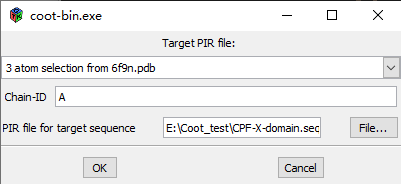
突变的链在“atom selection from pdb6f9n.ent”,目标序列在文件中
 CPF-X-domain.seq
{wait}
Refine → Chain Refine
{wait}
OK
8: Check & Edit
逐个检查结构残基,寻找需要修复的地方(这可能需要一些时间,所以在进入8.2节之前,您可能只需要做一些尝试)
8.1 Do some Fix-ups
Out of register errors
Missing side-chains
Missing loops
Loops with too many residues in the model
Bad rotamers
Bad peptides
Clashes
Use: Validate → Alignment vs. PIR… 帮助调节残基数量
有些地方需要通过对残基重新编号来关闭(或打开)loop。
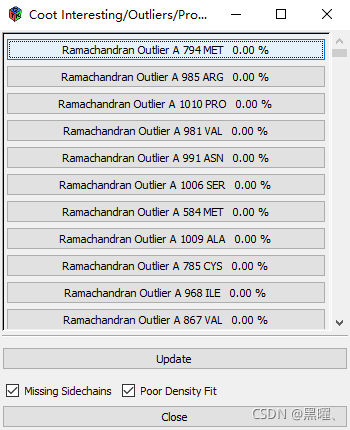
用Validate → Validation Outliers
或
Validate → Overlaps, Peptides, CBeta, Rama and Rota Outliers
可以使用“K”在屏幕中央添加残基,并使用“Shift K”删除侧链原子。
8.2 Unclash
改进工作的一部分是改变将非粘合接触降至最低的方式。减少/移除原子重叠(或莫雷米蒂将其称为“冲突”)
首先确定正在修复domain的model number-对作者来说是2
现在将氢原子添加到该模型中:
Calculate → Scripting → Python
coot_reduce(2)
Refine → Chain Refine
{等待-这比以前花费了更多时间-现在有很多interactions}
Accept
对于你的notes,现在不要对此采取行动,删除氢原子,请使用Python脚本函数delete_hydrogens(4)(加你的number)}
8.3 Ramachandran Outliers
使用Ramachandran约束可以方便地改进模型验证。我是这样做的:
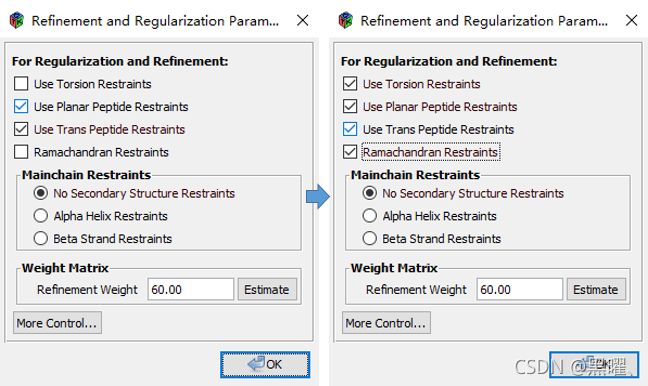
Click the R/RC 按钮
勾选 Use Torsion Restraints
勾选 Ramachandran Restraints
OK
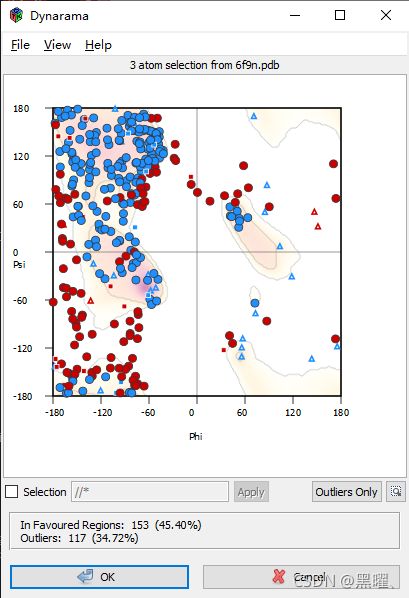
Validate → Ramachandran Plot [and chose the “atom selection” molecule]
Outliers Only
看看这个模型。有时,离群值是有问题的,因为存在建模错误-您不能使用Ramachandran restraints来修复此类问题。
但有时,是好的,只是主链的扭转角torsion angles需要调整:
Tandem Refine
现在,翻转和反转Peptide或Next Peptide 通常可以解决这个问题。
如果需要,您可以使用 Refine 菜单中的菜单项更改 Ramachandran restraints weight。 (但请注意,当 Ramachandran weights很高时,Coot 经常会 upset。)
9: Done
你可以通过与参考模型进行比较来检查你做得有多好–它的code是6oej。
coot_tutorial_2/3eoj.pdb
总结
提示:如果没有Morph选项需要手动添加
参考:https://www2.mrc-lmb.cam.ac.uk/personal/pemsley/coot/web/tutorial/Coot-Cryo-EM-basics.html
Install a Few Extensions
Calculate → Scripting → Python
curlew()
弹出窗口 ,在这里去选择安装“Black Box Morph and Fit”, “Chain Refine” 和“Morph”等

