写给新手的SpringBoot完整教程——04SpringBoot数据访问篇
写给新手的SpringBoot完整教程——04SpringBoot数据访问篇
-
- 一.JDBC与MySQL使用
-
- 1.连接演示
- 2.浅析原理
-
- I.DataSourceConfiguration(介绍数据源如何得到)
- II.DataSourceAutoConfiguration(介绍如何实现执行sql)
- 3.使用JdbcTemplate来操作数据库
- 二.整合Druid数据源
- 三.整合Mybatis
-
- 1.配置相关
- 2.基于注解的讲解
- 3.基于XML的讲解
- 四.整合JPA
一.JDBC与MySQL使用
首先使用SpringBoot Initializer来快速创建一个Web项目。创建完后在我们的Pom文件,关键依赖是:
<parent>
    <groupId>org.springframework.bootgroupId>
    <artifactId>spring-boot-starter-parentartifactId>
    <version>1.5.9.RELEASEversion>
    <relativePath/>
parent>
<dependencies>
   <dependency>
       <groupId>mysqlgroupId>
       <artifactId>mysql-connector-javaartifactId>
       <scope>runtimescope>
   dependency>
   <dependency>
       <groupId>org.springframework.bootgroupId>
       <artifactId>spring-boot-starter-jdbcartifactId>
   dependency>
   <dependency>
       <groupId>org.springframework.bootgroupId>
       <artifactId>spring-boot-starter-webartifactId>
   dependency>
   <dependency>
       <groupId>org.springframework.bootgroupId>
       <artifactId>spring-boot-starter-testartifactId>
       <scope>testscope>
   dependency>
 dependencies>
 <build>
     <plugins>
         <plugin>
             <groupId>org.springframework.bootgroupId>
             <artifactId>spring-boot-maven-pluginartifactId>
         plugin>
     plugins>
 build>
这里给出本教程最开始的初始项目:
链接:https://pan.baidu.com/s/1rYb4WQEA4ZgJOaO1XWt_Gw
提取码:6bml
1.连接演示
下载好了项目后我们需要在application.yml文件里面加入下面内容(根据自己的实际环境来配置):
spring:
  datasource:
    username: root
    password: 123456
    url: jdbc:mysql://localhost:3306/db_course
    driver-class-name: com.mysql.jdbc.Driver
接下来我们运行测试文件DatademoApplicationTests如下,说明测试成功:

再演示另外的一个功能:
首先添加下面文件

sql文件内容如下:
/*
Navicat MySQL Data Transfer

Source Server         : 本地
Source Server Version : 50528
Source Host           : 127.0.0.1:3306
Source Database       : restful_crud

Target Server Type    : MYSQL
Target Server Version : 50528
File Encoding         : 65001

Date: 2018-03-05 10:41:40
*/

SET FOREIGN_KEY_CHECKS=0;
-- ----------------------------
-- Table structure for department
-- ----------------------------
DROP TABLE IF EXISTS `department`;
CREATE TABLE `department` (
  `id` int(11) NOT NULL AUTO_INCREMENT,
  `departmentName` varchar(255) DEFAULT NULL,
  PRIMARY KEY (`id`)
) ENGINE=InnoDB AUTO_INCREMENT=1 DEFAULT CHARSET=utf8;
2.浅析原理
I.DataSourceConfiguration(介绍数据源如何得到)
这里我需要稍微来讲一下原理(不感兴趣可以跳过):
我们在运行时,这里的dataSource的默认注入的是:
org.apache.tomcat.jdbc.pool.DataSource作为数据源;而有关数据源的相关配置都在DataSourceProperties这个类里面;那么如何根据这个配置来创建数据源的呢,我们来看一下自动配置的原理:
在下面这个类里面:
org\springframework\boot\autoconfigure\jdbc\DataSourceConfiguration.class

上面这里就是说明了如果在配置类DataSourceProperties里如果没有指定要创建的类型就使用org.apache.tomcat.jdbc.pool.DataSource,当然也还支持HikariDataSource、BasicDataSource,如下:


也就是说SpringBoot是默认支持org.apache.tomcat.jdbc.pool.DataSource、HikariDataSource、BasicDataSource三种数据源的。但是如果我们指定的数据源不是上面的三种,这里还有一个方法如下:

他用来获得我们自己指定的数据源。
II.DataSourceAutoConfiguration(介绍如何实现执行sql)
有下面这个方法:

这里DataSourceInitializer的实际类型为ApplicationListener,它里面的方法有
1)runSchemaScripts();运行建表语句;
2)runDataScripts();运行插入数据的sql语句;
默认情况是把sql文件命名为schema.sql或者schema-all.sql就可执行
当然我们也可自己指定我们的文件去执行:
spring:
  datasource:
    username: root
    password: 123456
    url: jdbc:mysql://localhost:3306/db_course
    driver-class-name: com.mysql.jdbc.Driver
    schema:
      - classpath:department.sql
      - classpath:employee.sql
3.使用JdbcTemplate来操作数据库
我们首先把我们之前的department.sql删除,不然每次启动都会执行一次。接下来自己在department表里面加数据。
接下来我们创建HelloController:
package com.jack.controller;
import org.springframework.beans.factory.annotation.Autowired;
import org.springframework.jdbc.core.JdbcTemplate;
import org.springframework.stereotype.Controller;
import org.springframework.web.bind.annotation.GetMapping;
import org.springframework.web.bind.annotation.ResponseBody;
import java.util.List;
import java.util.Map;
@Controller
public class HelloController {
    @Autowired
    JdbcTemplate jdbcTemplate;
    @ResponseBody
    @GetMapping("/query")
    public Map<String,Object> query(){
        List<Map<String, Object>> list = jdbcTemplate.queryForList("select * from department");
        return list.get(0);
    }
}
二.整合Druid数据源
添加依赖:
<dependency>
	<groupId>com.alibabagroupId>
	<artifactId>druidartifactId>
	<version>1.1.8version>
dependency>
application.yml文件内容为:
spring:
  datasource:
    #数据源基本配置
    username: root
    password: 123456
    driver-class-name: com.mysql.jdbc.Driver
    url: jdbc:mysql://localhost:3306/db_course
    type: com.alibaba.druid.pool.DruidDataSource

    initialSize: 5
    minIdle: 5
    maxActive: 20
    maxWait: 60000
    timeBetweenEvictionRunsMillis: 60000
    minEvictableIdleTimeMillis: 300000
    validationQuery: SELECT 1 FROM DUAL
    testWhileIdle: true
    testOnBorrow: false
    testOnReturn: false
    poolPreparedStatements: true
    #配置监控统计拦截的filters,去掉后监控界面sql无法统计,'wall'用于防火墙
    filters: stat,wall,log4j
    maxPoolPreparedStatementPerConnectionSize: 20
    useGlobalDataSourceStat: true
    connectionProperties: druid.stat.mergeSql=true;druid.stat.slowSqlMillis=500
这样配置之后我们可以使用Druid连接池,但是这样存在问题就是上面initialSize往下的配置都没有被加载进来。需要做下面的事情:
package com.jack.datademo.config;
import com.alibaba.druid.pool.DruidDataSource;
import org.springframework.boot.context.properties.ConfigurationProperties;
import org.springframework.context.annotation.Bean;
import org.springframework.context.annotation.Configuration;
import javax.sql.DataSource;
@Configuration
public class DruidConfig{
    @ConfigurationProperties(prefix = "spring.datasource")
    @Bean
    public DataSource druid(){
        return new DruidDataSource();
    }
}
不过我们还要使用Druid的另外的强大的功能就是它的监控的功能。
DruidConfig添加下面代码:
//配置Druid监控分为两步:
//①配置管理后台的Servlet
//②配置一个监控的filter
@Bean
public ServletRegistrationBean statViewServlet(){
    //StatViewServlet类可以帮助我们访问到后台页面,"/druid/*"表示访问路径
    ServletRegistrationBean bean = new ServletRegistrationBean(new StatViewServlet(), "/druid/*");
    Map<String,String> map = new HashMap<>(20);
    //指定登录的用户是admin
    map.put("loginUsername","admin");
    map.put("loginPassword","123456");
    map.put("allow","");//这里默认允许任何所有访问,如果写localhost就表示只有主机可以访问
    map.put("deny","192.168.43.228");//表示拒绝访问,我的主机IPV4地址为192.168.43.228
    bean.setInitParameters(map);
    return bean;
}

public FilterRegistrationBean webStatFilter(){
    FilterRegistrationBean bean = new FilterRegistrationBean();
    bean.setFilter(new WebStatFilter());
    Map<String,String> map = new HashMap<>(20);
    //表示不拦截的请求
    map.put("exclutions","*.js,*.css,/druid/*");
    bean.setInitParameters(map);
    //表示拦截哪些请求
    bean.setUrlPatterns(Arrays.asList("/*"));
    return bean;
}
上面参数请见下面两张图:

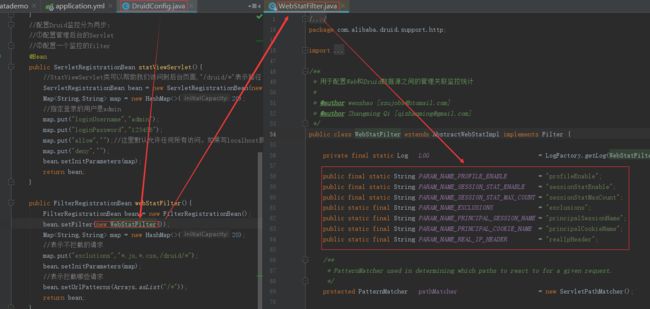
下面演示:
当我们来访问一次我们前面第一大节访问的http://localhost:8080/query时,我们可以再来查看Druid的后台如下:

更详细Druid介绍请参见:数据库连接池Druid使用总结
三.整合Mybatis
这里给一个全面的中文文档:MyBatis
1.配置相关
添加依赖:
<dependency>
    <groupId>org.mybatis.spring.bootgroupId>
    <artifactId>mybatis-spring-boot-starterartifactId>
    <version>1.3.1version>
dependency>
这里我们准备了两个bean对象:
package com.jack.datademo.bean;
public class Department {
    private Integer id;
    private String departmentName;

    public void setId(Integer id) {
        this.id = id;
    }

    public void setDepartmentName(String departmentName) {
        this.departmentName = departmentName;
    }

    public Integer getId() {
        return id;
    }

    public String getDepartmentName() {
        return departmentName;
    }
}
package com.jack.datademo.bean;
public class Employee {
    private Integer id;
    private String lastName;
    private Integer gender;
    private String email;
    private Integer dId;

    public void setId(Integer id) {
        this.id = id;
    }

    public void setLastName(String lastName) {
        this.lastName = lastName;
    }

    public void setGender(Integer gender) {
        this.gender = gender;
    }

    public void setEmail(String email) {
        this.email = email;
    }

    public void setdId(Integer dId) {
        this.dId = dId;
    }

    public Integer getId() {
        return id;
    }

    public String getLastName() {
        return lastName;
    }

    public Integer getGender() {
        return gender;
    }

    public String getEmail() {
        return email;
    }

    public Integer getdId() {
        return dId;
    }
}
然后是两个sql文件用于建表
SET FOREIGN_KEY_CHECKS=0;
-- ----------------------------
-- Table structure for employee
-- ----------------------------
DROP TABLE IF EXISTS `employee`;
CREATE TABLE `employee` (
  `id` int(11) NOT NULL AUTO_INCREMENT,
  `lastName` varchar(255) DEFAULT NULL,
  `email` varchar(255) DEFAULT NULL,
  `gender` int(2) DEFAULT NULL,
  `d_id` int(11) DEFAULT NULL,
  PRIMARY KEY (`id`)
) ENGINE=InnoDB AUTO_INCREMENT=1 DEFAULT CHARSET=utf8;
SET FOREIGN_KEY_CHECKS=0;
-- ----------------------------
-- Table structure for department
-- ----------------------------
DROP TABLE IF EXISTS `department`;
CREATE TABLE `department` (
  `id` int(11) NOT NULL AUTO_INCREMENT,
  `departmentName` varchar(255) DEFAULT NULL,
  PRIMARY KEY (`id`)
) ENGINE=InnoDB AUTO_INCREMENT=1 DEFAULT CHARSET=utf8;
application.yml文件内容为:
spring:
  datasource:
    #数据源基本配置
    username: root
    password: 123456
    driver-class-name: com.mysql.jdbc.Driver
    url: jdbc:mysql://localhost:3306/db_course
    type: com.alibaba.druid.pool.DruidDataSource

    initialSize: 5
    minIdle: 5
    maxActive: 20
    maxWait: 60000
    timeBetweenEvictionRunsMillis: 60000
    minEvictableIdleTimeMillis: 300000
    validationQuery: SELECT 1 FROM DUAL
    testWhileIdle: true
    testOnBorrow: false
    testOnReturn: false
    poolPreparedStatements: true
    #配置监控统计拦截的filters,去掉后监控界面sql无法统计,'wall'用于防火墙
    filters: stat,wall,log4j
    maxPoolPreparedStatementPerConnectionSize: 20
    useGlobalDataSourceStat: true
    connectionProperties: druid.stat.mergeSql=true;druid.stat.slowSqlMillis=500
    schema:
      - classpath:sql/employee.sql
      - classpath:sql/department.sql
现在我们启动项目后检查建表情况:

莫急,肯定不会就是这种功能嘛,我们接着学。(现在需要把sql文件删除,防止下次再次执行)
2.基于注解的讲解
我们创建Mapper和Controller来演示
package com.jack.datademo.mapper;
import com.jack.datademo.bean.Department;
import org.apache.ibatis.annotations.*;
//指定操作数据库的mapper
@Mapper
public interface DepartmentMapper {
    @Select("select * from department where id=#{id}")
    public Department queryById(Integer id);
    @Insert("insert into department (departmentName) values(#{departmentName})")
    public int insertDepartment(Department department);
    @Delete("delete from department where id=#{id}")
    public int deleteDepartment(Integer id);
    @Update("update department set deartmentName=#{departmentName} where id=#{id}")
    public int updateDepartment(Department department);
}
package com.jack.datademo.controller;
import com.jack.datademo.bean.Department;
import com.jack.datademo.mapper.DepartmentMapper;
import org.springframework.beans.factory.annotation.Autowired;
import org.springframework.web.bind.annotation.GetMapping;
import org.springframework.web.bind.annotation.PathVariable;
import org.springframework.web.bind.annotation.RestController;
//让返回的数据不是页面而是文本数据
@RestController
public class DeptController {
    @Autowired
    DepartmentMapper departmentMapper;
    @GetMapping("/dept/{id}")
    public Department getDepartment(@PathVariable("id") Integer id){
        return departmentMapper.queryById(id);
    }
    @GetMapping("/dept")
    public Department insertDepartment(Department department){
        departmentMapper.insertDepartment(department);
        return department;
    }
}
现在我们的department表的内容只有一条记录:
1 管理部
下面我们来演示:
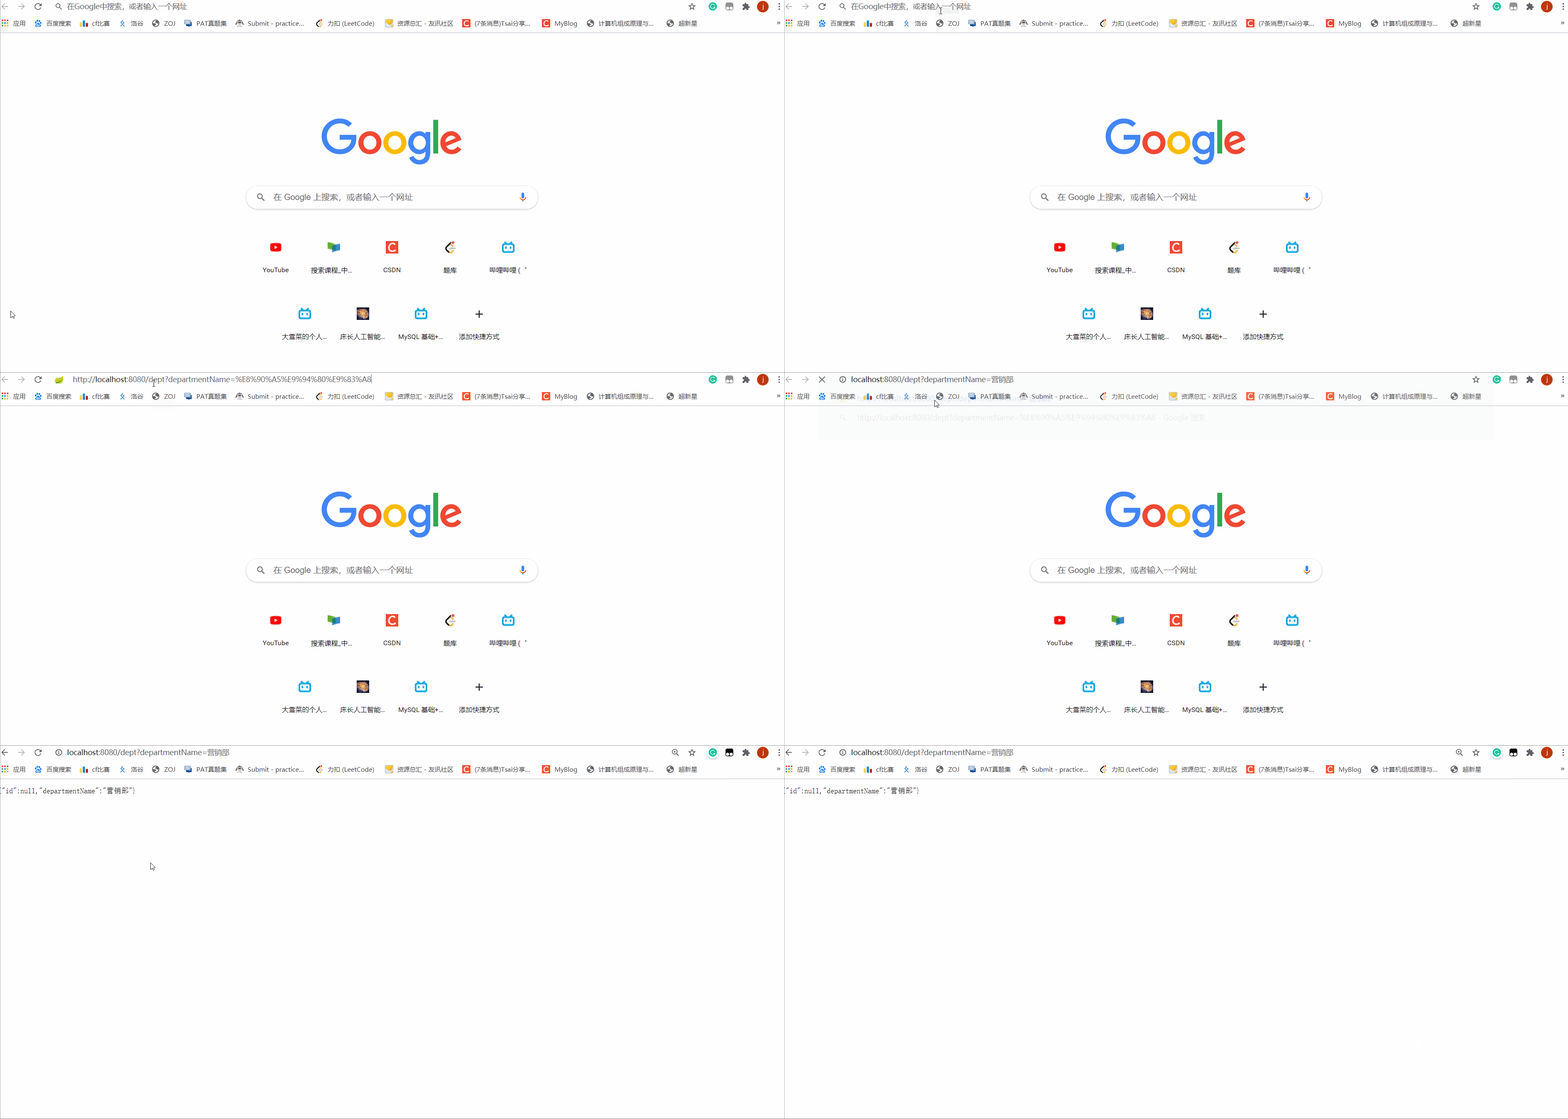
成功插入

但是在浏览器上回显的是id=null,那么我们可以这么做:
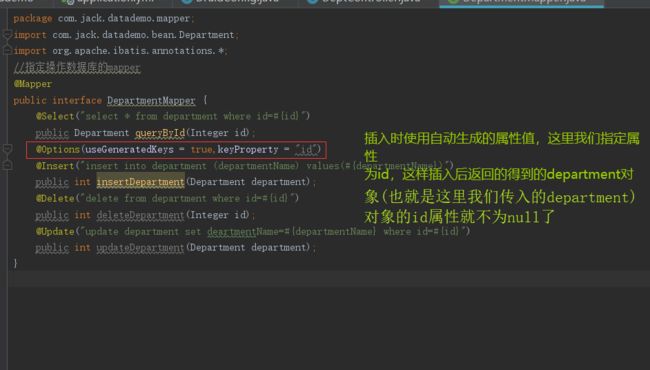

下面演示查询:
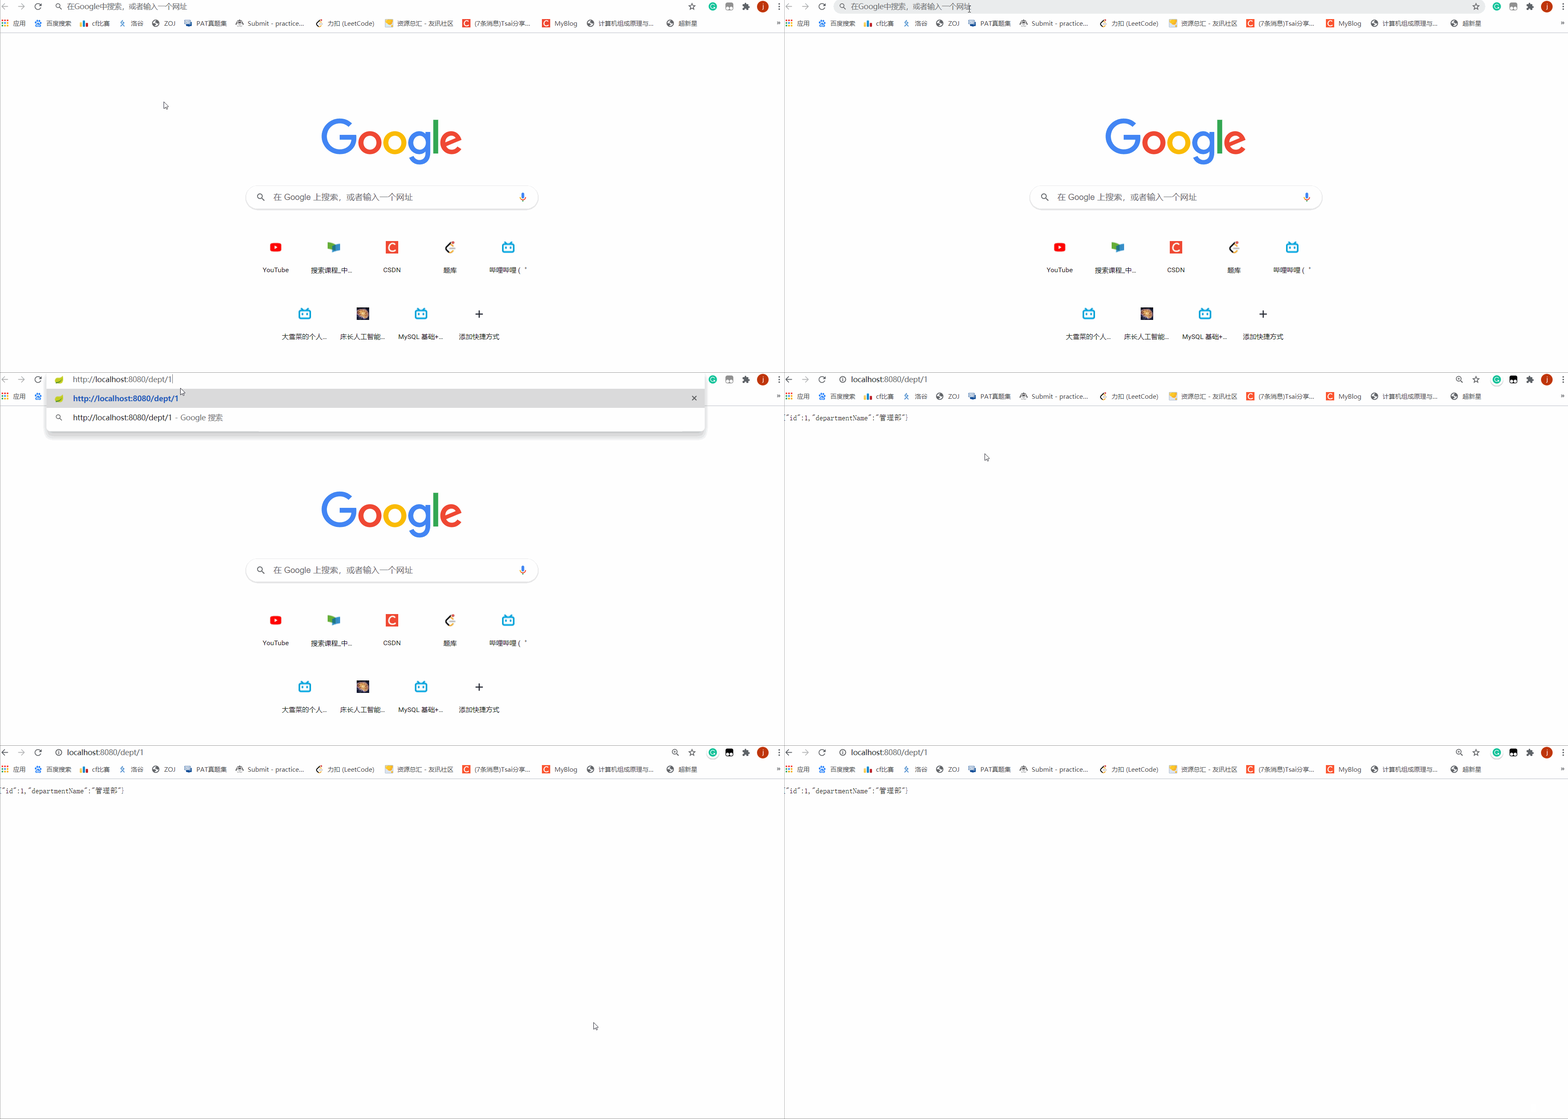
不过我们要解决一个问题就是数据库表的属性名与我们的javaBean对象的属性名不一致时如何解决(这里介绍的是开启驼峰命名法)?
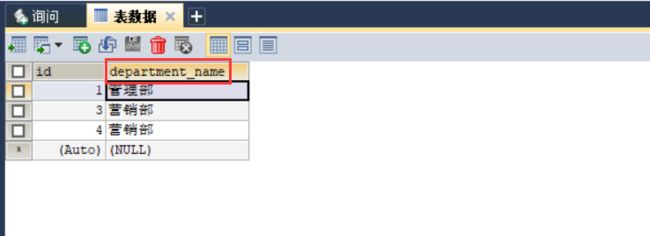
那么我们的DepartmentMapper类就应该修改为:
package com.jack.datademo.mapper;
import com.jack.datademo.bean.Department;
import org.apache.ibatis.annotations.*;
//指定操作数据库的mapper
@Mapper
public interface DepartmentMapper {
    @Select("select * from department where id=#{id}")
    public Department queryById(Integer id);
    @Options(useGeneratedKeys = true,keyProperty = "id")
    @Insert("insert into department (department_name) values(#{departmentName})")
    public int insertDepartment(Department department);
    @Delete("delete from department where id=#{id}")
    public int deleteDepartment(Integer id);
    @Update("update department set deartment_name=#{departmentName} where id=#{id}")
    public int updateDepartment(Department department);
}
这里就出现了departmentName和deartment_name不一致的问题。
那么需要编写一个配置类
package com.jack.datademo.config;
import org.mybatis.spring.boot.autoconfigure.ConfigurationCustomizer;
import org.springframework.context.annotation.Bean;
import org.springframework.context.annotation.Configuration;
@Configuration
public class MyBatisConfig {
    @Bean
    public ConfigurationCustomizer configurationCustomizer(){
        return new ConfigurationCustomizer() {
            @Override
            public void customize(org.apache.ibatis.session.Configuration configuration) {
                configuration.setMapUnderscoreToCamelCase(true);
            }
        };
    }
}
接下来重启一下SpringBoot应用。
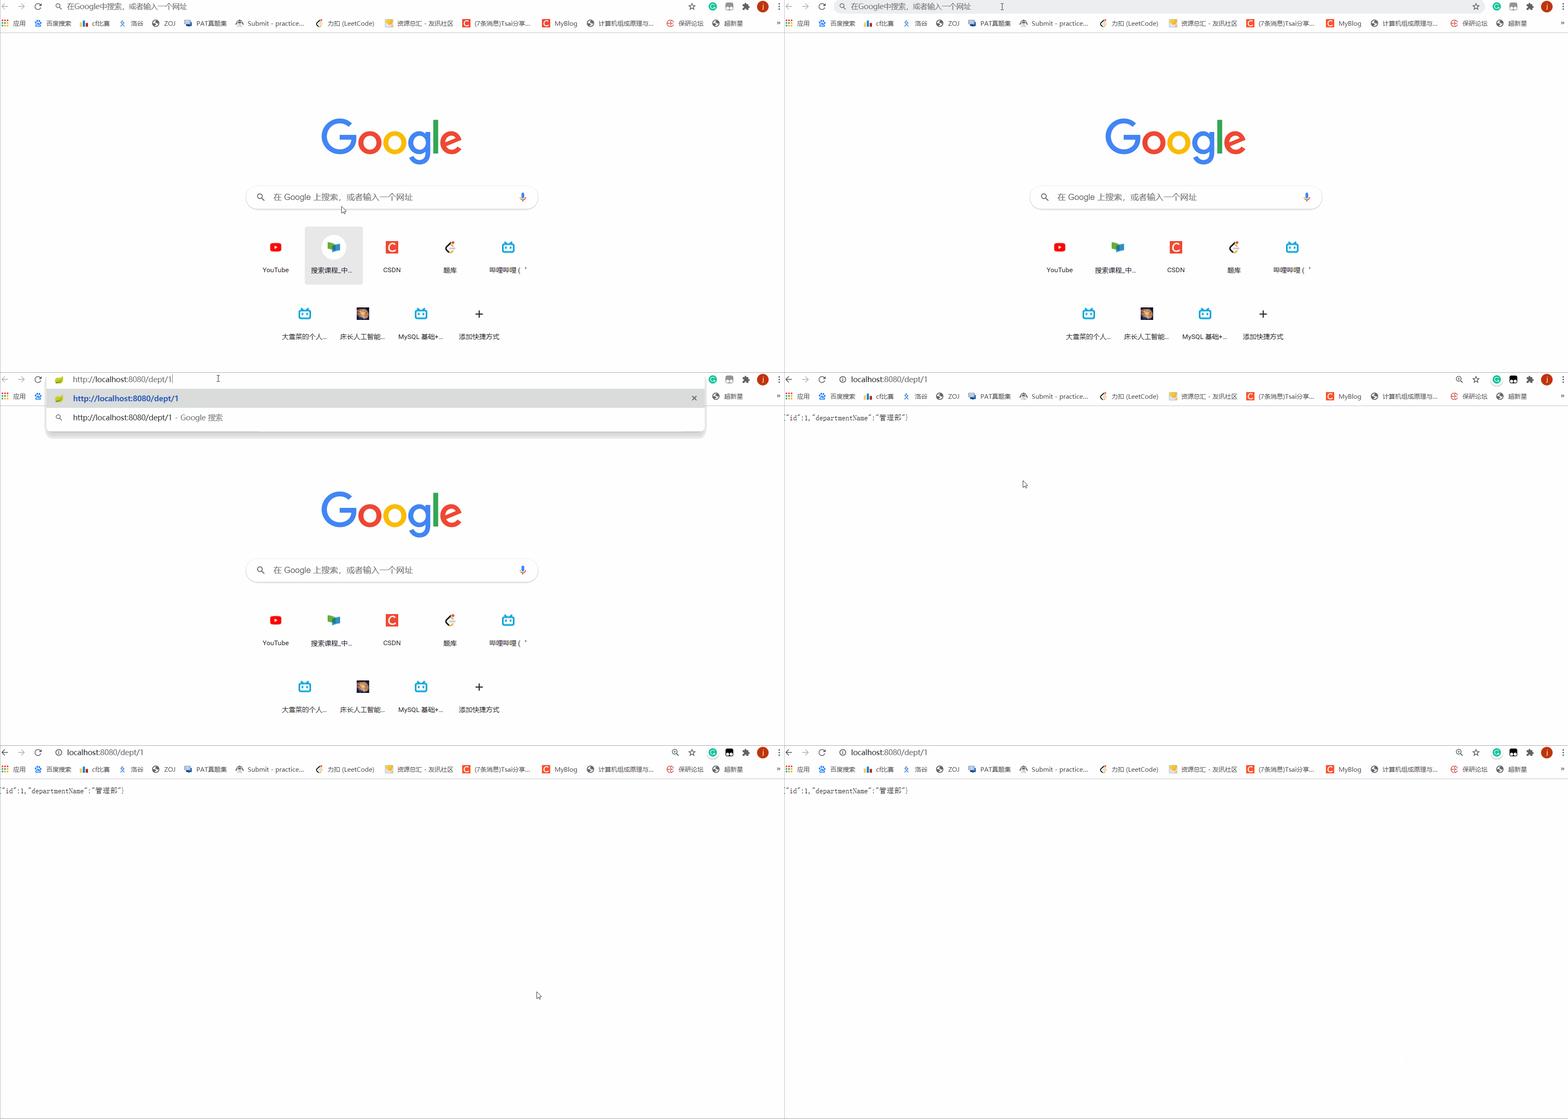
这里还要介绍一个问题,就是当做开发时如果有很多的Mapper那么我们就会把每一个Mapper都加上@Mapper注解,这样就会很麻烦了,于是我们可以这么做:

这样我们可以把之前的@mapper全部去掉,运行得到:

3.基于XML的讲解
这里我们以Employee为例子来演示。
我们相关的Xml文件的配置如下:
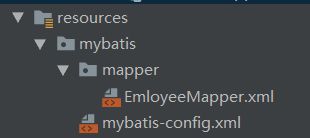
mybatis-config.xml:
<configuration>

configuration>
EmloyeeMapper.xml:
<mapper namespace="com.jack.datademo.mapper.EmployeeMapper">
    <select id="getEmployeeById" resultType="com.jack.datademo.bean.Employee">
        select * from Employee where id=#{id}
    select>
    <insert id="insertEmployee" parameterType="com.jack.datademo.bean.Employee">
        insert into Employee values(#{id},#{lastName},#{email},#{gender},#{dId})
    insert>
mapper>
我们的Mapper类为:
package com.jack.datademo.mapper;
import com.jack.datademo.bean.Employee;
//这里需要填@Mapper,也可以是在主应用程序上加上@MapperScan,这点是必须的
public interface EmployeeMapper{
    public Employee getEmployeeById(Integer id);
    public void insertEmployee(Employee employee);
}
最后编写EmployeeController来测试:
package com.jack.datademo.controller;
import com.jack.datademo.bean.Employee;
import com.jack.datademo.mapper.EmployeeMapper;
import org.apache.ibatis.annotations.Options;
import org.springframework.beans.factory.annotation.Autowired;
import org.springframework.web.bind.annotation.GetMapping;
import org.springframework.web.bind.annotation.PathVariable;
import org.springframework.web.bind.annotation.RestController;
@RestController
public class EmployeeController{
    @Autowired
    EmployeeMapper employeeMapper;
    @GetMapping("/emp/{id}")
    public Employee queryEmpById(@PathVariable("id") Integer id){
       return employeeMapper.getEmployeeById(id);
    }
    @Options(useGeneratedKeys = true,keyProperty = "id")
    @GetMapping("/emp")
    public Employee insert(Employee employee){
        employeeMapper.insertEmployee(employee);
        return employee;
    }
}
最后需要在application.yml文件里面配置:
mybatis:
  #指定全局配置文件的路径
  config-location: classpath:mybatis/mybatis-config.xml
  #指定特定mapper的配置路径
  mapper-locations: classpath:mybatis/mapper/*.xml
测试得到发现dId为空

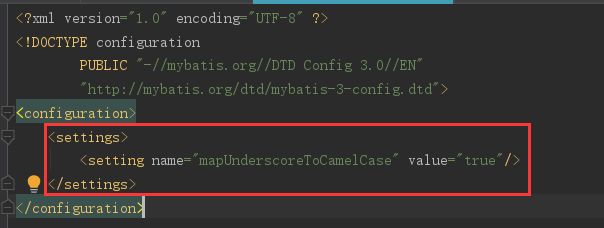
这出现了我们在讲注解是出现的表与bean属性名不一致导致的问题,由于我们之前配置的MybatisConfig并不对XML方式来起作用,我们可以这样解决:
再次测试:

不过这里要说明的是:如果没有我们的MybatisConfig,这里的xml配置也可以保证解决我们对dempartment的访问也不会存在驼峰命名不匹配的问题。

