shell 脚本编写使用
目录
- 一、什么是shell 脚本
- 二、shell 脚本写法
- 三、shell 脚本语法
-
- 1、第一个 shell 脚本
- 2、read命令
- 3、数值计算
- 4、test命令
- 5、中括号判断符
- 6、默认变量
- 7、条件判断
- 8、函数
- 9、循环
一、什么是shell 脚本
终端中输入一系列命令完成一些操作,但是我们一条一条输入命令,这样就会很麻烦,shell脚本可以将很多条命令放到一个文件里面,然后直接运行。
shell 脚本类似 windows 的批处理文件,shell 脚本就是将连续执行的命令写成一个文件。
shell 脚本提供数组、循环、条件判断等功能。shell 脚本一般是 Linux 运维、测试、系统管理员需要掌握的。
二、shell 脚本写法
shell 脚本是个纯文本文件,命令从上而下,一行一行地开始执行。
shell 脚本拓展名为.sh。shell 脚本第一行一定要为:
#!/bin/bash
三、shell 脚本语法
1、第一个 shell 脚本
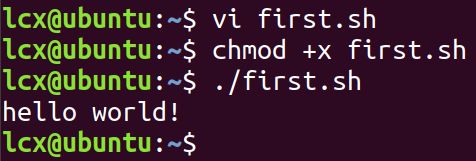
#!/bin/bash
echo hello world!
给shell脚本可运行权限:
chmod 777 first.sh
或者
chmod +x first.sh
2、read命令
脚本:
#!/bin/bash
echo "please input name and your age:"
read name age						    	#读取键盘输入字符串,赋值给变量 name 和 age
echo "your name:" $name ",your age: $age"	# shell 脚本输出变量:$变量名
#!/bin/bash
read -p "please input your name and your age" name age	#-p 后面跟提示信息,即在输入前打印提示信息
echo "your name: $name,your age $age"
3、数值计算
shell 仅支持整型,数值计算使用$((表达式)),示例:
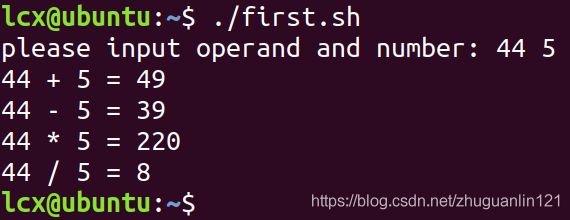
#!/bin/bash
read -p "please input operand and number: " operand number
echo "$operand + $number = $(($operand+$number))"
echo "$operand - $number = $(($operand - $number))"
echo "$operand * $number = $(($operand * $number))"
divided=$(($operand/$number))		#赋值等号间不能有空格!
echo "$operand / $number = $divided"
4、test命令
test命令用于查看文件是否存在、权限等信息,可以进行数值、字符和文件三方面的测试。
cmd1 && cmd2
#当 cmd1 执行完毕且正确,那么 cmd2 执行,当 cmd1 执行完毕且错误,那么 cmd2 不执行

cmd1 || cmd2
#当 cmd1 执行完毕且正确,那么 cmd2 不执行,当 cmd1 执行完毕且错误,那么 cmd2 执行
字符串相等测试:
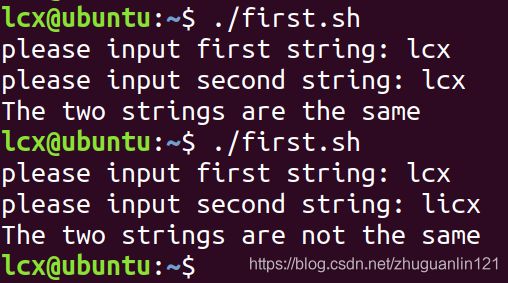
#!/bin/bash
read -p "please input first string: " firstStr
read -p "please input second string: " secondStr
test $firstStr = $secondStr && echo "The two strings are the same" || echo "The two strings are not the same"
# test str1 = str2 :两个字符串相等则为真
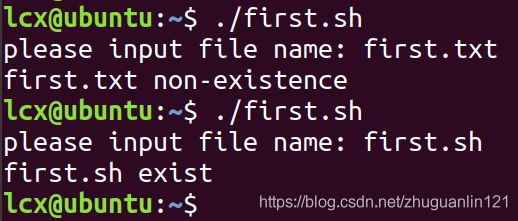
#!/bin/bash
read -p "please input file name: " filename
test -e $filename && echo "$filename exist" || echo "$filename non-existence"
# test -e :如果文件存在则为真
5、中括号判断符
字符串判断:
#!/bin/bash
read -p "please input first string: " firstStr
read -p "please input second string: " secondStr
[ "$firstStr" == "$secondStr" ] && echo "The two strings are the same" || echo "The two strings are not the same"
# 中括号两端内测要加空格,内容建议加 "",否则有空格时会出现参数过多
[ "$firstStr" != "$secondStr" ] && echo "The two strings are not the same" || echo "The two strings are the same"
[ "$firstStr" = "$secondStr" ] && echo "The two strings are the same" || echo "The two strings are not the same"
echo firstStr:  $firstStr
echo secondStr: $secondStr
6、默认变量
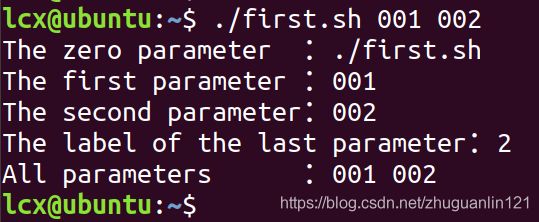
$0 ~ $n,表示 shell 脚本的执行参数,包括 shell 脚本执行命令本身,shell 脚本执行命令本身为$0。
$#表示最后一个参数的标号。
$@表示除$0外的所有参数。
很像main函数的argc、argv两个参数。
示例:
#!/bin/bash
echo "The zero parameter  :"$0
echo "The first parameter :"$1
echo "The second parameter:"$2
echo "The label of the last parameter:"$#
echo "All parameters      :"$@
7、条件判断
shell 脚本支持条件判断,虽然可以通过&&和||来实现简单的条件判断,但是稍微复杂一点的场景就不适合了。shell 脚本提供了if then条件判断语句:
if 条件判断;then
	# 判断成立后要执行的语句
fi				# 结束语句

--------------------------------------------------------------------

if 条件判断; then
	# 条件判断后成立要执行的语句
else
	# 条件判断后不成立要执行的语句
fi

--------------------------------------------------------------------

if 条件判断; then
	# 条件判断后成立要执行的语句
elif 条件判断;then		# 此语句可多次添加
	# 条件判断后成立要执行的语句
else
	# 条件判断后不成立要执行的语句
fi

--------------------------------------------------------------------

case $变量 in		# 与 C语言 switch case 相似
"第一个变量内容")
	# 程序段
	;;		# 表示第一个程序块结束
"第二个变量内容")
	# 程序段
	;;		# 表示第二个程序块结束
"第n个变量内容")
	# 程序段
	;;		# 表示第 n个程序块结束
*)			# 类似 C语言 switch case的 default
	# 程序段
	;;
esac
例一:
#!/bin/bash

read -p "please input(Y/N):" value

if [ "$value" == "Y"  ] || [  "$value" == "y" ]; then
        echo "your input is Y"
        exit 0
fi

if [ "$value" == "N"  ] || [  "$value" == "n" ]; then
        echo "your input is N"
        exit 0
fi
例二:
#!/bin/bash

case $1 in
        "a")
           echo "param is :a"
           ;;
         "b")
           echo "param is :b"
           ;;
         *)#这里通配符不能加上引号 加上就代表字符*了
           echo "can't identify"
           ;;
esac
8、函数
function fname(){		# function 可写可不写
	# 函数代码段
}

fname		# 函数调用

fname param1 param2		# 函数传参
函数传参用法示例:
#!/bin/bash
fun1(){
    echo "$0"
    echo "param1:$1"
    echo "param2:$2"
    echo "$#"
    echo "$@"
}

fun1 lcx1 lcx2 #函数调用和传参
执行结果:

可以看出,$n $# $@表示函数相应传参值,$0仍然表示 shell 脚本第0个参数。
9、循环
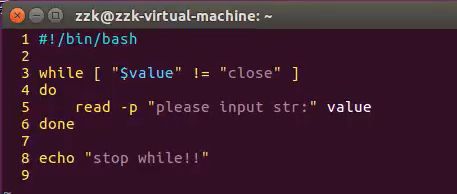
while 条件			# 条件状态为判断式,条件成立时循环,直到条件不成立
do					# 循环开始
	# 循环代码段
done

--------------------------------------------------------------------

until 条件			# 条件状态为判断式,条件不成立时循环,直到条件成立
do					# 循环开始
	# 循环代码段
done

--------------------------------------------------------------------

for var in con1 con2 con3 ......
do
	# 循环代码段
done
# 变量 var 循环变化,第一次循环等于 con1,第二次循环等于 con2,以此类推

--------------------------------------------------------------------

for((初始值;限制值;执行步长))
do
	# 循环代码段
done
# 用法类似于 C语言 for循环
while 循环示例:
for 循环示例1:
#!/bin/bash
for name in lcx1 lcx2 lcx3
do
    echo "name = $name"
done
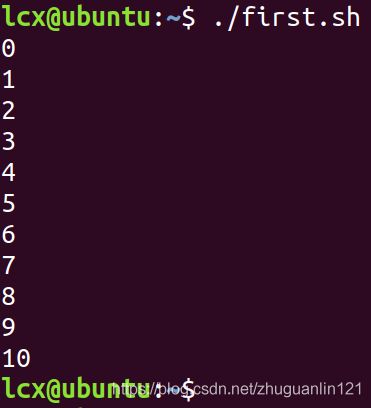
for 循环示例2:
#!/bin/bash
for((count=0;count<=10;count++))
do
    echo "$count"
done

