基于Pytorch的遥感大图预测(忽略边缘(划窗))
基于Pytorch的遥感大图预测
- 引言
-
- 代码实现
-
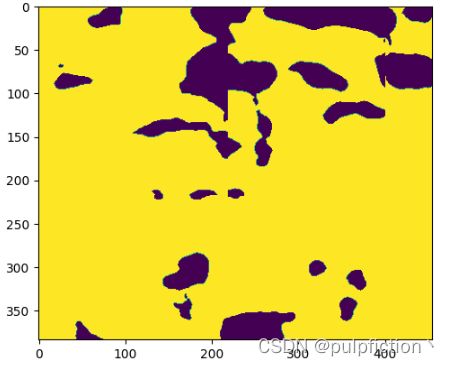
- 预测结果
引言
在深度学习中,对遥感数据进行预测时,往往需要大量的内存,造成计算机内存溢出,为了减少计算机内存溢出,本文采用忽略边缘预测方法对遥感图像进行预测及还原,Tensorflow版本请看参考文章链接。
(文章参考自https://zhuanlan.zhihu.com/p/158769096):
代码实现
from osgeo import gdal
import numpy as np
import datetime
import math
import sys
import torch
import cv2
from torchvision import transforms as T

# 读取tif数据集
def readTif(fileName, xoff = 0, yoff = 0, data_width = 0, data_height = 0):
    dataset = gdal.Open(fileName)
    if dataset == None:
        print(fileName + "文件无法打开")
    #  栅格矩阵的列数
    width = dataset.RasterXSize
    #  栅格矩阵的行数
    height = dataset.RasterYSize
    #  波段数
    bands = dataset.RasterCount
    #  获取数据
    if(data_width == 0 and data_height == 0):
        data_width = width
        data_height = height
    data = dataset.ReadAsArray(xoff, yoff, data_width, data_height)
    #  获取仿射矩阵信息
    geotrans = dataset.GetGeoTransform()
    #  获取投影信息
    proj = dataset.GetProjection()
    return data,geotrans,proj

#  保存tif文件函数
def writeTiff(im_data, im_geotrans, im_proj, path):
    if 'int8' in im_data.dtype.name:
        datatype = gdal.GDT_Byte
    elif 'int16' in im_data.dtype.name:
        datatype = gdal.GDT_UInt16
    else:
        datatype = gdal.GDT_Float32
    if len(im_data.shape) == 3:
        im_bands, im_height, im_width = im_data.shape
    elif len(im_data.shape) == 2:
        im_data = np.array([im_data])
        im_bands, im_height, im_width = im_data.shape

    #创建文件
    driver = gdal.GetDriverByName("GTiff")
    dataset = driver.Create(path, int(im_width), int(im_height), int(im_bands), datatype)
    if(dataset!= None):
        dataset.SetGeoTransform(im_geotrans) #写入仿射变换参数
        dataset.SetProjection(im_proj) #写入投影
    for i in range(im_bands):
        dataset.GetRasterBand(i+1).WriteArray(im_data[i])
    del dataset

#  tif裁剪(tif像素数据,裁剪边长)
def TifCroppingArray(img, SideLength):
    #  裁剪链表
    TifArrayReturn = []
    #  列上图像块数目
    ColumnNum = int((img.shape[0] - SideLength * 2) / (256 - SideLength * 2))
    #  行上图像块数目
    RowNum = int((img.shape[1] - SideLength * 2) / (256 - SideLength * 2))
    for i in range(ColumnNum):
        TifArray = []
        for j in range(RowNum):
            cropped = img[i * (256 - SideLength * 2) : i * (256 - SideLength * 2) + 256,
                          j * (256 - SideLength * 2) : j * (256 - SideLength * 2) + 256]
            TifArray.append(cropped)
        TifArrayReturn.append(TifArray)
    #  考虑到行列会有剩余的情况,向前裁剪一行和一列
    #  向前裁剪最后一列
    for i in range(ColumnNum):
        cropped = img[i * (256 - SideLength * 2) : i * (256 - SideLength * 2) + 256,
                      (img.shape[1] - 256) : img.shape[1]]
        TifArrayReturn[i].append(cropped)
    #  向前裁剪最后一行
    TifArray = []
    for j in range(RowNum):
        cropped = img[(img.shape[0] - 256) : img.shape[0],
                      j * (256-SideLength*2) : j * (256 - SideLength * 2) + 256]
        TifArray.append(cropped)
    #  向前裁剪右下角
    cropped = img[(img.shape[0] - 256) : img.shape[0],
                  (img.shape[1] - 256) : img.shape[1]]
    TifArray.append(cropped)
    TifArrayReturn.append(TifArray)
    #  列上的剩余数
    ColumnOver = (img.shape[0] - SideLength * 2) % (256 - SideLength * 2) + SideLength
    #  行上的剩余数
    RowOver = (img.shape[1] - SideLength * 2) % (256 - SideLength * 2) + SideLength
    return TifArrayReturn, RowOver, ColumnOver

#  获得结果矩阵
def Result(shape, TifArray, npyfile, RepetitiveLength, RowOver, ColumnOver):
    result = np.zeros(shape, np.uint8)
    #  j来标记行数
    j = 0
    for i,img in enumerate(npyfile):
        img = img.astype(np.uint8)

        #  最左侧一列特殊考虑,左边的边缘要拼接进去
        if(i % len(TifArray[0]) == 0):
            #  第一行的要再特殊考虑,上边的边缘要考虑进去
            if(j == 0):
                result[0 : 256 - RepetitiveLength, 0 : 256-RepetitiveLength] = img[0 : 256 - RepetitiveLength, 0 : 256 - RepetitiveLength]
            #  最后一行的要再特殊考虑,下边的边缘要考虑进去
            elif(j == len(TifArray) - 1):
                #  原来错误的
                #result[shape[0] - ColumnOver : shape[0], 0 : 256 - RepetitiveLength] = img[0 : ColumnOver, 0 : 256 - RepetitiveLength]
                #  后来修改的
                result[shape[0] - ColumnOver - RepetitiveLength: shape[0], 0 : 256 - RepetitiveLength] = img[256 - ColumnOver - RepetitiveLength : 256, 0 : 256 - RepetitiveLength]
            else:
                result[j * (256 - 2 * RepetitiveLength) + RepetitiveLength : (j + 1) * (256 - 2 * RepetitiveLength) + RepetitiveLength,
                       0:256-RepetitiveLength] = img[RepetitiveLength : 256 - RepetitiveLength, 0 : 256 - RepetitiveLength]
        #  最右侧一列特殊考虑,右边的边缘要拼接进去
        elif(i % len(TifArray[0]) == len(TifArray[0]) - 1):
            #  第一行的要再特殊考虑,上边的边缘要考虑进去
            if(j == 0):
                result[0 : 256 - RepetitiveLength, shape[1] - RowOver: shape[1]] = img[0 : 256 - RepetitiveLength, 256 -  RowOver: 256]
            #  最后一行的要再特殊考虑,下边的边缘要考虑进去
            elif(j == len(TifArray) - 1):
                result[shape[0] - ColumnOver : shape[0], shape[1] - RowOver : shape[1]] = img[256 - ColumnOver : 256, 256 - RowOver : 256]
            else:
                result[j * (256 - 2 * RepetitiveLength) + RepetitiveLength : (j + 1) * (256 - 2 * RepetitiveLength) + RepetitiveLength,
                       shape[1] - RowOver : shape[1]] = img[RepetitiveLength : 256 - RepetitiveLength, 256 - RowOver : 256]
            #  走完每一行的最右侧,行数+1
            j = j + 1
        #  不是最左侧也不是最右侧的情况
        else:
            #  第一行的要特殊考虑,上边的边缘要考虑进去
            if(j == 0):
                result[0 : 256 - RepetitiveLength,
                       (i - j * len(TifArray[0])) * (256 - 2 * RepetitiveLength) + RepetitiveLength : (i - j * len(TifArray[0]) + 1) * (256 - 2 * RepetitiveLength) + RepetitiveLength
                       ] = img[0 : 256 - RepetitiveLength, RepetitiveLength : 256 - RepetitiveLength]
            #  最后一行的要特殊考虑,下边的边缘要考虑进去
            if(j == len(TifArray) - 1):
                result[shape[0] - ColumnOver : shape[0],
                       (i - j * len(TifArray[0])) * (256 - 2 * RepetitiveLength) + RepetitiveLength : (i - j * len(TifArray[0]) + 1) * (256 - 2 * RepetitiveLength) + RepetitiveLength
                       ] = img[256 - ColumnOver : 256, RepetitiveLength : 256 - RepetitiveLength]
            else:
                result[j * (256 - 2 * RepetitiveLength) + RepetitiveLength : (j + 1) * (256 - 2 * RepetitiveLength) + RepetitiveLength,
                       (i - j * len(TifArray[0])) * (256 - 2 * RepetitiveLength) + RepetitiveLength : (i - j * len(TifArray[0]) + 1) * (256 - 2 * RepetitiveLength) + RepetitiveLength,
                       ] = img[RepetitiveLength : 256 - RepetitiveLength, RepetitiveLength : 256 - RepetitiveLength]
    return result

area_perc = 0.5

TifPath = r"L:\1-补充数据集制作\模型预测测试\图像\qgtx.tif" # 加载待预测的遥感大图路径
ResultPath = r"L:\1-补充数据集制作\模型预测测试\预测图像\yc.tif" # 预测完成后的遥感大图存储路径

RepetitiveLength = int((1 - math.sqrt(area_perc)) * 256/ 2)

big_image, geotrans, proj = readTif(TifPath)
big_image = big_image.swapaxes(2,0).swapaxes(1,0) #调整影像维度位置

TifArray, RowOver, ColumnOver = TifCroppingArray(big_image, RepetitiveLength)

# 对影像进行归一化并转换为张量
trfm = T.Compose([
    T.ToTensor(),
    ])

# 改成自己的model即可
model = DeepLabv3_plus(nInputChannels=3, n_classes=2, os=8, pretrained=True, _print=True)

predicts = []

for i in range(len(TifArray)):
    for j in range(len(TifArray[0])):
        image = TifArray[i][j]
        image = trfm(image)
        pred = np.zeros((1,3,256,256)) # 与模型训练影像维度保持一致即可
        model.load_state_dict(torch.load(r"weights_49.pth", map_location='cpu'))# 导入训练完成后的模型文件
        model.eval()
        with torch.no_grad():
            img = image.unsqueeze(0)
            out = model(img)
            out = torch.argmax(out,dim=1)
            out = torch.squeeze(out).numpy()
            pred = out
        pred = pred.astype(np.uint8)
        pred = pred.reshape((256,256))
        predicts.append((pred))

# 保存结果predictspredicts
result_shape = (big_image.shape[0], big_image.shape[1])
result_data = Result(result_shape, TifArray, predicts, RepetitiveLength, RowOver, ColumnOver)

# 可视化预测完成后的遥感大图
plt.imshow(result_data)
plt.show()

# 写入预测结果
writeTiff(result_data, geotrans, proj, ResultPath)
