【Spring 深入学习】配置DI 以及IOC的多种方式
配置DI 以及IOC的多种方式
1. 概述
防止将来遗忘,记录下DI等配置方式。从xml 配置文件 以及注解的方式来配置下DI
2. XML 方式
2.1 通过bean 依赖注入
xml 配置
<beans xmlns="http://www.springframework.org/schema/beans"
       xmlns:xsi="http://www.w3.org/2001/XMLSchema-instance"
       xsi:schemaLocation="http://www.springframework.org/schema/beans http://www.springframework.org/schema/beans/spring-beans.xsd">
    <bean id="user" class="plus.chendd.entity.User">
        <property name="name" value="test-lihh" />
    bean>
beans>
测试代码
public class TestBean {

    @Test
    public void testBean() {
        ClassPathXmlApplicationContext applicationContext = new ClassPathXmlApplicationContext("SpringContextTestBean.xml");
        User user = applicationContext.getBean("user", User.class);
        System.out.println(user);
    }
}
测试结果
上述的实例就是DI 以及IOC的一种表现。我们将实例化的过程交给了Spring容器来做。就连给属性name赋值都交给了Spring来做。
我们只需要使用getBean来获取实例化后的结果。
那怎么注入引用数据类型呢????
2.2 通过bean 注入引用类型
xml 代码实现
<beans xmlns="http://www.springframework.org/schema/beans"
       xmlns:xsi="http://www.w3.org/2001/XMLSchema-instance"
       xsi:schemaLocation="http://www.springframework.org/schema/beans http://www.springframework.org/schema/beans/spring-beans.xsd">

    <bean id="dog" class="plus.chendd.entity.Dog">
        <property name="name" value="jinmao"/>
    bean>

    <bean id="user" class="plus.chendd.entity.User">
        <property name="name" value="test-lihh" />
        <property name="dog" ref="dog"/>
    bean>
beans>
测试结果
上述注入引用数据类型都是通过我们自己手动注入,那如果想自动装配怎么处理呢???
2.3 通过bean 实现自动装配
xml 实现方式
<beans xmlns="http://www.springframework.org/schema/beans"
       xmlns:xsi="http://www.w3.org/2001/XMLSchema-instance"
       xsi:schemaLocation="http://www.springframework.org/schema/beans http://www.springframework.org/schema/beans/spring-beans.xsd">
    <bean id="dog" class="plus.chendd.entity.Dog">
        <property name="name" value="jinmao"/>
    bean>

    <bean id="user" class="plus.chendd.entity.User" autowire="byType">
        <property name="name" value="test-value"/>
    bean>
beans>
测试结果
上述示例我们通过bean中标签属性autowire="byType" 来实现自动装配。通过属性值byType我们可以知道是通过类型来匹配的。
如果有相同的数据类型实例,会自动注入。
如果两个相同的类型的怎么办呢??? 如下图:
    <bean id="dog" class="plus.chendd.entity.Dog">
        <property name="name" value="jinmao"/>
    bean>

    <bean id="dog1" class="plus.chendd.entity.Dog">
        <property name="name" value="dog1"/>
    bean>
所以我们还有一个别的选项,通过名称autowire="byName".
2.4 配置properties 以及文件扫描
xml 配置方式
<beans xmlns="http://www.springframework.org/schema/beans"
       xmlns:xsi="http://www.w3.org/2001/XMLSchema-instance"
       xmlns:context="http://www.springframework.org/schema/context"
       xsi:schemaLocation="http://www.springframework.org/schema/beans
       http://www.springframework.org/schema/beans/spring-beans.xsd
       http://www.springframework.org/schema/context
       http://www.springframework.org/schema/context/spring-context.xsd
">

    <context:component-scan base-package="plus.chendd" />

    <context:property-placeholder location="classpath:*.properties" />
beans>
3. 注解方式
说起注解方式就不得不提前几个相关的注解:
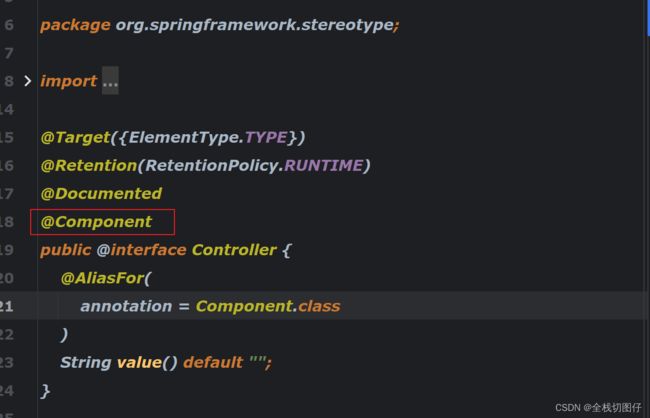
@Controller,@Service,@Repository,@Component。
其实@Controller 都是基于@Component 来实现的
但是还是推荐在开发过程中在mvc阶段使用@Controller等。因为他们更具有业务意义。
没有任何指向的情况下 可以使用@Component
3.1 通过配置文件 启动扫描
配置文件 代码
@ComponentScan(basePackages = "plus.chendd")
public class SpringConfig {
}
添加@Controller 代码
@Controller
public class UserController {
}
测试实例
public class TestAnnotate {

    @Test
    public void testAnnotate() {
        AnnotationConfigApplicationContext applicationContext = new AnnotationConfigApplicationContext(SpringConfig.class);
        UserController userController = applicationContext.getBean("userController", UserController.class);
        System.out.println(userController);
    }
}
3.2 属性依赖注入
3.2.1 @Autowired 方式
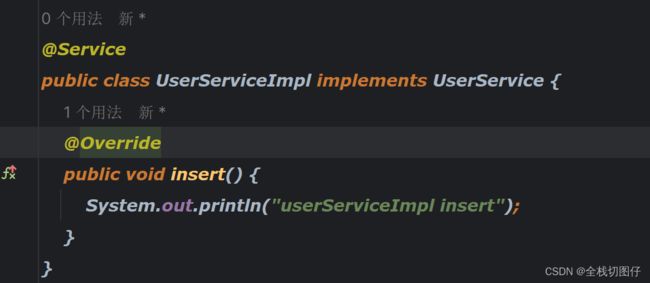
此注解是通过相同的数据类型来进行装配的。如下代码
@Service
public class UserServiceImpl implements UserService {
    @Override
    public void insert() {
        System.out.println("userServiceImpl insert");
    }
}
@Service
public class BUserServiceImpl implements UserService {
    @Override
    public void insert() {
        System.out.println("BUserServiceImpl insert");
    }
}
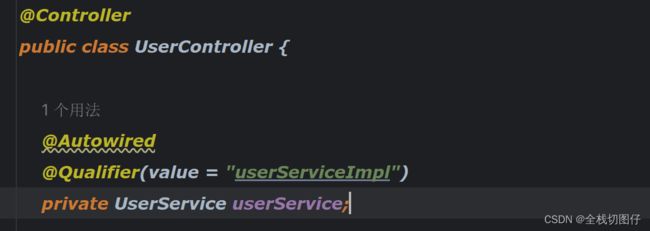
此时我们就需要注解Qualifier
同时
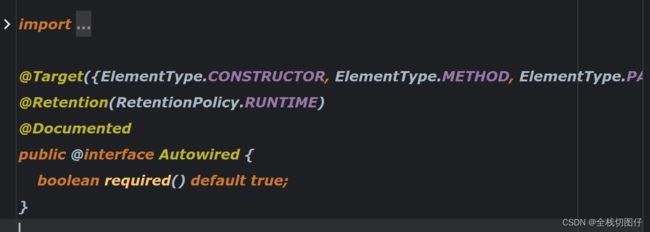
在注解Autowired中存在属性required. 默认是true。在应用初期化时就会按照类型到容器中查找,如果找不到就会报错。如果不想实现这种注入,可以设置为false。
3.2.2 @Qualifier 方式
此注解可以用来指定bean id。 可以跟@Autowired 搭配使用,避免出现相同的数据类型自动装配
3.2.3 @Resource 方式
@Resource==@Autowired都是按数据类型进行装配@Resource(name = "xxx")=@Autowired + @Qualifier按指定名称进行装配
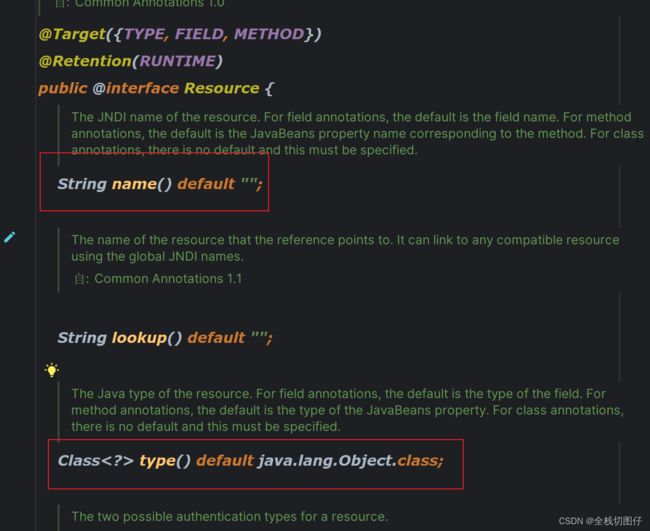
其实可以根据名称或是类型进行用来注入。如果两者都没写的话,默认先按名称在容器中进行查找,找不到的话,使用类型进行注入
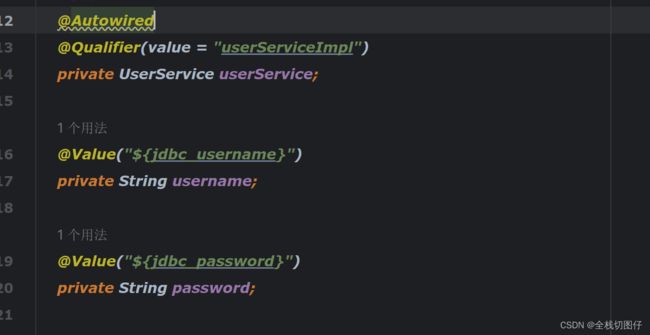
3.2.4 @Value 注入属性
配置类
@ComponentScan(basePackages = "plus.chendd")
@PropertySource("userInfo.properties")
public class SpringConfig {
}
4. 结论
以上就是我们关于Spring 注解简单的内容。主要要是区分:
@Autowired,@Qualifier,@Resource区别。以上的源码参照


