【Flutter -- 基础组件】Flutter 页面
文章目录
-
- 1. MaterialApp
-
- 1.1 代码
- 1.2 效果图
- 2. Scaffold
-
- 2.1 代码
- 2.2 效果图
- 3. AppBar
-
- 3.1 代码
- 3.2 效果图
- 4. Text
-
- 4.1 代码
- 4.2 效果图
- 5. RichText
-
- 5.1 代码
- 5.2 效果图
- 6. TextField
-
- 6.1 代码
- 6.2 效果图
- 7. Image
-
- 7.1 从 asset 中加载图片
- 7.2 从网络加载图片
- 7.3.声明分辨率相关的图片
- 8. Button
-
- 8.1 ElevatedButton
- 8.2 TextButton
- 8.3 OutlinedButton
- 8.4 IconButton
- 8.5 ButtonBar
- 8.6 FloatingActionButton
Flutter 有显示的 Widget 和完整页面呈现的 Widget,常见的有 MaterialApp、Scaffold、Appbar、Text、Image、Button,下面以思维导图形式简单列一下:

1. MaterialApp
1.1 代码
import 'package:flutter/material.dart';
//使用`flutter/material.dart` 目的是使用Matrial风格的小控件
void main(){
  //运行程序
  runApp(MyApp());
}

//用无状态控件显示
class MyApp extends StatelessWidget{

  @override
  Widget build(BuildContext context){
    return MaterialApp(
      //标题
      title:'Widget_Demo',
      //主题色
      theme:ThemeData(
        //设置为蓝色
        primarySwatch: Colors.blue
      ),
      //这是一个Widget对象,用来定义当前应用打开的时候,所显示的界面
      home:MyHomePage(),
    );
  }
}


class MyHomePage extends StatelessWidget{

  @override
  Widget build(BuildContext context){
     return Scaffold(
       //设置appbar
       appBar:new AppBar(
         title:new Text('This is a Demo'),
       ),
       //主体
       body:new Center(
         //在屏幕中央显示一个文本
         child:new Text('Hello'),
       ),
     );
  }
}
1.2 效果图
2. Scaffold
上面例子 home:MyHomePage() 这里返回了 ScaffoldWidget ,而这个 Widget 正是我们所看到的页面,看到 Scaffold 包含了 appBar 和 body,一开始说到,Scaffold 也包含 Drawers,下面实现一下:
2.1 代码
  @override
  Widget build(BuildContext context){
     return Scaffold(
       //设置appbar
       appBar:new AppBar(
         title:new Text('This is a Demo'),
       ),
       //主体
       body:new Center(
         //在屏幕中央显示一个文本
         child:new Text('Hello'),
       ),
       //左侧抽屉
       drawer:Drawer(
         //添加一个空的ListView
         child:ListView(),
       ),
     );
  }
2.2 效果图

下面往抽屉里添加点东西,就添加 ListView,代码如下:
       //左侧抽屉
       drawer:Drawer(
         child:ListView(
           //设置padding
           padding:EdgeInsets.zero,
           children: <Widget>[
             //据说这里可以替换自定义的header
             //userHeader,
             ListTile(
               //标题内容
               title: Text("This is Item_one"),
               //前置图标
               leading: new CircleAvatar(child:new Icon(Icons.scanner),),
             ),
             ListTile(
               //标题内容
               title: Text("This is Item_two"),
               //前置图标
               leading: new CircleAvatar(child:new Icon(Icons.list),),
             ),
             ListTile(
               //标题内容
               title: Text("This is Item_three"),
               //前置图标
               leading: new CircleAvatar(child:new Icon(Icons.score),),
             ),
           ],
         ),
       ),
3. AppBar
3.1 代码
      //设置appbar
      appBar: new AppBar(
        //AppBar内容显示
        title: new Text('This is a Demo'),
        //前置图标
        leading: new Icon(Icons.home),
        //背景颜色 改为红色
        backgroundColor: Colors.red,
        //设置为标题内容居中
        centerTitle: true,
        //一个 Widget 列表,代表 Toolbar 中所显示的菜单,
        // 对于常用的菜单,通常使用 IconButton 来表示;对于不常用的菜单通常使用 PopupMenuButton 来显示为三个点,点击后弹出二级菜单
        actions: <Widget>[
          //IconButton
          new IconButton(
            //图标
            icon: new Icon(Icons.add_a_photo),
            //提示
            tooltip: 'Add photo',
            //点击事件
            onPressed: () {},
          ),
          //菜单弹出按钮
          new PopupMenuButton<String>(
            itemBuilder: (BuildContext context) {
              return <PopupMenuItem<String>>[
                new PopupMenuItem<String>(
                    value: "one", child: new Text('This one')),
                new PopupMenuItem<String>(
                    value: "two", child: new Text('This two')),
              ];
            },
            //选择点击事件
            onSelected: (String action) {
              switch (action) {
                case "one":
                //增加点击逻辑
                  break;
                case "two":
                //增加点击逻辑
                  break;
              }
            },
          ),
        ],
      ),
3.2 效果图
4. Text
4.1 代码
下面用Text来展示文本,把上面例子用文本显示中间的 Hello 单独抽出来,如下:
   //主体
 body: new Center(
      //在屏幕中央显示一个文本 改为自定义样式
      child: new CustomTextStyle('This is a Text'),
 ),

//单独文本样式
class CustomTextStyle extends StatelessWidget{
  String text;
  //构造函数 参数外部传进来
  CustomTextStyle(this.text);
  @override
  Widget build(BuildContext context){
    return Text(text ?? "Hello");

  }
}
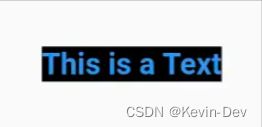
下面把文本字体大小修改,字体样式修改,背景颜色改改:
//文本 : 单独文本样式
class CustomTextStyle extends StatelessWidget {
  Paint pg = Paint();
  String text;

  //构造函数 参数外部传进来
  CustomTextStyle(this.text);

  @override
  Widget build(BuildContext context) {
    //设置画笔颜色为黑色
    pg.color = Color(0xFF000000);
    return Text(
      text ?? "Hello",
      style: TextStyle(
          //颜色
          color: Colors.blue,
          //字体大小
          fontSize: 14,
          //字体加粗
          fontWeight: FontWeight.bold,
          //文本背景颜色
          background: pg),
    );
  }
}
4.2 效果图
 const TextStyle({
    this.inherit = true,
    this.color,//文本样式
    this.fontSize,//字体大小
    this.fontWeight,//绘制文本时的字体粗细
    this.fontStyle,//字体变体
    this.letterSpacing,//水平字母之间的空间间隔(逻辑像素为单位),可以负值
    this.wordSpacing,//单词之间添加的空间间隔(逻辑像素为单位),可以负值
    this.textBaseline,//对齐文本的水平线
    this.height,//文本行与行的高度,作为字体代销的倍数
    this.locale,//用于选择区域定字形的语言环境
    this.foreground,//文本的前景色,不能与color共同设置
    this.background,//文本背景色
    this.shadows,//Flutter Decoration背景设定(边框,圆角,阴影,渐变等)
    this.decoration,//绘制文本装饰,添加上下划线,删除线
    this.decorationColor,//文本装饰的颜色
    this.decorationStyle,//文本装饰的样式,控制画虚线,点,波浪线
    this.debugLabel,
    String fontFamily,//使用字体的名称
    String package,
  })
5. RichText
5.1 代码
这是显示丰富样式的文本,这什么意思呢?Text 只能显示一种样式的文字,如果想在一段文字中显示多种样式,就好像 Android 里面的 SpannableString,就需要使用 RichText,直接上代码:
//富文本样式
class RichWidget extends StatelessWidget {
  @override
  Widget build(BuildContext context) {
    return RichText(
        text: TextSpan(
          text: 'This is RichText',
          style: new TextStyle(
            //false的时候不显示
              inherit: true,
              //字体大小
              fontSize: 16,
              //黑色
              color: Colors.black
          ),
          children: <TextSpan>[
            new TextSpan(
              text: 'Android艺术探索',
              style: new TextStyle(
                color: Colors.redAccent,
                //字体粗细
                fontWeight: FontWeight.bold,
              ),

            ),

            new TextSpan(text: '第一行代码'),
            new TextSpan(
              text: 'Android进阶之光',
              style: new TextStyle(
                color: Colors.indigo,
                //字体样式
                fontSize: 20,
              ),
            )
          ],
        )
    );
  }
}

//屏幕中间改为富文本widget
  //主体
      body: new Center(
        //Text在屏幕中央显示一个文本 改为自定义样式
        //child: new CustomTextStyle('This is a Text'),
        //富文本
          child:new RichWidget()
      ),
5.2 效果图
6. TextField
6.1 代码
下面看看文本输入框,文本输入框平时会经常用到:
body: new Center(
   //Text在屏幕中央显示一个文本 改为自定义样式
   //child: new CustomTextStyle('This is a Text'),
   //富文本
   //child:new RichWidget()
   //文本输入框
     child:new TextFieldWidget()
),

//文本输入框
class TextFieldWidget extends StatelessWidget{
  @override
  Widget build(BuildContext context){
      return TextField();
  }
}
上面例子只能输入文本内容,如果想要获取输入框内容,就要添加一个controller,通过这个controller添加通知来获取TextField的值,我们一般点击按钮或者需要跟后台交互就要读取controller.text的值:
class MyHomePage extends StatelessWidget {
  //获取TextEditingController
  final editController = TextEditingController();
            //IconButton
          new IconButton(
            //图标
            icon: new Icon(Icons.add_a_photo),
            //提示
            tooltip: 'Add photo',
            //点击事件
            onPressed: () {
              //输出
              print('text inputted: ${editController.text}');
              //Toast
              Fluttertoast.showToast(
                  msg:'text inputted: ${editController.text}',
                  toastLength: Toast.LENGTH_SHORT,
                  gravity: ToastGravity.CENTER,
                  timeInSecForIos: 1,
              );
            },
          ),
     ....
       //主体
      body: new Center(
        //Text在屏幕中央显示一个文本 改为自定义样式
        //child: new CustomTextStyle('This is a Text'),

        //富文本
        //child:new RichWidget()

        //文本输入框 以构造函数传递controller
          child:new TextFieldWidget(editController)
      ),
}
//文本输入框
class TextFieldWidget extends StatelessWidget{

  final controller;
  //构造函数传值
  TextFieldWidget(this.controller);
  @override
  Widget build(BuildContext context){
      return TextField(
        controller: controller,
      );
  }
}
注意上面用到了Toast,Toast库这里很简单需要两步:
- 在
pubspec.yaml添加依赖库fluttertoast: ^2.1.1 - 导入
import 'package:fluttertoast/fluttertoast.dart';
6.2 效果图
重新运行即可,热重载可能会出现异常。运行在 iOS 模拟器需要装 brew 和 CocoaPods,有问题运行flutter doctor,它真是如名字一样,就是帮你诊断有没有错误信息,会显示具体信息。效果如下:

下面改一下样式:
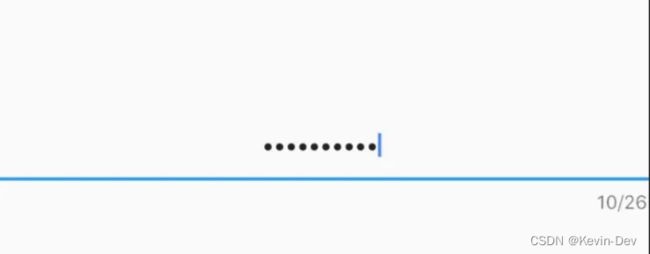
      return TextField(
        controller: controller,
        //最大长度,右下角会显示一个输入数量的字符串
        maxLength: 26,
        //最大行数
        maxLines: 1,
        //是否自动更正
        autocorrect: true,
        //是否自动对焦
        autofocus: true,
        //设置密码 true:是密码 false:不是秘密
        obscureText: true,
        //文本对齐样式
        textAlign: TextAlign.center,

      );
7. Image
7.1 从 asset 中加载图片
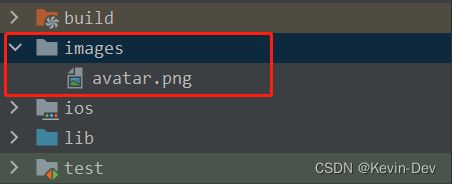
1. 在工程根目录下创建一个 images 目录,并将图片 avatar.png 拷贝到该目录。

2. 在 pubspec.yaml 中的 flutter 部分添加如下内容:
  assets:
    - images/avatar.png
注意: 由于 yaml 文件对缩进严格,所以必须严格按照每一层两个空格的方式进行缩进,此处 assets 前面应有两个空格。
3. 加载该图片
import 'package:flutter/material.dart';

void main() {
  runApp(const MyApp());
}

class MyApp extends StatelessWidget {
  const MyApp({Key? key}) : super(key: key);

  @override
  Widget build(BuildContext context) {
    return MaterialApp(
      title: 'Welcome to Flutter',

      home: Scaffold(
        appBar: AppBar(
          title: Text('图片 & Icon'),
        ),
          body: Column(
            crossAxisAlignment: CrossAxisAlignment.start,
            children: <Widget>[
              const Text("1.图片",
                textScaleFactor: 1.2,
              ),

              Image(
                  image: AssetImage("images/avatar.png"),
                  width: 100.0
              ),
            ],
          )
      )
    );
  }
}
Image 也提供了一个快捷的构造函数 Image.asset 用于从 asset 中加载、显示图片:
	Image.asset("images/avatar.png",
                width: 100.0,
    ),
7.2 从网络加载图片
- 代码
import 'package:flutter/material.dart';

void main() {
  runApp(const MyApp());
}

class MyApp extends StatelessWidget {
  const MyApp({Key? key}) : super(key: key);

  @override
  Widget build(BuildContext context) {
    return MaterialApp(
      title: 'Welcome to Flutter',

      home: Scaffold(
        appBar: AppBar(
          title: Text('图片 & Icon'),
        ),
          body: Column(
            crossAxisAlignment: CrossAxisAlignment.start,
            children: <Widget>[
              const Text("1.图片",
                textScaleFactor: 1.2,
              ),

              Image(
                image: NetworkImage(
                    "https://flutter.github.io/assets-for-api-docs/assets/widgets/owl.jpg"),
                width: 200.0,
              ),
            ],
          )
      )

    );
  }
}
Image 也提供了一个快捷的构造函数 Image.network 用于从网络加载、显示图片:
Image.network(
  "https://flutter.github.io/assets-for-api-docs/assets/widgets/owl.jpg",
  width: 200.0,
)
7.3.声明分辨率相关的图片
另外 Flutter 可以为当前设备添加合适其分辨率的图像,其实对于 Android 原生来说,就是在不同分辨率目录下放置不同分辨率的图片,只不过 flutter 并不是创建drawable-xxdpi文件,而是创建以下文件夹:
.../logo.png
.../Mx/logo.png
.../Nx/logo.png
其中M和N是数字标识符,对应于其中包含的图像分辨率,它们指定不同素设备像比例的图片,主资源默认对应于1.0倍的分辨率图片。看下面例子:

在设备像素比率为1.8的设备上,images/2.0x/logo.png 将被选择。对于2.7的设备像素比率,images/3.0x/logo.png将被选择。如果未在Image控件上指定渲染图像的宽度和高度,以便它将占用与主资源相同的屏幕空间量(并不是相同的物理像素),只是分辨率更高。 也就是说,如果images/logo.png是72px乘72px,那么images/3.0x/logo.png应该是216px乘216px; 但如果未指定宽度和高度,它们都将渲染为72像素×72像素(以逻辑像素为单位)。pubspec.yaml中asset部分中的每一项都应与实际文件相对应,但主资源项除外。当主资源缺少某个资源时,会按分辨率从低到的顺序去选择,也就是说1.0x中没有的话会在2.0x中找,2.0x中还没有的话就在3.0x中找。
      return Image(
        // 系统会根据分辨率自动选择不同大小的图片
        image: AssetImage('images/logo.png'),
        // ...
      ),
8. Button
Flutter 里有多种 Button 按钮组件:
- ElevatedButton : "漂浮"按钮
- TextButton :文本按钮
- OutlinedButton :线框按钮
- IconButton :图标按钮
- ButtonBar :按钮组
- FloatingActionButton :浮动按钮
8.1 ElevatedButton
ElevatedButton 即"漂浮"按钮,它默认带有阴影和灰色背景。按下后,阴影会变大。
- 代码
import 'package:flutter/material.dart';

void main() {
  runApp(const MyApp());
}

class MyApp extends StatelessWidget {
  const MyApp({Key? key}) : super(key: key);

  @override
  Widget build(BuildContext context) {
    return MaterialApp(
      title: 'Welcome to Flutter',

      home: Scaffold(
        appBar: AppBar(
          title: Text('按钮(Button)'),
        ),
          body: Column(
            crossAxisAlignment: CrossAxisAlignment.start,
            children: <Widget>[
              const Text("1.ElevatedButton",
                textScaleFactor: 1.2,
              ),

              ElevatedButton(
                child: Text("漂浮按钮"),
                onPressed: () {
                  print("Clicked me");
                },
              )
            ],
          )
      )

    );
  }
}
8.2 TextButton
TextButton 即文本按钮,默认背景透明并不带阴影。按下后,会有背景色。
- 代码
import 'package:flutter/material.dart';

void main() {
  runApp(const MyApp());
}

class MyApp extends StatelessWidget {
  const MyApp({Key? key}) : super(key: key);

  @override
  Widget build(BuildContext context) {
    return MaterialApp(
      title: 'Welcome to Flutter',

      home: Scaffold(
        appBar: AppBar(
          title: Text('按钮(Button)'),
        ),
          body: Column(
            crossAxisAlignment: CrossAxisAlignment.start,
            children: <Widget>[
              const Text("2.TextButton",
                textScaleFactor: 1.2,
              ),

              TextButton(
                child: Text("文本按钮"),
                onPressed: () {
                  print("Clicked me");
                },
              ),
            ],
          )
      )

    );
  }
}
8.3 OutlinedButton
OutlinedButton 默认有一个边框,不带阴影且背景透明。按下后,边框颜色会变亮、同时出现背景和阴影(较弱)
- 代码
import 'package:flutter/material.dart';

void main() {
  runApp(const MyApp());
}

class MyApp extends StatelessWidget {
  const MyApp({Key? key}) : super(key: key);

  @override
  Widget build(BuildContext context) {
    return MaterialApp(
      title: 'Welcome to Flutter',

      home: Scaffold(
        appBar: AppBar(
          title: Text('按钮(Button)'),
        ),
          body: Column(
            crossAxisAlignment: CrossAxisAlignment.start,
            children: <Widget>[
              const Text("3.OutlinedButton",
                textScaleFactor: 1.2,
              ),

              OutlinedButton(
                child: Text("线框按钮"),
                onPressed: () {
                  print("Clicked me");
                },
              ),
            ],
          )
      )

    );
  }
}
8.4 IconButton
IconButton 是一个可点击的 Icon,不包括文字,默认没有背景,点击后会出现背景
- 代码
import 'package:flutter/material.dart';

void main() {
  runApp(const MyApp());
}

class MyApp extends StatelessWidget {
  const MyApp({Key? key}) : super(key: key);

  @override
  Widget build(BuildContext context) {
    return MaterialApp(
      title: 'Welcome to Flutter',

      home: Scaffold(
        appBar: AppBar(
          title: Text('按钮(Button)'),
        ),
          body: Column(
            crossAxisAlignment: CrossAxisAlignment.start,
            children: <Widget>[
              const Text("4.IconButton",
                textScaleFactor: 1.2,
              ),

              IconButton(
                icon:Icon(Icons.add_a_photo),
                onPressed: () {
                  print("Clicked me");
                },
              ),
            ],
          )
      )

    );
  }
}
8.5 ButtonBar
ButtonBar,它里面可以放多个 Button,ButtonBar 可以给里面的 button 做统一样式处理。
- 代码
import 'package:flutter/material.dart';

void main() {
  runApp(const MyApp());
}

class MyApp extends StatelessWidget {
  const MyApp({Key? key}) : super(key: key);

  @override
  Widget build(BuildContext context) {
    return MaterialApp(
      title: 'Welcome to Flutter',

      home: Scaffold(
        appBar: AppBar(
          title: Text('按钮(Button)'),
        ),
          body: Container(
            color: Colors.green,
            width: 450,
            child: ButtonBar(
              buttonPadding: EdgeInsets.all(5),
              buttonHeight: 30,
              alignment: MainAxisAlignment.spaceBetween,
              buttonTextTheme: ButtonTextTheme.primary,
              layoutBehavior: ButtonBarLayoutBehavior.padded,

            children:[
              ElevatedButton.icon(
                icon: Icon(Icons.send),
                label: Text("发送"),
                onPressed: () {
                  print("Clicked me");
                },
              ),

              ElevatedButton.icon(
                icon: Icon(Icons.home),
                label: Text("首页"),
                onPressed: () {
                  print("Clicked me");
                },
              ),

              ElevatedButton.icon(
                icon: Icon(Icons.shop),
                label: Text("购物"),
                onPressed: () {
                  print("Clicked me");
                },
              ),
            ],
          ),
          )
      )

    );
  }
}
8.6 FloatingActionButton
一个 material design的浮动按钮。 浮动操作按钮是一个圆形图标按钮,它悬停在内容上以提升应用程序中的主要操作。 浮动操作按钮最常用于[Scaffold.floatingActionButton] 场景。
- 代码
import 'package:flutter/material.dart';

void main() {
  runApp(const MyApp());
}

class MyApp extends StatelessWidget {
  const MyApp({Key? key}) : super(key: key);

  @override
  Widget build(BuildContext context) {
    return MaterialApp(
      title: 'Welcome to Flutter',

      home: Scaffold(
        appBar: AppBar(
          title: Text('按钮(Button)'),
        ),
          body: Column(
            crossAxisAlignment: CrossAxisAlignment.start,
            children: <Widget>[
              const Text("6.FloatingActionButton",
                textScaleFactor: 1.2,
              ),

              FloatingActionButton(
                child: Icon(Icons.access_alarm_rounded),
                onPressed: () {
                  print("Clicked me");
                },
              ),
            ],
          )
      )

    );
  }
}


