Spring Security入门-1
Spring Security 入门-1
- 摘要
-
- 一、构建项目并配置简单的 url 和权限控制
-
- a. 构建项目
- b. 简单的url配置
- c. 编写登录成功后的controller
- d. 测试
- d. 不使用系统默认用户,使用自定义内存配置用户。
- e. 测试
- 二、实现用户从数据库中读取
-
- 1. 创建数据库表
- 2. 创建用户实体类
- 3. 配置从数据库查询数据
-
- 3.1 配置 pom 增加 jpa 的配置
- 3.2 yml文件中增加jpa的配置
- 3.3 创建 repository 接口
- 4. 配置 security 读取数据库用户信息
-
- 4.1 删除上次在 WebSecurityConfig 中配置的用户信息
- 4.2 配置 security 从数据库中获取用户信息
- 5. 测试
- 总结
摘要
看了好多的帖子来学习学习 spring security 这个安全框架了,但是一直没有系统的总结过,所以这次准备写出来一些东西记录一下,来帮助自己来记忆,上一次的帖子已经写了最简单的整合了,已经体验过了,所以这一次的主要目标是:
- 配置和使用一些简单的url权限
- 通过访问数据库来对用户进行认证(暂时忽略授权)
一、构建项目并配置简单的 url 和权限控制
在第一步的时候先完成项目的构建,然后用户的认证暂时通过内存的方式认证,通过数据库的认证在第二部完成
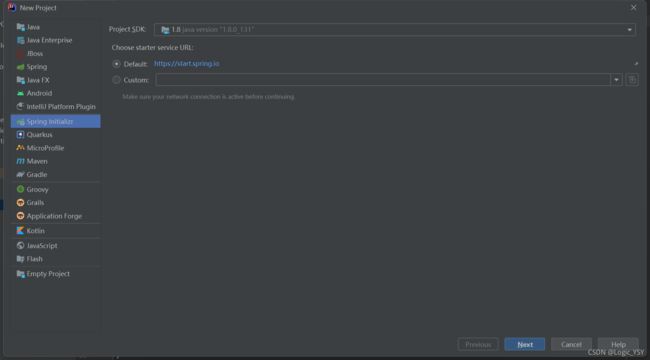
a. 构建项目
<project xmlns="http://maven.apache.org/POM/4.0.0" xmlns:xsi="http://www.w3.org/2001/XMLSchema-instance"
         xsi:schemaLocation="http://maven.apache.org/POM/4.0.0 https://maven.apache.org/xsd/maven-4.0.0.xsd">
    <modelVersion>4.0.0modelVersion>
    <parent>
        <groupId>org.springframework.bootgroupId>
        <artifactId>spring-boot-starter-parentartifactId>
        <version>2.5.5version>
        <relativePath/>
    parent>
    <groupId>com.logicgroupId>
    <artifactId>security-1artifactId>
    <version>0.0.1-SNAPSHOTversion>
    <name>security-1name>
    <description>Demo project for Spring Bootdescription>
    <properties>
        <java.version>1.8java.version>
    properties>
    <dependencies>
        <dependency>
            <groupId>org.springframework.bootgroupId>
            <artifactId>spring-boot-starter-securityartifactId>
        dependency>
        <dependency>
            <groupId>org.springframework.bootgroupId>
            <artifactId>spring-boot-starter-webartifactId>
        dependency>

        <dependency>
            <groupId>org.projectlombokgroupId>
            <artifactId>lombokartifactId>
            <optional>trueoptional>
        dependency>
        <dependency>
            <groupId>org.springframework.bootgroupId>
            <artifactId>spring-boot-starter-testartifactId>
            <scope>testscope>
        dependency>
        <dependency>
            <groupId>org.springframework.securitygroupId>
            <artifactId>spring-security-testartifactId>
            <scope>testscope>
        dependency>
    dependencies>

    <build>
        <plugins>
            <plugin>
                <groupId>org.springframework.bootgroupId>
                <artifactId>spring-boot-maven-pluginartifactId>
                <configuration>
                    <excludes>
                        <exclude>
                            <groupId>org.projectlombokgroupId>
                            <artifactId>lombokartifactId>
                        exclude>
                    excludes>
                configuration>
            plugin>
        plugins>
    build>
project>
b. 简单的url配置
如果要配置url则需要写一个配置类,然后继承 WebSecurityConfigurerAdapter 重写 configure(HttpSecurity http) 方法。
@Configuration
@EnableWebSecurity
public class WebSecurityConfig extends WebSecurityConfigurerAdapter {

	@Override
    protected void configure(HttpSecurity http) throws Exception {
        http.csrf().disable()
                // 配置所有的自定义请求都需要登录后才能访问
                .authorizeRequests().anyRequest().authenticated()
                .and()
                // 开启 页面表单登录
                .formLogin()
                // 配置登录成功后转发的请求 注释这里请求方式是 POST 方式。
                .successForwardUrl("/index")
                ;

    }

}
c. 编写登录成功后的controller
@RestController
public class HomeController {
    @PostMapping("/index")
    public String index(){
        return "登录成功之后的跳转";
    }
}
d. 测试
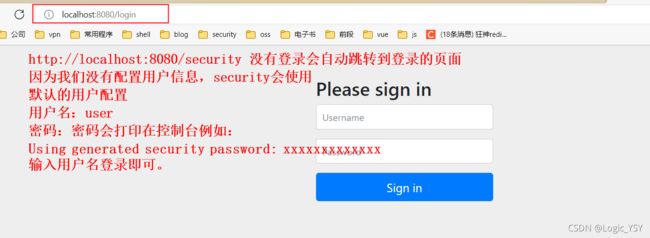
访问任意的任意的url例如:http://localhost:8080/security
注意:登录的页面是 security 默认集成的不需要我们编写,如果需要自定义配置登录页面,后期会再写帖子。

登录成功后的截图:

现在再访问 http://localhost:8080/security

d. 不使用系统默认用户,使用自定义内存配置用户。
配置用户还是需要继承 WebSecurityConfigurerAdapter 重写 configure(AuthenticationManagerBuilder auth) 方法,这里我直接写在了上面已经创建的 WebSecurityConfig 类中。
spring security 5 之后要添加一个加密类,我们使用的是 BCryptPasswordEncoder 加密工具
@Configuration
@EnableWebSecurity
public class WebSecurityConfig extends WebSecurityConfigurerAdapter {

	/**
     * 这个是密码的认证的类
     * @return pass
     */
    @Bean
    public PasswordEncoder getPasswordEncoder(){
        return new BCryptPasswordEncoder();
    }

    @Override
    protected void configure(AuthenticationManagerBuilder auth) throws Exception {
        auth.inMemoryAuthentication()
                .withUser("admin").password(getPasswordEncoder().encode("admin")).roles("admin") // 这里随便写了一个权限,不写会报错
                .and()
                .withUser("root").password(getPasswordEncoder().encode("root")).roles("root")// 这里随便写了一个权限,不写会报错
                ;
    }

}
e. 测试
二、实现用户从数据库中读取
1. 创建数据库表
其实这里也可以不用创建,我用的是jpa可以自动的创建数据库表
-- 1. 创建数据库表
CREATE TABLE `sys_user` (
  `id` bigint(20) NOT NULL,
  `username` varchar(64) NOT NULL DEFAULT '0' COMMENT '用户名',
  `password` varchar(64) NOT NULL DEFAULT '0' COMMENT '密码',
  `org_id` bigint(20) NOT NULL COMMENT '组织id',
  `enabled` tinyint(1) NOT NULL DEFAULT '1' COMMENT '0禁用用户,1是激活用户',
  `phone` varchar(16) DEFAULT NULL COMMENT '手机号',
  `email` varchar(32) DEFAULT NULL COMMENT 'email',
  `create_by` varchar(64) NOT NULL COMMENT '本条记录创建人',
  `create_time` datetime NOT NULL DEFAULT CURRENT_TIMESTAMP COMMENT '本条记录创建时间',
  `update_by` varchar(64) NOT NULL COMMENT '本条记录修改人',
  `update_time` datetime NOT NULL DEFAULT CURRENT_TIMESTAMP ON UPDATE CURRENT_TIMESTAMP COMMENT '本条记录的修改时间',
  PRIMARY KEY (`id`),
  UNIQUE KEY `username` (`username`)
) ENGINE=InnoDB DEFAULT CHARSET=utf8 COMMENT='用户信息表';

-- 插入数据 这里的密码通过代码得来的。下面会赘述
INSERT INTO `sys_user`(`id`, `username`, `password`, `org_id`, `enabled`, `phone`, `email`, `create_by`, `create_time`, `update_by`, `update_time`) VALUES (1297873308628307970, 'admin', '$2a$10$/yOSnA2NwMh4UwXK5K8gnOUI37y.Jl.eAwnXrfML6SXoTRwWThvN6', 1, 1, '12345678901', '[email protected]', '', '2020-10-06 10:32:22', 'admin', '2021-10-25 10:52:31');
![]()
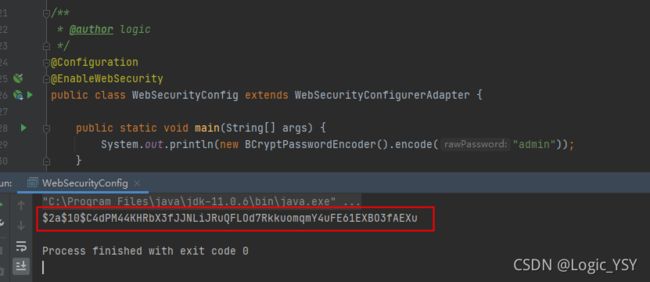
通过 main 方法获取 admin 的密码,admin 的明文密码为 admin ,获取到密码之后贴入数据库即可。

2. 创建用户实体类
@Data
@Entity(name = "sys_user")
public class SysUser implements Serializable {
    @Transient
    private static final long serialVersionUID = 523701959739148945L;

    @Id
    @GeneratedValue
    private Long id;
    private String username;
    private String password;
    private Long orgId;
    private String phone;
    private String email;
    private String createBy;
    private LocalDateTime createTime;
    private String updateBy;
    private LocalDateTime updateTime;
}
3. 配置从数据库查询数据
3.1 配置 pom 增加 jpa 的配置
        <dependency>
            <groupId>mysqlgroupId>
            <artifactId>mysql-connector-javaartifactId>
        dependency>

        <dependency>
            <groupId>com.alibabagroupId>
            <artifactId>druid-spring-boot-starterartifactId>
            <version>1.1.9version>
        dependency>
3.2 yml文件中增加jpa的配置
spring:
  datasource:
    url: jdbc:mysql://localhost:3306/security
    type: com.alibaba.druid.pool.DruidDataSource
    username: root
    password: root
    driver-class-name: com.mysql.cj.jdbc.Driver
  jpa:
    hibernate:
      ddl-auto: update
    show-sql: true
3.3 创建 repository 接口
public interface SysUserRepository extends JpaRepository<SysUser,Long> {
    // 查询用户
    SysUser findByUsername(String username);
}
4. 配置 security 读取数据库用户信息
4.1 删除上次在 WebSecurityConfig 中配置的用户信息
注释掉配置在内存中的用户。
//    @Override
//    protected void configure(AuthenticationManagerBuilder auth) throws Exception {
//        auth.inMemoryAuthentication().withUser("admin").password(getPasswordEncoder().encode("admin")).roles("admin")
//                .and()
//                .withUser("root").password(getPasswordEncoder().encode("root")).roles("root");
//    }
4.2 配置 security 从数据库中获取用户信息
security测数据库获取用户信息就需要实现 UserDetailsService 这个接口
@Service
public class UserServiceImpl implements UserDetailsService {
    @Resource
    SysUserRepository userRepository;
    // 这里实现 loadUserByUsername 这个方法,根据用户的名称来获取用户的基本信息,至于密码是在哪里比对的,是怎么认证的,这个随后再写
    @Override
    public UserDetails loadUserByUsername(String username) throws UsernameNotFoundException {
        SysUser userDb = userRepository.findByUsername(username);
        return new User(userDb.getUsername(), userDb.getPassword(), Collections.singletonList(new SimpleGrantedAuthority("admin")));
    }
}
5. 测试
总结
security 用户的读取有多种多样的方式,security 为我们提供了很多的方案,一般我们使用的读取方式 测试就使用 内存 的读取方式,正式的一般就是使用实现 UserDetailsService 这个接口的 loadUserByUsername 这个方法来从数据库中查询用户。


