带你快速手写一个简易版vue了解vue响应式
起始
在使用vue的时候,数据双向绑定,插值语法...等等,一系列让人眼花缭乱的操作.作为一个使用者搞懂轮子是怎么造,并不是为了自己造一个轮子,而是为了更好的使用轮子.
虽然现在vue3已经开始使用,但是很多公司现在使用的应该还是vue2.X.
## 使用
在我们使用的时候,一般都是在main文件进行初始化,一般都是这样
new Vue({
  router,
  store,
  .......
  render: h => h(App)
}).$mount('#app')
在这里对于我一个初入前端的切图仔肯定不会实现我们在项目中那么复杂,对于vue我们还有另一种用法,在html文件中引入vue.js,譬如这样
new Vue({
    el: '#app',
    data: {
      number: 1,
    },
    methods: {
      add() {
        this.number++
      },
      changeInput() {
        console.log('changeInput');
      }
    }
  })
就像这样,今天实现的就是以这样使用的,在vue的真正使用中会有三种render,template和el,优先级也是如此排列.
分析
首先需要分析我们实现的是怎样的一个类
- 首先它会接受一个对象,有el,data,methods.....
- data中的数据需要响应式处理
- 解析模板处理,也就是我们在div中写入的{{number}}之类
- 响应式更新,这也是最重要的,在改变数据的时候通知视图进行更新
- 处理事件和指令,比如v-model,@click之类
开始操刀实现
首先创建vue这个类
class Vue{
  constructor(options) {
    // 将传入的保存
    this.$options = options;
    // 将传入data,保存在$data中
    this.$data = options.data
  }
}
但是在我们的使用data的值时我们从来没有使用过\$data,我们都是this.xxx就可以拿到这个值,由此可见我们首先需要将this.\$data中的数据全部代理到这个类上让我们可以使用this.XXX可以使用这个也很简单,使用defineProperty就可以实现,下边来实现这个方法.
function proxy(vm) {
  //这里的vm需要我们拿到vue本身的实例
  Object.keys(vm.$data).forEach(key => {
    Object.defineProperty(vm, key, {
      get: () => vm.$data[key],
      set: (v) => vm.$data[key] = v
    })
  })
}
这个方法很简单,不用做过多赘述,下边在vue类中使用让我们可以通过实例可以拿到data中的值
class Vue{
  constructor(options) {
    this.$options = options;
    this.$data = options.data
+   proxy(this)
  }
这样我们就可以使用this.xx拿到,因为我们还没有实现method所以我们通过new Vue拿到的实例来实验
const app = new Vue({
    el: '#app',
    data: {
      counter: 1,
    },
  })
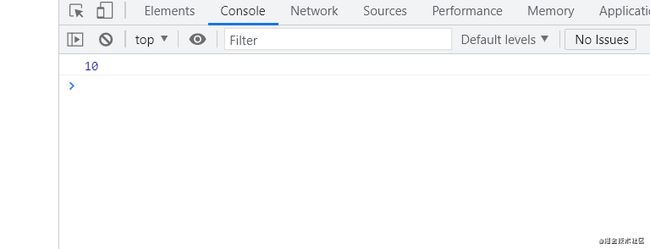
  console.log(app.number);
我们在控制台可以看到成功输出了numbe的值
那么对于data的代理就成功了.
模板解析
对于模板解析,需要处理写入的插值表达式(写入的自定义指令和事件,后边会解决)
首先先将模板中的插值解析时页面打开不会满屏的大括号.```js
class Compile {
  //我们需要将el和vue本身传入来进行模板解析,el需要用来拿到元素,vue本身则需要其中的data,methds...
  constructor(el, vm) {
    this.$vm = vm
    //拿到我们解析的元素
    this.$el = document.querySelector(el)

    if(this.$el) {
      // 编写一个函数来解析模板
      this.compile(this.$el)
    }
  }
  compile(el) {
    // 遍历el的子节点 判断他们的类型做相应的处理
    const childNodes = el.childNodes
    if(!childNodes) return;
    childNodes.forEach(node => {
      if(node.nodeType === 1) {
        // 元素 处理指令和事件(后续来处理)
      } else if(this.isInter(node)) {
        // 文本
        this.compileText(node)
      }
      // 在有子元素的情况下需要递归
      if(node.childNodes) {
        this.compile(node)
      }
    })
  }

  // 编译文本
  compileText(node) {
      node.textContent = this.$vm[RegExp.$1]
  }

  // 是否插值表达式
  isInter(node) {
    return node.nodeType === 3 && /\{\{(.*)\}\}/.test(node.textContent)
  }
}
然后在vue中使用它.
class Vue{
  constructor(options) {
    this.$options = options;
    this.$data = options.data
    proxy(this)
+   new Compile(options.el, this)
  }
}
这样页面中的插值就可以被替换为data中的数据了,但是我们在外边通过vue实例修改的时候数据是没有变化的.
实现数据响应式
在实现数据响应式这里,借用源码的思想,使用Observer来做响应式,watcher和dep来通知更新,在vue中一个组件只有一个watcher,而我们的粒度就没办法相提并论了,毕竟是一个只实现部分的简单版vue.
首先编写Observer
Observer编写
// 遍历obj做响应式
function observer(obj) {
  if(typeof obj !== 'object' || obj === null) {
    return
  }
  // 遍历obj的所有key做响应式
  new Observer(obj);
}
// 遍历obj的所有key做响应式
class Observer {
  constructor(value) {
    this.value = value
    if(Array.isArray(this.value)) {
      // TODO  对于数组的操作不做处理  无非是对于数组的七个方法进行重写覆盖
    } else {
      this.walk(value)
    }
  }
  // 对象响应式
  walk(obj) {
    Object.keys(obj).forEach(key => {
      //这个东西看到很多人会觉得很眼熟,当然也只是名字眼熟
      defineReactive(obj, key, obj[key])
    })
  }
}
defineReactive这里是用于数据进行响应式处理函数,在进行这个函数的编写之前,还需要先进行watcher的编写
watcher编写
// 监听器:负责依赖更新
const watchers = []; //先不使用dep  先使用一个数组来收集watcher进行更新
class Watcher {
  constructor(vm, key, updateFn) {
    this.vm = vm;
    this.key = key;
    this.updateFn = updateFn
    watchers.push(this)
  }  // 未来被Dep调用
  update() {
    // 执行实际的更新操作
    //因为我们需要在watcher更新时拿到最新的值,所以需要我们在这里作为参数传递给我们在收集到的函数
    this.updateFn.call(this.vm, this.vm[this.key])
  }
}
有了watcher之后,需要修改我们之前写的Compile类来进行watcher的收集,于此同时,修改编译时的修改方法同时为v-model和v-test...做前置基础
Compile进化
class Compile {
  //我们需要将el和vue本身传入来进行模板解析,el需要用来拿到元素,vue本身则需要其中的data,methds...
  constructor(el, vm) {
    this.$vm = vm
    //拿到我们解析的元素
    this.$el = document.querySelector(el)

    if(this.$el) {
      // 编写一个函数来解析模板
      this.compile(this.$el)
    }
  }
  compile(el) {
    // 遍历el的子节点 判断他们的类型做相应的处理
    const childNodes = el.childNodes
    if(!childNodes) return;
    childNodes.forEach(node => {
      if(node.nodeType === 1) {
        // 元素 处理指令和事件(后续来处理)
      } else if(this.isInter(node)) {
        // 文本
        this.compileText(node)
      }
      // 在有子元素的情况下需要递归
      if(node.childNodes) {
        this.compile(node)
      }
    })
  }

  //新添加函数
  //node 为修改的元素  exp为获取到大括号内的值的key dir为这边自定义的要执行的操作
  update(node, exp, dir) {
    // 初始化
    const fn = this[dir + 'Update']
    fn && fn(node, this.$vm[exp])
    // 更新  在这里创建watcher 并将更新的函数传进去  这里的val就是watcher触发更新函数时传入的最新值
    new Watcher(this.$vm, exp, function(val) {
      fn && fn(node, val)
    })
  }
  //新添加函数
  textUpdate(node, val) {
     node.textContent = val
   }
  // 编译文本
  compileText(node) {
  -   //node.textContent = this.$vm[RegExp.$1]
  +   this.update(node, RegExp.$1, 'text')
  }

  // 是否插值表达式
  isInter(node) {
    return node.nodeType === 3 && /\{\{(.*)\}\}/.test(node.textContent)
  }
}
defineReactive编写
下边来编写defineReactive来达到视图真正的更新
/**
 * 在key发生变化时可以感知做出操作
 * @param {*} obj 对象
 * @param {*} key 需要拦截的key
 * @param {*} val 初始值
 */
 function defineReactive(obj, key, val) {
  //  递归
  observer(val);
  Object.defineProperty(obj, key, {
    get() {
      return val
    },
    set(newVal) {
      console.log('set', newVal);
      if (newVal != val) {
        observer(newVal)
        val = newVal
        //这里为粗糙实现  后续会加入dep会更加精致一点
        watchers.forEach(w => w.update())
      }
    }
  })
}
在vue类中使用
class Vue{
  constructor(options) {
    this.$options = options;
    this.$data = options.data
+   observer(this.$data)
    proxy(this)
    new Compile(options.el, this)
  }
}
接下来在修改我们使用的页面
const app = new Vue({
    el: '#app',
    data: {
      number:10,
    }
  })
  console.log(app.number);
  setTimeout(() => {
    app.counter = 100
  }, 1000)
就可以在页面中看到在一秒钟之后视图朝着我们预想的结果发生变化,这样子就达到了我想要的结果,但是这样存在一个问题,就是当我们在data中定义了很多属性的时候,在页面中使用.
当我们改变其中一个的时候,我们所有的watcher都会执行一遍,页面所有用到data的地方都会发生更新,这样的问题我是肯定不想要的,这样就需要dep来管理,达到我们修改其中一个值,那只有修改的地方会发生变化,这样就会更好一点.
接下来先编写dep这个类,这个类的的功能很简单,一个dep管理data中的一条数据,收集和这条数据有关系的watcher,在发生变化时通知更新
Dep编写
class Dep{
  constructor() {
    this.deps = []
  }
  addDep(dep) {
    this.deps.push(dep)
  }
  notify() {
    this.deps.forEach(dep => dep.update())
  }
}
在dep为前提时需要修改watcher这个类,同时也不再需要watchers这个数组来管理.
Watcher进化
// 监听器:负责依赖更新
- //const watchers = []; //先不使用dep  先使用一个数组来收集watcher进行更新
class Watcher {
  constructor(vm, key, updateFn) {
    this.vm = vm;
    this.key = key;
    this.updateFn = updateFn
-    watchers.push(this)
    // 触发依赖收集
+   Dep.target = this
    //在这里纯属因为需要触发get来进行收集,下边重写defineReactive是会用到
+   this.vm[this.key]
+   Dep.target = null
  }

  // 未来被Dep调用
  update() {
    // 执行实际的更新操作
    //因为我们需要在watcher更新时拿到最新的值,所以需要我们在这里作为参数传递给我们在收集到的函数
    this.updateFn.call(this.vm, this.vm[this.key])
  }
}
编写好Watcher后来重新方法,来使用到dep来管理更新,而不是将所有watcher都进行触发更新
defineReactive进化
/**
 * 在key发生变化时可以感知做出操作
 * @param {*} obj 对象
 * @param {*} key 需要拦截的key
 * @param {*} val 初始值
 */
 function defineReactive(obj, key, val) {
  //  递归
  observer(val);
   // 创建Dep实例
  // data中的数据每一项都会进入到此,创建一个Dep
+  const dep = new Dep()
  Object.defineProperty(obj, key, {
    get() {
       // 依赖收集
      // 只有在调用时存在target才会被Dep收集更新(在初始化时设置静态属性target为watcher,被收集)
      //我们在watcher进入时获取过一次当前使用到的watcher的值这里就会进入get,并且当时wacher将自己设置为了Dep的target,在这里使用到进行收集方便更新,但是在触发之后将dep.target设置为了null,使我们在平时的读取时不做这个操作
+     Dep.target && dep.addDep(Dep.target)
+     return val
    },
    set(newVal) {
      console.log('set', newVal);
      if (newVal != val) {
        observer(newVal)
        val = newVal
        //这里为粗糙实现  后续会加入dep会更加精致一点
-       watchers.forEach(w => w.update())
        // 被修改时通知所有属于自己的watcher更新
        // 一个watcher对应一处依赖,一个Dep对应一个data中的数据  一个dep的更新可以指向多个watcher
+       dep.notify()
      }
    }
  })
}
接下来修改使用的html文件来查看效果
const app = new Vue({
    el: '#app',
    data: {
      counter: 1,
      number:10,
    },
  })
  console.log(app.number);
  setTimeout(() => {
    app.counter = 100
  }, 2000)
这样子我们在没有使用到这个数据的地方就不会产生dom更新.在使用number的地方并没有产生变化
接下来编写指令和事件的梳理
主要修改Compile类在模板解析时处理,处理之前我们首先修改Vue类,将methods保存```js
class Vue{
  constructor(options) {
    this.$options = options;
    this.$data = options.data
+   this.$methods = options.methods
    observer(this.$data)
    proxy(this)
    new Compile(options.el, this)
  }
}
```
### Compile最终成型
接下来修改Compile类在模板解析时处理指令和事件
```js
class Compile {
  //我们需要将el和vue本身传入来进行模板解析,el需要用来拿到元素,vue本身则需要其中的data,methds...
  constructor(el, vm) {
    this.$vm = vm
    //拿到我们解析的元素
    this.$el = document.querySelector(el)

    if(this.$el) {
      // 编写一个函数来解析模板
      this.compile(this.$el)
    }
  }
  compile(el) {
    // 遍历el的子节点 判断他们的类型做相应的处理
    const childNodes = el.childNodes
    if(!childNodes) return;
    childNodes.forEach(node => {
      if(node.nodeType === 1) {
        // 元素 处理指令和事件
+       const attrs = node.attributes
+       Array.from(attrs).forEach(attr => {
+         // v-xxx="abc"
+         const attrName = attr.name
+         const exp = attr.value
+         //当属性值以v-开头便认为这是一个指令 这里只处理v-text v-model v-html
+         if(attrName.startsWith('v-')) {
+           const dir = attrName.substring(2)
+           this[dir] && this[dir](node, exp)
+         //事件的处理也非常简单
+         } else if(attrName.startsWith('@')) {
+           const dir = attrName.substring(1)
+           this.eventFun(node, exp, dir)
+         }
+       })
      } else if(this.isInter(node)) {
        // 文本
        this.compileText(node)
      }
      // 在有子元素的情况下需要递归
      if(node.childNodes) {
        this.compile(node)
      }
    })
  }
+ //新添加函数 处理事件
  eventFun(node, exp, dir) {
    node.addEventListener(dir, this.$vm.$methods[exp].bind(this.$vm))
  }
  //node 为修改的元素  exp为获取到大括号内的值的key dir为这边自定义的要执行的操作
  update(node, exp, dir) {
    // 初始化
    const fn = this[dir + 'Update']
    fn && fn(node, this.$vm[exp])
    // 更新  在这里创建watcher 并将更新的函数传进去  这里的val就是watcher触发更新函数时传入的最新值
    new Watcher(this.$vm, exp, function(val) {
      fn && fn(node, val)
    })
  }
  textUpdate(node, val) {
     node.textContent = val
   }
+ //新添加函数 处理v-text
  text(node, exp) {
    this.update(node, exp, 'text')
  }
+ //新添加函数 处理v-html
  html(node, exp) {
    this.update(node, exp, 'html')
  }
+ //新添加函数
  htmlUpdate(node, val) {
    node.innerHTML = val
  }
  // 编译文本
  compileText(node) {
  -   //node.textContent = this.$vm[RegExp.$1]
  +   this.update(node, RegExp.$1, 'text')
  }
+ //新添加函数 处理v-model
  model(node, exp) {
    // console.log(node, exp);
    this.update(node, exp, 'model')
    node.addEventListener('input', (e) => {
      // console.log(e.target.value);
      // console.log(this);
      this.$vm[exp] = e.target.value
    })
  }
  // 是否插值表达式
  isInter(node) {
    return node.nodeType === 3 && /\{\{(.*)\}\}/.test(node.textContent)
  }
}
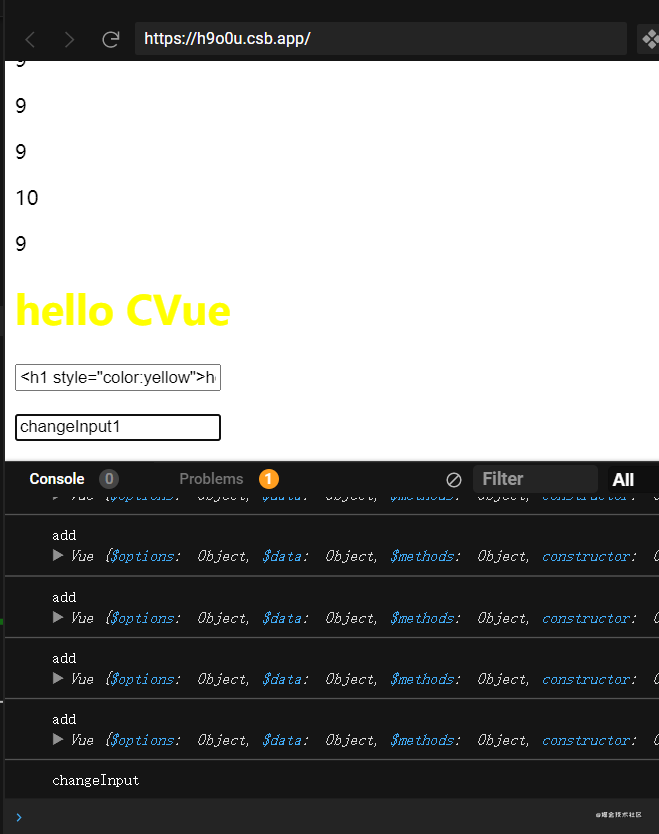
接下来修改html文件查看效果
{{counter}}
{{counter}}
{{counter}}
{{number}}
到这里就编写结束了,页面也达到了预期的效果.
体验网址: https://codesandbox.io/s/dazzling-williams-h9o0u?file=/src/index.js
作为自己学习的笔记,代码中也有很多疏忽,借鉴别人的代码来实现,不过学到了就是自己的.
最后
点个赞再走吧!


