thinkphp3.2
1、安装WAMPServer,到D:\wamp\。
2、下载ThinkPHP3.2.2核心版。解压缩后,放到D:\wamp\www\MyWeb\。打开浏览器,输入网址:http://localhost/MyWeb/
显示:
:)
欢迎使用 ThinkPHP!
[ 您现在访问的是Home模块的Index控制器 ]
3、在mysql的thinkphp数据库中建表并插入数据,用wamp内置的phpmyadmin运行sql:
CREATE TABLE IF NOT EXISTS `think_data` (
`id` int(8) unsigned NOT NULL AUTO_INCREMENT,
`data` varchar(255) NOT NULL,
PRIMARY KEY (`id`)
) ENGINE=MyISAM DEFAULT CHARSET=utf8 ;
INSERT INTO `think_data` (`id`, `data`) VALUES
(1, 'thinkphp'),
(2, 'php'),
(3, 'framework');
4、修改数据库配置参数,打开:D:\wamp\www\MyWeb\Application\Common\Conf\config.php:
<?php
return array(
//'配置项'=>'配置值'
// 添加数据库配置信息
'DB_TYPE' => 'mysql', // 数据库类型
'DB_HOST' => 'localhost', // 服务器地址
'DB_NAME' => 'thinkphp', // 数据库名
'DB_USER' => 'root', // 用户名
'DB_PWD' => '', // 密码
'DB_PORT' => 3306, // 端口
'DB_PREFIX' => 'think_', // 数据库表前缀
);
5、修改 D:\wamp\www\MyWeb\Application\Home\Controller\IndexController.class.php:
<?php
namespace Home\Controller;
use Think\Controller;
class IndexController extends Controller {
public function index(){
$Data = M('Data'); // 实例化Data数据模型
$this->data = $Data->select();
$this->display();
}
}
6、文件夹D:\wamp\www\MyWeb\Application\Home\View下建立文件夹 Index ,然后建文件 index.html:
<html>
<head>
<title>Select Data</title>
</head>
<body>
<volist name="data" id="vo">
{$vo.id}--{$vo.data}<br/>
</volist>
</body>
</html>
好了到此大功告成。再次浏览 http://localhost/MyWeb/:
显示:
1--thinkphp
2--php
3--framework
这个例子不涉及数据库操作。在控制器中设置变量值,通过模板显示该变量值。
1、以第一个例子的文件夹及文件为基础。
2、修改D:\wamp\www\MyWeb\Application\Home\Controller\IndexController.class.php:
<?php
namespace Home\Controller;
use Think\Controller;
class IndexController extends Controller {
public function index(){
$name = 'ThinkPHP';
$this->assign('name',$name);
$this->display();
}
}
3、修改D:\wamp\www\MyWeb\Application\Home\View\Index\index.html:
<html>
<head>
<title>Select Data</title>
</head>
<body>
hello, {$name}!
</body>
</html>
4、浏览网址:http://localhost/MyWeb/index.php/Home/Index/index.html
显示内容:
hello, ThinkPHP!
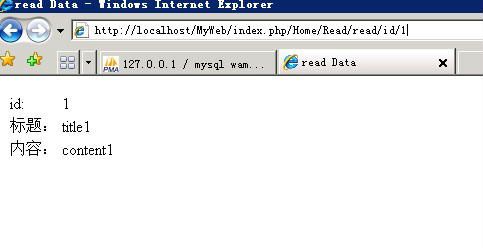
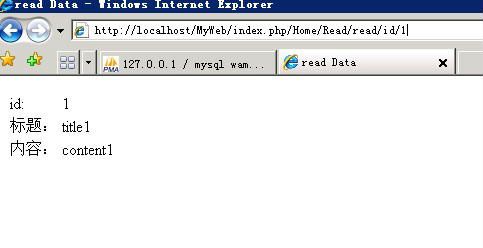
1、先在数据库中创建一个think_form表:
CREATE TABLE IF NOT EXISTS `think_form` (
`id` smallint(4) unsigned NOT NULL AUTO_INCREMENT,
`title` varchar(255) NOT NULL,
`content` varchar(255) NOT NULL,
`create_time` int(11) unsigned NOT NULL,
PRIMARY KEY (`id`)
) ENGINE=MyISAM DEFAULT CHARSET=utf8 ;
插入两条数据,便于我们测试:
INSERT INTO `think_form` (`id`, `title`, `content`, `create_time`) VALUES
(1, 'title1', 'content1', 0),
(2, 'title2', 'content2', 0);
2、建模板文件 D:\wamp\www\MyWeb\Application\Home\View\Read\read.html:
<html>
<head>
<title>read Data</title>
</head>
<body>
<table>
<tr>
<td>id:</td>
<td>{$data.id}</td>
</tr>
<tr>
<td>标题:</td>
<td>{$data.title}</td>
</tr>
<tr>
<td>内容:</td>
<td>{$data.content}</td>
</tr>
</table>
</body>
</html>
3、建控制器:D:\wamp\www\MyWeb\Application\Home\Controller\ReadController.class.php:
<?php
namespace Home\Controller;
use Think\Controller;
class ReadController extends Controller {
public function read($id=0){
$Form = M('Form');
// 读取数据
$data = $Form->find($id);
if($data) {
$this->data = $data;// 模板变量赋值
}else{
$this->error('数据错误');
}
$this->display();
}
}
4、浏览:http://localhost/MyWeb/index.php/Home/Read/read/id/2

