1天搞定SpringBoot+Vue全栈开发
一、SpringBoot基础
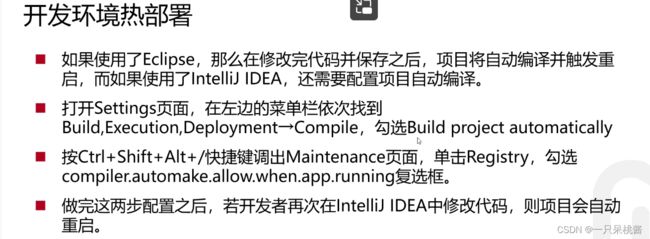
1.开发环境热部署(无需重启服务器,自动编译)
a. 首先在pom文件中加上依赖:
<dependency>
   <groupId>org.springframework.boot</groupId>
   <artifactId>spring-boot-devtools</artifactId>
   <optional>true</optional>
</dependency>
b. 然后在配置文件application.yml文件中开启热部署:
spring:
  devtools:
    restart:
      enabled: true
      additional-paths: src/main/java
      exclude: static/**
c. 开启idea相关配置:
2. 前端上传文件到后端接口
a. 配置映射资源目录—web端直接访问
spring:
 servlet:
    multipart:
      max-file-size: 10MB
  web:
    resources:
      static-locations: /upload/
b. 撰写代码
@RestController
public class FileUploadController {
    @PostMapping("/upload")
    public String up(String nickname, MultipartFile photo, HttpServletRequest request) throws IOException {
        System.out.println(nickname);
        System.out.println(photo.getOriginalFilename());
        System.out.println(photo.getContentType());
        String path= request.getServletContext().getRealPath("/upload/");
        System.out.println(path);
        saveFile(photo,path);
        return "上传成功!";
    }

    public void saveFile(MultipartFile photo, String path) throws IOException {
        File dir= new File(path);
        if(!dir.exists()){
            dir.mkdir();
        }
        File file = new File(path+photo.getOriginalFilename());
        photo.transferTo(file);

    }
}
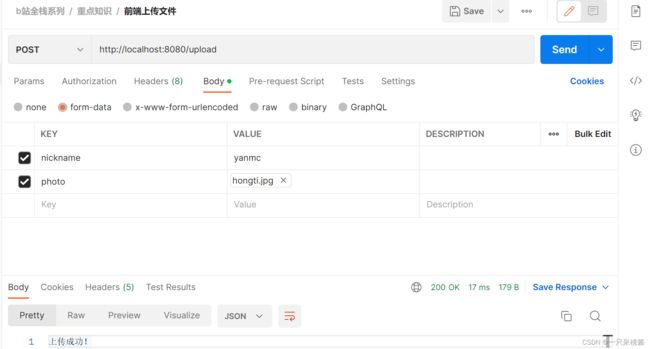
c. postman测试
3. 拦截器

a:一般只设置preHandle,作为执行controller之间的拦截器,先撰写拦截器类
public class LoginInterceptor implements HandlerInterceptor {
    @Override
    public boolean preHandle(HttpServletRequest request, HttpServletResponse response, Object handler) throws Exception {
        if(!(handler instanceof HandlerMethod)){
            return true;
        }
        System.out.println("LoginInterceptor");
        return true;
    }
}
b. 撰写配置类:绑定拦截器和拦截的资源访问路径,切记要加@Controller,才能被整个程序配置到
@Configuration
public class WebConfig implements WebMvcConfigurer {
    @Override
    public void addInterceptors(InterceptorRegistry registry) {
        registry.addInterceptor(new LoginInterceptor()).addPathPatterns("/user/**");
    }
}
4. Swagger接口文档配置
a. pom文件中导入依赖
<dependency>
    <groupId>io.springfox</groupId>
    <artifactId>springfox-swagger2</artifactId>
    <version>2.9.2</version>
</dependency>

<dependency>
    <groupId>io.springfox</groupId>
    <artifactId>springfox-swagger-ui</artifactId>
    <version>2.9.2</version>
</dependency>
b. 撰写Swagger配置类
@Configuration  //告诉Spring容器这是一个配置类
@EnableSwagger2 //开启Swagger的功能
public class Swagger2Config {
    @Bean
    public Docket createRestApi(){
        return new Docket(DocumentationType.SWAGGER_2)
                .apiInfo(apiInfo()).select().apis(RequestHandlerSelectors.basePackage("com"))
                .paths(PathSelectors.any()).build();
    }

    /**
     * 这里为API文档显示的信息
     */
    private ApiInfo apiInfo(){
        return new ApiInfoBuilder().title("演示项目API")
                .description("学习Swagger2的演示项目")
                .build();
    }
}
c. SpringBoot2.6以上版本与Swagger有冲突,需要在application.yml中添加配置
spring:
  mvc:
    pathmatch:
      matching-strategy: ant_path_matcher
5. 分页功能拦截器配置
a. 撰写MybatisPlus拦截器,将page拦截器加入MybatisPlus拦截器中
@Configuration
public class MybatisPlusConfig {
    @Bean
    public MybatisPlusInterceptor paginationInterceptor(){
        MybatisPlusInterceptor interceptor = new MybatisPlusInterceptor();
        PaginationInnerInterceptor paginationInnerInterceptor = new PaginationInnerInterceptor();
        interceptor.addInnerInterceptor(paginationInnerInterceptor);
        return interceptor;
    }
}
b. 分页功能使用:传入pageNum和pageSize,需要有条件查询再撰写相应的wrapper写入null处即可
@Override
public Page<User> selectUserList(Integer pageNum, Integer pageSize){
    Page page=new
    Page(pageNum,pageSize);
    userMapper.selectPage(page,null);
    return page;
}
二、前端Vue组件化开发
利用Vue Cli脚手架去创建vue框架
1. 导入axios,异步跨域访问响应相应配置
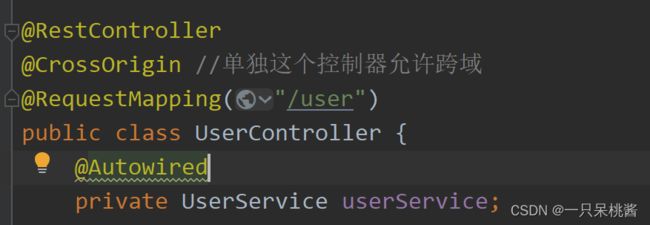
a. 在后台控制器中开启跨域访问:在控制器上方添加@CrossOrigin
b. 在main.js中写入
先执行npm install axios
import axios from "axios";

axios.defaults.baseURL="http://localhost:8088"
Vue.prototype.$http=axios
c. 在具体的vue的methods中使用可以将axios变成this.$http,后面接口URL不再需要baseURL
用=>的原因是=>函数可以继承父类的this,避免还需要保存父类this指针
created() {
    this.$http.get("/user/getAll").then((res)=>{
      console.log(res.data);
      this.tableData = res.data;
    })
  }
this.$http.post("/brands",this.addNewBrand).then((res)=>{
    //如果操作成功,关闭弹层,显示数据
    if(res.data.code == 20011){
      this.dialogVisible = false;
      this.$message.success("添加成功");
    }else if(res.data.code == 20010){
      this.$message.error("添加失败");
    }else{
      this.$message.error(res.data.msg);
    }
  }).finally(()=>{
    this.addNewBrand={};
    this.getAll();
  });
2. 导入ElementUI组件库,设置全局注册
a. npm下载element-ui
在CMD中切入该项目中,运行指令下载组件
npm i element-ui -S
b. 在main.js中导入并全局注册,之后在具体的vue文件中直接使用即可
import ElementUI from 'element-ui';
import 'element-ui/lib/theme-chalk/index.css';

Vue.use(ElementUI); //全局注册
3. 自己创建组件,并使用的具体步骤
a. 在components文件下创建组件:组件名.vue:包含template、script、style三部分内容
<template>
  <div>
    <h1>{{title}}</h1>
    <span>{{rating}}</span>
    <button @click="fun">点击收藏</button>
  </div>
</template>
<script>
export default {
  name:"Hello",
  props:["title","rating"],//相当于参数,谁使用这个组件都可以传递这个参数
  data:function (){
    return{
    }
  },
  methods:{
    fun(){
      alert("收藏成功")
    }
  }
}
</script>
<style>
</style>
**b. 在其他Vue文件中使用Movie组件 **
(1)在Script中导入:
import Movie from "@/components/Movie.vue";

在method下方components内部写上组件注册
components:{
    Movie //做一个注册才能够在上面template中使用该组件
  }

当使用Movie组件时,在上方<template></template>中写入
<Movie v-for="movie in movies" :key="movie.id" :title="movie.title" :rating="movie.rating"></Movie>

data中加入数据:
movies:[
        {id:1,title:"金刚狼1",rating:8.7},
        {id:2,title:"金刚狼2",rating:8.8},
        {id:3,title:"金刚狼3",rating:8.6}
      ]
4. 使用VueRouter路由
a. 首先npm install vue-router@3,注意vue2使用vue-router@3而vue3使用vue-router@4
b. 先写组件

c. 在根页面 App.vue中写组件,因为是跳转路由,所以不需要声明组件、导入组件
<template>
  <div id="app">
    <!--声明路由链接-->
    <router-link to="/discover">发现音乐</router-link>
    <router-link to="/friends">关注</router-link>
    <router-link to="/my">我的音乐</router-link>
    <!--声明路由占位标签-->
    <router-view></router-view>
  </div>
</template>
d.在router文件夹下的index.js中配置路由,将组件和跳转路由路径绑定在一起
import Vue from 'vue'
import VueRouter from 'vue-router'
import Discover from "@/components/Discover.vue";
import Friends from "@/components/Friends.vue";
import My from "@/components/My.vue";

//将VueRouter设置为Vue的插件
Vue.use(VueRouter)

const routes = [
    {
        path:"/",  //表示首页会直接跳转至/discover页面
        redirect:"/discover"
    },
    {
        path: '/discover',
        component:Discover
    },
    {
        path: '/friends',
        component:Friends
    },
    {
        path: '/my',
        component:My
    },
]

const router = new VueRouter({
  mode: 'history',
  base: process.env.BASE_URL,
  routes  //加进去
})

export default router
e.在main.js中加入以下代码
import router from './router'

new Vue({
  router,  //添加router
  render: h => h(App)
}).$mount('#app')
4. 使用VueRouter路由嵌套(在上述3的基础上)
a. 先写嵌套的组件

b. 在组件Discover.vue中嵌套组件
<template>
  <div>
    <!--声明路由链接-->
    <h1>发现音乐</h1>
    <router-link to="/discover/playlist">歌单</router-link>
    <router-link to="/discover/toplist">推荐</router-link>
    <hr>
    <!--声明路由占位标签-->
    <router-view></router-view>
  </div>
</template>

c. 嵌套的组件和路由路径之间绑定关系
在组件Discover 中嵌套TopList和PlayList组件,可以直接写在Discover的children中
    {
        path: '/discover',
        component:Discover,
        children:[
            {
                path: "toplist",
                component:TopList
            },
            {
                path: "playlist",
                component: PlayList
            }
        ]
    }
5. 使用VueRouter路由嵌套时,对于商品详情,所有的商品所需要的组件是一样的,只是组建县市的具体的商品信息不同,创建关系为多个路由对应一个组件的映射
a. My.vue中构造三个路由链接(可以看成是大厅的商品简要信息链接,点击后可以进入商品详情),前端可用v-for来循环生成多个路由链接
<template>
  <div>
    <h1>我的音乐</h1>
    <router-link to="/my/1">商品1</router-link>
    <router-link to="/my/2">商品2</router-link>
    <router-link to="/my/3">商品3</router-link>
    <hr>
    <router-view></router-view>
  </div>
</template>
b. 构造roduct组件获取id
<template>
  <div>
    <h3>商品{{id}}</h3>
  </div>
</template>
<script>
export default {
  props:["id"]
}
</script>
c. 设置/my/* 多个路由路径对应一个组件的映射,并将该id作为props参数传给组件,实际开发中组件获取商品id之后可以通过axios异步请求获取后端数据库中该商品的信息
   {
        path: '/my',
        component:My,
        children: [
            {
                path:':id',
                component:Product,
                props:true
            }
        ]
    }
导航守卫(和后端的拦截器相同作用,比如没登录想要加购物车等行为会被拒绝,然后跳转至登录页面)

程序内部跳转页面
this.$router.push("/user/register")