Graylog单机升级集群
概述
前期可能存在资源紧张,
Graylog以单机形式部署,后期有富有资源时需要进行升级。升级过程中主要是Elasticsearch单机升级集群问题较多。mongoDB和Graylog升级问题较少。
服务器说明
以下配置按照如下服务器进行,生产环境需要自行替换为对应服务器
| IP | 作用 | 备注 |
|---|---|---|
| 10.0.107.55 | elasticsearch、mongodb、graylog原始节点 | 存在历史数据,需要备份 |
| 10.0.204.70 | elasticsearch、mongodb、graylog新增节点1 | 新加入的机器 |
| 10.0.169.95 | elasticsearch、mongodb、graylog新增节点2 | 新加入的机器 |
MongoDB单机升级为副本集
数据备份
| 备份内容 | 文件/文件夹位置 | 是否需要备份 | 操作 |
|---|---|---|---|
| mongoDB数据 | /var/lib/mongo | 是 | cp -r /var/lib/mongo /var/lib/mongo.bak |
| mongoDB配置文件 | /etc/mongod.conf | 是 | cp /etc/mongod.conf /etc/mongod.conf.bak |
| 日志文件 | /var/log/mongodb/mongod.log | ||
| pid文件 | /var/run/mongodb/mongod.pid | ||
注意:
备份前注意磁盘空间,注意文件属组关系。
备份恢复时也需要注意文件权限问题。
修改配置
生成access.keyfile文件
在主节点上【任意节点也可】使用OpenSSL生成授权文件
#!/bin/bash
########################################################
# 脚本描述:mongo集群配置
#######################################################

# 生成access.keyfile
openssl rand -base64 756 > /var/lib/mongo/access.keyfile

# 修改组
chown mongod:mongod /var/lib/mongo/access.keyfile

# 设置文件权限
chmod 600 /var/lib/mongo/access.keyfile
在另外两个节点拷贝文件到本机,并配置文件权限和组信息
# 文件拷贝
scp [email protected]:/var/lib/mongo/access.keyfile /var/lib/mongo/

# 修改组
chown mongod:mongod /var/lib/mongo/access.keyfile

# 设置文件权限
chmod 600 /var/lib/mongo/access.keyfile
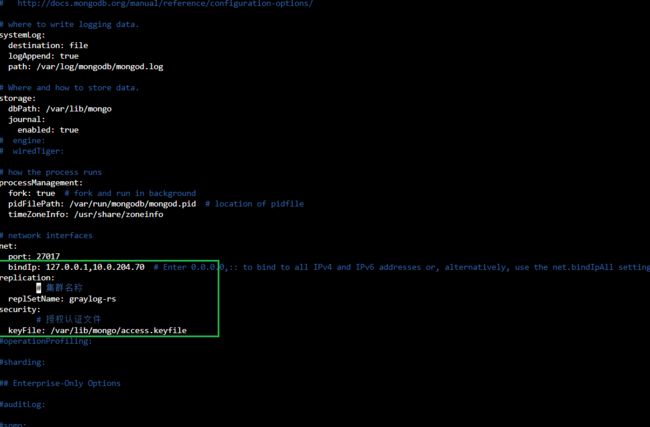
修改/etc/mongod.conf 配置文件
主要修改net、replication、security即可,其他配置不动
net:
  port: 27017
  # 本机ip(可绑定多个网卡地址,用逗号隔开,127.0.0.1用于本地登录,10.0.107.55用于集群配置)
  bindIp: 127.0.0.1,10.0.107.55
replication:
	# 集群名称
  replSetName: graylog-rs
security:
	# 授权认证文件
  keyFile: /var/lib/mongo/access.keyfile
配置集群
本地登录MongoDB初始化集群配置(仅在主节点操作即可)
新增节点需要安装并启动MongoDB,添加节点后,数据会自动同步到新增节点中。
# 进入MongoDB控制台
mongo

# 创建admin库
use admin

# 初始化集群 返回{ "ok" : 1 }
rs.initiate( {
   _id : "graylog-rs",
   members: [
      { _id: 0, host: "10.0.107.55:27017" },
      { _id: 1, host: "10.0.204.70:27017" }
   ]
})

# 设置从节点可读
# rs.slaveOk();已经弃用
rs.secondaryOk();
# 查看状态 初始化集群成功后,会默认显示graylog-rs:SECONDARY>
graylog-rs:SECONDARY> rs.status()
创建库并设置密码
在主节点配置即可
# 进入控制台
mongo

#修改admin用户密码
use admin
db.createUser({user: "admin", pwd: "admin123graylog", roles: ["root"]})
# 授权
db.auth("admin","admin123graylog")

# 可以进行修改密码,但是必须登录
db.changeUserPassword('admin','admin123graylog')

#创建graylog数据库并设置密码
use graylog
db.createUser({
   user: "graylog",
   pwd: "admin123graylog",
  "roles" : [{
      "role" : "dbOwner",
      "db" : "graylog"
    }, {
      "role" : "readWrite",
      "db" : "graylog"
    }]
})
验证
登录从节点查看数据是否存在
# 进入控制台
mongo


use graylog
# 授权
db.auth("graylog","admin123graylog")

# 查看数据;
db.index_sets.find();

graylog-rs:SECONDARY> db.index_sets.find();
{ "_id" : ObjectId("6369f7c9e77f9c348b8d3693"), "title" : "Default index set", "description" : "The Graylog default index set", "regular" : true, "index_prefix" : "graylog", "shards" : 4, "replicas" : 0, "rotation_strategy_class" : "org.graylog2.indexer.rotation.strategies.MessageCountRotationStrategy", "rotation_strategy" : { "type" : "org.graylog2.indexer.rotation.strategies.MessageCountRotationStrategyConfig", "max_docs_per_index" : 20000000 }, "retention_strategy_class" : "org.graylog2.indexer.retention.strategies.DeletionRetentionStrategy", "retention_strategy" : { "type" : "org.graylog2.indexer.retention.strategies.DeletionRetentionStrategyConfig", "max_number_of_indices" : 20 }, "creation_date" : ISODate("2022-11-08T06:31:37.982Z"), "index_analyzer" : "standard", "index_template_name" : "graylog-internal", "index_template_type" : null, "index_optimization_max_num_segments" : 1, "index_optimization_disabled" : false, "field_type_refresh_interval" : NumberLong(5000), "writable" : true }......
ElasticSearch单机升级集群
- 以原始节点作为主节点,配置集群,删除/esdata/nodes/0/_state目录下manifest开头数据(删除或重命名),启动主节点
- 启动其他节点,等待同步
- 通过其他节点查询数据。
- 后续方案和集群部署一致。
数据备份
| 备份内容 | 文件/文件夹位置 | 是否需要备份 | 操作 |
|---|---|---|---|
| es数据 日志 | /data/elasticsearch | 是 | cp -r /data/elasticsearch /data/elasticsearch.bak |
| es配置文件 | /etc/elasticsearch | 是 | cp -r /etc/elasticsearch /etc/elasticsearch.bak |
注意:
备份前注意磁盘空间,注意文件属组关系。
备份恢复时也需要注意文件权限问题。
修改配置
生成elastic-certificates.p12文件
在主节点上【任意节点也可】使用/usr/share/elasticsearch/bin/elasticsearch-certutil生成证书文件。需要输入密码,输入admin123graylog
注意证书文件的权限问题,es需要有证书文件的读写权限
# 生成证书
/usr/share/elasticsearch/bin/elasticsearch-certutil ca --out /etc/elasticsearch/elastic-certificates.p12
# 给读写权限
chmod +660 /etc/elasticsearch/elastic-certificates.p12

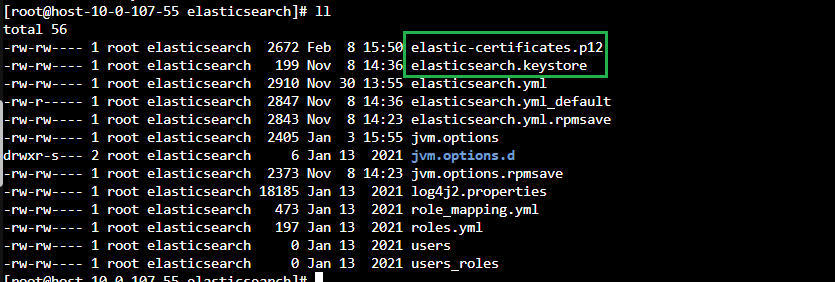
将生成的授权文件拷贝到其他节点的配置文件目录下,并配置文件权限和组信息
包括elastic-certificates.p12和elasticsearch.keystore
# 文件拷贝 拷贝过去带有权限
scp -rp /etc/elasticsearch/elastic-certificates.p12 [email protected]:/etc/elasticsearch/
scp -rp /etc/elasticsearch/elasticsearch.keystore [email protected]:/etc/elasticsearch/
修改/etc/elasticsearch/elasticsearch.yml 配置文件
主要修改cluster.name、node.name、network.host、transport.port、discovery.seed_hosts、cluster.initial_master_nodes即可,其他配置不动
各个节点都需要配置,集群名称在示例中配置为graylog【与原有Elasticsearch中集群名称一致】
# 在7.X之后的版本集群角色配置弃用,添加后会不断打印告警日志
# node.master: false
# node.data: true

# 集群名称
cluster.name: graylog
# 节点名称(多节点不重复)
node.name: graylog01
# 数据和日志文件路径(注:需要提前存在目录,使用脚本安装会自动创建)
path.data: /data/elasticsearch/data
path.logs: /data/elasticsearch/logs
# 本机ip
network.host: 10.0.107.55
# api端口(接口使用)
http.port: 9200
# 集群端口(数据同步调度使用)
transport.port: 9300
# 集群发现(各节点配置相同)
discovery.seed_hosts: ["10.0.107.55:9300", "10.0.204.70:9300","10.0.169.95:9300"]
# 初始化主节点(各节点配置相同)。cluster.initial_master_nodes。当集群初次启动时, 需要在 cluster.initial_master_nodes 配置一个或多个集群A内的节点, 用于在es集群初始化时选举主节点master
cluster.initial_master_nodes: ["graylog01"]
另外两个节点也需要配置,以下是数据查看配置的结果。
# 查看配置数据
cat  /etc/elasticsearch/elasticsearch.yml | grep -v "^#" | grep -v "^$"

cluster.name: graylog
node.name: graylog02
path.data: /data/elasticsearch/data
path.logs: /data/elasticsearch/logs
network.host: 10.0.204.70
http.port: 9200
transport.port: 9300
discovery.seed_hosts: ["10.0.107.55:9300", "10.0.204.70:9300","10.0.169.95:9300"]
cluster.initial_master_nodes: ["graylog01"]
# 查看配置数据
cat  /etc/elasticsearch/elasticsearch.yml | grep -v "^#" | grep -v "^$"

cluster.name: graylog
node.name: graylog01
path.data: /data/elasticsearch/data
path.logs: /data/elasticsearch/logs
network.host: 0.0.0.0
http.port: 9200
transport.port: 9300
discovery.seed_hosts: ["10.0.107.55:9300", "10.0.204.70:9300","10.0.169.95:9300"]
cluster.initial_master_nodes: ["graylog01"]
密码配置
xpack密码配置
/etc/elasticsearch/elasticsearch.yml文件,加入以下配置(各个节点均添加配置)
xpack.security.enabled: true
xpack.security.transport.ssl.enabled: true
xpack.security.transport.ssl.verification_mode: certificate
xpack.security.transport.ssl.keystore.path: /etc/elasticsearch/elastic-certificates.p12
xpack.security.transport.ssl.truststore.path: /etc/elasticsearch/elastic-certificates.p12
重置密码(主节点操作)
在主节点配置即可 输入密码,例如: admin123graylog
# 修改密码
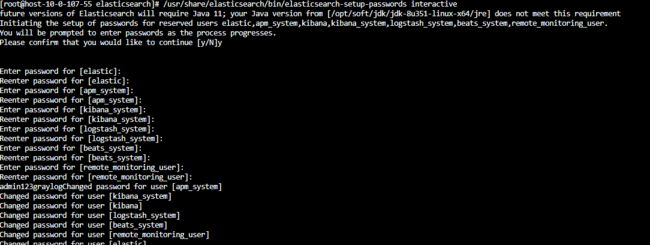
/usr/share/elasticsearch/bin/elasticsearch-setup-passwords interactive

# 输入如下,在如下内容中输入密码即可
future versions of Elasticsearch will require Java 11; your Java version from [/opt/soft/jdk/jdk-8u351-linux-x64/jre] does not meet this requirement
Initiating the setup of passwords for reserved users elastic,apm_system,kibana,kibana_system,logstash_system,beats_system,remote_monitoring_user.
You will be prompted to enter passwords as the process progresses.
Please confirm that you would like to continue [y/N]y


Enter password for [elastic]:
Reenter password for [elastic]:
Enter password for [apm_system]:
Reenter password for [apm_system]:
Enter password for [kibana_system]:
Reenter password for [kibana_system]:
Enter password for [logstash_system]:
Reenter password for [logstash_system]:
Enter password for [beats_system]:
Reenter password for [beats_system]:
Enter password for [remote_monitoring_user]:
Reenter password for [remote_monitoring_user]:
admin123graylogChanged password for user [apm_system]
Changed password for user [kibana_system]
Changed password for user [kibana]
Changed password for user [logstash_system]
Changed password for user [beats_system]
Changed password for user [remote_monitoring_user]
Changed password for user [elastic]
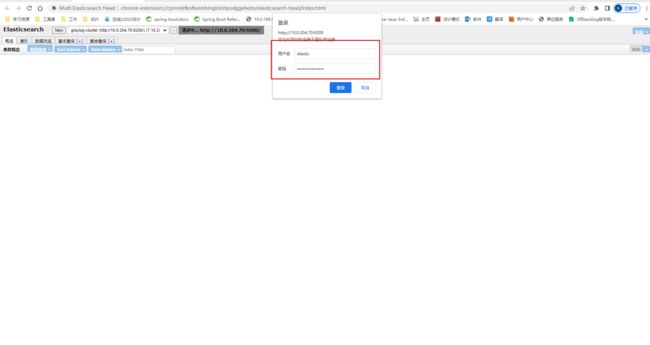
验证
用户名:elastic
密码:admin123graylog
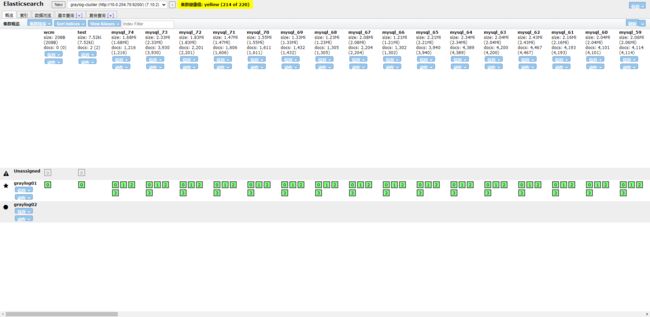
可以从其他节点查询是否有数据。
Graylog单机升级集群
注意:
graylog的集群需要给每个节点安装时钟同步服务
配置文件
各个节点均修改配置文件,启动服务即可
注意主节点和从节点不同配置项is_master、http_bind_address、http_publish_uri
# 主节点为true,从节点为false
is_master = true
# graylog 绑定地址(各节点为当前ip)
http_bind_address = 10.0.107.55:9000
# graylog api 接口(各节点为当前ip) 默认为http://$http_bind_address/  可不配置
http_publish_uri = http://10.0.107.55:9000/
# 打开gray的跨域支持
http_enable_cors = true
# es 集群地址(各节点相同,密码中的@和:符号需要转义,参考)
elasticsearch_hosts = http://elastic:[email protected]:9200,http://elastic:[email protected]:9200,http://elastic:[email protected]:9200
# mongo 集群地址(各节点相同,只需要写入单个节点的ip和端口,密码中的@:符号需要转义,参考https://www.mongodb.com/docs/manual/reference/connection-string/)
mongodb_uri = mongodb://graylog:[email protected]:27017/graylog?replicaSet=graylog-rs
负载均衡配置
graylog通过nginx实现服务后台接口与input推送接口的负载均衡
nginx打开stream模块
Nginx要求:configure编译时增加配置--with-stream
增加nginx配置
nginx.conf新增Stream相关内容
# 注意转发tcp和udp端口不能放在http块内,stream块和http块为同级配置
stream {
  upstream server_input1{
    server 10.0.107.55:12201;
    server 10.0.204.70:12201;
    server 10.0.169.95.70:12201;
  }

  server {
    # 推送TCP端口
    #listen    22201;
    # 推送UDP端口
    listen    22201 udp;
    proxy_pass    server_input1;
  }
}
单独配置文件配置graylog服务转发
http {
  default_type  application/octet-stream;

  log_format  main  '$remote_addr - $remote_user [$time_local] "$request" '
    '$status $body_bytes_sent "$http_referer" '
    '"$http_user_agent" "$http_x_forwarded_for"';

  #access_log  /var/log/nginx/access.log  main;

  sendfile        on;
  #tcp_nopush     on;

  keepalive_timeout  65;

  #gzip  on;

  upstream graylog_servers{
    server 10.0.107.55:9000;
    server 10.0.169.95:9000;
    server 10.0.204.70:9000;
  }

  server {
    listen 19000;
    server_name  10.0.107.55;
    location / {
      root   html;
      index  index.html index.htm;
      proxy_set_header Host $http_host;
      proxy_set_header X-Forwarded-Host $host;
      proxy_set_header X-Forwarded-Server $host;
      proxy_set_header X-Forwarded-For $proxy_add_x_forwarded_for;
      proxy_set_header X-Graylog-Server-URL http://graylog_servers/;
      proxy_pass       http://graylog_servers;
    }
  }
}
关闭nginx,并指定配置文件重启(注意一定要关闭并重启,否则新增的转发监控端口不生效)
nginx -s stop
nginx -c /usr/local/nginx/conf/nginx.conf
验证
tcp端口验证使用telnet命令即可udp端口验证需要使用netcat工具
nc -vuz 10.0.204.70 22201
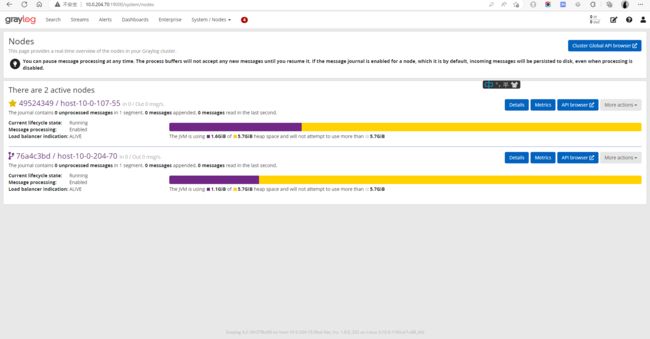
graylog验证,关闭主节点服务测试日志是否可以正常推送
参考资料
- 记一次Mongodb数据从单机迁移到集群过程_大往生指导员的博客-CSDN博客
- ES数据迁移_唯梦想与美食不可辜负的博客-CSDN博客
