搭建zabbix4.0监控服务实例
一.Zabbix服务介绍
1.1服务介绍
Zabbix是基于WEB界面的分布式系统监控的开源解决方案,Zabbix能够监控各种网络参数,保证服务器系统安全稳定的运行,并提供灵活的通知机制让SA快速定位并解决存在的各种问题。
1.2 Zabbix优点
Zabbix分布式监控系统的优点如下:
- 支持自动发现服务器和网络设备
- 支持底层自动发现
- 分布式的监控体系和集中式的WEB管理
- 支持主动监控和被动监控模式
- 服务器端支持多种操作系统
- Agent客户端支持多种操作系统
- 基于SNMP、IPMI接口方式、Agent方式
- 安全的用户认证和权限配置
- 基于WEB的管理方法,支持自定义事件和邮件、短信发送
- 高水平的业务视图监控资源,支持日志审计,资产管理等功能
- 支持高水平API二次开发、脚本监控、自Key定义、自动化运维整合调用
二.实验环境
[root@localhost ~]# cat /etc/redhat-release
CentOS Linux release 7.9.2009 (Core)
关闭安全上下文
[root@localhost ~]# setenforce 0
虚拟机IP
[root@localhost ~]# hostname -I
192.168.196.128 192.168.122.1
是否可以ping通服务
[root@localhost ~]# ping -c1 -w 1 www.baidu.com
PING www.a.shifen.com (14.119.104.189) 56(84) bytes of data.
64 bytes from 14.119.104.189 (14.119.104.189): icmp_seq=1 ttl=53 time=36.5 ms
清空防火墙规则
[root@localhost ~]# iptables -F
以上环境都布置好之后,就可开始安装Zabbix服务了。
三.部署Zabbix监控
3.1 安装LAMP环境所需要的软件包
yum install httpd httpd-devel mariadb mariadb-server php php-mysql php-devel php-common php-gd php-mbstring php-xml php-bcmath php-cli php-pear -y
当然为了防止有些包可能为安装上,可以多执行一次上面的命令。
安装好之后,可以看看包是不是都已经安装了。

都安装了之后,继续执行下一步操作。
3.2 下载Zabbix软件包
rpm -Uvh https://repo.zabbix.com/zabbix/4.0/rhel/7/x86_64/zabbix-release-4.0-1.el7.noarch.rpm
点击安装之后进度条到了100%说明是已经成功了。

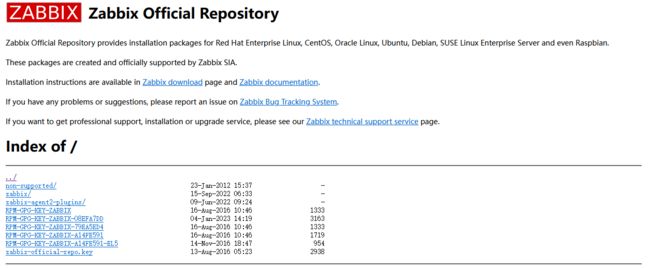
如果需要下载其他Zabbix的rpm包可以到Zabbix官网去找。
Zabbix官网的repo源–点击这里

Zabbix的rpm包下载好后,可以开始安装Zabbix一系列程序了。
3.3 安装Zabbix程序
yum install zabbix-server-mysql zabbix-web-mysql zabbix-agent -y
因为使用的是Zabbix官网的源,安装过程中会有些许慢,可以稍微等一会;当然也可直接替换使用国内的源。
3.4 启动Apache和数据库
启动Apache和数据库服务是为了下一步做准备。
systemctl start httpd mariadb
systemctl enable httpd mariadb
3.5 创建数据库&密码授权
很奇怪这一步为什么不需要找mysql的初始密码,因为安装的mariadb不用找密码,可以直接进入数据库的。
[root@localhost ~]# mysql
Welcome to the MariaDB monitor.  Commands end with ; or \g.
Your MariaDB connection id is 2
Server version: 5.5.68-MariaDB MariaDB Server

Copyright (c) 2000, 2018, Oracle, MariaDB Corporation Ab and others.

Type 'help;' or '\h' for help. Type '\c' to clear the current input statement.
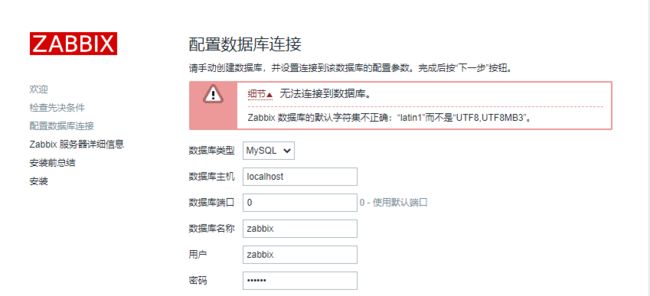
#创建zabbix的数据库,并且需要将字符集做修改,否则在网页上会显示默认的字符集不正确
MariaDB [(none)]> create database zabbix character set utf8 collate utf8_bin;
Query OK, 1 row affected (0.00 sec)
#授权数据库并且设置账号密码
MariaDB [(none)]> grant all on zabbix.* to 'zabbix'@'localhost' identified by 'GUANzhu123//';
Query OK, 0 rows affected (0.00 sec)

MariaDB [(none)]> exit
Bye
3.6 导入基础数据库
-p接的密码填写之前创建数据库的密码
zcat /usr/share/doc/zabbix-server-mysql-4.0.44/create.sql.gz|mysql -uzabbix -pGUANzhu123// zabbix
等待片刻后,可以重新进入数据库查看Zabbix数据是否成功导入到数据库了。
[root@localhost ~]# mysql
Welcome to the MariaDB monitor.  Commands end with ; or \g.
Your MariaDB connection id is 4
Server version: 5.5.68-MariaDB MariaDB Server

Copyright (c) 2000, 2018, Oracle, MariaDB Corporation Ab and others.

Type 'help;' or '\h' for help. Type '\c' to clear the current input statement.

MariaDB [(none)]> use zabbix
Reading table information for completion of table and column names
You can turn off this feature to get a quicker startup with -A

Database changed
MariaDB [zabbix]> show tables;
+----------------------------+
| Tables_in_zabbix           |
+----------------------------+
| acknowledges               |
| actions                    |
| alerts                     |
| application_discovery      |
| application_prototype      |
| application_template       |
| applications               |
| auditlog                   |
| auditlog_details           |
| autoreg_host               |
  ......#一共有144个表,为了方便查看,我删除了一些
+----------------------------+
144 rows in set (0.00 sec)

MariaDB [zabbix]> exit
Bye
到这里Zabbix监控服务已经是配置好一大半了。
3.7 修改Zabbix配置文件
还记得之前授权数据库的信息不?

配置文件的时候需要用到,分别是这三个值:
DBName=zabbix
DBUser=zabbix
DBPassword=GUANzhu123//
这里密码填写您自己设置的密码
#Zabbix配置文件在这里,若不记得,可以使用这个查看
[root@localhost ~]# rpm -qc zabbix-server-mysql
/etc/logrotate.d/zabbix-server
/etc/zabbix/zabbix_server.conf
[root@localhost ~]# vim /etc/zabbix/zabbix_server.conf
[root@localhost ~]# grep "DBPassword" !$
grep "DBPassword" /etc/zabbix/zabbix_server.conf
### Option: DBPassword
DBPassword=GUANzhu123//
3.8修改Zabbix文件
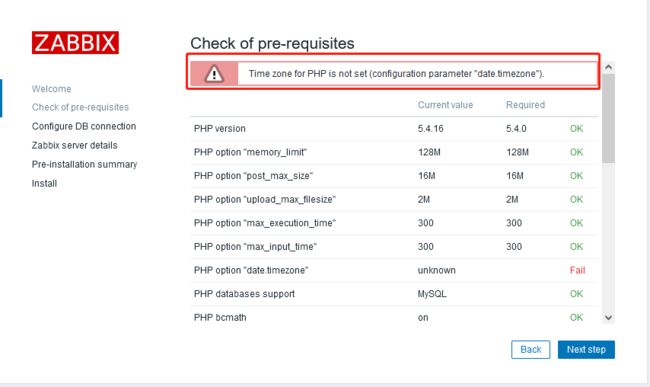
注意这里是还需要修改一个文件的,要将PHP的时区修改成上海。
[root@localhost ~]# grep "timezone" !$
grep "timezone" /etc/httpd/conf.d/zabbix.conf
        php_value date.timezone Asia/Shanghai
3.9 重启服务
systemctl restart httpd zabbix-server zabbix-agent
到这里已经不需要在虚拟机上配置了,在网页上执行试试吧
四.网页部署
#在网页上输入您本地的IP/zabbix/即可访问监控
ZABBIX默认的账号密码是:
Username:Admin
Password:zabbix


