Spring Security控制权限
目录
一 、认识SpringSecurity
二、环境搭建 认证和授权
1、引入Spring Security模块
2、编写Spring Security配置类
3、定制请求的授权规则
4、在SecurityConfigure中开启自动配置的登录功能
5、自定义认证规则
三 、注销
1、开启自动配置的注销功能
2、增加一个注销按钮
3、自定义注销(注销成功后跳转到指定页面)
四、权限控制
1、导入依赖
2、 修改前端页面
1、导入命名口空间
2、修改导航栏,增加认证判断
3、解决注销404了
3、角色功能模块
五、定制登录页面
1、开启记住我功能
2、自定义登录首页
一 、认识SpringSecurity
Spring Security 是针对Spring项目的安全框架,也是Spring Boot底层安全模块默认的技术选型,他可以实现强大的Web安全控制,对于安全控制,我们仅需要引入 spring-boot-starter-security 模块,进行少量的配置,即可实现强大的安全管理。
记住几个类:
WebSecurityConfigurerAdapter: 自定义Security策略
AuthenticationManagerBuilder:自定义认证策略
@EnableWebSecurity:开启WebSecurity模式 @Enablexxx 开启xx模式
Spring Security的两个主要目标是 “认证” 和 “授权”(访问控制)。
“认证”(Authentication)
身份验证是关于验证您的凭据,如用户名/用户ID和密码,以验证您的身份。
身份验证通常通过用户名和密码完成,有时与身份验证因素结合使用。
“授权” (Authorization)
授权发生在系统成功验证您的身份后,最终会授予您访问资源(如信息,文件,数据库,资金,位置,几乎任何内容)的完全权限。
二、环境搭建 认证和授权
1、引入Spring Security模块
            org.springframework.boot
            spring-boot-starter-security
2、编写Spring Security配置类
package com.kuang.config;
import  org.springframework.security.config.annotation.web.builders.HttpSecurity;
import  org.springframework.security.config.annotation.web.configuration.EnableWebSecurity;
import  org.springframework.security.config.annotation.web.configuration.WebSecurity
ConfigurerAdapter;
@EnableWebSecurity // 开启WebSecurity模式
public class SecurityConfig extends WebSecurityConfigurerAdapter {
@Override
protected void configure(HttpSecurity http) throws Exception {
}
}
3、定制请求的授权规则
        //请求授权的规则    如果没有权限会报403错误(没有权限)
        http.authorizeRequests().antMatchers("/").permitAll()//所有用户都可以访问首页
                .antMatchers("/level1/**").hasRole("vip1")//vip1的用户可以访问level1下的资
                .antMatchers("/level2/**").hasRole("vip2")//vip2的用户可以访问level2下的资
                .antMatchers("/level3/**").hasRole("vip3");//vip3的用户可以访问level3下的资
4、在SecurityConfigure中开启自动配置的登录功能
    //没有权限访问会默认到登录页面,需要开启登录的页面
        http.formLogin();
5、自定义认证规则
        @Override//认证
        protected void configure(AuthenticationManagerBuilder auth) throws Exception {
        //下面这些数据可以从数据库中读取 也可以从内存中读取  {noop}是对密码进行加密 不加密会报500错误
        auth.inMemoryAuthentication()
                .withUser("rk").password("{noop}123456").roles("vip2","vip3")
                .and()
                .withUser("root").password("{noop}123456").roles("vip1","vip2","vip3")
                .and()
                .withUser("guest").password("{noop}123456").roles("vip1");
    }
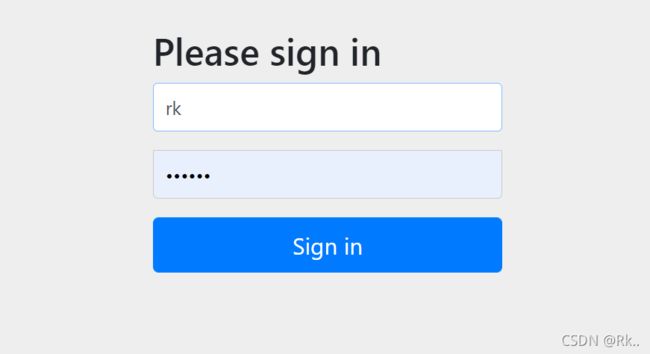
测试 :使用rk进行登录
访问:level1的资源
访问level2、level3
三 、注销
1、开启自动配置的注销功能
//定制请求的授权规则
@Override
protected void configure(HttpSecurity http) throws Exception {
    //开启自动配置的注销的功能
    // /logout 注销请求
    http.logout();
}
2、增加一个注销按钮
路径为:/logout
注销
3、自定义注销(注销成功后跳转到指定页面)
// .logoutSuccessUrl("/"); 注销成功来到首页
http.logout().logoutSuccessUrl("/");
四、权限控制
需求:
1、用户没有登录的时候,导航栏上只显示登录按钮,用户登录之后,导航栏可以显示登录的用户信息及注销按钮
2、比如rk这个用户,它只有 vip2,vip3功能,那么登录则只显示这两个功能,而vip1的功能菜单不显示
thymeleaf和springsecurity整合包
1、导入依赖
    org.thymeleaf.extras
    thymeleaf-extras-springsecurity5
    3.0.4.RELEASE
2、 修改前端页面
1、导入命名口空间
xmlns:sec="http://www.thymeleaf.org/thymeleaf-extras-springsecurity5"2、修改导航栏,增加认证判断


