Docker Compose部署实战
Compose
官方编排工具。简单来说就是项目部署。详情可以参考之前的文章Docekr三剑客之 Docekr compose
一、安装和卸载
1.1 安装
在 Linux 上的也安装十分简单,从 GitHub Release 处直接下载编译好的二进制文件即可。
例如,在 Linux 64 位系统上直接下载对应的二进制包。
// 先把docker-compose文件dump到当前目录
wget https://github.com/docker/compose/releases/download/v2.12.2/docker-composelinux-x86_64
// 然后拷贝到/usr/bin/
$ sudo cp -arf docker-compose-linux-x86_64 /usr/bin/docker-compose
$ sudo chmod +x /usr/bin/docker-compose
1.2 卸载
如果是二进制包方式安装的,删除二进制文件即可。
sudo rm /usr/bin/docker-compose
二、实战部署
2.1 下载代码
git clone https://gitee.com/nickdemo/helloworld.git
2.2 在同一级目录下创建Dockerfile.compose文件
vim Dockerfile.compose
FROM golang:1.18
ADD ./helloworld /go/src/helloworld/
WORKDIR /go/src/helloworld
RUN go env -w GOPROXY=$http_proxy
RUN CGO_ENABLE=0 GOOS=linux GOARCH=amd64 go build -o app .

FROM ubuntu:latest
COPY ./helloworld/curl-amd64 /usr/bin/curl
RUN chmod +x /usr/bin/curl
ENV env1=env1value
ENV env2=env2value
WORKDIR /app/
COPY --from=0 /go/src/helloworld/app ./
EXPOSE 80
ENTRYPOINT ["./app"]
CMD ["--param1=p1","--param2=p2"]
2.3 在同一级目录下创建docker-compose.yaml文件
vim docker-compose.yaml
version: '3.7'
# 定义项目中的服务
services:
  # 名为web的服务
  web:
    # 根据配置构建镜像
    build:
      # 构建镜像的上下文
      context: .
      # 构建镜像的dockerfile
      dockerfile: Dockerfile.compose
      # 构建参数
      args:
        http_proxy: https://proxy.golang.com.cn,https://goproxy.cn,direct
      # 设置labels元数据
      labels:
        myhello: 1.0
        com.example.description: "Accounting webapp"
      # 为构建的镜像指定tags
      tags:
      - "myhello:1.0.0"
      - "localhost:5000/myhello:1.0.0"
    # 指定容器名称
    container_name: "myweb"
    # 设置容器依赖关系,表示web服务依赖于redis服务
    depends_on:
    - redis
    # 运行容器的端口映射
    ports:
    - "80:80"
    # 覆盖容器的cmd指令
    command: ["--param1=1","--param2=2"]
    # 设置环境变量
    environment:
      env1: "a"
      env2: "b"
    # 健康检查
    healthcheck:
      # 检查命令
      #test: ["CMD","curl","http://localhost/health"]
      test: ["CMD-SHELL","statuscode=`curl -o /dev/null -s -w %{http_code} http://localhost/health`; [ $$statuscode -le 400 ] || exit 1"]
      # 检查时间间隔
      interval: 5s
      # 检查超时时间
      timeout: 1s
      # 重试次数,即连续失败指定次数则判定为不健康
      retries: 5
      # 设置容器初始化时间,再次期间不报告健康检查状态
      start_period: 5s
    # 使用定义的网络
    networks:
    - mynetwork
    - net1
  # 名为 redis的服务
  redis:
    # 服务启动镜像
    image: "redis:latest"
    container_name: "myredis"
    # 容器暴露端口
    expose:
    - 6379
    # 指定容器启动命令,即覆盖cmd指令
    command: redis-server --requirepass 123456
    # 数据卷设置
    volumes:
    - /data
    networks:
    - mynetwork
    - net2
# 定义网络
networks:
  net1: {}
  net2: {}
  mynetwork:
    ipam:
      driver: default
      config:
      - subnet: "172.16.238.0/24"
2.4 验证docker-compose.yaml文件正确性
注意: 以下 docker-compose 命令都是在项目目录下,否则就需要指定相关配置文件。
docker-compose -f docker-compose.yaml config
如果config命令原样输出配置文件,就说明配置文件没有问题了。
2.5 启动应用程序
建议在项目文件夹下操作docker-compose,否则就需要显式指定项目名称和配置文件了。启动前确定配置文件中的端口没有被占用。
docker-compose up -d
2.6 查看容器名称和服务名称
myredis 和 myweb 是容器的名字,docker-compose 操作的对象是服务(redis、web)。
docker-compose ps
curl http://localhost/health
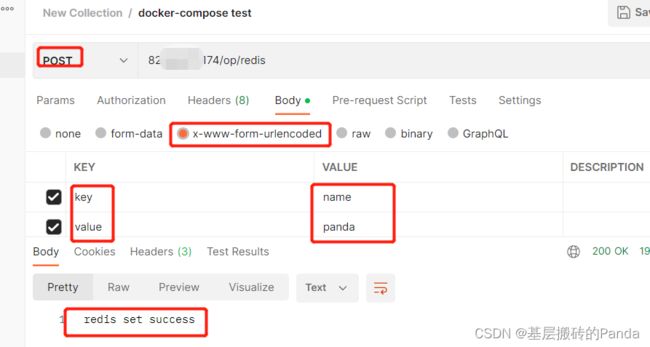
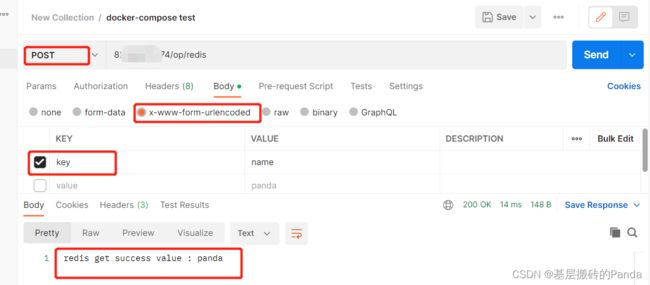
验证redis服务,通过 key value 设置键值对,再通过key获取对应的值。


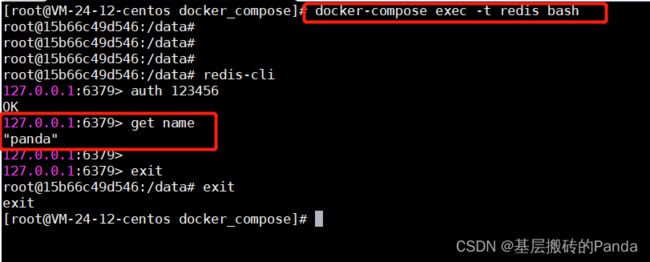
进入到redis容器,也能成功查看name的值。

2.7 重新编译
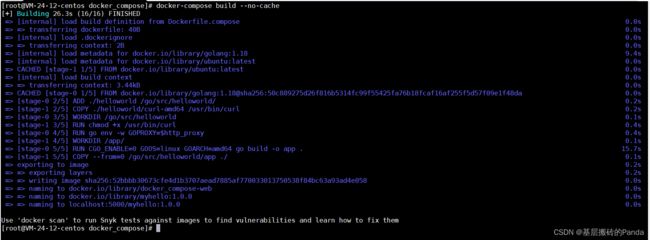
修改配置文件以及代码后需要重新编译,可以使用–no-cahe 指定不需要使用缓存。
docker-compose build --no-cache
2.8 重启项目
docker-compose restart
容器呢,不会因为你重新编译了新镜像,就去更换启动镜像。除非down掉,再up。
2.9 关闭项目
docker-compose down
2.10 停止及启动指定服务
docker-compose stop

docker-compose start server_name
如果不指定服务名,默认停止/启动所有服务。
推荐一个零声学院免费教程,个人觉得老师讲得不错,
分享给大家:[Linux,Nginx,ZeroMQ,MySQL,Redis,
fastdfs,MongoDB,ZK,流媒体,CDN,P2P,K8S,Docker,
TCP/IP,协程,DPDK等技术内容,点击立即学习:


