Flutter Modul集成到IOS项目
Flutter Modul集成到IOS项目中
- 1. 创建一个Flutter Modul
- 2.在既有应用中集成Flutter Modul
-
- 2.1 Flutter的构建模式选择
-
- 2.1.1 debug模式
- 2.1.2 Release模式
- 2.1.3 Podfile 模式
- 2.2 Cocoapods管理依赖库集成方式
- 2.3 直接在Xcode中集成framework
- 2.4 Local Network Privacy Permissions(本地网络权限)
官方网站资料:Flutter modul集成到现有IOS项目
中文官网资料:Flutter modul集成到现有IOS项目
Flutter UI组件可以逐渐地内嵌到你现有的IOS中,官方提供一下三种方法:
- Use the CocoaPods dependency manager and installed Flutter SDK. In this case, the flutter_module is compiled from the source each time the app is built. (Recommended.) (使用Cocoapods依赖管理器安装Flutter SDK,每次构建应用都会从源码中编译flutter_modul 官方推荐)
- Create frameworks for the Flutter engine, your compiled Dart code, and all Flutter plugins. Here, you manually embed the frameworks, and update your existing application’s build settings in Xcode. This can be useful for teams that don’t want to require every developer to have the Flutter SDK and Cocoapods installed locally.(创建一个框架,把 Flutter 引擎、已编译的 Dart 代码和所有 Flutter 插件都放进去 这种方式你可以手动嵌入这个框架,并在 Xcode 中更改现有的应用的构建设置。如果不想要求开发团队的每一位成员都在本地安装 Flutter SDK 和 Cocoapods,这种方式比较适用。)
- Create frameworks for your compiled Dart code, and all Flutter plugins. Use CocoaPods for the Flutter engine. With this option, embed the frameworks for your application and the plugins in Xcode, but distribute the Flutter engine as a CocoaPods podspec. This is similar to the second option, but it provides an alternative to distributing the large Flutter.xcframework.(为已编译的 Dart 代码和所有 Flutter 插件创建一个框架,对 Flutter 引擎使用 CocoaPods 来管理 这种方式是将应用内容和插件作为内嵌的框架,但将 Flutter 引擎作为 CocoaPods podspec 分发。这有点类似第二种方式,但是它为分发大型的 Flutter.xcframework 文件提供了替代方案。)
开发环境必须要满足Flutter对Mac OS系统的版本要求,并且已经安装Xcode, Flutter支持IOS11及以上。此外还需要1.10版本以上的Cocoapods。
1. 创建一个Flutter Modul
为了将Flutter集成到引用内,参考上面的任意方法创建一个Flutter Modul.执行命令行:flutter create --template module cocaopods_test(名称), 如果你是使用上面的第一种方法,来集成Flutter Modul,那么你应在与现有IOS应用工程父目录中创建这个Flutter Modul
在这个目录中,你可以像在其它 Flutter 项目中一样,执行 flutter 命令。比如 flutter run --debug 或者 flutter build ios。同样,你也可以通过 Android Studio/IntelliJ 或者 VS Code 中的 Flutter 和 Dart 插件运行这个 module,在集成到现有应用前,这个项目在 Flutter module 中包含了一个单视图的示例代码,对 Flutter 侧代码的测试会有帮助。
Flutter Modul工程结构目录和Flutter项目基本类似:
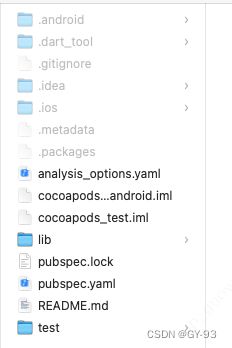
添加你的 Dart 代码到 lib/ 目录。
添加 Flutter 依赖到 my_flutter/pubspec.yaml,包括 Flutter packages 和 plugins。
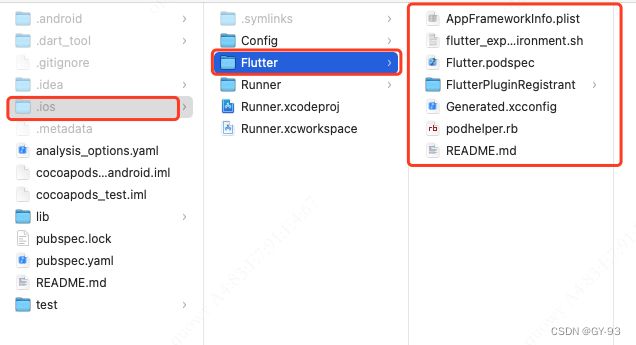
.ios/ 隐藏文件夹包含了一个 Xcode workspace,用于单独运行你的 Flutter module。它是一个独立启动 Flutter 代码的壳工程,并且包含了一个帮助脚本,用于编译 framewroks 或者使用 CocoaPods 将 Flutter module 集成到你的既有应用。
提示:IOS的代码要添加到你既又的应用或者Flutter Plugin中, 而不是Flutter Modul的
.ios/ 目录下。.ios/ 下的改变不会集成到你的既有应用,并且这有可能被 Flutter 重写
由于.ios/目录是自动生成的,因此请勿对其进行版本控制。在新机器上构建 module 时,请在使用 Flutter module 构建 iOS 项目之前,先于 cocaopods_test 目录运行 flutter pub get 以生成 .ios/ 目录。
2.在既有应用中集成Flutter Modul
在你的Modul开发完成后,你能使用上面秒速的三种方式来集成Flutter Modul
提示: 你可以模拟器上和真机上运行Debug模式,在真机上运行Release模式。 文档资料-Flutter 的构建模式
使用Flutter会增加应用体积
2.1 Flutter的构建模式选择
- 首先这里有三种模式供我们选择, 简单介绍下三种构建模式:
- 开发过程中需要使用
热重载功能,请选择debug模式。 - 当你需要分析性能的时候, 选择使用
podfile构建模式。 - 发布应用的时候,需要使用
release构建模式。
- 开发过程中需要使用
2.1.1 debug模式
在Debug模式下,app可以被安装在物理设备上,仿真器或则模拟器上运行测试。Debug模式,也意味着断点是开启的、服务扩展是开启的、针对快速开发和周期进行编译优化(但不是针对执行速度、二进制文件大小或者部署)、调试开启,类似 开发者工具 等调试工具可以连接到进程里
默认情况下,使用指令flutter run 会使用Debug模式。
注意:热重载仅能在调试模式下运行; 仿真器和模拟器仅能在模拟器下运行;在调试模型下,应用的性能可能会掉帧或者卡顿, profile 模式下会更接近真机性能
2.1.2 Release模式
当你想要最大的优化以及最小的占用空间时,就使用Release模式来部署APP吧。release模式是不支持模拟器或则仿真器的,使用Release意味着:
- 断点不可用
- 调试信息不可见
- 调试是禁用的
- 编译针对快速启动、快速执行和小的package的大小进行了优化
- 服务扩展是禁用的
命令flutter run --release会使用Release模式来进行编译, 你也可以 使用flutter build 针对特定目标编译release模式 ,请使用flutetr help build查看支持的列表, 也可以通过flutter build --release命令 使用release模式
2.1.3 Podfile 模式
在 profile 模式下,一些调试能力是被保留的—足够分析你的 app 性能。在仿真器和模拟器上,Profile 模式是不可用的,因为他们的行为不能代表真实的性能。 profile 模式和 release 类似,但有以下不同:
- 一些服务扩展是启用的。例如,支持 performance overlay。
- Tracing 是启用的,一些调试工具,比如 开发者工具 可以连接到进程里。
flutter run --profile 命令是使用 Profile 模式来编译的
注意:上述这些相关编译模式除了使用命令行, 相关的开发工具也提供了对应的编译模式,直接编译
2.2 Cocoapods管理依赖库集成方式
这个方法需要你的项目的所有开发者,都在本地安装 Flutter SDK。你的工程在每次构建的的时候,都将会从源码里编译 Flutter 模块。只需要在 Xcode 中编译应用,就可以自动运行脚本来集成 Dart 代码和插件。这个方法允许你使用 Flutter module 中的最新代码快速迭代开发,而无需在 Xcode 以外执行额外的命令。
如果你的既又应用还没有Podfile,那么需要你使用pod init 来创建一个。具体的Cocoapods管理依赖库的内容,这里就不多介绍了。这里默认大家都已经会使用Cocoapods管理工具。
首先我们需要再IOS项目中的Podflie文件中进行如下设置:

flutter_application_path = ‘…/…/…/cocoapods_test’ (把Flutter Modul项目的路径赋值给变量flutter_application_path)
load File.join(flutter_application_path, ‘.ios’, ‘Flutter’, ‘podhelper.rb’) (这个ruby的语法,简单的意思是返回一个字符串,由指定的项连接在一起,并使用文件分割符进行分隔。
- File.join(flutter_application_path, ‘.ios’, ‘Flutter’, ‘podhelper.rb’) 等价于 “flutter_application_path/.iOS/Flutter/podhelper.rb”
- load则是引入该文件,可以理解为将podhelper.rb文件导入进来。 )
当我们在IOS的项目Podfile文件中配置上述代码之后, 我们就可以执行pod install命令, 可能会发生如下错误:

原因是IOS项目中Podfile文件中配置的platform :ios, '9.0', IOS最低支持的版本低于Flutter Modul生成的IOS的库最低支持版本,导致的版本兼容错误。有两种解决方法:
- 直接把IOS项目中的Podfile文件中的最低支持版本
修改成不低于Flutter Modul中的最低支持版本 - 修改
Flutter Modul生成IOS库的版本(目前还没有找到怎么修改)
修改之后,执行pod install命令成功后如下:
flutter_post_install 方法(Flutter 3.1.0 中新增的)增加了原生 Apple Silicon arm64 iOS 模拟器的支持。它包括 if defined?(flutter_post_install) 的检查以确保你的 Podfile 在旧版本的没有该方法的 Flutter 上也能正常运行。
当你在 cocoapods_test/pubspec.yaml 改变了 Flutter plugin 依赖,需要在 Flutter module 目录运行 flutter pub get,来更新会被
podhelper.rb脚本用到的 plugin 列表,然后再次在你的应用目录下 运行pod install.
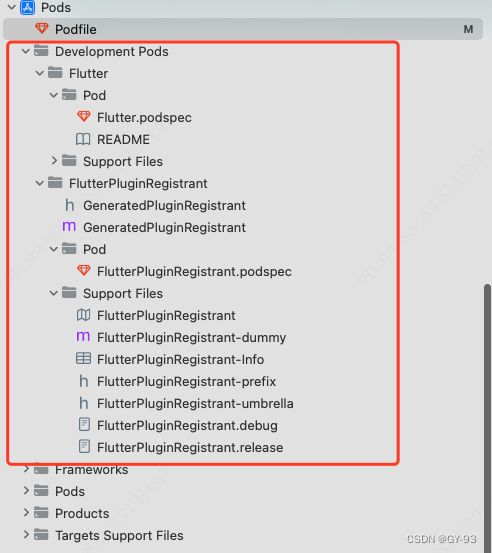
podhelper.rb脚本会把你的plugins, Flutter.framework,和App.framework集成到你的项目中。
你应用的 Debug 和 Release 编译配置,将会集成相对应的 Debug 或 Release 的 编译产物。可以增加一个 Profile 编译配置用于在 profile 模式下测试应用。
注意:Flutter.framework 是 Flutter engine 的框架, App.framework 是你的 Dart 代码的编译产物
在集成完成之后,可以打开你的IOS项目运行了。
2.3 直接在Xcode中集成framework
除了上面使用Cocoapods管理, 你还可以直接把Flutter Modul 打包成对应的framework,然后直接继承到你的IOS项目中,但是每当你修改了Flutter Modul中的代码,你都需要重新打包flutter build ios-framework,然后替换到你的IOS项目中。
例如:flutter build ios-framework --output=./MyApp/ Flutter/ (把打好的包输出到MyApp/ Flutter/路径下)
MyApp/
└── Flutter/
    ├── Debug/
    │   ├── Flutter.xcframework
    │   ├── App.xcframework
    │   ├── FlutterPluginRegistrant.xcframework (only if you have plugins with iOS platform code)
    │   └── example_plugin.xcframework (each plugin is a separate framework)
    ├── Profile/
    │   ├── Flutter.xcframework
    │   ├── App.xcframework
    │   ├── FlutterPluginRegistrant.xcframework
    │   └── example_plugin.xcframework
    └── Release/
        ├── Flutter.xcframework
        ├── App.xcframework
        ├── FlutterPluginRegistrant.xcframework
        └── example_plugin.xcframework
注意:始终使用相同目录下的
Flutter.xcframework和App.xcframework。如果你混合使用不同的目录下的(例如Profile/Flutter.xcframework以及Debug/App.xcframework)将会导致运行失败
Tip: Xcode11以上会打包回自动生成对应的xcframework, 但是Xcode11及以下是不会自动生成的,需要你添加
--xcframework --no-universal参数生成对应的XCFrawework, 而不是直接使用通用的framework
把framework集成到项目中后,在target 编译设置的 General > Frameworks, Libraries, and Embedded Content 下,然后在 Embed 下拉列表中选择 “Embed & Sign”。 示例如下:
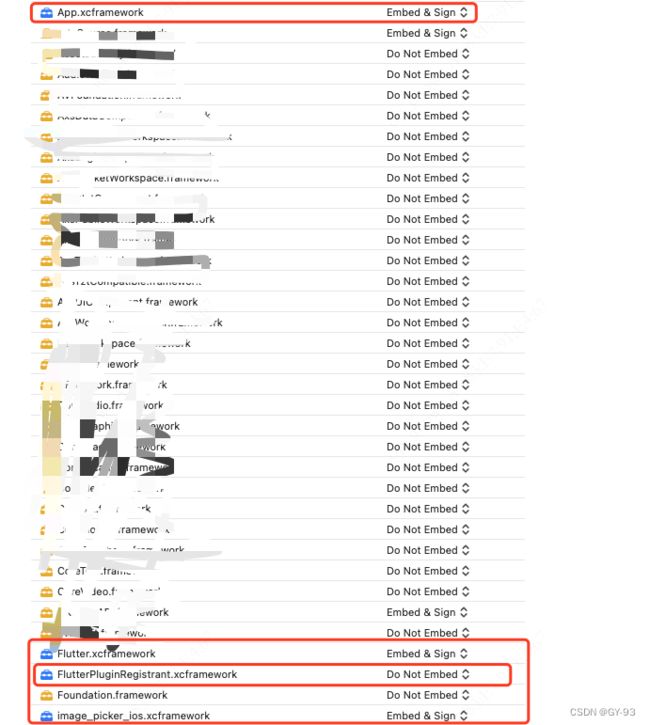
官方还提供这种方式:(本人没有试过,经过上面的配置,项目已经可以正常运行起来)
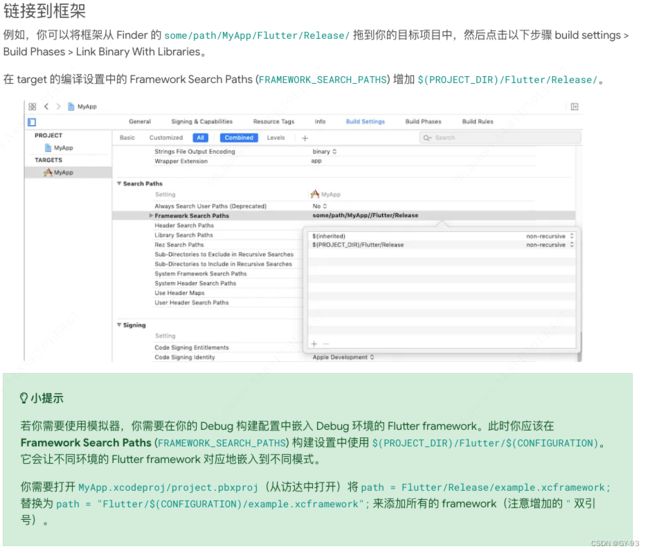
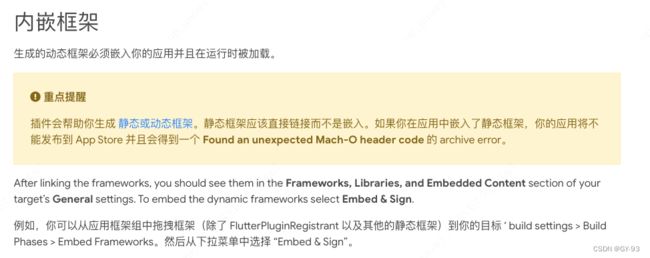
注意:生成的动态框架必须嵌入你的应用并且在运行时被加载。
重点提示:插件会帮助你生成 静态或动态框架。静态框架应该直接链接而不是嵌入。如果你在应用中嵌入了静态框架,你的应用将不能发布到 App Store 并且会得到一个 Found an unexpected Mach-O header code 的 archive error
2.4 Local Network Privacy Permissions(本地网络权限)
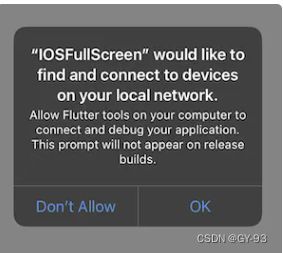
在IOS14及以上固件版本中, 在应用版本的调试过程中启用Dart的DNS服务, 在Debug模式下需要再Xcode项目中配置本地网络访问权限, 然后才能使用热重载、DevTools等调试功能以及flutter attach指令调试功能
注意: 这里配置,必须只能配置再debug模式下,如果你配置到release模式下, 你的app可能遭遇AppStore的拒绝
![]()

