万字简析Netty启动流程源码
文章目录
-
- 前言
- 0.NIO中服务器是如何启动的
- 1.Netty启动流程
- 2.initAndRegister方法
-
- 2.1 init
- 2.2 Register
- 3.启动流程阶段性总结
- 4. NioEventLoop分析
-
- 4.1NioEventLoop的组成
- 4.2 selector的创建
- 4.3 两个selector成员变量
- 5. NioEventLoop线程何时启动
- 6. eventLoop wakeup 方法
- 7. EventLoop进入select分支
-
- 7.1讨论什么时候进入select方法
- 7.2进入select方法
- 7.3 Netty解决了NIO的空轮询bug
- 7.4 ioRatio参数控制
- 7.5 selectedKeys的优化
- 8. Netty中accept流程
-
- 8.1 Nio中的accept流程
- 8.2 Netty中的accept流程
- 9. Netty中的Read流程
前言
本文参考黑马程序员《Netty全套教程》最后一部分源码分析,从源码级别详细介绍了Netty的启动流程,evenLoop工作原理,accept流程, read流程。根据该教程结合本人理解写了一篇文章。大体捋了一遍上述流程,总体还算顺利。但是由于本人水平有限,文章可能有些地方有问题,所以鼓励自己主动求证,欢迎评论区指正!!
0.NIO中服务器是如何启动的
在看netty之前,我们先回忆一下NIO中服务器是如何启动的首先我们要打开selector选择器,然后将原生的ServerSocketChannel设置成非阻塞,然后注册到selector上,然后再将NioServerSocketChannel作为attachment,这个attachment就是selector监听到事件发生了得交给一个人处理这个人就是attachment。最后让selector关注这个事件就行了。用代码描述是这样的。
//1 netty 中使用 NioEventLoopGroup (简称 nio boss 线程)来封装线程和 selector
Selector selector = Selector.open();

//2 创建 NioServerSocketChannel,同时会初始化它关联的 handler,以及为原生 ssc 存储 config
NioServerSocketChannel attachment = new NioServerSocketChannel();

//3 创建 NioServerSocketChannel 时,创建了 java 原生的 ServerSocketChannel
ServerSocketChannel serverSocketChannel = ServerSocketChannel.open();
serverSocketChannel.configureBlocking(false);

//4 启动 nio boss 线程执行接下来的操作

//5 注册(仅关联 selector 和 NioServerSocketChannel),未关注事件
SelectionKey selectionKey = serverSocketChannel.register(selector, 0, attachment);

//6 head -> 初始化器 -> ServerBootstrapAcceptor -> tail,初始化器是一次性的,只为添加 acceptor

//7 绑定端口
serverSocketChannel.bind(new InetSocketAddress(8080));

//8 触发 channel active 事件,在 head 中关注 op_accept 事件
selectionKey.interestOps(SelectionKey.OP_ACCEPT);
所以Netty要启动的话大概也是这样一个流程,只不过比这个要复杂得多。
1.Netty启动流程
我们以这段代码为例
    public static void main(String[] args) {
        new ServerBootstrap()
                .group(new NioEventLoopGroup())
                .channel(NioServerSocketChannel.class)
                .childHandler(new ChannelInitializer<NioSocketChannel>() {
                    @Override
                    protected void initChannel(NioSocketChannel ch) {
                        ch.pipeline().addLast(new LoggingHandler());
                    }
                }).bind(8080);
    }
在bind这块打个断点。运行进去看看里面执行的是哪个方法
    private ChannelFuture doBind(final SocketAddress localAddress) {
        final ChannelFuture regFuture = initAndRegister();
        final Channel channel = regFuture.channel();
        if (regFuture.cause() != null) {
            return regFuture;
        }

        if (regFuture.isDone()) {
            // At this point we know that the registration was complete and successful.
            ChannelPromise promise = channel.newPromise();
            doBind0(regFuture, channel, localAddress, promise);
            return promise;
        } else {
            // Registration future is almost always fulfilled already, but just in case it's not.
            final PendingRegistrationPromise promise = new PendingRegistrationPromise(channel);
            regFuture.addListener(new ChannelFutureListener() {
                @Override
                public void operationComplete(ChannelFuture future) throws Exception {
                    Throwable cause = future.cause();
                    if (cause != null) {
                        // Registration on the EventLoop failed so fail the ChannelPromise directly to not cause an
                        // IllegalStateException once we try to access the EventLoop of the Channel.
                        promise.setFailure(cause);
                    } else {
                        // Registration was successful, so set the correct executor to use.
                        // See https://github.com/netty/netty/issues/2586
                        promise.registered();

                        doBind0(regFuture, channel, localAddress, promise);
                    }
                }
            });
            return promise;
        }
    }
通过打断点我们可以看到执行的是doBind方法。我们从上到下看上来他先执行initAndRegister()这个函数的主要作用是负责初始化NioServerSocketChannel并且将这个channel注册到selector中。从代码能看出来这个肯定是异步获取结果的。返回了一个regFuture,然后我们就会判断这个regFuture中的任务执行完没,大部分是没执行完,因为注册需要一定时间,之后regFuture通过异步的方式由Nio线程执行doBind0。也就是说再doBind中是存在线程切换的。执行到addLIstener之后,由main线程切换到nio线程。
2.initAndRegister方法
final ChannelFuture initAndRegister() {
        Channel channel = null;
        try {
            channel = channelFactory.newChannel();
            init(channel);
        } catch (Throwable t) {
            if (channel != null) {
                // channel can be null if newChannel crashed (eg SocketException("too many open files"))
                channel.unsafe().closeForcibly();
                // as the Channel is not registered yet we need to force the usage of the GlobalEventExecutor
                return new DefaultChannelPromise(channel, GlobalEventExecutor.INSTANCE).setFailure(t);
            }
            // as the Channel is not registered yet we need to force the usage of the GlobalEventExecutor
            return new DefaultChannelPromise(new FailedChannel(), GlobalEventExecutor.INSTANCE).setFailure(t);
        }

        ChannelFuture regFuture = config().group().register(channel);
        if (regFuture.cause() != null) {
            if (channel.isRegistered()) {
                channel.close();
            } else {
                channel.unsafe().closeForcibly();
            }
        }

        // If we are here and the promise is not failed, it's one of the following cases:
        // 1) If we attempted registration from the event loop, the registration has been completed at this point.
        //    i.e. It's safe to attempt bind() or connect() now because the channel has been registered.
        // 2) If we attempted registration from the other thread, the registration request has been successfully
        //    added to the event loop's task queue for later execution.
        //    i.e. It's safe to attempt bind() or connect() now:
        //         because bind() or connect() will be executed *after* the scheduled registration task is executed
        //         because register(), bind(), and connect() are all bound to the same thread.

        return regFuture;
    }
2.1 init
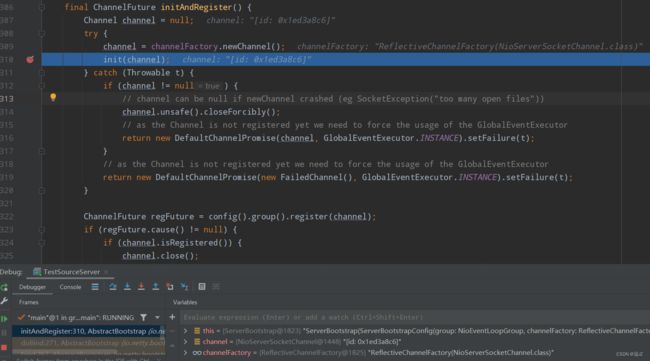
channel = channelFactory.newChannel();
上来第一步通过channelFactory创建一个NioServerSocketChannel,我们来看一下是怎么创建的。
@Override
public T newChannel() {
    try {
        return constructor.newInstance();
    } catch (Throwable t) {
        throw new ChannelException("Unable to create Channel from class " + constructor.getDeclaringClass(), t);
    }
}
这里我们可以看到他是通过构造器反射的方式创建。所以一定会走到他的构造方法。
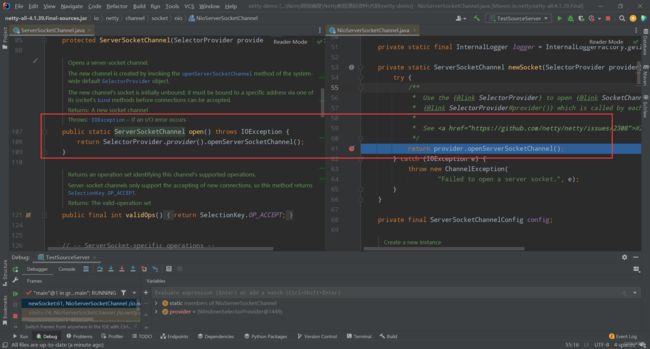
果然走到了他的构造方法,然后我们再看看里面的newSocket是啥玩意儿?
我们可以看到他是调用了一个provider.openServerSocketChannel(),但是这个和ServerSocketChannel的方法有几分神似,都是创建一个ServerSocketChannel。所以经过newSocket之后实际上是创建一个ServerSocketChannel,然后this(…),
    public NioServerSocketChannel(ServerSocketChannel channel) {
        super(null, channel, SelectionKey.OP_ACCEPT);
        config = new NioServerSocketChannelConfig(this, javaChannel().socket());
    }
super追踪到最后是这样的,
    protected AbstractNioChannel(Channel parent, SelectableChannel ch, int readInterestOp) {
        super(parent);
        this.ch = ch;
        this.readInterestOp = readInterestOp;
        try {
            ch.configureBlocking(false);
        } catch (IOException e) {
            try {
                ch.close();
            } catch (IOException e2) {
                if (logger.isWarnEnabled()) {
                    logger.warn(
                            "Failed to close a partially initialized socket.", e2);
                }
            }

            throw new ChannelException("Failed to enter non-blocking mode.", e);
        }
    }
我们能明显的看到他将我们刚才创建的ServerSocketChannel设置为非阻塞。
然后将config赋值最后创建出来一个NioServerSocketChannel。创建好channel之后我们走到init(channel)。
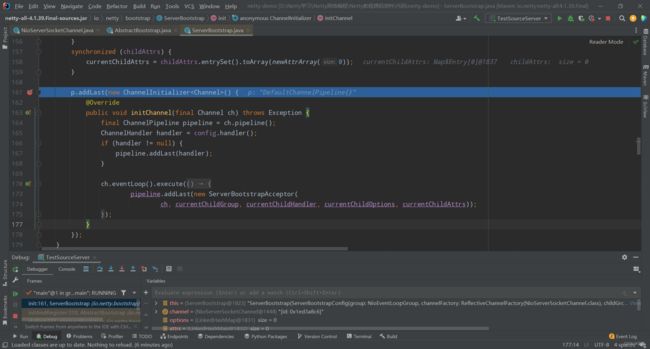
initchannel直接跳到创建为NioServerSocketChannel创建流水线
这块主要干了一件事就是初始化handler但是没有执行里面的代码,这个以后再说。
到此为止initAndRegister的init部分结束,它主要干了两件事一个是创建了一个NioServerSocketChannel,然后在这个channel中添加了一个handler但是没执行里面的代码。
2.2 Register
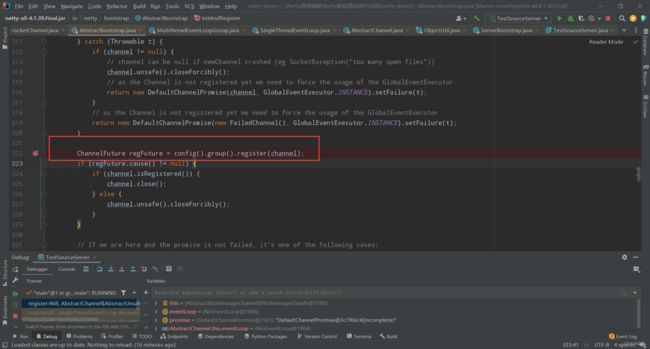
然后我们要执行这个register
不断追踪到最后来到这个函数
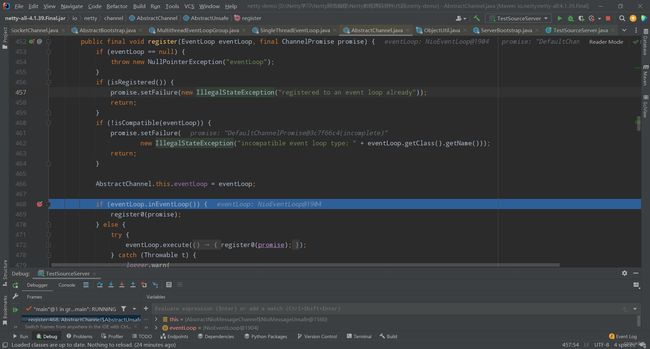
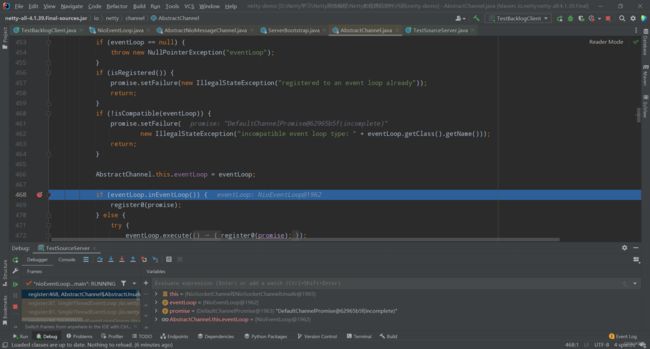
在这里我们就要涉及到主线程和Nio线程之间的切换了。eventLoop就是Nio线程,inEventLoop()就是判断一下当前线程是不是Nio线程。现在他还在main线程,所以肯定不是,会执行else代码块的内容。else的内容就是将真正要干活的register0封装到一个任务对象交给我们的eventLoop去执行。这样就保证了register0一定是在eventLoop线程中运行。在register0中找到真正干活的doRegister。
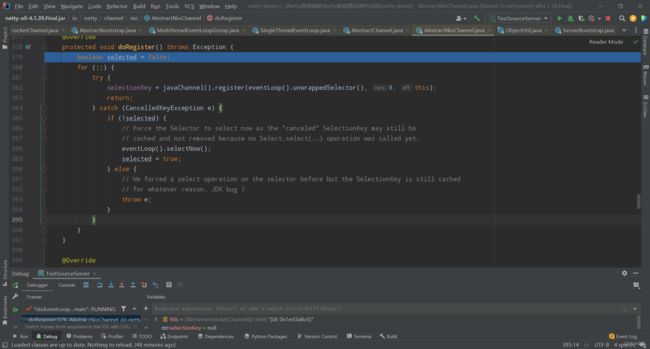
这里面的javaChannel()就是java原生的ServerSocketChannel,将他注册进eventLoop()包装过的selector,然后他没有关注任何事件,所以参数为0,最后就是att这个参数,出事了应该找一个人来处理这个人就是NioServerSocketChannel。
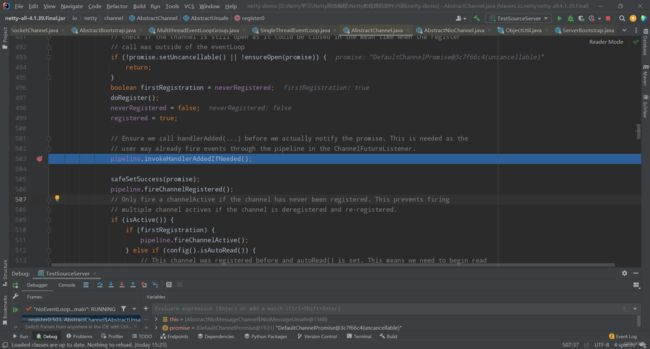
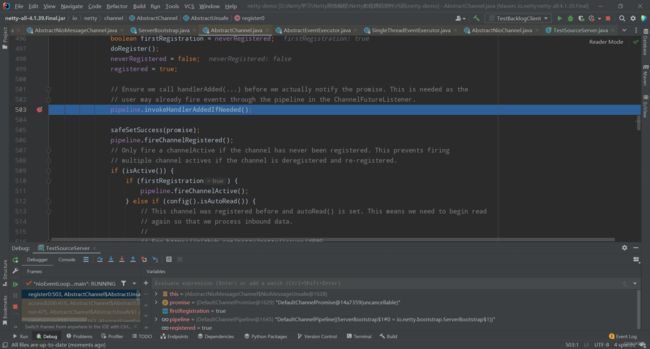
然后之前在init中我只是添加了handler没有执行但是在这块我就要执行了。doRegister之后,我会调用invokeHandlerAddedIfNeed()。
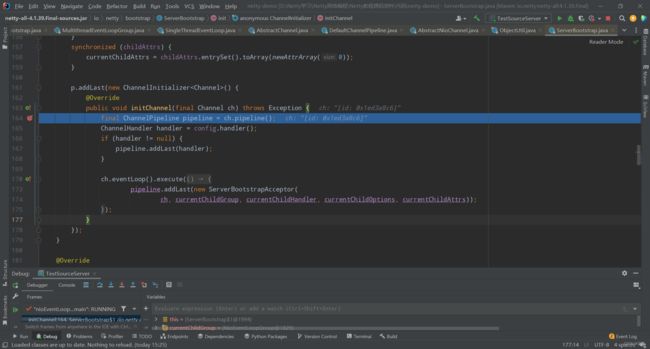
然后我向下运行的时候就会走到之前的InitChannel方法,执行上次没执行的代码。
这个方法的主要作用是在pipline中添加handler,pipline.addLast(new ServerBootstrapAcceptor)。这个的主要作用是在accept事件发生之后建立连接。
这个结束之后就会跳到这里
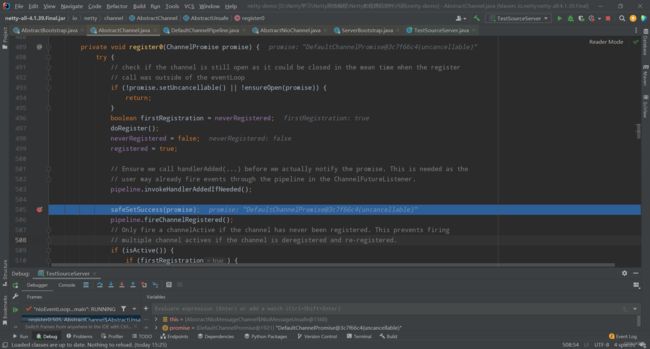
这块是为promise设置结果。然后之前的initAndRegister会返回一个regFuture其实可以把regFuture看成promise,这个也绑定了一个addListener,一旦拿到结果就会执行里面的逻辑,最终执行到doBind。
    private ChannelFuture doBind(final SocketAddress localAddress) {
        final ChannelFuture regFuture = initAndRegister();
//........此处省略一大堆
            regFuture.addListener(new ChannelFutureListener() {
                @Override
                public void operationComplete(ChannelFuture future) throws Exception {
                    Throwable cause = future.cause();
                    if (cause != null) {
                        // Registration on the EventLoop failed so fail the ChannelPromise directly to not cause an
                        // IllegalStateException once we try to access the EventLoop of the Channel.
                        promise.setFailure(cause);
                    } else {
                        // Registration was successful, so set the correct executor to use.
                        // See https://github.com/netty/netty/issues/2586
                        promise.registered();

                        doBind0(regFuture, channel, localAddress, promise);
                    }
                }
            });
            return promise;
        }
    }
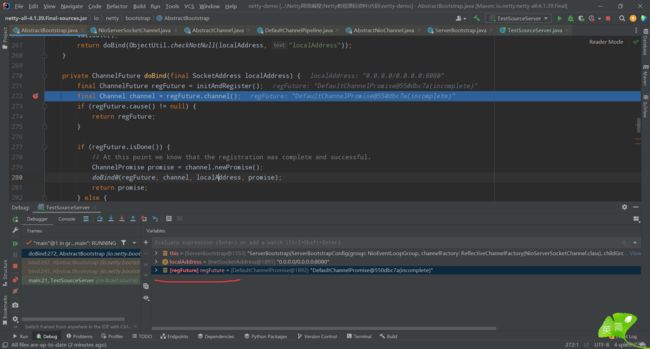
假设safeSetSuccess(promise)中的promise就是regFuture那一切就很合理了。我们看看他到底是不是。所以我们在调试的时候将regFuture加上高亮,然后我一路debug知道promise看看他俩是不是一样的。
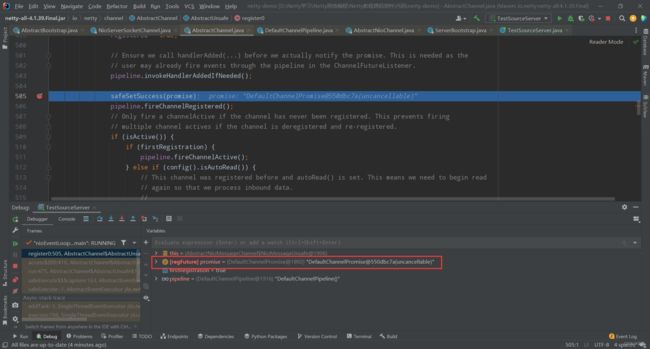
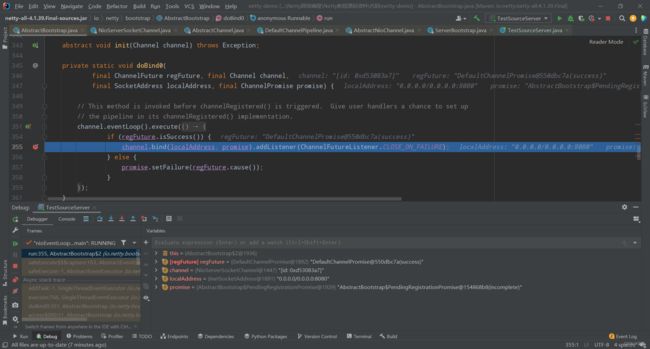
我们把断点放行一直到这个safeSetSuccess方法,最后发现regFuture和这个promise一模一样。说明刚才的猜测是对的,然后他就会执行异步方法中的dobind0,看看dobind0。
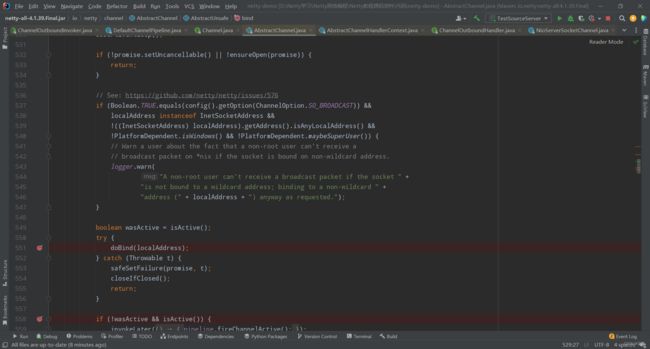
对这个bind方法一路向下找,到这个AbstractChannel类中的bind方法。
然后看他的两个重要的位置我们加上断点一个是doBind,这个doBind才是真真正正干活的。
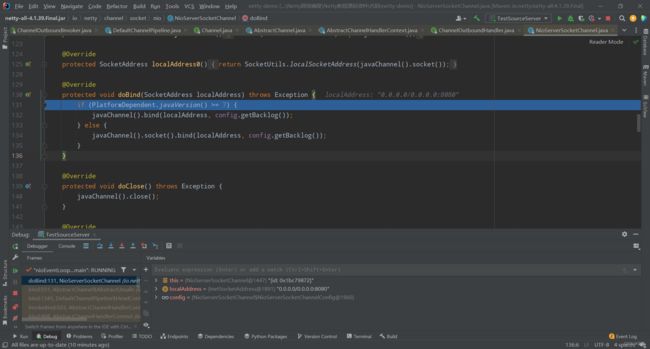
在这里会判断一下是不是java7以上的版本,如果是java原生的ServerSocketChannel绑定地址和端口号,然后就是一些配置比如全链接队列设置大小。至此我们已经完成了端口的绑定。然后看下一个断点部分。
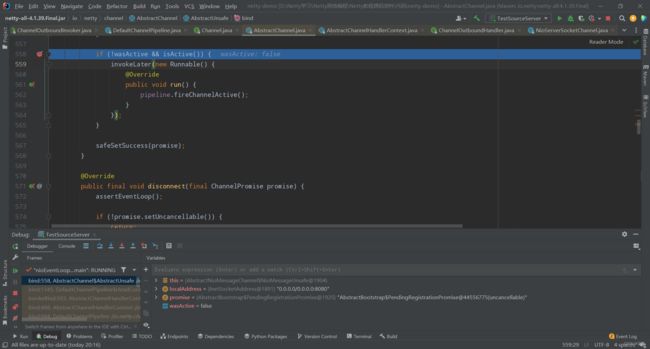
isActive判断这个ServerSocketChannel经过之前一系列的初始化之后是否达到可用状态,如果可用执行下一个部分。
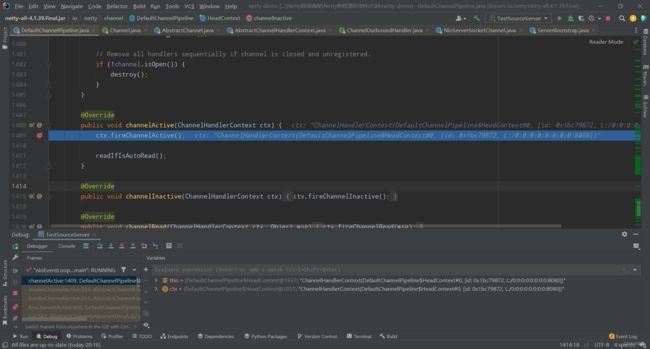
然后就会走到下面的fireChannelActive方法,这个方法会触发pipline上所有handler的channelActive事件。此时此刻我们的pipline上一共有三个handler,head->accpetor->tail。之后会执行到channelActive
一开始ServerSocketChannel没有关注任何事件,关注的事件一开始是0,然后再readIfIsAutoRead()方法。进来之后通过一个长长的调用链找到doBeginRead,看到read就往里进就行。
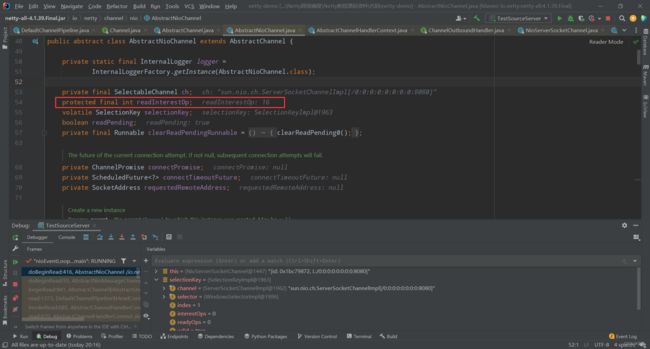
我们能看到之前interestOps为0。说明这个ServerSocketChannel之前没关注任何事件。然后判断关没关注readInterestOp如果没关注,让他关注一下然后我们看看这个readInterestOp是啥。
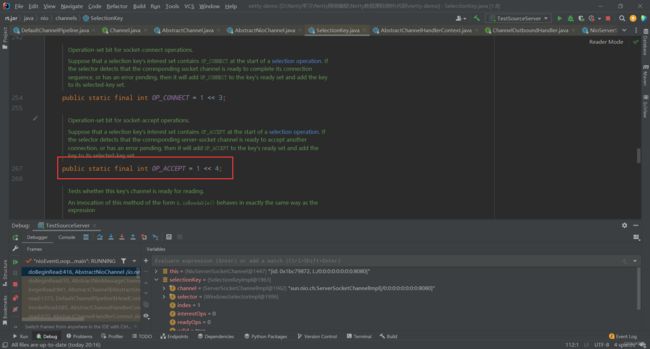
这个值为16。然后看看这个是哪个事件。
我们能看到这个是OP_ACCEPT,这就让这个channel关注了这个接收请求的事件。
至此Netty服务端启动成功。
3.启动流程阶段性总结
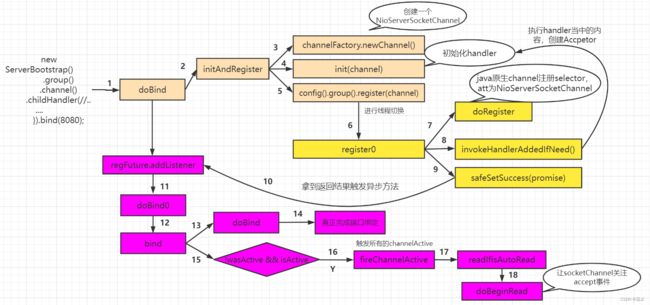
如图所示上述就是ServerBootStrap().bind之后所暗含的玄机。他其实也没有那么复杂,首先在init的过程中,他创建了一个NioServerSocketChannel,NioServerSocketChannel初始化handler,然后向他的pipline中添加acceptor handler。之后就是register,register当中会将原生的ServerSocketChannel注册至selector来关注事件,之后执行handler中的代码。initAndRegister返回结果之后回调doBind0将原生的ServerSocketChannel绑定端口号,之后触发所有的channelActive事件。最后让channel关注Accept事件。
4. NioEventLoop分析
4.1NioEventLoop的组成
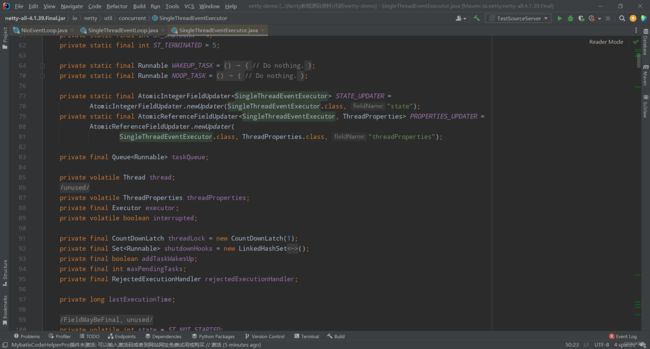
NioEventLoop由selector,线程还有任务队列组成,他既会处理io事件,也会处理普通任务和定时任务。
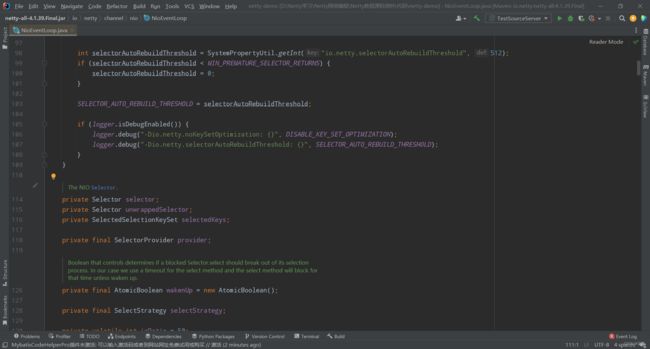
如图所示这个就是selector,NioEventLoop他是单线程。他的线程在他的祖父类里面。
和这个线程关系比较密切的是executor,executor其实就是一个执行器,可以提交任务之类的。然后他还有taskQueue,这个就是任务队列,因为NioEventLoop是单线程的如果任务太多,就会先放在这个taskQueue队列当中,当前任务执行完之后就会从队列中拿出新的任务继续执行。之后我们在看一下他的曾祖父类。
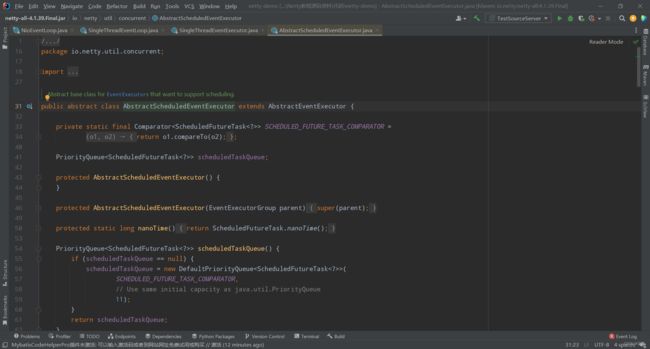
他的曾祖父类这块有一个定时任务队列,负责处理定时任务。
因此NioEventLoop既可以处理定时任务,也可以处理普通任务。
4.2 selector的创建
我们通过构造函数中的openSelector()来创建selector的。
    NioEventLoop(NioEventLoopGroup parent, Executor executor, SelectorProvider selectorProvider,
                 SelectStrategy strategy, RejectedExecutionHandler rejectedExecutionHandler,
                 EventLoopTaskQueueFactory queueFactory) {
        super(parent, executor, false, newTaskQueue(queueFactory), newTaskQueue(queueFactory),
                rejectedExecutionHandler);
        if (selectorProvider == null) {
            throw new NullPointerException("selectorProvider");
        }
        if (strategy == null) {
            throw new NullPointerException("selectStrategy");
        }
        provider = selectorProvider;
        final SelectorTuple selectorTuple = openSelector();
        selector = selectorTuple.selector;
        unwrappedSelector = selectorTuple.unwrappedSelector;
        selectStrategy = strategy;
    }
然后我们具体看一下openSelector()。
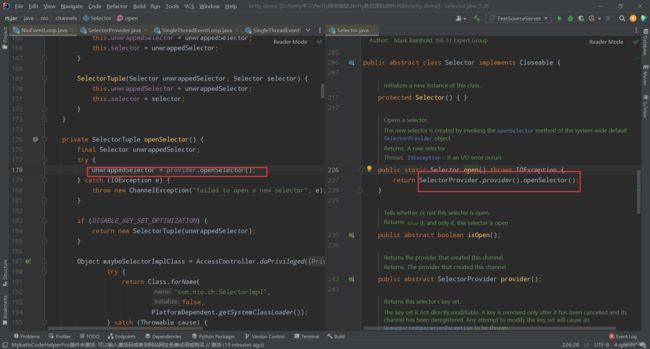
如图所示,NioEventLoop和Selector,都是调用的provider中的openSelector()一模一样,所以这个NioEventLoop中的创建selector就相当于selector.open()。
4.3 两个selector成员变量
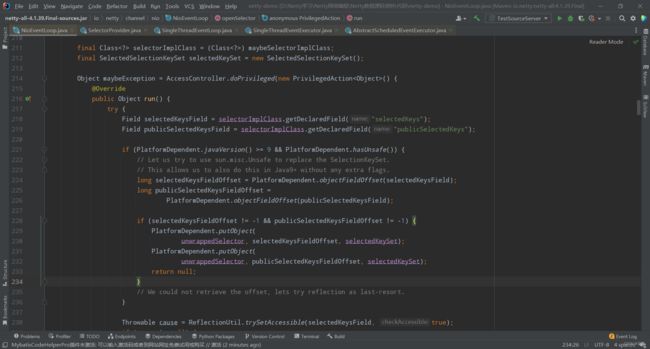
之前NioEventLoop的构造函数中一共有两个成员变量,一个是selector,另一个是unwrappedSelector。为什么Netty会再加一个selector呢?因为原生的selector内部有一个selectionKeys集合存放发生的事件,我们要从集合里拿到事件的信息去处理。但是这个set集合遍历效率太低了。既得遍历哈希桶,又得遍历后面的链表。Netty做了一个优化他直接把selectionKeys放弃了,用数组实现,这样遍历效率会提高。这个具体体现在这块。
首先我们通过反射拿到他selector的真正的实现类中的两个属性,分别是selectedKeysField,publicSelectedKeysField。然后trySetAccessible,将这两个属性设置成可以修改。
                    selectedKeysField.set(unwrappedSelector, selectedKeySet);
                    publicSelectedKeysField.set(unwrappedSelector, selectedKeySet);
通过这两段代码将unwrappedSelector中的selectedKeys设置成Netty自定义的selectedKeySet。
5. NioEventLoop线程何时启动
    public static void main(String[] args) {
        EventLoop eventLoop = new NioEventLoopGroup().next();
        eventLoop.execute(()->{
            System.out.println("hello");
        });
    }
我们通过打断点追踪一下这段代码
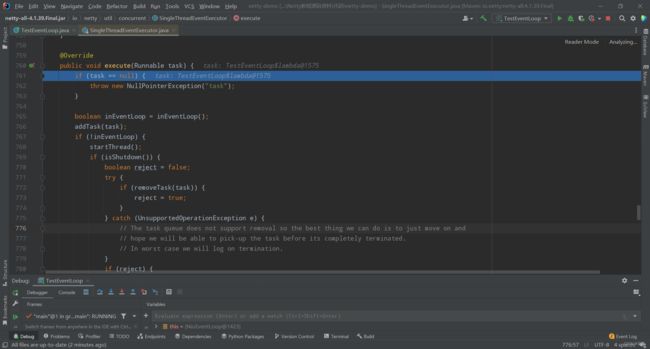
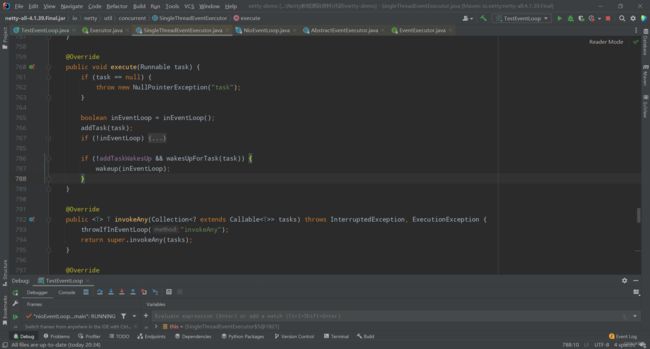
上来先判断我们这个task任务是否为空,如果任务都为空了直接抛出异常。然后我们看看inEventLoop()方法,这个方法是判断当前线程和EventLoop线程是同一个线程。
    @Override
    public boolean inEventLoop() {
        return inEventLoop(Thread.currentThread());
    }

             ↓    ↓   ↓   ↓
    @Override
    public boolean inEventLoop(Thread thread) {
        return thread == this.thread;
    }
在这里我们的当前线程是main线程,this.thread为空所以不相等返回false。顺着代码往下走,addTask将任务添加进任务队列当中。然后判断由于我们的inEventLoop为false,取反就是true,执行startThread(),这个就是首次开启线程。
进入startThread()方法之后首先判断state状态,ST_NOT_STARTED为1,代表着线程未开启状态。第一次肯定是返回true,然后就进入这个代码块当中,将state改成ST_STARTED(2),这样能保证这个线程只被开启一次。然后进入doStartThread()这个方法。
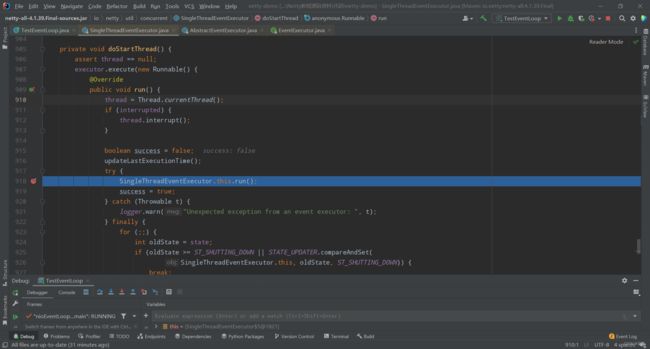
上来先断言这个thread为空。然后进入到执行器这段代码这个执行器executor实际上就是EventLoop线程,进入里面的run方法,将当前线程赋值给thread,这个时候当前线程就是EventLoop线程,所以这时候EventLoop线程创建成功。然后来看一下这个SingleThreadEventExecutor.this.run()。
这个润方法就是一个死循环不断地查看是否有任务,定时任务,IO事件。如果有则执行之。
综上所述EventLoop的Nio线程是在首次调用execute()方法的时候启动,并且他会通过state状态控制线程只会启动一次。
6. eventLoop wakeup 方法
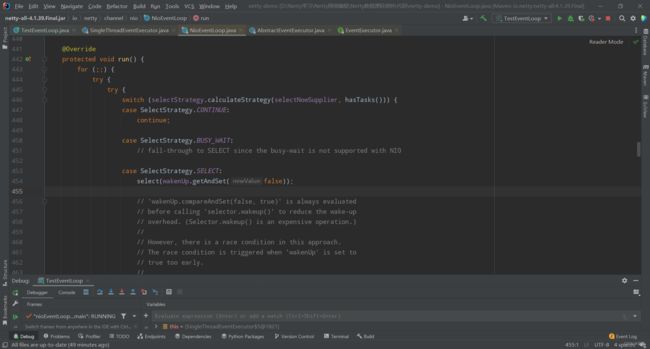
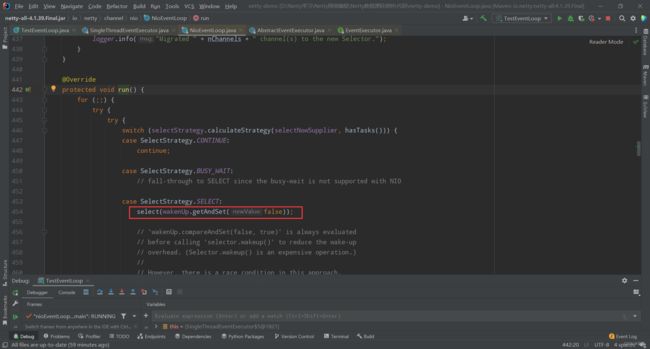
在上次的run方法中我们能看到某些时候会来到这个select方法。点进去看看
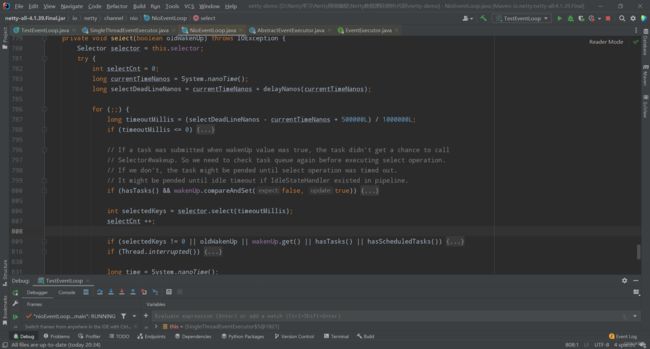
然后看这个selector.select(timeoutMillis)。之前在Nio当中是让线程阻塞,别空转有事件在处理。Netty稍有不同,他有一个参数,超时时间,也就是说这个select不会一直阻塞。因为EventLoop线程不仅要处理IO事件,还要处理普通任务,或者定时任务。所以不能一直阻塞,要到一段时间就放开,以便处理IO事件之外的事件。让我们来看看他是如何处理IO事件之外的事。
执行execute的时候,由于一开始已经创建了线程所以不会进入if里面再创建一次线程了,它会进入wakeup
他调用了selector.wakeup()。这样一提交任务就会唤醒selector,不会一直阻塞。然后看看这两个if判断条件,第一个条件说明只有在其他线程提交任务时才可能唤醒selector,然后selector.wakeup是一个重量级操作,所以他不应该被频繁调用,而wakenup是原子类型的布尔变量对它的操作是原子的,当多线程对他进行修改的时候只有一个线程能成功,因此selector.wakeup不会被频繁调用。
7. EventLoop进入select分支
7.1讨论什么时候进入select方法
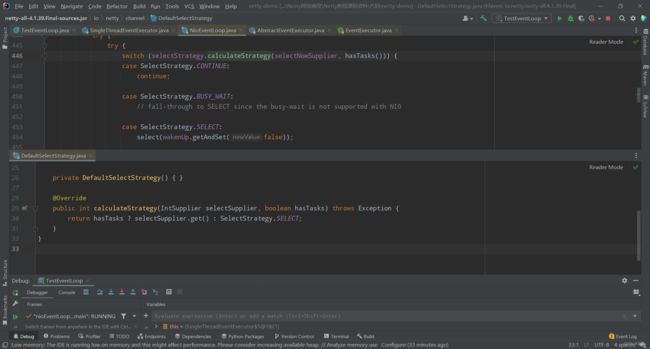
我们来看看这个select方法。每次循环的时候什么时候会来到SelectStrategy.SELECT。这个switch的值是通过calculateStrategy这个方法计算的。我们来看看这个方法的实现。
首先他会传进来一个参数,看看当前线程是不是有任务,如果没有任务,就选择SELECT策略,让当前线程阻塞。如果有任务就会执行get()方法,我们看看这个get追踪到最后到底是啥。
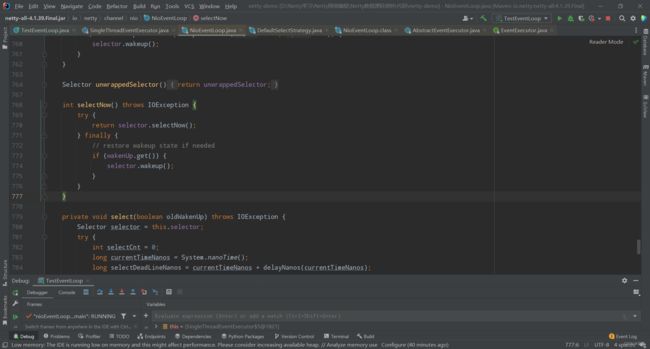
追踪到最后是selectNow,这个selector.selectNow()就是立刻查看selector上有没有事件发生。如果有返回这个事件,没有返回0。如果有事件发生就会拿到任务顺便调用。
7.2进入select方法
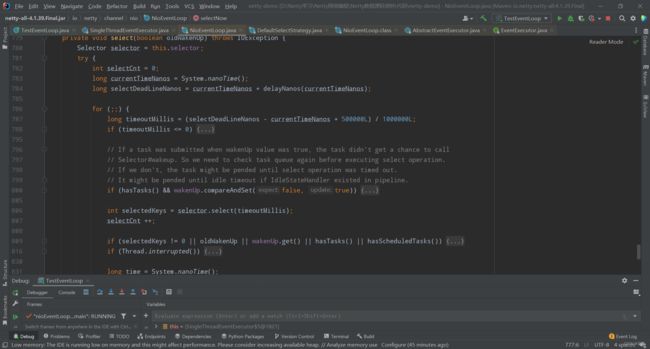
我们来看selector.select(timeoutMillis)这个到底阻塞多长时间这个时间是咋来的。timeoutMillis与后面selectDeadLineNanos有关,这个可以理解为截止时间,我们首先看看selectDeadLineNanos到底是咋算出来的。selectDeadLineNanos是由当前时间加上后面的delayNanos(currentTimeNanos)。我们看一下这个delayNanos函数。
这个函数当中会拿到定时任务队列中的任务,然后看看他是不是有任务如果没有的话返回一个默认值。如果有的话回执行delayNanos。我们首先假设没有定时任务。返回默认值,
private static final long SCHEDULE_PURGE_INTERVAL = TimeUnit.SECONDS.toNanos(1);
刚才那个默认值为1,所以如果没有定时任务的话selectDeadLineNanos应该是当前时间+1,回到之前的超时时间计算的函数上,
            long selectDeadLineNanos = currentTimeNanos + delayNanos(currentTimeNanos);
            long timeoutMillis = (selectDeadLineNanos - currentTimeNanos + 500000L) / 1000000L;
截止时间就是当前时间+1s,然后到了超时时间这块截止时间会减去当前时间,然后再加上500000纳秒修正最后单位换算一下把纳秒换成毫秒。所以如果没有定时任务的话超时时间默认是1.5毫秒。
然后我们回到select方法,看看他怎么退出for(;;)死循环,首先就是当前时间到了截止时间,也就是timeoutMillis为0的时候他会退出死循环。还有一种情况就是hasTasks()有其他普通任务了他也会退出循环,还有一种情况是超时时间到了返回一个selectedKeys,这个就是事件数,如果有事件了那也会退出循环。
7.3 Netty解决了NIO的空轮询bug
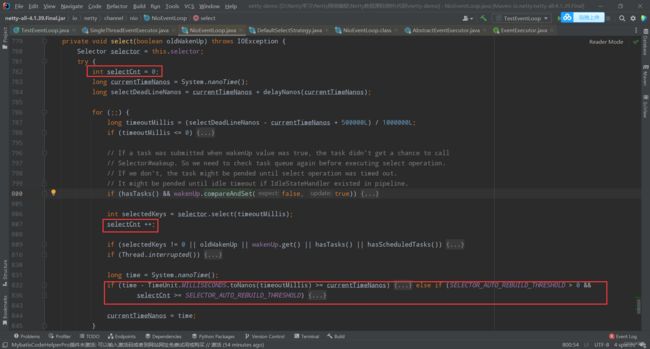
这个空轮询就发生在selector.select()方法上,如果是没有事件发生或者是在超时时间之内没有事件发生,他就会一直运行,由于我这个是一个死循环所以十分消耗CPU资源,严重情况下多个Nio线程都这样的话CPU占用率可能拉满。Netty通过循环计数解决了这个问题,设置一个selectCnt一开始设置为0。每次循环都会+1。然后他有一个阈值,判断一下是否超过了这个阈值如果超过了就退出循环。
然后我们看看这个阈值是多少?
        int selectorAutoRebuildThreshold = SystemPropertyUtil.getInt("io.netty.selectorAutoRebuildThreshold", 512);
        if (selectorAutoRebuildThreshold < MIN_PREMATURE_SELECTOR_RETURNS) {
            selectorAutoRebuildThreshold = 0;
        }

        SELECTOR_AUTO_REBUILD_THRESHOLD = selectorAutoRebuildThreshold;
这个阈值是从系统设置中读取的,如果没有设置默认值就是512,也就是说如果空轮询了512次就会认为他出了空轮询bug,出现之后哦们的解决方案是重新创建了一个selector,把之前的selector所有的东西都复制到新的selector上面。
                if (time - TimeUnit.MILLISECONDS.toNanos(timeoutMillis) >= currentTimeNanos) {
                    // timeoutMillis elapsed without anything selected.
                    selectCnt = 1;
                } else if (SELECTOR_AUTO_REBUILD_THRESHOLD > 0 &&
                        selectCnt >= SELECTOR_AUTO_REBUILD_THRESHOLD) {
                    // The code exists in an extra method to ensure the method is not too big to inline as this
                    // branch is not very likely to get hit very frequently.
                    selector = selectRebuildSelector(selectCnt);
                    selectCnt = 1;
                    break;
                }
selectRebuildSelector就是重建一个selector。
7.4 ioRatio参数控制
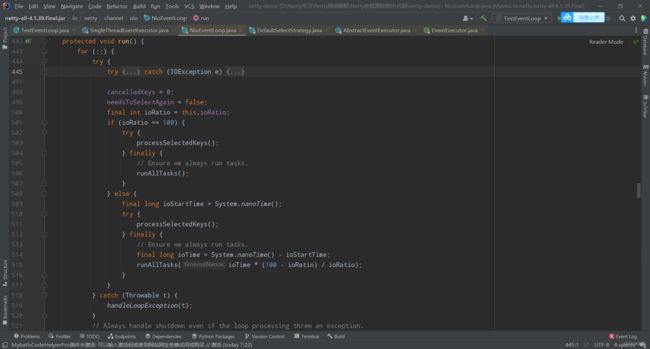
当事件发生时,就会继续向下运行。如果ioRatio不等于100,就会向下运行处理所有的IO事件即执行processSelectedKeys(),最终IO事件处理完了就会处理所有的普通任务,runAllTasks。但是普通任务如果执行事件过长的话势必会影响IO事件,所以有了ioRatio这个参数,这个参数就是控制处理IO事件的比例。他是这样控制的,上来先计算一下io事件的开始时间,然后io事件执行完,计算一下io事件的时间,然后根据你设置的ioRatio计算普通任务要用多少时间。比如你io事件运行了10s,ioRatio设置成80,那普通任务就运行了10 x 20/80 = 2.5s。如果没执行完的普通任务会放到队列里去下次执行,即下次一定。设置成100也不好,如果设置成100finally直接执行所有的普通任务,反而不如之前。
7.5 selectedKeys的优化
之前已经说了selectedKeys变成数组方便遍历。这个体现在processSelectedKeys这个方法,点进去看看。
    private void processSelectedKeys() {
        if (selectedKeys != null) {
            processSelectedKeysOptimized();
        } else {
            processSelectedKeysPlain(selector.selectedKeys());
        }
    }
如果selectedKeys不为空也就是被优化过了,就执行被优化后的方法,如果为空就执行普通方法。我们看看这个被优化后的方法。
    private void processSelectedKeysOptimized() {
        for (int i = 0; i < selectedKeys.size; ++i) {
            final SelectionKey k = selectedKeys.keys[i];
            // null out entry in the array to allow to have it GC'ed once the Channel close
            // See https://github.com/netty/netty/issues/2363
            selectedKeys.keys[i] = null;

            final Object a = k.attachment();

            if (a instanceof AbstractNioChannel) {
                processSelectedKey(k, (AbstractNioChannel) a);
            } else {
                @SuppressWarnings("unchecked")
                NioTask<SelectableChannel> task = (NioTask<SelectableChannel>) a;
                processSelectedKey(k, task);
            }

            if (needsToSelectAgain) {
                // null out entries in the array to allow to have it GC'ed once the Channel close
                // See https://github.com/netty/netty/issues/2363
                selectedKeys.reset(i + 1);

                selectAgain();
                i = -1;
            }
        }
    }
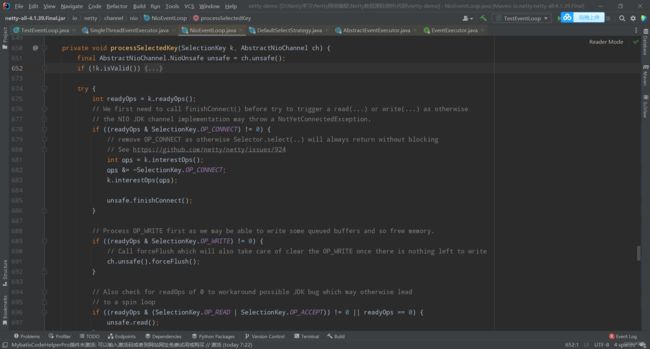
我们通过遍历的方式拿到selectedKeys.key[i],就是事件,然后k.attachment()就是拿到这个事件的附件,之前启动的时候这个附件是Nio的channel,因为我们要对事件进行处理,channel上有handler,handler是对这些事件进行处理的。然后拿到了这个a,判断一下他是不是NioChannel如果是就进去processSelectedKey。
在这个函数中我们去区分具体的事件类型并分别对这些类型进行处理。
8. Netty中accept流程
8.1 Nio中的accept流程
- selector.select()阻塞直到事件的发生。
- 遍历处理selectedKeys
- 拿到一个key判断事件类型是否为accept
- 创建socketChannel,设置非阻塞
- 将SocketChannel注册进selector
- 关注selectionKey的read事件。
8.2 Netty中的accept流程
我们开一个服务端一个客户端。然后我们把断点直接打在监听事件的位置。当客户端启动时断点会停在这个位置。
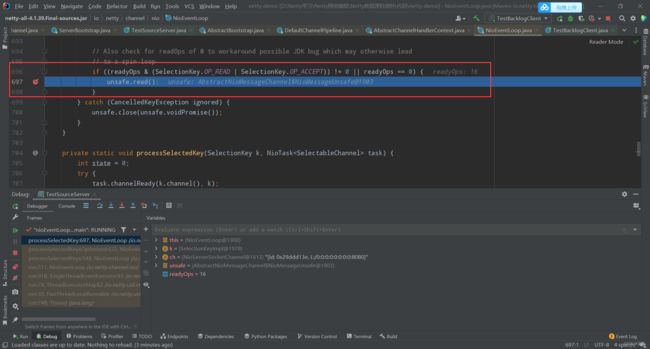
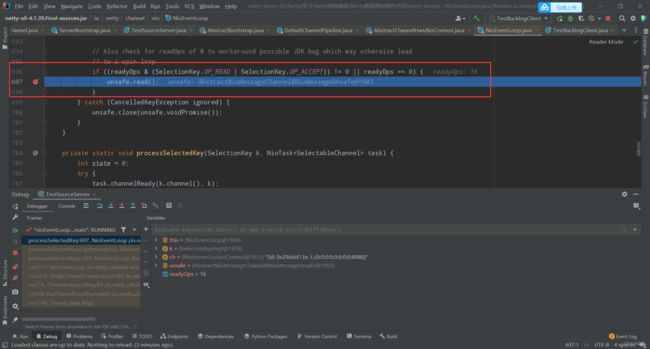
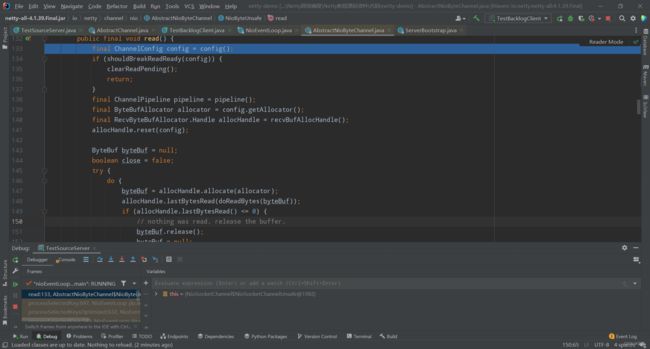
我们可以看到这个readyOps是16这个是accept事件,然后我们进去看看这个read方法。
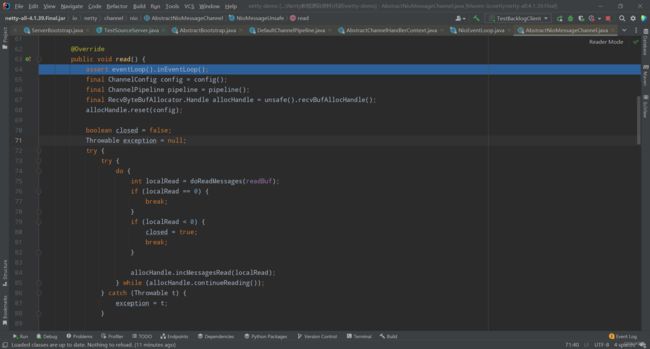
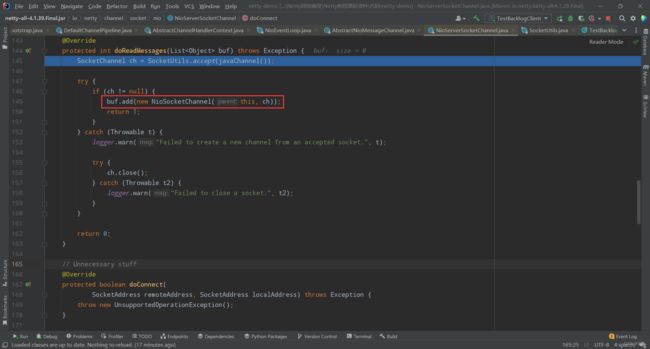
read方法中有一个比较重要的方法就是doReadMessages,这个方法的作用是创建SocketChannel,设置非阻塞。doReadMessages这个方法有一个非常重要的方法就是SocketUtils.accept();然后我们追进去看一下
SocketChannel ch = SocketUtils.accept(javaChannel());
accept
    public static SocketChannel accept(final ServerSocketChannel serverSocketChannel) throws IOException {
        try {
            return AccessController.doPrivileged(new PrivilegedExceptionAction<SocketChannel>() {
                @Override
                public SocketChannel run() throws IOException {
                    return serverSocketChannel.accept();
                }
            });
        } catch (PrivilegedActionException e) {
            throw (IOException) e.getCause();
        }
    }
这步就是serverSocketChannel.accept()建立连接,拿到一个channel。
拿到socketChannel之后会作为NioSocketChannel的一个参数,创建一个NioSocketChannel,在这个过程中socketChannel已经被设置为非阻塞。创建好的NioSocketChannel作为一个消息放到结果里等待pipline去处理。然后返回到上一步的read方法中。
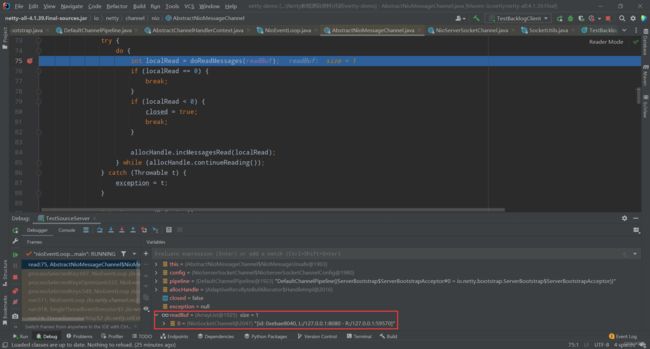
我们能看到这个readBuf里面多了一个NioSocketChannel。
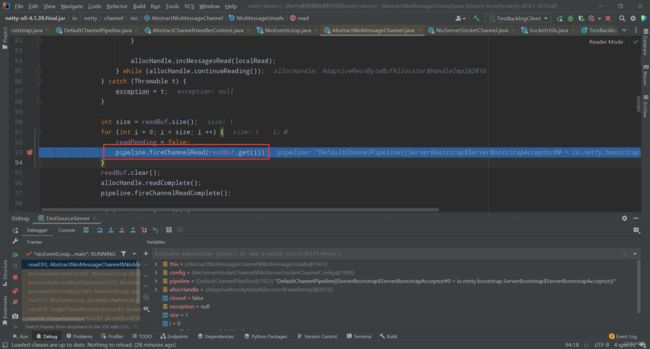
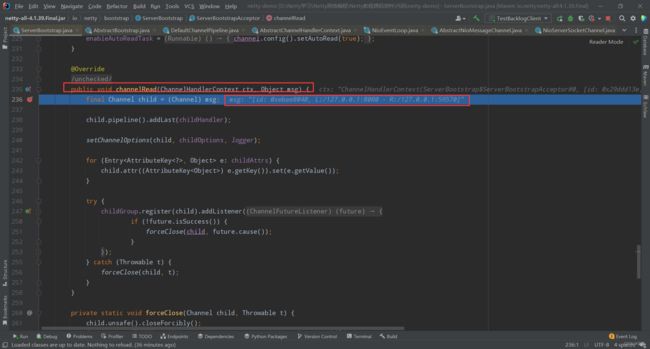
既然这个NioSocketChannel是一个消息,那么他一定要在pipline中处理,这个pipline就是ServerSocketChannel,pipline上有很多handler,这些handler会对我们刚才建立的连接,连接当成消息处理。之前的acceptorhandler会处理这个消息。然后他就会到acceptor这个handler处理,我们看看这个的相关源码,因为他是fireChannelRead所以他触发的是读事件。我们只需看他对应的读事件就行了。
如图所示,msg是NioSocketChannel,然后会通过setChannelOptions这个方法设置一系列的参数。之后会走到这个位置。
                childGroup.register(child).addListener(new ChannelFutureListener() {
                    @Override
                    public void operationComplete(ChannelFuture future) throws Exception {
                        if (!future.isSuccess()) {
                            forceClose(child, future.cause());
                        }
                    }
                });
这个register的方法实际上就是把一个EventLoop跟我们的新来的NioSocketChannel进行绑定。也就是从EventLoop哪一个新的selector监听NioSocketChannel发生的事件。并且我会有一个线程去监测这个channel发生的事件。然后我们看一下这个register的最终实现。
我们直接看这个地方首先判断当前线程是不是eventLoop线程如果是执行register0,如果不是就封装成一个新的任务,分派到新的eventLoop线程去执行。在这里由于我新建了一个SocketChannel所以跟之前的eventLoop肯定不一样,所以会走到else里面。
到else里面之后我们看看register0是啥样的。进去之后会发现有一个doRegister,这个就似曾相识了。之前说过了
    protected void doRegister() throws Exception {
        boolean selected = false;
        for (;;) {
            try {
                selectionKey = javaChannel().register(eventLoop().unwrappedSelector(), 0, this);
                return;
            } catch (CancelledKeyException e) {
                if (!selected) {
                    // Force the Selector to select now as the "canceled" SelectionKey may still be
                    // cached and not removed because no Select.select(..) operation was called yet.
                    eventLoop().selectNow();
                    selected = true;
                } else {
                    // We forced a select operation on the selector before but the SelectionKey is still cached
                    // for whatever reason. JDK bug ?
                    throw e;
                }
            }
        }
    }
这里头会先拿到java原生的socketChannel,然后将我新建的这个NioSocketChannel注册到当前eventLoop上的selector上。并且刚开始没有关注任何事件。
之后他会调用invokeHandlerAddedIfNeed()。这个的作用就是触发新的channel上pipline的初始化事件。这个就和我们之前的启动流程差不多了,他会来到这个fireChannelActive()这块。追踪到最后又是来到了这个方法。
        @Override
        public void channelActive(ChannelHandlerContext ctx) {
            ctx.fireChannelActive();

            readIfIsAutoRead();
        }
这次的ChannelHandlerContext,即header就不是之前的了,这个是我们新的NioSocketChannel中的流水线的头,然后再readIfIsAutoRead()中完成关注事件的操作。经过一串漫长的调用链我们来到这个方法。
    @Override
    protected void doBeginRead() throws Exception {
        // Channel.read() or ChannelHandlerContext.read() was called
        final SelectionKey selectionKey = this.selectionKey;
        if (!selectionKey.isValid()) {
            return;
        }

        readPending = true;

        final int interestOps = selectionKey.interestOps();
        if ((interestOps & readInterestOp) == 0) {
            selectionKey.interestOps(interestOps | readInterestOp);
        }
    }
我们一开始没关注任何事件所以interestOps是0,这个|运算符就是1加上前面的所以我们就把这个read事件给挂上去了。
9. Netty中的Read流程
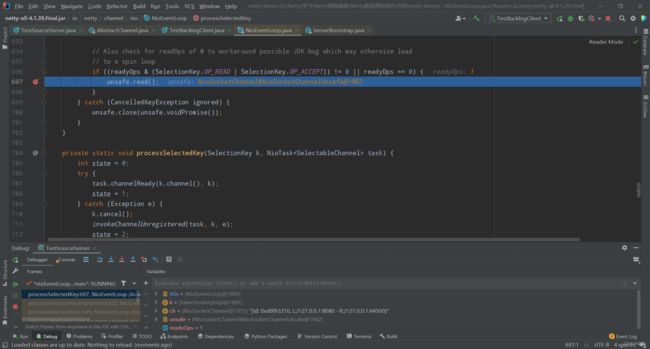
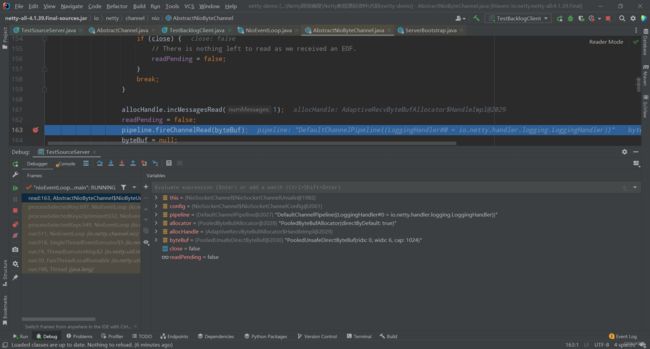
由于read事件和accept事件都是在一个地方触发所以我们还是先来到这。但是第一次我们触发的是accept,因为客户端连接服务端,服务端得接收而且readyOps是16所以第一次是accept,我们再来一次,再回到这个地方就是read了。
这次readyOps为1所以是read事件。
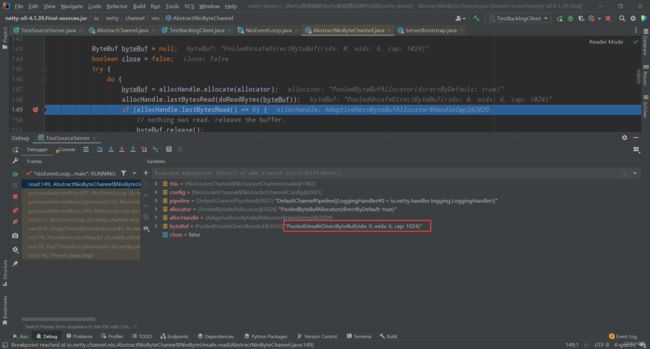
这个代码allocator创建一个分配byteBuf的分配器,然后recvBufAllocHandle这个决定你这个byteBuf是池化的还是非池化的。然后分配一个byteBuf然后doReadBytes就是接收从客户端发过来的数据的。
我们能看到这个读完之后这个读写指针已经发生了改变。
这个是当前NioSocketChannel流水线上的pipline,通过流水线上的handler处理这条消息。此时这个流水线上已经有三个handler了。
    public static void main(String[] args) {
        new ServerBootstrap()
                .group(new NioEventLoopGroup())
                .channel(NioServerSocketChannel.class)
                .childHandler(new ChannelInitializer<NioSocketChannel>() {
                    @Override
                    protected void initChannel(NioSocketChannel ch) {
                        ch.pipeline().addLast(new LoggingHandler());
                    }
                }).bind(8080);
    }
其中两个是我们看不见的头和尾,中间的是我们自己挂的LoggingHandler()。刚才的fireChannelRead就会把byteBuf上的数据依次交给三个handler去处理。到此为止读流程结束。


