vue 分环境打包
vue开发项目的时候,需要开发环境,测试环境和生产环境的请求地址不同,打不同的包,
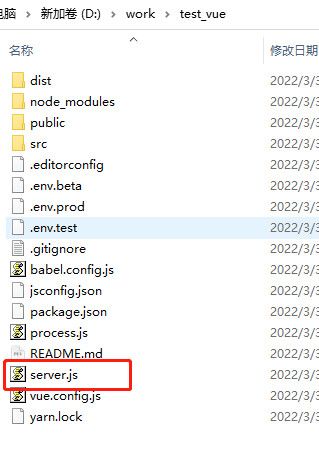
在server.js中添加代码后执行node server,以下项目是使用官方[vue-cli]创建的vue2项目

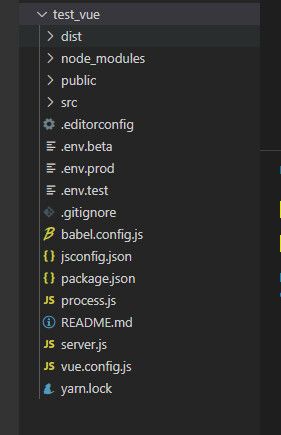
文件目录
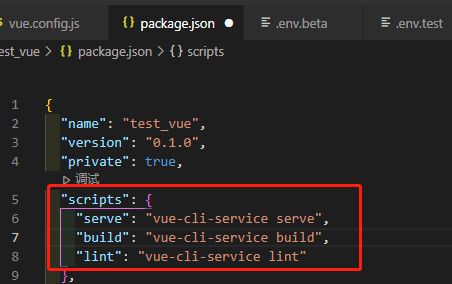
在package.json文件中默认是存在三个命令的
“scripts”: { “serve”: “vue-cli-service serve”, “build”: “vue-cli-service build”, “lint”: “vue-cli-service lint” }

server : 用来启动本地开发环境的
build :用来打包生产环境代码的
lint :检测你写的代码有没有问题的,如果有语法错误会在控制台打印
这三个命令只有开发环境和生产环境的打包命令,没有测试环境的命令,默认情况下生产环境对应的是"production",开发环境对应的是"development"
创建环境变量的文件
如文件目录图片上显示的,分别创建.env.test、.env.beta、.env.prod,test字段可以根据个人喜好命名,他是测试环境的配置文件,三个文件对应的内容如下:
//.env.test文件内容
//.env.test文件内容
NODE_ENV = "test"
VUE_APP_API_URL = "111.111.111"
VUE_APP_BASE_API = "111.111.111"
//.env.beta文件内容
//.env.beta文件内容
NODE_ENV = "beta"
VUE_APP_API_URL = "222.222.222"
VUE_APP_BASE_API = "222.222.222"
//.env.prod文件内容
//.env.prod文件内容
NODE_ENV = "prod"
VUE_APP_API_URL = "333.333.333"
VUE_APP_BASE_API = "333.333.333"
添加测试打包命令
在package.json文件中的script中添加命令
"scripts": {
    "serve": "vue-cli-service serve",
    "test": "vue-cli-service serve --mode test",
    "beta": "vue-cli-service serve --mode beta",
    "prod": "vue-cli-service serve --mode prod",
    "build:test": "vue-cli-service build --mode test",
    "build:beta": "vue-cli-service build --mode beta",
    "build:prod": "vue-cli-service build --mode prod",
    "lint": "vue-cli-service lint"
  },
原理大致是,在执行命令npm build:test时,他会自动去找–mode后面对应的文件,我命名test,他就会自动去找.env.test文件,然后把文件内的对应字段加到环境变量中
当然这个环境变量名字是不能随便起的,我测试的时候只发现NODE_ENV、VUE_APP_API_URL、VUE_APP_BASE_API是能加进去的,其他的我随意起的名字就无法获取到,返回undefined
我在代码中获取到的环境变量,都能正常打印
mounted () {
    window.console.log(process.env.NODE_ENV)
    // 在node中,有全局变量process表示的是当前的node进程。process.env包含着关于系统环境的信息
    window.console.log(process.env.VUE_APP_API_URL)
    window.console.log(process.env.VUE_APP_BASE_API)
  }
通过以上配置就可以打包生成开发环境,生产环境和测试环境的代码了,不同环境下的环境变量不同,就可以根据环境变量判断当前是什么环境,做哪些操作了
测试
我做测试是本地搭建了一个node服务,感兴趣的朋友可以查看这篇文章
server.js代码
var url = require("url"),
fs = require("fs"),
http = require("http"),
path = require("path");
http.createServer(function (req, res) {
var pathname = __dirname + url.parse("/dist"+req.url).pathname;//资源指向dist目录
if (path.extname(pathname) == "") {
pathname += "/";
}
if (pathname.charAt(pathname.length - 1) == "/") {
pathname += "index.html";
}
fs.exists(pathname, function (exists) {
if (exists) {
switch(path.extname(pathname)){
case ".html":
res.writeHead(200, {"Content-Type": "text/html"});
break;
case ".js":
res.writeHead(200, {"Content-Type": "text/javascript"});
break;
case ".css":
res.writeHead(200, {"Content-Type": "text/css"});
break;
case ".gif":
res.writeHead(200, {"Content-Type": "image/gif"});
break;
case ".jpg":
res.writeHead(200, {"Content-Type": "image/jpeg"});
break;
case ".png":
res.writeHead(200, {"Content-Type": "image/png"});
break;
default:
res.writeHead(200, {"Content-Type": "application/octet-stream"});
}
fs.readFile(pathname, function (err, data) {
res.end(data);
});
} else {
res.writeHead(404, {
"Content-Type": "text/html"
});
res.end("404 Not Found
");
}
});
}).listen(3003);
console.log("监听3003端口");
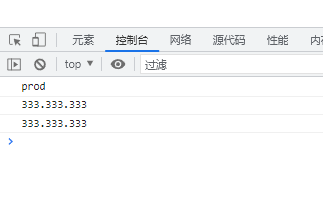
然后把打包后的代码放到dist文件夹下,访问本地服务http://127.0.0.1:3003/index.html或者http://localhost:3003/index.html,打开控制台,结果如下
